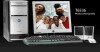
eMachines T6536 eMachines Setup Guide
eMachines T6536 Manual
 |
View all eMachines T6536 manuals
Add to My Manuals
Save this manual to your list of manuals |
eMachines T6536 manual content summary:
- eMachines T6536 | eMachines Setup Guide - Page 1
User Guide - eMachines T6536 | eMachines Setup Guide - Page 2
. Acer Incorporated. All Rights Reserved. eMachines User Guide Original Issue: 01 / 2009 Changes may be made periodically to the information in this publication without obligation to notify any person of such revisions or changes. Such changes will be incorporated in new editions of this manual or - eMachines T6536 | eMachines Setup Guide - Page 3
the load should not exceed 80% of the power strip's input rating. • This product's AC adapter is equipped with a three-wire grounded plug. The plug only fits in a grounded power outlet. Make sure the power outlet is properly grounded before inserting the AC adapter plug. Do not insert the plug into - eMachines T6536 | eMachines Setup Guide - Page 4
power supply cord set. If you need to replace the power cord set, make sure that the new power cord meets the following requirements: detachable type, UL listed/CSA certified, type SPT-2, rated 7 A 125 V minimum, VDE approved or its equivalent, 4.6 meters (15 feet) maximum length. Product servicing - eMachines T6536 | eMachines Setup Guide - Page 5
instructions Do not throw this electronic device into the trash when discarding. To minimize pollution and ensure utmost protection of the global environment, please recycle.For more information on the Waste from Electrical and Electronics Equipment (WEEE) regulations, visit http://global.acer - eMachines T6536 | eMachines Setup Guide - Page 6
from Sleep mode by pushing power button. • More power management settings can be done through Windows power management. Tips and information maximum comfort. Observe the following tips: • refrain from staying too long in one fixed posture • avoid slouching forward and/or leaning backward • stand up - eMachines T6536 | eMachines Setup Guide - Page 7
the display's top front edge • Avoid adjusting your display to an awkward viewing angle. • Avoid looking at bright light sources, such as open windows, for extended periods of time. Developing good work habits Develop the following work habits to make your computer use more relaxing and productive - eMachines T6536 | eMachines Setup Guide - Page 8
: vi - eMachines T6536 | eMachines Setup Guide - Page 9
power source problems 7 Checking the voltage selection 8 Connecting to a broadband modem or network . . . 9 Connecting a dial-up modem 9 Using the World Wide Web 10 Connecting to a Web site 11 Downloading files 12 Ethernet networking 13 Wired Ethernet networking 13 Establishing your Ethernet - eMachines T6536 | eMachines Setup Guide - Page 10
31 File management 31 Hard drive 31 Internet 33 Keyboard 35 Memory 35 Memory card reader 36 Modem (cable or DSL 36 Modem (dial-up 36 Monitor 40 Mouse 41 Networks 42 Optical disc drives 42 Passwords 44 Power 44 Printer 44 Sound 46 Recovering your system 47 Creating recovery discs 48 - eMachines T6536 | eMachines Setup Guide - Page 11
Chapter 1 Checking Out Your Computer 1 - eMachines T6536 | eMachines Setup Guide - Page 12
guide This guide includes information and maintenance instructions that are specific to your model of computer. Some illustrations in this guide may look different than your computer because hardware options and port locations may vary. Front Component Icon DVD/CD drive Memory card reader Power - eMachines T6536 | eMachines Setup Guide - Page 13
-ORFront speakers jack PS/2 mouse port Ethernet (network) jack Description Connects to a Kensington-compatible computer security lock. The switch is preset at the factory. Make sure that this is set to the correct voltage for your area. Plug the power cord into this connector. Plug a PS/2 keyboard - eMachines T6536 | eMachines Setup Guide - Page 14
rear right and left speakers into this jack. This jack is user configurable for one of the following: Stereo in: Plug an external audio input source (such fast external disk access. Connects to devices such as terminals and various peripherals. Supports high definition digital video connections. 4 - eMachines T6536 | eMachines Setup Guide - Page 15
Chapter 2 Setting Up and Getting Started 5 - eMachines T6536 | eMachines Setup Guide - Page 16
the top of the screen is no higher than eye leve. • Place your feet flat on the floor or on a footrest. • Keep ventilation openings clear of obstructions. Avoiding discomfort and injury from repetitive strain • Vary your activities to avoid excessive repetition. • Take breaks to change your position - eMachines T6536 | eMachines Setup Guide - Page 17
connections Protecting from power source problems Warning High voltages can enter your computer through both the power cord and the modem connection reaching your computer. An uninterruptible power supply (UPS) supplies battery power to your computer during a power failure. Although you cannot run - eMachines T6536 | eMachines Setup Guide - Page 18
, add-in cards, and peripheral devices. The power supply's voltage selection for your location is typically set at the factory, but you can change it to match the electrical service available in your usage area (such as while in another country). Use the power selection switch on the back of your - eMachines T6536 | eMachines Setup Guide - Page 19
(broadband) modem or to a wired Ethernet network. To connect to a broadband modem or to an Ethernet network: 1 Insert one end of the network cable into the the risk of fire, use only No. 26 AWG or larger telecommunications line cord. Your computer may have a 56K modem that you can use with a - eMachines T6536 | eMachines Setup Guide - Page 20
Using the World Wide Web The World Wide Web is a multimedia window to the Internet that gives you access to millions of information sources. site. You can access Web sites to shop, track investments, read the news, download programs, and much more. You can explore a Web site or visit other Web . 10 - eMachines T6536 | eMachines Setup Guide - Page 21
information about connecting to a Web site, click Start, then click Help and Support. Type connecting to a Web site in the Search Help box, then press ENTER. The Web browser locates the server computer on the Internet, downloads (transfers) data to your computer, and displays the page on the site - eMachines T6536 | eMachines Setup Guide - Page 22
it takes to transfer the file to your computer depends on file size and Internet conditions. 6 Open the folder that you created. 7 Install or view the downloaded file by double-clicking it. If applicable, follow the instructions provided on the Web site to run or install the program. Help For more - eMachines T6536 | eMachines Setup Guide - Page 23
office. Your municipality may require you to obtain a permit and hire a licensed installer. Ethernet is available at three different speeds. Standard Ethernet runs at 10 Mbps, Fast Ethernet runs at 100 Mbps, and Gigabit Ethernet runs at 1000 Mbps. Most home networks are built using Standard or Fast - eMachines T6536 | eMachines Setup Guide - Page 24
or Gigabit Ethernet (1000 Mbps or 10/100/1000). A mixture of components rated at different speeds will result in your network running at the speed of the slowest rated component. For a wired Ethernet network you need: • Two or more computers with Ethernet jacks • One router • One broadband Internet - eMachines T6536 | eMachines Setup Guide - Page 25
window opens. 4 Click the plus (+) in front of Network adapters. The Ethernet device installed in your computer is listed. If one is not listed, you must install one. Setting up wired Ethernet network, you should contact your ISP for any specific instructions they have for setting up a network. - eMachines T6536 | eMachines Setup Guide - Page 26
your network, you need to install Ethernet cards and drivers on the computers that do not have Ethernet already installed. Use the documentation that comes with your Ethernet cards for instructions on installing the card and any required drivers. Plug your Ethernet cable into your computer's jack - eMachines T6536 | eMachines Setup Guide - Page 27
Cable/DSL modem Router WAN port To set up a network using a router: 1 Plug one end of the power adapter into the AC connector on the router and the other end into a grounded, 110V electrical outlet. 2 Turn WAN port on the router and the other end into the Ethernet jack on the DSL or cable modem. 17 - eMachines T6536 | eMachines Setup Guide - Page 28
Setting Up and Getting Started Establishing your Ethernet network connection Naming the computers and the workgroup Start, then click Control Panel. The Control Panel window opens. 2 Click System and Maintenance. The System and Maintenance window opens. 3 Click System, then click Change Settings in - eMachines T6536 | eMachines Setup Guide - Page 29
language computers use to talk to each other. One of several available protocols must be set up ), as well as for Internet communications. When networking is set up in Windows Vista™, TCP/IP is automatically installed as the default protocol. Using a instructions, see your router's documentation. 19 - eMachines T6536 | eMachines Setup Guide - Page 30
set up, log onto one of your computers and access window. Take any actions suggested. • If you are using a wired Ethernet desktop computer. • Turn off all of the devices, then power them back on. • Refer to your router's or access point's troubleshooting information. • Contact your Internet service - eMachines T6536 | eMachines Setup Guide - Page 31
, you can share drives (for example hard drives and DVD drives) and printers among the computers connected to the network. Important To share a printer among the network computers, each computer must have the shared printer's drivers installed. Follow the instructions included with your printer - eMachines T6536 | eMachines Setup Guide - Page 32
or folder that you want to share, then click Share. The Properties dialog box opens. If you share a drive, the entire contents of that drive will be available to everyone on your network. If you share a folder, only the contents of that folder will be available to everyone on the - eMachines T6536 | eMachines Setup Guide - Page 33
information about workgroups, click Start, then click Help and Support. Type workgroups in the Search Help box, then press ENTER. To view shared drives and folders: 1 Click (Start), then click Network. The Network window opens. 2 If no drives or folders are displayed, click the option bar under the - eMachines T6536 | eMachines Setup Guide - Page 34
the icon for the shortcut is placed on your desktop. 3 Click × to close the window. Opening files across the network To open files across the network: 1 Start the program for the file you want to open. 2 Click File, then click Open. 3 Browse to the network drive that contains the file you want to - eMachines T6536 | eMachines Setup Guide - Page 35
the computer you are sending the file from. You can obtain the printer driver and installation instructions from the CD that shipped with your printer or from the manufacturer's Web site. To print files across the network: 1 Open the file you want to print, then click Print. 2 Click the arrow button - eMachines T6536 | eMachines Setup Guide - Page 36
Chapter 2: Setting Up and Getting Started 26 - eMachines T6536 | eMachines Setup Guide - Page 37
Chapter 3 Troubleshooting 27 - eMachines T6536 | eMachines Setup Guide - Page 38
Chapter 3: Troubleshooting First steps If you have problems with your computer, try these things first: • Make sure that the power cord is connected to your computer and an AC outlet and that the AC outlet is supplying power. • If you use a power strip or surge protector, make sure that it is turned - eMachines T6536 | eMachines Setup Guide - Page 39
DVD drives" on page 29. Ethernet You cannot see the other computers on your network • Make sure that your Ethernet cable is plugged into the Ethernet jack on your computer. Make sure that the other end is plugged into a router. • Make sure that all computers are plugged into a powered electrical - eMachines T6536 | eMachines Setup Guide - Page 40
Chapter 3: Troubleshooting • Make sure that all Ethernet component. For best results, all Ethernet components should be standard Ethernet (10 Mbps), Fast Ethernet (100 Mbps or 10/100 Mbps), or Gigabit Ethernet (1000 Mbps or 10/100/1000 Mbps). A mixture of Ethernet, Fast Ethernet, and Gigabit Ethernet - eMachines T6536 | eMachines Setup Guide - Page 41
a file, the file cannot be restored. Hard drive You see an "Insufficient disk space" error message • Delete unnecessary files from the hard drive using Disk Cleanup. Help For more information about file management, click Start, then click Help and Support. Type file management in the Search box - eMachines T6536 | eMachines Setup Guide - Page 42
error" message • This may be the result of a defective area on the hard drive. To fix hard drive problems, run the Error checking program. The hard drive cannot be accessed, or you see a "General failure reading drive C" error message • Restart your computer. • Press CTRL+ALT+DEL to restart your - eMachines T6536 | eMachines Setup Guide - Page 43
-system disk" or "disk error" error message • Your hard drive may have become damaged. Internet See also "Modem (dial-up)" on page 36. You cannot connect to the Internet • If you are using a dial-up modem, make sure that the modem cable is plugged into the modem jack and not the Ethernet network - eMachines T6536 | eMachines Setup Guide - Page 44
performing multiple downloads, and having multiple programs open on your computer People are sending you e-mail messages, but you have not received any mail • Click the receive button in your e-mail program. • Make sure that your account with your Internet service provider (ISP) is set up correctly - eMachines T6536 | eMachines Setup Guide - Page 45
the keyboard port works. • Reinstall the keyboard device driver. A keyboard character keeps repeating or you see a Memory Help For more information about troubleshooting memory errors, click Start, then click Help and Support. Type memory error in the Search box, then press ENTER. You see a "Memory - eMachines T6536 | eMachines Setup Guide - Page 46
all programs, then restart your computer. Memory card reader Drive letters for the memory card slots do not appear in the My Computer window • Reboot your computer. Modem (cable or DSL) • See the documentation that came with your modem for additional troubleshooting information. Modem (dial-up) See - eMachines T6536 | eMachines Setup Guide - Page 47
Control Panel window opens. If Support. Type dialing in the Search box, then press ENTER. • Disconnect any answering machine, fax machine common problem that can cause the modem to connect at a slower rate, abort downloads, service and have the telephone line checked for noise or low line levels. 37 - eMachines T6536 | eMachines Setup Guide - Page 48
service. • Try connecting with the modem at a lower connection speed. If reducing the connect speed lets you connect, call your telephone service. support. • See if the modem works with a different communications program. The problem may be with just one program. • Review the troubleshooting - eMachines T6536 | eMachines Setup Guide - Page 49
with no data, or if you get an error such as port already open or the modem has failed to respond, the modem did not pass diagnostics. Help For more information about modem troubleshooting, click Start, then click Help and Support. Type modem troubleshooting in the Search box, then press ENTER. 39 - eMachines T6536 | eMachines Setup Guide - Page 50
Troubleshooting volume: 1 Click Start, then click Control Panel. The Control Panel window opens. If your Control Panel is in Category View, click Printers and Other plugged in and turned on. If the monitor is turned on, the power LED should be lit. • Adjust the brightness and contrast controls to - eMachines T6536 | eMachines Setup Guide - Page 51
• Reinstall the device driver. • Connect a monitor that you know works to your computer. documentation. Help For more information about changing the screen resolution, click Start, then click Help and Support. Type screen resolution in the Search box, then press ENTER. Mouse The mouse does not work - eMachines T6536 | eMachines Setup Guide - Page 52
your computer, then enter the BIOS Setup utility by pressing and holding F1 while your computer restarts. Make sure that the IDE controllers are enabled. • Make sure that the drive is configured correctly by following the instructions in the drive documentation. • Reinstall the device driver. 42 - eMachines T6536 | eMachines Setup Guide - Page 53
connected correctly and securely. • Shut down and restart your computer. • Clean the disc. • Reinstall the audio device drivers. A DVD movie will not play • Make sure that you have a DVD drive. • Make sure that the disc label is facing up, then try again. • Try a different disc. Occasionally discs - eMachines T6536 | eMachines Setup Guide - Page 54
Chapter 3: Troubleshooting Passwords Your computer does not accept your password • Make sure that CAPS LOCK is turned off, then retype the password. Power Your computer will not turn on • Make sure that the power cord is connected to an AC power source and to your computer, and that your computer - eMachines T6536 | eMachines Setup Guide - Page 55
Faxes icon. The Printers and Faxes window opens. 3 Right-click the printer you want to be the default printer, then click Set as Default Printer. • Reinstall the printer driver. See the guide that came with your printer for instructions on installing the printer driver. You see a "Printer queue is - eMachines T6536 | eMachines Setup Guide - Page 56
files at one time, you may want to add additional memory to the printer. See the printer documentation for instructions for adding additional memory. You For more information about printer troubleshooting, click Start, then click Help and Support. Type printer troubleshooter in the Search box, then - eMachines T6536 | eMachines Setup Guide - Page 57
software problems. For instructions, see "Creating recovery discs" on page 48. 2 Perform minor fixes. If only one or two items of software or hardware have stopped working correctly, the problem may be solved by reinstalling the software or the device drivers. To recover software and drivers that - eMachines T6536 | eMachines Setup Guide - Page 58
To create recovery discs: 1 Click (Start), All Programs, eMachines, then click eMachines Recovery Management. eMachines Recovery Management opens. 2 To create recovery discs for the hard drive's entire original contents, including Windows OS and all factory-loaded software and drivers, click Create - eMachines T6536 | eMachines Setup Guide - Page 59
instructions. To recover your pre-installed software and drivers: 1 Click (Start), All Programs, eMachines, then click eMachines Recovery Management. eMachines Recovery Management opens. - OR If you are recovering from your driver and application recovery disc, insert it into the disc drive - eMachines T6536 | eMachines Setup Guide - Page 60
replacement hard drive, see "Recovering from your recovery discs" on page 51. Recovering from within Windows OS To reinstall Windows OS and all pre-installed software and drivers: 1 Click (Start), All Programs, eMachines, then click eMachines Recovery Management. eMachines Recovery Management opens - eMachines T6536 | eMachines Setup Guide - Page 61
prompts for first-time system setup. Recovering from the hard drive during startup To reinstall Windows OS and all pre-installed software and drivers: 1 Turn on your computer, then press ALT+F10 during startup. eMachines Recovery Management opens. 2 Click Restore system from factory default. Caution - eMachines T6536 | eMachines Setup Guide - Page 62
Chapter 3: Troubleshooting 4 Insert the second recovery disc when prompted, then follow the on-screen prompts to complete the recovery. Creating You can make this type of label by using your Labelflash optical disc drive to burn an image onto a Labelflash disc. Creating disc labels with LabelPrint - eMachines T6536 | eMachines Setup Guide - Page 63
2 Click (Start), All Programs, CyberLink LabelPrint, then click LabelPrint. The LabelPrint program starts. 3 Click LabelFlash, then click the green arrow (in the lower-right corner) to continue. The Edit titles and other information screen opens. 53 - eMachines T6536 | eMachines Setup Guide - Page 64
Chapter 3: Troubleshooting 4 Enter the information you want printed on the disc into the fields, such as Disc Title, Author, and the track's Title. 5 Click the to the left to return to the previous screen. If you click the right arrow, the Select the label's layout and background screen opens. 54 - eMachines T6536 | eMachines Setup Guide - Page 65
• To change the font of the text that will be printed on the disc, double-click the box's dotted outline, then specify the font attributes and click OK. • To change the general layout style, click Select in the Layout Style box. 55 - eMachines T6536 | eMachines Setup Guide - Page 66
Chapter 3: Troubleshooting • To change the background, click Select in the Background Image box. You can use images included with • BMP • GIF 6 Click green arrow pointing to the right to continue. The Begin labelling your Labelflash disc screen opens and shows you a preview of your disc label. 56 - eMachines T6536 | eMachines Setup Guide - Page 67
Labelflash disc is in the Labelflash drive, label side down, then click Next. The Labelflash Wizard's settings screen opens. Tip The label side of most discs is the least "shiny" side. 9 Click Preview to see how the disc will look when printed. The Preview window opens. 10 Click Close. 11 Click Next - eMachines T6536 | eMachines Setup Guide - Page 68
Chapter 3: Troubleshooting 12 When the printing of the label image is finished, the drive tray opens and the LabelFlash Wizard window displays the message "Burning completed." 13 Click Close. Telephone support Before calling Customer Care If you have a technical problem with your computer, follow - eMachines T6536 | eMachines Setup Guide - Page 69
Windows documentation • The software publisher's Web site • See the troubleshooting section of this chapter. Warning To avoid bodily injury, do not attempt to troubleshoot your computer problem if: - Power cords information and online documentation for eMachines-supplied hardware can be found in our - eMachines T6536 | eMachines Setup Guide - Page 70
Chapter 3: Troubleshooting 60 - eMachines T6536 | eMachines Setup Guide - Page 71
Appendix A Regulations and safety notices 61 - eMachines T6536 | eMachines Setup Guide - Page 72
and, if not installed and used in accordance with the instructions, may cause harmful interference to radio communications. However, there is off and on, the user is encouraged to try to correct the interference by one or more of the following measures: • Reorient or relocate the receiving antenna. - eMachines T6536 | eMachines Setup Guide - Page 73
, eMachines, declares that this PC series may discontinue your service temporarily. If possible problem is with the equipment, discontinue use and contact your dealer or vendor. Caution: To reduce the risk of fire, use only No. 26 AWG or larger UL Listed or CSA Certified Telecommunication Line Cord - eMachines T6536 | eMachines Setup Guide - Page 74
for compliance with Telecom's Specifications: a There shall be no more than 10 call attempts to the same number within any 30 minute period for any single manual call initiation, and b The equipment shall go on-hook for a period of not less than 30 seconds between the end of one attempt and the - eMachines T6536 | eMachines Setup Guide - Page 75
on local power, is available for emergency use. Laser compliance statement The CD or DVD drive used with this computer is a laser product. The CD or DVD drive's classification label (shown below) is located on the drive. CLASS 1 LASER PRODUCT CAUTION: INVISIBLE LASER RADIATION WHEN OPEN. AVOID - eMachines T6536 | eMachines Setup Guide - Page 76
by Macrovision, and is intended for home and other limited viewing uses only unless otherwise authorized by Macrovision. Reverse engineering or disassembly is prohibited. Radio device regulatory notice Note: Below regulatory information is for models with wireless LAN and/or Bluetooth only. General - eMachines T6536 | eMachines Setup Guide - Page 77
radiated output power of the wireless LAN Card and Bluetooth card is far below the FCC radio frequency exposure limits. Nevertheless, the PC series shall be in 2.4 GHz band To prevent radio interference to the licensed service, this device is intended to be operated indoors and installation outdoors - eMachines T6536 | eMachines Setup Guide - Page 78
Appendix A: Regulations and safety notices 68 - eMachines T6536 | eMachines Setup Guide - Page 79
- eMachines T6536 | eMachines Setup Guide - Page 80
-
 1
1 -
 2
2 -
 3
3 -
 4
4 -
 5
5 -
 6
6 -
 7
7 -
8
-
9
-
10
-
11
-
12
-
13
-
14
-
15
-
16
-
17
-
18
-
19
-
20
-
21
-
22
-
23
-
24
-
25
-
26
-
27
-
28
-
29
-
30
-
31
-
32
-
33
-
34
-
35
-
36
-
37
-
38
-
39
-
40
-
41
-
42
-
43
-
44
-
45
-
46
-
47
-
48
-
49
-
50
-
51
-
52
-
53
-
54
-
55
-
56
-
57
-
58
-
59
-
60
-
61
-
62
-
63
-
64
-
65
-
66
-
67
-
68
-
69
-
70
-
71
-
72
-
73
-
74
-
75
-
76
-
77
-
78
-
79
-
80
 |
 |

User Guide