eMachines eView_15 8512499 - eMachines Flat Panel Monitor User Guide
eMachines eView_15 Manual
 |
View all eMachines eView_15 manuals
Add to My Manuals
Save this manual to your list of manuals |
eMachines eView_15 manual content summary:
- eMachines eView_15 | 8512499 - eMachines Flat Panel Monitor User Guide - Page 1
Flat Panel Monitor User Guide - eMachines eView_15 | 8512499 - eMachines Flat Panel Monitor User Guide - Page 2
- eMachines eView_15 | 8512499 - eMachines Flat Panel Monitor User Guide - Page 3
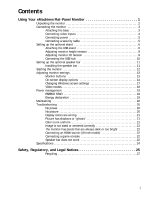
the speaker bar 11 Starting the monitor 12 Adjusting monitor settings 13 Monitor buttons 13 On-screen display options 14 Changing Windows screen settings 17 Video modes 18 Power management 19 ENERGY STAR 19 Energy declaration 19 Maintaining 20 Troubleshooting 20 No power 20 No picture - eMachines eView_15 | 8512499 - eMachines Flat Panel Monitor User Guide - Page 4
Contents ii - eMachines eView_15 | 8512499 - eMachines Flat Panel Monitor User Guide - Page 5
Using Your eMachines Flat-Panel Monitor • Connecting the monitor • Setting up the optional stand • Setting up the optional speaker bar • Starting the monitor • Adjusting monitor settings • Power management • Maintaining • Troubleshooting • Specifications 1 - eMachines eView_15 | 8512499 - eMachines Flat Panel Monitor User Guide - Page 6
eMachines Flat-Panel Monitor Unpacking the monitor Your monitor box should contain the following items: • Monitor (with neck attached) • Base • This User Guide • VGA cable • Power cord If you are missing any items, call Customer Care. For telephone numbers, see the label on the back of your monitor - eMachines eView_15 | 8512499 - eMachines Flat Panel Monitor User Guide - Page 7
www.emachines.com Connecting the monitor Important To attach the optional USB stand instead of the base, complete the instructions in "Setting up the optional stand" on page 6. To set up the monitor, first attach the base, then make your cable connections. Attaching the base To attach the base: • - eMachines eView_15 | 8512499 - eMachines Flat Panel Monitor User Guide - Page 8
Using Your eMachines Flat-Panel Monitor Connecting video inputs To connect video sources to your monitor: 1 Position your computer and the monitor so you can reach the back of each. Tip (19-inch model) When using the optional speaker bar (described in "Setting up the optional speaker - eMachines eView_15 | 8512499 - eMachines Flat Panel Monitor User Guide - Page 9
security cable You can secure your monitor to your computer desk (or to another heavy object) with a cable lock (such as a Kensington™ lock). To connect a cable lock, follow the cable lock's instructions to connect it to the lock slot on the back of your monitor (cable lock not included). Cable lock - eMachines eView_15 | 8512499 - eMachines Flat Panel Monitor User Guide - Page 10
Using Your eMachines Flat-Panel Monitor Setting up the optional stand Attaching the USB stand In 2.0 ports on the stand. To attach the adjustable stand: 1 Make sure that the monitor is turned off. 2 Place the monitor face-down on a stable, soft (non-marring) surface. A non-slip mat on a tabletop is - eMachines eView_15 | 8512499 - eMachines Flat Panel Monitor User Guide - Page 11
www.emachines.com 6 Tighten the thumbscrew under the base with your fingers (or a flat screwdriver) to secure the neck into place. Thumbscrew 7 With the stand facing you, - eMachines eView_15 | 8512499 - eMachines Flat Panel Monitor User Guide - Page 12
Using Your eMachines Flat-Panel Monitor 9 Slide the neck's bracket slot onto the bracket's mounting tab. 10 Press the bracket lever to the right and hold it, then lower the neck into place and release the lever. Adjusting monitor height tension The stand is factory adjusted to maintain the height - eMachines eView_15 | 8512499 - eMachines Flat Panel Monitor User Guide - Page 13
.emachines.com 2 Insert a Phillips screwdriver through the access hole in the base and onto the height tension screw (on the back of the stand, in the slot above the USB In port). Height tension screw 3 Adjust the height tension screw so the monitor stays in place when you let go. If the monitor - eMachines eView_15 | 8512499 - eMachines Flat Panel Monitor User Guide - Page 14
Using Your eMachines Flat-Panel Monitor Ergonomic guidelines The recommended screen positioning is based upon the following guidelines. These guidelines are based on available scientific literature and published standards. Screen height - eMachines eView_15 | 8512499 - eMachines Flat Panel Monitor User Guide - Page 15
www.emachines.com Setting up the optional speaker bar Power/Volume control Kensington lock slot Headphone jack Power indicator Microphone jack Headphone jack Bass port (for bass - eMachines eView_15 | 8512499 - eMachines Flat Panel Monitor User Guide - Page 16
. If the power LED is not blue or you do not see a display image, check the connections. For more troubleshooting information, see "Troubleshooting" on page 20. 3 Adjust the tilt of the monitor for the best viewing angle. 4 After you see the Windows desktop, press the Auto button on the right side - eMachines eView_15 | 8512499 - eMachines Flat Panel Monitor User Guide - Page 17
www.emachines.com Adjusting monitor settings Use the monitor controls (located on the monitor itself) and computer controls (accessible through Windows) to adjust the display image. For more information about computer controls, see "Changing Windows screen settings" on page 17. Monitor buttons This - eMachines eView_15 | 8512499 - eMachines Flat Panel Monitor User Guide - Page 18
Using Your eMachines Flat-Panel Monitor On-screen display options Adjusting OSD settings To adjust the OSD settings: Tip While the OSD is active, on-screen labels appear next to the - eMachines eView_15 | 8512499 - eMachines Flat Panel Monitor User Guide - Page 19
www.emachines.com OSD menus OSD Menu Main menu Main Menu Auto Picture Geometry Advanced Reset Description Auto-Automatically adjusts your monitor to its optimum settings. Picture-Opens the Picture menu, where you can adjust brightness, contrast, and gamma. Geometry-Opens the Geometry menu, where - eMachines eView_15 | 8512499 - eMachines Flat Panel Monitor User Guide - Page 20
Using Your eMachines Flat-Panel Monitor OSD Menu Geometry menu Geometry H-Position V-Position Clock Phase your computer's settings to use the optimum 1440 × 900 resolution. If you prefer using your monitor at a resolution less than that, use this option to turn off the Resolution Reminder. For - eMachines eView_15 | 8512499 - eMachines Flat Panel Monitor User Guide - Page 21
information and screen components (such as icons and menu bars) can be displayed on the monitor. Help For more information about adjusting the screen, click Start, then click Help and Support. Type adjusting monitor settings in the Search Help box, then press ENTER. To change the color depth and - eMachines eView_15 | 8512499 - eMachines Flat Panel Monitor User Guide - Page 22
Using Your eMachines Flat-Panel Monitor Video modes Your monitor supports several video modes. If you do not use the best mode for the monitor, the display image may look slightly "fuzzy." Mode Mode name and resolution Horizontal Vertical Available in DVI mode frequency (kHz) frequency (Hz) ( - eMachines eView_15 | 8512499 - eMachines Flat Panel Monitor User Guide - Page 23
STAR® Partner, eMachines has determined that this product meets the ENERGY STAR guidelines for energy efficiency. This monitor complies with the When connected to a computer that supports the VESA Display Power Management Signaling (DPMS) Protocol, the monitor can conserve significant energy by - eMachines eView_15 | 8512499 - eMachines Flat Panel Monitor User Guide - Page 24
has warmed up for approximately 30 minutes before making any judgments about the picture quality. If you have problems with the monitor, the information in this troubleshooting section may help you solve them. No power • Make sure that the power cord is connected correctly to both the back of - eMachines eView_15 | 8512499 - eMachines Flat Panel Monitor User Guide - Page 25
centered correctly • Press Menu, then Auto to automatically adjust the display image to the ideal settings. • Use the position controls to adjust the image. For instructions on how to adjust the display image position, see "Adjusting monitor settings" on page 13. 21 - eMachines eView_15 | 8512499 - eMachines Flat Panel Monitor User Guide - Page 26
older video drivers on your computer. See the eMachines support Web site (www.emachines.com) for updated video drivers for your computer. You can also game console • If you want to connect your game console to this monitor, use optional video cables (available at www.gateway.com if ordering from - eMachines eView_15 | 8512499 - eMachines Flat Panel Monitor User Guide - Page 27
www.emachines.com All connections are made correctly and the speaker bar is on, speaker bar's sound may always be distorted. To adjust the audio device's output volume, see the device's user guide. To adjust the volume in Windows XP, click the speaker icon in the Windows taskbar. For optimum volume - eMachines eView_15 | 8512499 - eMachines Flat Panel Monitor User Guide - Page 28
Using Your eMachines Flat-Panel Monitor Specifications Specifications are subject to change without notice or obligation. Many products for eMachines are custom engineered by our suppliers to eMachines specifications and may vary from similarly marketed products. 17-inch model 19-inch model - eMachines eView_15 | 8512499 - eMachines Flat Panel Monitor User Guide - Page 29
Safety, Regulatory, and Legal Notices • Important safety information • Environmental information • Regulatory compliance statements • Notices 25 - eMachines eView_15 | 8512499 - eMachines Flat Panel Monitor User Guide - Page 30
factory to the correct voltage. ■ Openings in the monitor case are provided for ventilation. Do not block or servicing to qualified personnel if: ■ The power cord or plug is damaged. ■ Liquid has been spilled into the system. ■ The system does not operate properly when the operating instructions - eMachines eView_15 | 8512499 - eMachines Flat Panel Monitor User Guide - Page 31
www.emachines.com may contact us at the Customer Care number listed in your product's user guide and we will be glad to help you with your effort. Finally, we and, if not installed and used in accordance with the instructions, may cause harmful interference to radio or television reception. However - eMachines eView_15 | 8512499 - eMachines Flat Panel Monitor User Guide - Page 32
of continued product development, Gateway reserves the right to make improvements in this manual and the products it describes at any time, without notices or obligation. Trademark acknowledgments Gateway and eMachines are trademarks or registered trademarks of Gateway, Inc. in the United States and - eMachines eView_15 | 8512499 - eMachines Flat Panel Monitor User Guide - Page 33
- eMachines eView_15 | 8512499 - eMachines Flat Panel Monitor User Guide - Page 34
MAN E17T6W/E19T6W GDE R2 10/07
-
 1
1 -
 2
2 -
 3
3 -
 4
4 -
 5
5 -
 6
6 -
 7
7 -
8
-
9
-
10
-
11
-
12
-
13
-
14
-
15
-
16
-
17
-
18
-
19
-
20
-
21
-
22
-
23
-
24
-
25
-
26
-
27
-
28
-
29
-
30
-
31
-
32
-
33
-
34
 |
 |
Flat Panel Monitor
User Guide