2006 Lincoln Mark LT Quick Reference Guide 2nd Printing
2006 Lincoln Mark LT Manual
2006 Lincoln Mark LT manual content summary:
- 2006 Lincoln Mark LT | Quick Reference Guide 2nd Printing - Page 1
current information. For detailed operating and safety information, please see your Owner's Guide. .1 .2 .3 .4 .5 .6 .7 .8 .7 .6 .9 .10 .11 .12 .13 June 2005 Second Printing Quick Reference Guide Lincoln Mark LT Litho in U.S.A. *F6L3J19G217FA* 6L3J-19G217-FA FUEL: Your vehicle is designed - 2006 Lincoln Mark LT | Quick Reference Guide 2nd Printing - Page 2
problems with a display of system warnings, followed by a long indicator chime. For more detailed information, please see your Owner's Guide. .1 .2 .3 .4 .5 .6 .7 .8 .9 .10 .11 4H (4WD HIGH) provides mechanically locked four-wheel drive power to all four .8 AUDIOPHILE IN-DASH SIX CD / MP3 SOUND
-
 1
1 -
 2
2
 |
 |
2 0 0 6
L I N C O L N M A R K LT
Q U I C K R E F E R E N C E G U I D E
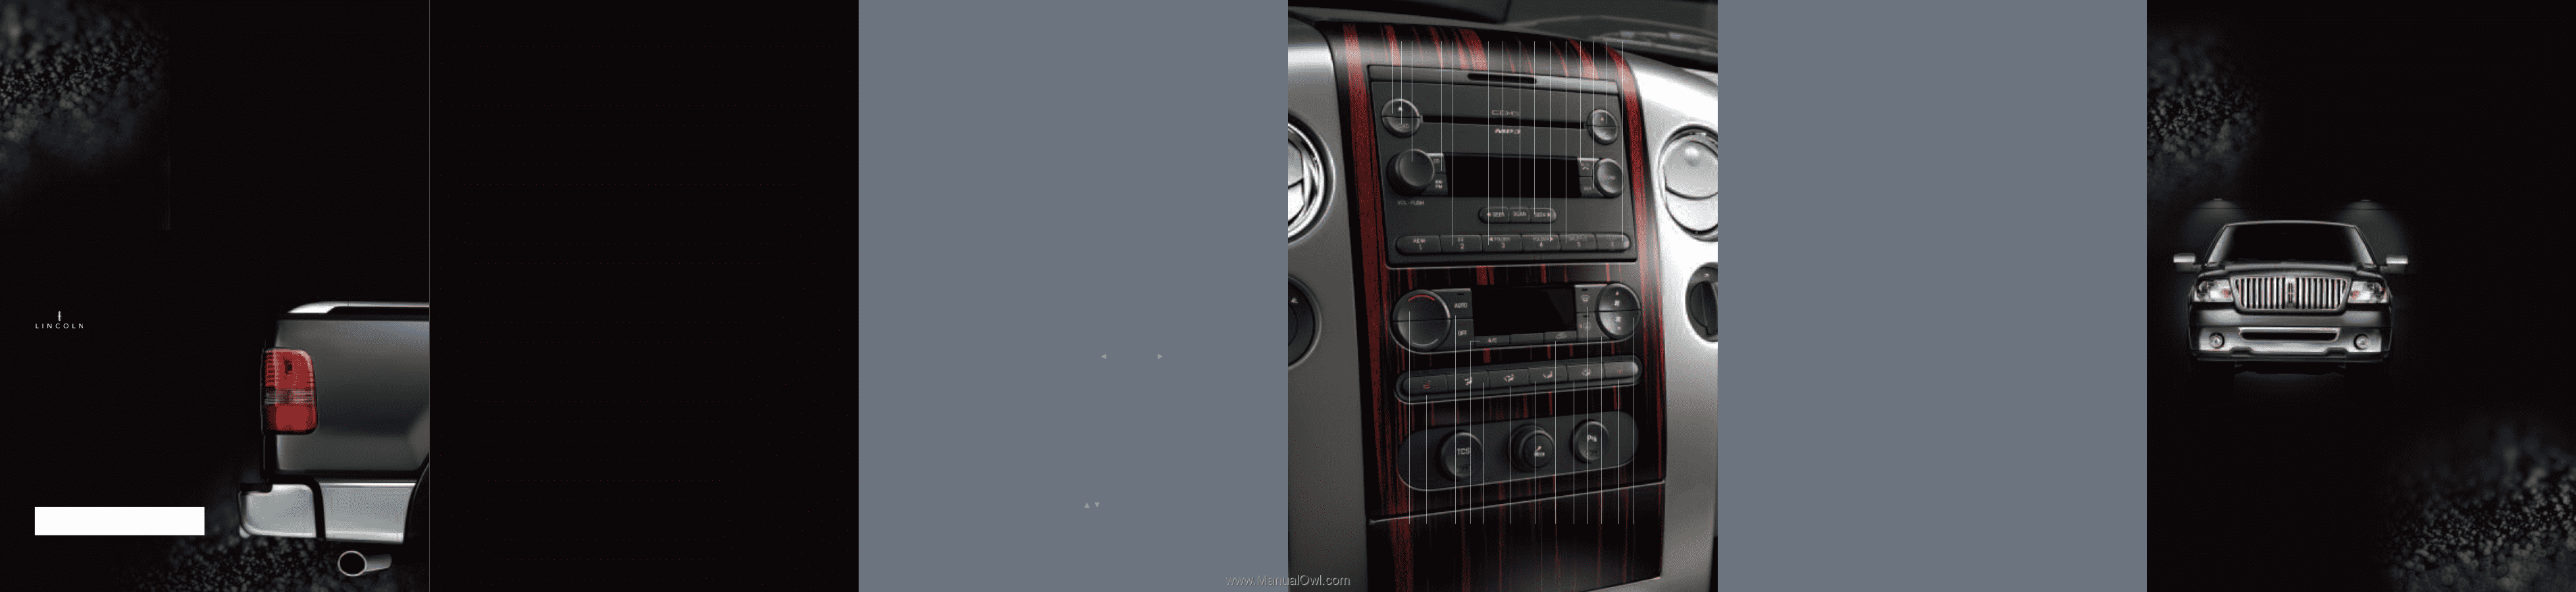
AUDIOPHILE IN-DASH SIX CD / MP3 / SATELLITE COMPATIBLE
S O U N D S Y S T E M
W I T H H E AT E D S E AT S
AUTOMATIC TEMPERATURE CONTROL (ATC) SYSTEM
6L3J-19G217-FA
All information
contained in this
Lincoln Quick
Reference Guide
was accurate
at the time of
duplication.
We reserve the
right to change
features, operation
and / or functionality
of any vehicle
specification at
any time. Your
Lincoln dealer is
the best source
for the most
current information.
For detailed
operating and
safety information,
please see your
Owner’s Guide.
June 2005
Second Printing
Quick Reference
Guide
Lincoln Mark LT
Litho in U.S.A.
*F
6L3J19G217FA
*
FUEL:
Your vehicle is designed to use “Regular” unleaded gasoline
with a pump (R+M)/2 octane rating of 87.
Note:
when “Low Fuel
Level” appears in the message center display, you must push the
RESET button to clear this warning
. Until fuel is added,
“Low Fuel
Level”
will reappear at 10 minute
intervals.
TIRE PRESSURE:
Your
tire pressure is properly set at the dealership to the recommended
specifications found on the Tire Label or Safety Compliance
Certification Label located inside on the edge of the driver’s
door
pillar. Please check your tire pressure during routine maintenance
and
seasonal changes.
FUSES:
If electrical components in the vehicle
are
not working, a fuse may have blown. For more information about
changing a
fuse, please see your Owner’s Guide.
FUEL PUMP
SHUT-OFF SWITCH:
After a collision, if the engine cranks but does
not start, the fuel pump shut-off switch may have to be reset.
The switch is located in the front passenger’s footwell, behind the
kick panel
access cover, to the left of the fuse box. For complete
details on resetting
the switch, please see your Owner's Guide.
CHANGING THE TIRES:
For more information on changing the tires,
please see your Owner’s Guide.
LOCATION OF THE SPARE TIRE AND
TOOLS:
The spare tire is located under the vehicle, just forward of
the rear bumper. The jack, jack handle and wheel nut wrench are
located under the rear seat on the passenger side of the vehicle.
ROADSIDE EMERGENCIES:
To fully assist you if you should have a
vehicle concern, Ford offers a complimentary Roadside Assistance
Program. This program is separate from the New Vehicle Limited
Warranty. The service is available 24 hours a day, seven days a week
for the New Vehicle Limited Warranty period (U.S.) or Basic Warranty
period (Canada) of four years or 50,000 miles (80,000 km). Roadside
Assistance will cover: Changing a flat tire, jump-starts, limited fuel
delivery, lock-out assistance, and towing of your vehicle. Roadside
Assistance Centers:
UNITED STATES
(800) 521-4140
CANADA
(800) 665-2006. For complete details on any roadside assistance
concern, see the Roadside Emergencies chapter or the Customer
Assistance chapter in your Owner’s Guide.
.1 EJECTING CDS:
Press this to eject a
CD. For the In-dash
Six CD / MP3 system,
press and hold to
auto-eject all CDs
present in the system.
.2 LOADING CDS:
Press the LOAD button
and then a preset
number to select a
slot. Pressing and
holding LOAD will
activate the autoload
to load up to 6 CDs.
.3 ON / OFF /
VOLUME CONTROL:
Press to turn ON or
OFF. Turn to increase
or decrease volume.
.4 AM / FM AND CD
SELECT:
In radio
mode, press to select
AM or FM frequency
bands. Press CD to
begin CD play. In CD
mode, press AM / FM
to stop play and begin
radio play.
.5 SETTING MEMORY
PRESETS:
To set a
station: Select a
frequency band with
the AM / FM button,
then select a station.
Press and hold a
numbered preset
button until the
sound returns.
.6 FOLDERS:
Press to
access previous or next
folder on MP3 discs, if
folders are available.
.7 SEEK FUNCTION:
Press to access the
next listenable station
or CD track.
.8 SCAN FUNCTION:
Press for a brief
sampling of radio
stations or CD tracks.
Press again to stop.
.9 SHUFFLE FUNCTION:
SHUFFLE plays tracks
in random order.
.10 MUTE MODE:
Pressing the MUTE
button will mute the
playing media. Pressing
it again will return to
the playing media.
.11
SATELLITE RADIO
CONTROLS & FEATURES
(IF EQUIPPED
):
Satellite Radio
Button (AUX):
Press to
enter Satellite Radio
Mode
Channel Switch &
Select Button (SEEK):
Use (
SEEK/SEEK
)
to navigate over 120
Sirius Channels.
Category Mode:
Restricts channels to a
selected category only.
See Owner’s Guide for
details.
To exit Category
Mode:
press MENU
until the current
category appears on
the display, then press
(
/
) to select
“CATEGORY ALL”and
press SEEK to select.
Memory Presets (1-6):
Sets and selects
preset channels.
.12 TUNE / DISC
SELECT:
Press to go
up or down the radio
frequency or to select a
desired disc. Also, use
in menu mode to select
various settings.
.13 TEXT:
In CD
mode, this feature
reads and displays
track, song title, artist
name and album title.
SPEED SENSITIVE
VOLUME
:
This audio
system is equipped
with speed sensitive
volume. The volume
automatically changes
slightly with vehicle
speed to compensate
for road and wind
noise. Press MENU to
access and use SEEK
to adjust.
.14 TEMPERATURE
CONTROL:
Increases /
decreases the
temperature in
the cabin.
.15 DRIVER HEATED
SEAT CONTROL:
Press
once to activate high
heat; press a second
time to activate low
heat. Press a third
time to deactivate.
.16 AUTO:
The system
will automatically
determine fan speed,
airflow location, A/C on
or off, and outside or
recirculated air, to
heat or cool the
vehicle to reach the
desired temperature.
.17 A/C:
Activates /
deactivates the air
conditioning.
AIRFLOW DIRECTION
CONTROLS:
These
controls
allow you
to choose the air
distribution mode
you desire.
.18
Distributes air
through the instrument
panel and center
console registers.
.19
Distributes air
through the windshield
defroster ducts, demister
outlets, and the front
and rear seat floor ducts.
.20
Distributes air
through the floor and
rear seat floor vents.
.21
Recirculates air in
the
cabin, thereby
reducing
the amount of
time needed to cool
down the interior of
the vehicle
when used
with A/C.
.22
Distributes air
through the windshield
defroster vents,
demister outlets, and
the front and rear seat
floor vents. The system
will automatically
provide outside
air to reduce
window fogging.
.23 DEFROST:
Use to
clear ice or fog from
the windshield by
distributing air through
the windshield
defroster and
demister vents.
.24 REAR DEFROST /
HEATED MIRRORS
(IF
EQUIPPED)
:
Use to defrost
your rear windshield of
fog and thin ice. It
also
operates the heated
mirrors to remove snow
and thin ice from the
side mirrors. If your
vehicle is equipped
with a power sliding
rear window, rear
defrost is not available.
.25 PASSENGER
HEATED SEAT
CONTROL:
Press once
to activate high heat;
press a second time to
activate low heat.
Press a third time
to deactivate.
.26 FAN SPEED
CONTROL:
Increases /
decreases the fan speed.
MAX A/C OVERRIDE
OF AUTO FUNCTION:
Select panel
mode.
Then select
A/C and
recirculated
air.
Set the temperature
setting to 60°F.
Adjust fan speed to
maintain comfort.
E S S E N T I A L I N F O R M AT I O N
.2
.1
.14
.17
.15
.16
.18
.19
.20
.22
.21
.23 .24
.26
.25
.3
.4
.5
.12
.13
.11
.10
.9
.7
.6
.6
.7
.8