2009 Nissan Armada Owner's Manual
2009 Nissan Armada Manual

2009 Nissan Armada manual content summary:
- 2009 Nissan Armada | Owner's Manual - Page 1
® 2011 AR MADA OWNER'S MANUAL For your safety, read carefully and keep in this vehicle. - 2009 Nissan Armada | Owner's Manual - Page 2
FOREWORD Welcome to the growing family of new NISSAN owners. This vehicle is delivered to you with confidence. It was produced using the latest techniques and strict quality control. This manual was prepared to help you understand the operation and maintenance of your vehicle so that you may enjoy - 2009 Nissan Armada | Owner's Manual - Page 3
options available on this model. Therefore, you may find some information that does not apply to your vehicle. All information, specifications and illustrations in this manual are those in effect at the time of printing. NISSAN reserves the right to change arrow points to the front of the vehicle. - 2009 Nissan Armada | Owner's Manual - Page 4
material. The following advisory is provided: "Perchlorate Material - special handling may apply, See www.dtsc.ca.gov/hazardouswaste/perchlorate." © 2010 NISSAN NORTH AMERICA, INC. All rights reserved. No part of this Owner's Manual may be reproduced or stored in a retrieval system, or transmitted - 2009 Nissan Armada | Owner's Manual - Page 5
to assist you with all your automobile sales and service needs. However, if there is something that your NISSAN dealer cannot assist you with or you would like to provide NISSAN directly with comments or questions, please contact the NISSAN Consumer Affairs Department using our toll-free number - 2009 Nissan Armada | Owner's Manual - Page 6
and controls Pre-driving checks and adjustments Monitor, climate, audio, phone and voice recognition systems Starting and driving In case of emergency Appearance and care Maintenance and do-it-yourself Technical and consumer information Index 0 1 2 3 4 5 6 7 8 9 10 - 2009 Nissan Armada | Owner's Manual - Page 7
- 2009 Nissan Armada | Owner's Manual - Page 8
0 Illustrated table of contents Air bags, seat belts and child restraints ...0-2 Exterior front ...0-3 Exterior rear...0-4 Passenger compartment ...0-5 Instrument panel...0-6 Engine compartment check locations ...0-8 Warning/indicator lights ...0-9 - 2009 Nissan Armada | Owner's Manual - Page 9
1-21) 2nd row seat belts (P. 1-21) Roof-mounted curtain side-impact and rollover supplemental air bag (P. 1-53) Front seat belts (P. 1-21) Head Restraints (P. 1-8 ) Supplemental front-impact air bags (P. 1-53) Seats (P. 1-2) Occupant classification sensor (pressure sensor) (P. 1-60) Seat belt with - 2009 Nissan Armada | Owner's Manual - Page 10
Windshield (P. 8-20) Power windows (P. 2-51) Door locks, NISSAN Intelligent Key™, keys (P. 3-5, 3-12, 3-2) Mirrors (P. 3-32) Tire pressure (P. 9-12) Flat tire (P. 6-2) Tire chains (P. 8-42) Replacing bulbs (P. 8-32) Headlight and turn signal switch (P. 2-30) Fog light switch (P. 2-34) Tow hooks (if - 2009 Nissan Armada | Owner's Manual - Page 11
29) Glass hatch release (P. 3-28) Lift gate release (P. 3-27) Rearview monitor (if so equipped) (P. 4-33) 8. Replacing bulbs (P. 8-32) 9. Fuel-filler cap, fuel recommendation (P. 3-28, P. 9-3, 9-4) 10. Fuel-filler door (P. 3-28) 11. Child safety rear door locks (P. 3-7) See the page number indicated - 2009 Nissan Armada | Owner's Manual - Page 12
PASSENGER COMPARTMENT 1. 2. 3. Rear ventilators (P. 4-35) Storage (P. 2-40) DVD entertainment system (if so equipped) (P. 4-77) 4. Moonroof (if so equipped) (P. 2-55) 5. Map lights (P. 2-58) 6. Sun visors (P. 3-31) 7. HomeLink (P. 2-59) 8. Glove box (P. 2-42) 9. Seats (P. 1-2) 10. Cup holders (P. 2- - 2009 Nissan Armada | Owner's Manual - Page 13
3. 4. Vents (P. 4-35) Headlight/fog light (if so equipped)/turn signal switch navigation system* (if so equipped) (P. 4-2, P. 4-17) Navigation system* controls (if so equipped) (P. 4-17) Audio system controls (P. 4-40) Front passenger supplemental air bag (P. 1-53) Glove box (P. 2-42) Hazard lights - 2009 Nissan Armada | Owner's Manual - Page 14
3-30) Rear or front and rear sonar system off switch (if so equipped) (P. 2-37) Pedal position adjustment switch (P. 3-31) Power vent window (if so equipped) (P. 2-54) Lift gate open/close switch (if so equipped) (P. 3-23) *: Refer to the separate Navigation System Owner's Manual (if so equipped - 2009 Nissan Armada | Owner's Manual - Page 15
CHECK LOCATIONS 1. 2. 3. 4. 5. 6. Battery (P. 8-14) Fuse/fusible link box (P. 8-23) Transmission dipstick (P. 8-11) Engine oil filler cap (P. 8-9) Brake fluid reservoir (P. 8-12) Windshield-washer fluid reservoir (P. 8-13) 7. Air cleaner (P. 8-17) 8. Drive belt location (P. 8-16) 9. Radiator cap - 2009 Nissan Armada | Owner's Manual - Page 16
Anti-lock Braking System (ABS) warning light Page 2-14 Warning light Name Engine oil pressure low/ engine coolant temperature high warning light 4WD warning light ( model) Low fuel warning light Page 2-16 Indicator light Name Front passenger air bag status light High beam indicator light (Blue - 2009 Nissan Armada | Owner's Manual - Page 17
MEMO 0-10 Illustrated table of contents - 2009 Nissan Armada | Owner's Manual - Page 18
and supplemental restraint system Seats ...1-2 Front manual seat adjustment (if so equipped for passenger's seat) ...1-2 Front power seat adjustment (for driver ...1-24 Seat belt extenders ...1-30 Seat belt maintenance ...1-30 Child safety ...1-31 Infants...1-31 Small children warning light ...1-68 - 2009 Nissan Armada | Owner's Manual - Page 19
be sure not to contact any moving parts to avoid possible injuries and/or damage. The shoulder belt will not be against your body. In an accident, you could be thrown in the seat with both feet on the floor and adjust the seat properly. See "Precautions accidents. FRONT MANUAL SEAT ADJUSTMENT - 2009 Nissan Armada | Owner's Manual - Page 20
back. To bring the seatback forward, pull the lever up and lean your body forward. Release the lever to lock the seatback in position. The reclining feature allows adjustment of the seatback for occupants of different sizes for added comfort and to help obtain proper seat belt fit. See "Precautions - 2009 Nissan Armada | Owner's Manual - Page 21
The reclining feature allows adjustment of the seatback for occupants of different sizes for added comfort and to help obtain proper seat belt forward again, move the switch forward and move your body forward. The seatback will move forward. 1-4 Safety-Seats, seat belts and supplemental - 2009 Nissan Armada | Owner's Manual - Page 22
LRS0634 LRS0635 WRS0369 Seat lifter (driver's seat) Push the front or rear end of the switch up or down to adjust the angle and height of the seat cushion. Lumbar support (driver's seat) The lumbar support feature provides lower back support to the driver. Move the lever up or down to adjust the - 2009 Nissan Armada | Owner's Manual - Page 23
seat base. Then lift up on the seat base and tip it forward. Outboard seats 2ND ROW BENCH SEAT ADJUSTMENT (if so equipped) Reclining To recline the seatback, pull up on the lever and lean back. The recline feature allows adjustment of the seatback for occupants of different sizes for added comfort - 2009 Nissan Armada | Owner's Manual - Page 24
is reclined. This can be dangerous. The shoulder belt will not be against your body. In an accident, you could be thrown into it and receive neck or other release the back of the seat so it may be tipped forward. Then 2 lift up on the lower corner of the seat base and tip the outboard seating - 2009 Nissan Armada | Owner's Manual - Page 25
restraint was removed, reinstall and properly adjust the head restraint before an occupant uses the seating position. Failure to follow these instructions can reduce the effectiveness of the head restraints. This may increase the risk of serious injury or death in a collision. WRS0368 ARMRESTS - 2009 Nissan Armada | Owner's Manual - Page 26
LRS0886 LRS0887 The illustration shows the seating positions equipped with head restraints. All of the head restraints are adjustable. Indicates the seating position is equipped with a head restraint. Components 1. Head restraint 2. Adjustment notches 3. Lock knob 4. Stalks Safety-Seats, seat - 2009 Nissan Armada | Owner's Manual - Page 27
WRS0134 LRS0888 LRS0889 Adjustment Adjust the head restraint so the center is level with the center of the seat occupant's ears. To raise the head restraint, pull it up. To lower, push and hold the lock knob and push the head restraint down. 1-10 Safety-Seats, seat belts and supplemental - 2009 Nissan Armada | Owner's Manual - Page 28
adjust the head restraint before an occupant uses the seating position. Front-seat Active Head Restraints The Active Head Restraint moves forward utilizing a rear-end collision. The movement of the head restraint helps support the occupant's head by reducing its backward movement and helping absorb - 2009 Nissan Armada | Owner's Manual - Page 29
. If the headrest was removed, reinstall and properly adjust the headrest before an occupant uses the seating position. Failure to follow these instructions can reduce the effectiveness of the adjustable headrests. This may increase the risk of serious injury or death in a collision. LRS0892 The - 2009 Nissan Armada | Owner's Manual - Page 30
LRS0887 WRS0134 LRS0888 Components 1. Adjustable headrest 2. Adjustment notches 3. Lock knob 4. Stalks Adjustment Adjust the headrest so the center is level with the center of the seat occupant's ears. To raise the headrest, pull it up. Safety-Seats, seat belts and supplemental restraint - 2009 Nissan Armada | Owner's Manual - Page 31
LRS0889 LRS0890 LRS0891 To lower, push and hold the lock knob and push the headrest down. Removal Use the following procedure to remove the adjustable headrests. 1. Pull the headrest up to the highest position. 2. Push and hold the lock knob. 3. Remove the headrest from the seat. 4. Store the - 2009 Nissan Armada | Owner's Manual - Page 32
to passengers or damage to the vehicle in case of sudden braking or an accident. ● When returning the seatbacks to the upright cargo higher than the seatbacks. In a sudden stop or collision, unsecured cargo could cause personal injury. LRS0341 Folding the front passenger's seatback To fold the front - 2009 Nissan Armada | Owner's Manual - Page 33
row captain's chairs flat for maximum cargo hauling: 1 3. To return the front passenger's seat to a seating position, lift up on the seatback and push the 2nd row center console, see "2nd row center console" in the "Instruments and controls" section of this Owner's Manual. Pull the strap forward - 2009 Nissan Armada | Owner's Manual - Page 34
LRS0333 3 LRS0334 4 LRS0641 5 Then lift up on the recline lever to fold the seatback flat forward. There is a carpet panel flap that can be folded toward the back of the vehicle. The carpet panel flaps provide a level cargo floor when the 3rd row seats are also folded flat. Reverse this process - 2009 Nissan Armada | Owner's Manual - Page 35
(if so equipped) To fold the 2nd row bench seat flat for maximum cargo hauling: 1 Pull the strap forward, located in the center of each seat cushion, and fold each seat cushion toward the front of the vehicle. Then lift up on the recline lever on the side of the outboard seats to - 2009 Nissan Armada | Owner's Manual - Page 36
cargo floor when the 3rd row seats are also folded flat. Folding the 3rd row split bench seat (if so equipped) To fold the 3rd row split bench seat flat for maximum cargo capacity to a seating position, lift up on the pull strap on the back of the seat base while lifting on the seatback. Then push - 2009 Nissan Armada | Owner's Manual - Page 37
are located behind the 2nd row seat (passenger's side) on the 3rd row cup holder console 1 . There are also controls located on the rear quarter trim panel behind the 3rd are in the full upright or folded position, bring your vehicle in for service. 1-20 Safety-Seats, seat belts and supplemental - 2009 Nissan Armada | Owner's Manual - Page 38
you are sitting upright and well back in your seat with both feet on the floor, your chances of being injured or killed in an accident and/or the severity of injury may be greatly reduced. NISSAN strongly encourages you and all of your passengers to buckle up every time you drive - 2009 Nissan Armada | Owner's Manual - Page 39
SSS0134 SSS0016 WARNING ● Every person who drives or rides in this vehicle should use a seat belt at all times. Children should be properly restrained in the rear seat and, if appropriate, in a child restraint. WARNING ● The seat belt should be properly adjusted to a snug fit. Failure to do so - 2009 Nissan Armada | Owner's Manual - Page 40
light glows continuously while the ignition is turned ON with all doors closed and all seat belts fastened, it may indicate a malfunction in the system. Have the system checked by a NISSAN dealer. ● No changes the restraint manufacturer's inspection instructions and replacement recommendations. The - 2009 Nissan Armada | Owner's Manual - Page 41
can be dangerous. The shoulder belt will not be against your body. In an accident, you could be thrown into it and floor and adjust the seat belt properly. 1 INJURED PERSONS NISSAN recommends that injured persons use seat belts. Check with your doctor for specific recommendations. WRS0174 Manual - 2009 Nissan Armada | Owner's Manual - Page 42
not be activated. If it is activated, it may cause uncomfortable seat belt tension. It can also change the operation of the front passenger air bag. See "Front passenger air bag and status light" later in this section. WRS0137 2 WRS0138 3 Slowly pull the seat belt out of the retractor and insert - 2009 Nissan Armada | Owner's Manual - Page 43
further belt movement. If the retractor does not lock during this check or if you have any questions about seat belt operation, see a NISSAN dealer. WRS0139 Unfastening the seat belts 1 To unfasten the seat belt, press the button on the buckle. The seat belt automatically retracts. Checking - 2009 Nissan Armada | Owner's Manual - Page 44
SSS0240 SSS0241 Center of the 3rd row bench seat The 3rd row center seat belt has a connector tongue 1 and a seat belt tongue 2 . Both the connector tongue and the seat belt tongue must be securely latched for proper seat belt operation. WARNING ● Always fasten the connector tongue and the seat - 2009 Nissan Armada | Owner's Manual - Page 45
Stowing the 3rd row center seat belt When folding down the 3rd row seat, the 3rd row center seat belt can be retracted into a stowed position as follows: 1 WARNING ● Do not unfasten the rear center seat belt connector except when folding down the rear seat. ● When attaching the rear center seat - 2009 Nissan Armada | Owner's Manual - Page 46
center seat belt connector buckle. To fasten the seat belt, see "Fastening the seat belts" earlier in this section. Front and 2nd row outboard seats Shoulder belt height adjustment (front and 2nd row outboard seats) The shoulder belt anchor height should be adjusted to the position best for you - 2009 Nissan Armada | Owner's Manual - Page 47
in (200 mm) of length and may be used for either the driver or front passenger seating position. See a NISSAN dealer for assistance with purchasing an extender if an extender is required. SEAT BELT MAINTENANCE ● To clean the seat belt webbing, apply a mild soap solution or any solution recommended - 2009 Nissan Armada | Owner's Manual - Page 48
general information in this manual, child safety information is seat The proper restraint depends on the child's size. Generally, infants up to about 1 year bag system) for the front passenger. See "Supplemental restraint instructions for minimum and maximum weight and height recommendations. NISSAN - 2009 Nissan Armada | Owner's Manual - Page 49
kg). A booster seat should be used to obtain proper seat belt fit. NISSAN recommends that a child be placed in a commercially available booster seat if the shoulder stand or kneel on any seat and do not allow a child in the cargo area. The child could be seriously injured or killed in a sudden stop - 2009 Nissan Armada | Owner's Manual - Page 50
section. - Even with the NISSAN Advanced Air Bag System, never install a rearfacing child restraint in the front seat. An inflating air bag the vehicle. WRS0256 WARNING ● Failure to follow the warnings and instructions for proper use and installation of child restraints could result in serious - 2009 Nissan Armada | Owner's Manual - Page 51
LATCH compatible child restraint, the vehicle seat belts can be used. Several manufacturers offer child restraints for infants and children of various sizes. When selecting any child restraint, keep the following points in mind: ● Choose only a restraint with a label certifying that it complies with - 2009 Nissan Armada | Owner's Manual - Page 52
LATCH lower anchor WARNING Failure to follow the warnings and instructions for proper use and installation of child restraints could result in serious injury or death of a child or other passengers in a sudden stop or collision: - - 2009 Nissan Armada | Owner's Manual - Page 53
to secure the child restraint. Check your child restraint for a label stating that it is compatible with LATCH. This information may also be in the instructions provided by the child restraint manufacturer. 1-36 Safety-Seats, seat belts and supplemental restraint system - 2009 Nissan Armada | Owner's Manual - Page 54
the top tether anchor, remove the cargo cover from the vehicle or secure it on the cargo floor below its attachment location. If the cargo cover is not removed, it may a child restraint, carefully read and follow the instructions in this manual and those supplied with the child restraint. 2nd row - 2009 Nissan Armada | Owner's Manual - Page 55
the seat. Always follow the child restraint manufacturer's instructions. LRS0361 LRS0640 2nd row bench seat (if so floor behind the outboard seating positions as shown. ● 2nd row captain's chairs (if so equipped) on the floor behind the seats as shown. ● 3rd row bench seat on the floor of the cargo - 2009 Nissan Armada | Owner's Manual - Page 56
WRS0801 WRS0802 LRS0673 Rear-facing web-mounted - step 2 2. Secure the child restraint anchor attachments to the LATCH lower anchors. Check to make sure the LATCH attachment is properly attached to the lower anchors. Rear-facing rigid-mounted - step 2 Rear-facing - step 3 3. For child - 2009 Nissan Armada | Owner's Manual - Page 57
5. Check to make sure the child restraint is properly secured prior to each use. If the child restraint is loose, repeat steps 2 through 4. LRS0674 WRS0256 Rear-facing - step 4 4. After attaching the child restraint, test it before you place the child in it. Push it from side to side while - 2009 Nissan Armada | Owner's Manual - Page 58
or collision. Also, it can change the operation of the front passenger air bag. See "Front passenger air bag and status light" later in this section. ● be used in the front seat. Position the child restraint on the seat. Always follow the restraint manufacturer's instructions. Rear-facing - step - 2009 Nissan Armada | Owner's Manual - Page 59
LRS0669 LRS0670 WRS0762 Rear-facing - step 3 3. Pull the shoulder belt until the belt is fully extended. At this time, the seat belt retractor is in the Automatic Locking Retractor (ALR) mode (child restraint mode). It reverts to the Emergency Locking Retractor (ELR) mode when the seat belt is - 2009 Nissan Armada | Owner's Manual - Page 60
restraint in the 2nd row seats using the LATCH system: 1. Position the child restraint on the seat. Always follow the child restraint manufacturer's instructions. WRS0799 Rear-facing - step 6 6. After attaching the child restraint, test it before you place the child in it. Push it from side to - 2009 Nissan Armada | Owner's Manual - Page 61
knee to compress the vehicle seat cushion and seatback while tightening the webbing of the anchor attachments. 5. Tighten the tether strap according to the manufacturer's instructions to remove any slack. 1-44 Safety-Seats, seat belts and supplemental restraint system - 2009 Nissan Armada | Owner's Manual - Page 62
over or be loose and cause injury to a child in a sudden stop or collision. Also, it can change the operation of the front passenger air bag. See "Front passenger air bag and status light" later in this section. When installing a child restraint system in the rear center position, both the center - 2009 Nissan Armada | Owner's Manual - Page 63
child restraint and insert it into the buckle until you hear and feel the latch engage. Be sure to follow the child restraint manufacturer's instructions for belt routing. Forward-facing - step 4 4. Pull the shoulder belt until the belt is fully extended. At this time, the seat belt retractor is - 2009 Nissan Armada | Owner's Manual - Page 64
LRS0668 WRS0681 WRS0698 Forward-facing - step 5 5. Allow the seat belt to retract. Pull up on the shoulder belt to remove any slack in the belt. Forward-facing - step 6 6. Remove any additional slack from the seat belt; press downward and rearward firmly in the center of the child restraint with - 2009 Nissan Armada | Owner's Manual - Page 65
passenger air bag should illuminate. If this status light light is not illuminated see, Front passenger air bag and status light in this section. Move the child restraint to another seating position. Have the system checked by a NISSAN dealer. After the child restraint is removed and the seat belt - 2009 Nissan Armada | Owner's Manual - Page 66
Secure the tether strap to the tether anchor point 2 on the floor behind the child restraint. LRS0361 2nd row bench seat (if so any questions when installing a top tether strap on the rear seat, consult your NISSAN dealer for details. LRS0640 3rd row bench seat INSTALLING TOP TETHER STRAP (2nd - 2009 Nissan Armada | Owner's Manual - Page 67
Secure the tether strap to the tether anchor point 2 on the floor behind the child restraint. 3. Refer to the appropriate child restraint installation a top tether strap child restraint on the rear seat, consult your NISSAN dealer for details. BOOSTER SEATS Precautions on booster seats WARNING If a - 2009 Nissan Armada | Owner's Manual - Page 68
● Make sure the child's head will be properly supported by the booster seat or vehicle seat. The seatback must operated. The instructions in this section apply to booster seat installation in the rear seats or the front passenger seat. LRS0453 LRS0464 Booster seats of various sizes are offered by - 2009 Nissan Armada | Owner's Manual - Page 69
, move the seat to the rearmost position. 2. Position the booster seat on the seat. Only place it in a front-facing direction. Always follow the booster seat manufacturer's instructions. Front passenger position 3. The booster seat should be positioned on the vehicle seat so that it is stable. If - 2009 Nissan Armada | Owner's Manual - Page 70
follow the booster seat manufacturer's instructions for adjusting the seat belt Front passenger air bag and status light" later in this section. ● Roof-mounted curtain side-impact and rollover supplemental air bag ● Seat belt with pretensioner Supplemental front-impact air bag system: The NISSAN - 2009 Nissan Armada | Owner's Manual - Page 71
seat is unoccupied. See "Front passenger air bag and status light" later in this section. ● The seat belts and the front air bags are most effective when you are sitting well back and upright in the seat. The front air bags inflate with great force. Even with the NISSAN Advanced Air Bag System, if - 2009 Nissan Armada | Owner's Manual - Page 72
seat. Failure to be properly seated and wearing the seat belt can increase the risk or severity of injury in an accident. See "Front passenger air bag and status light" later in this section. ● Keep hands on the outside of the steering wheel. Placing them inside the steering wheel rim could increase - 2009 Nissan Armada | Owner's Manual - Page 73
your lap or arms. Some examples of dangerous riding positions are shown in the illustrations. WARNING ● Children may be severely injured or killed when the front air bags, side air bags or curtain and rollover air bags inflate if they are not properly restrained. Pre-teens and children should be - 2009 Nissan Armada | Owner's Manual - Page 74
ARS1044 ARS1045 WRS0256 WARNING ● Even with the NISSAN Advanced Air Bag System, never install a rear-facing child restraint in the front seat. An inflating front air bag could seriously injure or kill your child. See "Child restraints" earlier in this section for details. Safety-Seats, seat - 2009 Nissan Armada | Owner's Manual - Page 75
WRS0431 WRS0365 SSS0162 Do not lean against the door. Do not lean against doors or windows. Do not lean against doors or windows. WARNING Front seat-mounted side-impact supplemental air bags and roof-mounted curtain side-impact and rollover supplemental air bags: ● The side air bags and - 2009 Nissan Armada | Owner's Manual - Page 76
seat or near the side roof rails. Do not allow anyone sitting in the front seats or rear outboard seats to extend their hand out of the window or lean against the door. Some examples of dangerous riding positions are shown in the previous illustrations. WRS0363 SSS0159 WARNING ● When sitting - 2009 Nissan Armada | Owner's Manual - Page 77
is equipped with the NISSAN Advanced Air Bag System for the driver and front passenger seats. This system is designed to meet certification requirements under U.S. regulations. It is also permitted in Canada. However, all of the information, cautions and warnings in this manual still apply and must - 2009 Nissan Armada | Owner's Manual - Page 78
performance of the system. If you have any questions about your air bag system, please contact NISSAN or your NISSAN dealer. If you are considering modification of your vehicle due to a disability, you may also contact NISSAN. Contact information is contained in the front of this Owner's Manual - 2009 Nissan Armada | Owner's Manual - Page 79
instructions in this manual concerning the use of seats, seat belts and child restraints can increase the risk or severity of injury in an accident. ● Occupied passenger seat and the passenger meets the conditions outlined in this is OFF to indicate section: The light that the front not part of - 2009 Nissan Armada | Owner's Manual - Page 80
instructions in this manual. Always be sure that you and all vehicle occupants are seated and restrained properly. Using the passenger air bag status light, you can monitor when the front seat (in which case the air bag is OFF). Your NISSAN dealer can check that the system is OFF by using a special - 2009 Nissan Armada | Owner's Manual - Page 81
Modifying or tampering with the front passenger seat may result in serious personal injury. For example, do not change the front seats by placing material on inform the buyer about the front air bag system and guide the buyer to the appropriate sections in this Owner's Manual. 1-64 Safety-Seats, - 2009 Nissan Armada | Owner's Manual - Page 82
do not provide restraint to the lower body. The seat belts should be correctly worn as far away as practical from the door finishers and side roof rails. The side light illuminates. The supplemental air bag warning light will turn off after about 7 seconds if the system is operational. WRS0381 Front - 2009 Nissan Armada | Owner's Manual - Page 83
front seats. Also, do not place any objects (an umbrella, bag, etc.) between the front door finisher and the front guide the buyer to the appropriate sections in this Owner's Manual. Seat belts with pretensioners (Front , replaced by your NISSAN dealer. ● No unauthorized changes should be made to - 2009 Nissan Armada | Owner's Manual - Page 84
in certain types of collisions, helping to restrain front seat occupants. The pretensioner is encased with the seat NISSAN dealer. When selling your vehicle, we request that you inform the buyer about the pretensioner system and guide the buyer to the appropriate sections in this Owner's Manual - 2009 Nissan Armada | Owner's Manual - Page 85
NISSAN dealer. When maintenance work is required on the vehicle, the front air bags, side air bags, curtain and rollover air bags, pretensioners and related parts should be pointed out to the person performing the maintenance light does not come on at all. Under these conditions, the front air - 2009 Nissan Armada | Owner's Manual - Page 86
air bag, side air bag, curtain and rollover air bag systems and the pretensioner system should be inspected by a NISSAN dealer if there is any damage to the front end or side portion of the vehicle. ● If you need to dispose of a supplemental air bag or pretensioner or scrap the vehicle, contact - 2009 Nissan Armada | Owner's Manual - Page 87
Headlight and turn signal switch...2-30 Headlight control switch...2-30 Daytime running light system (Canada only) ...2-32 Instrument brightness control ...2-33 Turn signal switch ...2-33 Fog light Control (VDC) OFF switch ...2-36 Rear sonar system off switch (if so equipped)...2-37 Front and rear - 2009 Nissan Armada | Owner's Manual - Page 88
vent windows (if so equipped) ...2-54 Manual vent windows (if so equipped) ...2-54 Moonroof (if so equipped) ...2-55 Automatic moonroof ...2-55 Interior light ...2-56 Console light...2-57 Personal lights ...2-58 Map lights ...2-58 Cargo light ...2-58 HomeLink universal transceiver (if so equipped - 2009 Nissan Armada | Owner's Manual - Page 89
3. 4. Vents (P. 4-35) Headlight/fog light (if so equipped)/turn signal switch navigation system* (if so equipped) (P. 4-2, P. 4-17) Navigation system* controls (if so equipped) (P. 4-17) Audio system controls (P. 4-40) Front passenger supplemental air bag (P. 1-53) Glove box (P. 2-42) Hazard lights - 2009 Nissan Armada | Owner's Manual - Page 90
3-30) Rear or front and rear sonar system off switch (if so equipped) (P. 2-37) Pedal position adjustment switch (P. 3-31) Power vent window (if so equipped) (P. 2-54) Lift gate open/close switch (if so equipped) (P. 3-23) *: Refer to the separate Navigation System Owner's Manual (if so equipped - 2009 Nissan Armada | Owner's Manual - Page 91
METERS AND GAUGES WIC1243 1. 2. 3. 4. 5. 6. Warning/indicator lights Tachometer Engine coolant temperature gauge Voltmeter Fuel gauge Speedometer 7. 8. 9. Automatic transmission fluid temperature gauge Odometer/Twin trip odometer/Vehicle Information Display Engine oil pressure gauge 2-4 - 2009 Nissan Armada | Owner's Manual - Page 92
records the distance of individual trips. Changing the display: Pushing the change button changes the display as follows: Trip → Trip time, driving distance and average speed information is also available for vehicles with navigation system (if so equipped). Refer to "Control panel buttons" in the - 2009 Nissan Armada | Owner's Manual - Page 93
CAUTION If the gauge indicates coolant temperature near the hot (H) end of the normal range, reduce vehicle speed to decrease temperature. If the gauge is over the normal range, stop the vehicle as soon as safely possible. If the engine is overheated, continued operation of the vehicle may seriously - 2009 Nissan Armada | Owner's Manual - Page 94
should turn off. If the the light remains on after a few driving trips, have the vehicle inspected by a NISSAN dealer. LIC1199 FUEL GAUGE The gauge indicates the approximate fuel level in the tank. The gauge may move slightly during braking, turning, acceleration, or going up or down hills. The - 2009 Nissan Armada | Owner's Manual - Page 95
dipstick to check the oil level. (See "Engine oil" in the "Maintenance and do-it-yourself" section.) ● If the gauge needle does not move with the proper amount of engine oil, have the vehicle checked by a NISSAN dealer. Continued vehicle operation in such a condition could cause serious damage to - 2009 Nissan Armada | Owner's Manual - Page 96
for about: 1 second 8 seconds 11 seconds 13 seconds Feature: (Push button again for about 1 second to change settings) Compass display toggles on/off Automatic anti-glare/indicator light toggles on/off Compass zone can be changed to correct false compass readings Compass enters calibration mode - 2009 Nissan Armada | Owner's Manual - Page 97
WIC0904 LIC0583 Type A COMPASS DISPLAY Push the or button for about 1 second when the ignition switch is placed in the ON position to toggle the compass direction display 1 on or off. The display will indicate the direction that the vehicle is heading. N: North E: East S: South W: West Type B If - 2009 Nissan Armada | Owner's Manual - Page 98
Zone variation change procedure The difference between magnetic north and geographical north is known as variance. In some areas, this difference can sometimes be great enough to cause false compass readings. Follow these instructions to set the variance for your particular location if this happens: - 2009 Nissan Armada | Owner's Manual - Page 99
indication soon after repeated adjustment, have the compass checked at an authorized NISSAN dealer. ● The compass may not indicate the correct compass point in .) ● If a magnet is located in or near the overhead console in the front of the vehicle or the vehicle is driven where the terrestrial - 2009 Nissan Armada | Owner's Manual - Page 100
temperature high warning light Seat belt warning light and chime Supplemental air bag warning light Turn signal/hazard indicator lights Vehicle Dynamic Control (VDC) OFF indicator light Front passenger air bag status light CHECKING BULBS With all doors closed, apply the parking brake and place - 2009 Nissan Armada | Owner's Manual - Page 101
a NISSAN dealer. If an ABS malfunction occurs, the anti-lock function is turned off. The brake system then operates normally, but without anti-lock assistance. See "Brake system" in the "Starting and driving" section. Automatic transmission park model) warning light ( WARNING ● If the ATP light is - 2009 Nissan Armada | Owner's Manual - Page 102
, stop the vehicle and perform the following: 1. Check the brake fluid level. Add brake fluid as necessary. See "Brake fluid" in the "Maintenance and do-it-yourself" section of this manual. 2. If the brake fluid level is correct, have the warning system checked by a NISSAN dealer. ● Pressing the - 2009 Nissan Armada | Owner's Manual - Page 103
the N position and shift the 4WD shift switch to 2WD. ● If the warning light is still on after the above operation, have your vehicle checked by a NISSAN dealer as soon as possible. 4WD warning light model) ( The 4WD warning light comes on when the ignition switch is placed in the ON position. It - 2009 Nissan Armada | Owner's Manual - Page 104
the driver's door opening. The low tire pressure warning light does not Maintenance and do-it-yourself" section in this manual. WARNING ● If the light does not illuminate with the ignition switch in the ON position, have the vehicle checked by a NISSAN dealer as soon as possible. ● If the light - 2009 Nissan Armada | Owner's Manual - Page 105
front air bag, front seat-mounted side-impact air bag , roof-mounted curtain and rollover air bag and pretensioner systems need servicing and your vehicle must be taken to a NISSAN dealer: ● The supplemental air bag warning light restraint system" section of this manual. CAUTION ● The TPMS is not - 2009 Nissan Armada | Owner's Manual - Page 106
is being used. For front passenger air bag status light operation, see "Front passenger air bag and status light" in the "Safety - Seats, seat belts and supplemental restraint system" section of this manual. High beam indicator light (blue) This blue light comes on when the headlight high beams are - 2009 Nissan Armada | Owner's Manual - Page 107
poor driveability, reduced fuel economy, and possible damage to the emission control system. Vehicle Dynamic Control (VDC) OFF indicator light This indicator light comes on when the Vehicle Dynamic Control off switch is pushed to OFF, the transfer case is in the 4LO position ( model), or when the - 2009 Nissan Armada | Owner's Manual - Page 108
● other information For details about the Intelligent Key, see "NISSAN Intelligent Key™" in the "Pre-driving checks and adjustments" section toggle through the following modes. MPG → Range → Warning Rotate the INFO button 2 to highlight the desired menu option within the selected mode. Press - 2009 Nissan Armada | Owner's Manual - Page 109
warnings that may be present. Once the screen is selected you have the option of skipping the warning or viewing it in detail. Warnings can be present for issues such as an open door or low fuel. For more information about potential warnings see "Vehicle information display warnings and indicators - 2009 Nissan Armada | Owner's Manual - Page 110
liftgate open warning 2. Lock warning (NISSAN Intelligent Key™ model) 3. Low fuel warning 4. Low windshield-washer fluid warning 5. No key warning (NISSAN Intelligent Key™ model) 6. Parking brake warning 7. Shift P warning (NISSAN Intelligent Key™ model) 8. Cruise main switch indicator 9. Cruise - 2009 Nissan Armada | Owner's Manual - Page 111
fluid" in the "Maintenance and do-ityourself" section of this manual. No key warning (NISSAN Intelligent Key™ model) This warning illuminates and perform the assigned remedies: - The battery of the Intelligent Key carried with you is discharged completely. Replace the battery with a new one - 2009 Nissan Armada | Owner's Manual - Page 112
Key™ battery discharge indicator (NISSAN Intelligent Key™ model) This indicator illuminates when the Intelligent Key battery is running out of power. If this indicator illuminates, replace the battery with a new one. See "Battery replacement" in the "Maintenance and do-it-yourself" section - 2009 Nissan Armada | Owner's Manual - Page 113
company to see if you may be eligible for discounts for various theft protection features. Keyfob and NISSAN Intelligent Key™ operation: button. All doors lock. ● Push the The hazard lights flash twice and the horn beeps once to indicate all doors are locked. button is pushed with ● When the all - 2009 Nissan Armada | Owner's Manual - Page 114
key is removed. If the indicator light fails to glow for 30 seconds, unlock the door once and lock it again. NISSAN Vehicle Immobilizer System (CONT ASSY - IMMOBILIZER, ANT ASSY - IMMOBILIZER) This device complies with part operation of the device. CHANGES OR MODIFICATIONS NOT EXPRESSLY APPROVED - 2009 Nissan Armada | Owner's Manual - Page 115
, climate, audio, phone and voice recognition systems" section later in this manual. 2 3 Low (LO) - continuous low speed operation High (HI) function indicates the NISSAN Vehicle Immobilizer System is operational. If the NISSAN Vehicle Immobilizer System is malfunctioning, the light will remain on - 2009 Nissan Armada | Owner's Manual - Page 116
is empty. ● Do not fill the windshield-washer fluid reservoir with washer fluid concentrates at full strength. Some methyl alcohol based washer fluid concentrates may permanently stain the grille if spilled while filling the windshieldwasher fluid reservoir. ● Pre-mix washer fluid concentrates with - 2009 Nissan Armada | Owner's Manual - Page 117
the vehicle battery. When turning the switch to the position, the front parking, tail, license plate and instrument panel lights come on. When turning the switch to the position, the headlights come on and all the other lights remain on. 2 CAUTION When cleaning the inner side of the rear - 2009 Nissan Armada | Owner's Manual - Page 118
systems section later in this manual. To turn on the autolight system: 1. Turn the headlight switch to the AUTO position headlights, front parking, tail, license plate and instrument panel lights automatically when it is dark. ● Turn off all the lights when it is light. ● Keep all the lights - 2009 Nissan Armada | Owner's Manual - Page 119
though the battery saver feature automatically turns off the headlights after a period of time, you should turn the headlight switch to the OFF brake released. The daytime running lights operate with the headlight switch in the position. Turn the OFF position or in the position for full headlight - 2009 Nissan Armada | Owner's Manual - Page 120
the daytime running light system is active, tail lights on your vehicle are not on. It is necessary at dusk to turn on your headlights. Failure to cancel automatically. Lane change signal 2 To signal a lane change, move the lever up or down to the point where the indicator light begins to flash, - 2009 Nissan Armada | Owner's Manual - Page 121
switch to the position. To turn the fog lights on with the headlight switch in the AUTO position, the headlights must be on, then position. turn the fog light switch to the To turn the fog lights off, turn the fog light switch to the OFF position. The headlights must be on and the low beams selected - 2009 Nissan Armada | Owner's Manual - Page 122
the center pad area of the steering wheel. The front seats are warmed by built-in heaters. 1. Start depending on the temperature. The indicator light in the switch will illuminate. The heater is switch off and have the system checked by your NISSAN dealer. ● The battery could run down if the - 2009 Nissan Armada | Owner's Manual - Page 123
off manually. The indicator light will go off. The vehicle should be driven with the Vehicle Dynamic Control (VDC) floor. If maximum engine power is needed to free a stuck vehicle, turn the VDC system off. To turn off the VDC system, push the VDC OFF indicator will come on. switch. The Push the VDC - 2009 Nissan Armada | Owner's Manual - Page 124
pushing the OFF switch. When the system is disabled, the indicator light on the switch will illuminate. The system will automatically reset the next detect obstacles within 5.9 ft (1.8 m) of the rear bumper, a beeping tone is emitted. WARNING ● The front sonar system is a convenience but it is not - 2009 Nissan Armada | Owner's Manual - Page 125
m) of the front bumper. The rear consumer information" section later in this manual. Tow mode should be used when pulling a heavy trailer or hauling a heavy load. Driving the vehicle in the tow mode with no trailer/load or light trailer/light load will not cause any damage. However, fuel economy - 2009 Nissan Armada | Owner's Manual - Page 126
POWER OUTLET LIC1193 LIC0550 LIC0551 Front row 2nd row Luggage area The power outlets are for powering electrical accessories such as cellular telephones. The power outlets located on the driver's side of the instrument panel and in the luggage area are powered directly by - 2009 Nissan Armada | Owner's Manual - Page 127
STORAGE CONSOLE BOX CAUTION ● The outlet and plug may be hot during or immediately after use. ● Only certain power outlets are designed for use with a cigarette lighter unit. Do not use any other power outlet for an accessory lighter. See your NISSAN dealer for additional information. ● Do not use - 2009 Nissan Armada | Owner's Manual - Page 128
LIC1369 LIC1370 LIC1371 Console box storage trays Console box storage Pull up on the lever 1 to open the console box lid 2 . Console box lock Use the master key to lock 1 or unlock 2 the console box. Instruments and controls 2-41 - 2009 Nissan Armada | Owner's Manual - Page 129
holder while parking in direct sunlight. The heat may damage the sunglasses. LIC1176 WIC0673 GLOVE BOX Open the glove box by pulling the handle. Use the master key when locking 1 or unlocking 2 the glove box. SUNGLASSES HOLDER To open the sunglasses holder, push and release. Only store - 2009 Nissan Armada | Owner's Manual - Page 130
LIC1195 LIC0575 LIC0568 MAP POCKETS SEATBACK POCKET The seatback pocket is located on the back of the driver seat. The pocket can be used to store maps. Small bin OVERHEAD CONSOLE Instruments and controls 2-43 - 2009 Nissan Armada | Owner's Manual - Page 131
bin (if so equipped) Large bin Front Storage bins WARNING Keep storage bins closed while driving to help prevent injury in an accident or a sudden stop. Push the button to open a storage bin. Push the lid up to close. CUP HOLDERS CAUTION ● Avoid abrupt starting and braking when the cup holder is - 2009 Nissan Armada | Owner's Manual - Page 132
Adjustable Position the arm on the adjustable cup holder so that the cup is held securely. 2nd row (rear of front console) To open the 2nd row cup holders (rear of the front console), lower the lid. To close, raise the lid. 2nd row center console (if so equipped) Instruments and controls 2-45 - 2009 Nissan Armada | Owner's Manual - Page 133
holder CAUTION ● Do not use bottle holder for any other objects that could be thrown about in the vehicle and possibly injure people during sudden braking or an accident. ● Do not use bottle holder for open liquid containers. 2-46 Instruments and controls - 2009 Nissan Armada | Owner's Manual - Page 134
on the lever to open the console box lid. Removing the 2nd row center console box To remove the 2nd row center console box: 1 2 Lift out the cup holder tray. Pull up on the handle to tilt the console box up. Move the console box toward the front of the vehicle and lift it out. 3 Instruments and - 2009 Nissan Armada | Owner's Manual - Page 135
for the jack may dent body panel or damage power back door assembly (if so equipped). To access the floor storage area, push down 1 to raise the handle, then pull up on the handle 2 to lift the luggage board. LUGGAGE HOOKS The luggage hooks can be used to secure cargo with ropes or other types - 2009 Nissan Armada | Owner's Manual - Page 136
top tether strap may be damaged by contact with items in the cargo area. Secure any items in the cargo area. Your child could be seriously injured or killed in a or 44 lb (196 N) to a single B hook. Floor hooks Do not apply a load of more than 110 lb (490 N) to a single hook. Instruments and - 2009 Nissan Armada | Owner's Manual - Page 137
rack has the potential to affect the vehicle stability and handling during sudden or abnormal handling maneuvers. ● Roof rack load should be evenly distributed. ● Do not exceed maximum roof rack load weight capacity. ● Properly secure all cargo with ropes or straps to help prevent it from sliding - 2009 Nissan Armada | Owner's Manual - Page 138
Axle Weight Rating (GAWR front and rear). The GVWR and GAWR are located on the F.M.V.S.S. label (located on the driver's door pillar). For more information regarding GVWR and GAWR, refer to "Vehicle loading information" in the "Technical and consumer information" section later in this manual. POWER - 2009 Nissan Armada | Owner's Manual - Page 139
up. To stop the opening or closing function at any time, simply release the switch. LIC1181 WIC1237 1. 2. 3. 4. 5. 6. Window lock button Power door lock switch Front passenger side automatic switch Right rear passenger window switch Left rear passenger window switch Driver side automatic switch - 2009 Nissan Armada | Owner's Manual - Page 140
's side shown) to the second detent and release it; it need not be held. The window automatically opens all the way. To stop the window, lift the switch up while the window is opening. To fully close a window equipped with automatic operation, pull the switch up to the second detent and - 2009 Nissan Armada | Owner's Manual - Page 141
switch is placed in the OFF position. If the driver's or passenger's door is opened during this 45 second period, power to the vent windows is in the open position, push the latch handle rearward until it locks. To close a manual vent window, pull the latch handle toward you and push the rear portion - 2009 Nissan Armada | Owner's Manual - Page 142
the switch toward the close position 4 . To open or close the moonroof part way, push the switch in any direction 5 while the moonroof is sliding open is placed in the ACC or OFF position. If the driver's door or the front passenger's door is opened during this period of about 45 seconds, power to - 2009 Nissan Armada | Owner's Manual - Page 143
the moonroof does not close Have your NISSAN dealer check and repair the moonroof. body out of the moonroof opening while the vehicle is in motion or while the moonroof is closing. LIC0585 The interior light , the interior lights illuminate, regardless of door position. The lights will go off - 2009 Nissan Armada | Owner's Manual - Page 144
switch is in the OFF position 3 , the interior lights do not illuminate, regardless of door position. The puddle lights (if so equipped) come on when any front or rear passenger door is opened. The lights will turn off automatically after 15 minutes while doors are open to prevent the battery from - 2009 Nissan Armada | Owner's Manual - Page 145
PERSONAL LIGHTS MAP LIGHTS CARGO LIGHT LIC0588 LIC0586 LIC0590 The personal lights on the overhead console can be swiveled 360 degrees. To turn on the light, press the button. Press the button again to turn off the light. To turn the map lights on, press the switches. To turn them off, press - 2009 Nissan Armada | Owner's Manual - Page 146
RF) devices such as garage doors, gates, home and office lighting, entry door locks and security systems. (Example: new vehicle purchases). Upon sale of the door and then automatically stop and reverse, does not meet current federal safety standards. Using a garage door opener without these features - 2009 Nissan Armada | Owner's Manual - Page 147
door opener's motor and the "training light" is lit, you have 30 seconds in which to perform step 7. Use the help of a second person for convenience to assist when performing . 4. Hold down both buttons until the indicator light on the HomeLink flashes, changing from a "slow blink" to a "rapidly - 2009 Nissan Armada | Owner's Manual - Page 148
NISSAN Consumer Affairs Department. The phone numbers are located in the Foreword of this manual. 2. When the indicator light held transmitter batteries with new batteries. ● position change the codes of any non-rolling code device that has been programmed into HomeLink . Consult the Owner's Manual - 2009 Nissan Armada | Owner's Manual - Page 149
FCC Notice: This device complies with FCC rules part 15 and RSS-210 of Industry Canada. Operation is subject to operation. This transmitter has been tested and complies with FCC and DOC/MDC rules. Changes or modifications not expressly approved by the party responsible for compliance could void the - 2009 Nissan Armada | Owner's Manual - Page 150
signals ...3-21 Troubleshooting guide ...3-22 Hood ...3-23 Lift gate ...3-23 Operating the manual lift gate (if so equipped) ...3-24 Operating the power lift gate (if so equipped) ...3-24 Cancel switch...3-26 Lift gate release ...3-27 Glass hatch...3-28 Fuel-filler door ...3-28 Fuel-filler cap - 2009 Nissan Armada | Owner's Manual - Page 151
and do not have one to duplicate from. If you still have a key, your NISSAN dealer can duplicate it. WPD0128 WPD0427 1. 2. 3. 4. Two master keys (black) with transponder chip and chrome NISSAN brand symbol on one side Valet key (black) with transponder chip Key number plate Transponder chip - 2009 Nissan Armada | Owner's Manual - Page 152
one vehicle. The new keys must be registered by a NISSAN dealer prior to use with the Intelligent Key and NISSAN Vehicle Immobilizer System of not strike the Intelligent Key sharply against another object. ● Do not change or modify the Intelligent Key. Mechanical key The Intelligent Key contains the - 2009 Nissan Armada | Owner's Manual - Page 153
slot. See "Doors" in this section and "Storage" in the "Instruments and controls" section of this manual. NISSAN VEHICLE IMMOBILIZER SYSTEM Remove the mechanical key from the Intelligent Key. 2. Lock the glove box or console box with the mechanical key. 3. Hand the Intelligent Key to the valet and - 2009 Nissan Armada | Owner's Manual - Page 154
doors can not be opened using the inside or outside door handles. The doors must be unlocked to open the doors. Opening and closing windows The driver's door door is unlocked. ● To close the windows, turn the driver's door key toward the front of the vehicle for longer than 1 second after the door - 2009 Nissan Armada | Owner's Manual - Page 155
, move the inside lock knob to the unlock position 2 . LOCKING WITH POWER DOOR LOCK SWITCH To lock all the doors without a key, push the door lock switch (driver's or front passenger's side) to the lock position 1 . When locking the door this way, be certain not to leave the key inside the vehicle - 2009 Nissan Armada | Owner's Manual - Page 156
all doors, turn on the interior lights and puddle lights (if so equipped), and activate the panic alarm by using the keyfob from outside the vehicle. Some settings for the keyfob, such as horn beep, can be adjusted. For vehicles without navigation system, refer to "Silencing the horn beep feature - 2009 Nissan Armada | Owner's Manual - Page 157
against another object. ● Do not change or modify the keyfob. ● Wetting NISSAN dealer. LPD0209 HOW TO USE REMOTE KEYLESS ENTRY SYSTEM Locking doors doors. button on the keyfob. All 4. Press the the doors lock. The hazard warning lights flash twice and the horn beeps once to indicate all doors - 2009 Nissan Armada | Owner's Manual - Page 158
, audio, phone and voice recognition system" section of this manual. button on the keyfob again Press the within 5 seconds. ● All doors unlock. ● The hazard warning lights flash once if all doors are completely closed. The interior lights can be turned off without waiting 30 seconds by inserting - 2009 Nissan Armada | Owner's Manual - Page 159
than 3 seconds after all doors are unlocked. The door windows will open while pressing button on the keyfob. the The door windows cannot be closed by the lift gate. The hazard warning lights flash and a chime sounds to indicate the power open or power close sequence has started. The lift gate - 2009 Nissan Armada | Owner's Manual - Page 160
on the keyfob once to turn on the interior lights and puddle lights (if so equipped). For additional information, refer to "Interior light" in the "Instruments and controls" section in this manual. NOTE: If you change the horn beep and light flash feature with the keyfob, the display screen (if so - 2009 Nissan Armada | Owner's Manual - Page 161
NISSAN INTELLIGENT KEY™ ( approximately 2 years. If the battery is discharged, replace it with a new one. When the Intelligent Key battery is low, the Intelligent Key indicator "Battery replacement" in the "Maintenance and do-it-yourself" section of this manual. For models with a steering wheel lock - 2009 Nissan Armada | Owner's Manual - Page 162
and personal computers. If an Intelligent Key is lost or stolen, NISSAN recommends erasing the ID code of that Intelligent Key from the vehicle. Do not strike the Intelligent Key sharply against another object. ● Do not change or modify the Intelligent Key. ● Wetting may damage the Intelligent Key. - 2009 Nissan Armada | Owner's Manual - Page 163
. The operating range is within 31.50 in (80 cm) from each request switch 1 . If the Intelligent Key is too close to the door glass, handle or rear bumper, the request switches may not function. When the Intelligent Key is within the operating range, it is possible for anyone, even someone who does - 2009 Nissan Armada | Owner's Manual - Page 164
Key with you and then lock the doors. ● Do not pull the door handle before pushing the door handle request switch. The door will be unlocked but will not open. Release the door handle once and pull it again to open the door. WPD0411 WPD0412 NISSAN INTELLIGENT KEY™ OPERATION You can lock or - 2009 Nissan Armada | Owner's Manual - Page 165
ignition switch is not in the LOCK position. ● Doors do not lock by pushing the door handle request switch while any door is open. However, doors lock with the mechanical key even if any door is open. ● Doors do not lock with the door handle request switch with the Intelligent Key inside the vehicle - 2009 Nissan Armada | Owner's Manual - Page 166
by performing one of the following operations. ● Placing the ignition switch in the ON position. ● Locking the doors with the remote controller. ● Switching the room light switch to the OFF position. WPD0412 WPD0413 Unlocking doors 1. Carry the Intelligent Key. 2. Push the door handle request - 2009 Nissan Armada | Owner's Manual - Page 167
the door handles. CAUTION When locking the doors using the Intelligent Key, be sure not to leave the key in the vehicle. WPD0359 Locking doors 1. Place the ignition switch in the LOCK position. 2. Close all doors. 3. Press the Key. button on the Intelligent 4. The hazard warning lights flash - 2009 Nissan Armada | Owner's Manual - Page 168
The interior light illuminates for 15 seconds when a door is unlocked and the room light switch is in the DOOR position. The light can be turned off without waiting for 15 seconds by performing one of the following operations: ● Placing the ignition switch in the ON position. ● Locking the doors - 2009 Nissan Armada | Owner's Manual - Page 169
range of the door handle. WPD0415 WPD0362 Using the panic alarm If you are near your vehicle and feel threatened, you may activate the panic alarm to call attention button on the by pressing and holding the Intelligent Key for longer than 0.5 seconds. The panic alarm and headlights will stay on - 2009 Nissan Armada | Owner's Manual - Page 170
change the horn beep and light flash feature with the keyfob, the display screen (if so equipped) will not show the current mode and cannot be used to change the the Intelligent Key. See the "Troubleshooting guide" that follows and "Vehicle information display" in the "Instruments and - 2009 Nissan Armada | Owner's Manual - Page 171
TROUBLESHOOTING GUIDE Verify the location of all Intelligent Keys that are programmed chime sounds for approximately knob turned to LOCK 3 seconds and all the doors unlock. When pushing the door handle request switch to lock the door Possible Cause The shift selector is not in the P (Park) position - 2009 Nissan Armada | Owner's Manual - Page 172
lift gate open. This could allow dangerous exhaust gases to be drawn into the vehicle. See "Exhaust gas" in the "Starting and driving" section of this manual are clear of the door frame to avoid injury while closing the lift gate. LPD0244 1 Pull the hood lock release handle located below the driver - 2009 Nissan Armada | Owner's Manual - Page 173
LPD0245 LPD0247 LPD0283 OPERATING THE MANUAL LIFT GATE (if so equipped) The power door lock system allows you to lock or unlock all doors including the lift gate simultaneously. To open the lift gate, pull up on the handle. To close, lower and push the lift gate down securely. Rear pillar switch - 2009 Nissan Armada | Owner's Manual - Page 174
will reverse direction and return to the full open or full close position. If a second obstacle is detected, the lift gate motion will stop and the drive motor will disengage. The lift gate will enter manual mode. A pinch strip is mounted on each side of the lift gate. If an obstacle is detected by - 2009 Nissan Armada | Owner's Manual - Page 175
by your NISSAN dealer. CANCEL SWITCH Push the switch toward the CANCEL position to disable the rear pillar switch. The lift gate can still be opened and closed using the switch on the instrument panel and keyfob. The lift gate can also be opened manually with the outside handle if the lift gate is - 2009 Nissan Armada | Owner's Manual - Page 176
in one or both of the lift gate gas stays. Have the lift gate inspected by a NISSAN dealer. ● Do not activate the power lift gate if one or both of the lift gate gas stays are removed. Damage to the lift gate or power lift gate mechanisms may occur. Manual lift gate release LPD0251 LPD0252 Power - 2009 Nissan Armada | Owner's Manual - Page 177
light the (MIL) to come on. ● Never pour fuel into the throttle body to attempt to start your vehicle. WARNING Do not drive with the glass hatch open. This could allow dangerous exhaust gases to be drawn into the vehicle. See "Exhaust gas" in the "Starting and driving" section of this manual - 2009 Nissan Armada | Owner's Manual - Page 178
gas in any vehicle or trailer. To reduce the risk of serious injury or death when filling portable fuel NISSAN dealer. ● For additional information, see the "Malfunction Indicator Light (MIL)" in the "Instruments and Controls" section in this manual. ● If fuel is spilled on the vehicle body - 2009 Nissan Armada | Owner's Manual - Page 179
STEERING WHEEL For additional information, see "Fuel recommendation" and "Flexible fuel vehicle (FFV) fuel recommendation" in the "Technical and consumer information" section in this manual. LRS2005 WPD0428 Loose Fuel Cap warning The LOOSE FUEL CAP warning appears in the vehicle information - 2009 Nissan Armada | Owner's Manual - Page 180
pedals can be adjusted for driving comfort. Use the pedal adjusting switch to adjust the brake and accelerator pedal position away from the driver 1 or toward the driver 2 . The brake and accelerator pedals cannot be adjusted separately. WARNING Do not adjust the pedal position while driving. You - 2009 Nissan Armada | Owner's Manual - Page 181
mount and swing the visor to the side. To block glare from the side and front, swing down the sub-sun visor. Slide the extension sun visor in or out as MIRROR (if so equipped) The night position 1 reduces glare from the headlights of vehicles behind you at night. Use the day position 2 when driving - 2009 Nissan Armada | Owner's Manual - Page 182
), see "Compass display" in the "Instruments and controls" section of this manual. Type A Type A With the ignition switch placed in the ON posibutton as described: tion, press the ● To turn off the anti-glare feature, press button. The indicator light will turn the off. ● To turn on the anti-glare - 2009 Nissan Armada | Owner's Manual - Page 183
the "Instruments and controls" section of this manual. LPD0469 LPD0470 Type B-Without compass Type B and Type C The indicator light 2 will illuminate when the automatic anti-glare feature is operating. To turn off the automatic anti-glare feature, press: ● the O button for inside mirrors without - 2009 Nissan Armada | Owner's Manual - Page 184
or ON position. Rotate the round switch 1 to select the right or left mirror. Adjust each mirror to the desired position pushing the round switch. Manual folding outside mirrors (if so equipped) Pull the outside mirror toward the door to fold it. Pre-driving checks and adjustments 3-35 - 2009 Nissan Armada | Owner's Manual - Page 185
feature again, press button on the rearview mirror. The inthe dicator light will turn on. For information on the automatic anti-glare rearview mirror, see "Automatic anti-glare rearview mirror" earlier in this section. LPD0417 Power folding outside mirrors (if so equipped) CAUTION Do not manually - 2009 Nissan Armada | Owner's Manual - Page 186
switch. After the indicator light goes off, the selected positions are stored in the selected memory (1 or 2). If a new memory is stored in Adjust the driver's seat, accelerator and brake pedals, and outside mirrors to the desired positions by manually operating each adjusting switch. For additional - 2009 Nissan Armada | Owner's Manual - Page 187
light goes off, the keyfob is linked to that memory setting. With the key removed from the ignition switch or the ignition switch is moved to OFF, press button on the keyfob. The driver's seat, the accelerator and brake pedals, and outside mirrors will move to the memorized position. NOTE: If a new - 2009 Nissan Armada | Owner's Manual - Page 188
and voice recognition systems" section of this manual. For vehicles without navigation system, see your NISSAN dealer. ● When any of the memory is moved from P (Park) to any other position. ● When the driver's door remains open more than 45 seconds and the ignition switch is not in the ON - 2009 Nissan Armada | Owner's Manual - Page 189
How to use the INFO button ...4-5 How to use the SETTING button ...4-9 OFF button ...4-16 Control panel buttons - color screen with Navigation System (if so equipped) ...4-17 How to use the NISSAN controller ...4-18 How to use the touch screen ...4-18 Start-up screen ...4-20 How to select menus on - 2009 Nissan Armada | Owner's Manual - Page 190
Digital video disc (DVD) player controls ...4-79 Remote control...4-80 Flip-down screen ...4-80 Before operating the DVD mobile entertainment system ...4-82 Playing a digital versatile disc (DVD) ...4-83 Remote control operation...4-88 Care and maintenance ...4-90 How to handle the DVD ...4-90 Car - 2009 Nissan Armada | Owner's Manual - Page 191
COLOR SCREEN WITHOUT NAVIGATION SYSTEM (if so equipped) WARNING ● Positioning of the heating or air conditioning controls and display controls should not be done while driving in order that full NISSAN dealer. Ignoring such conditions may lead to accidents, fire or electrical shock. 1. NISSAN - 2009 Nissan Armada | Owner's Manual - Page 192
CONTROLLER Use the NISSAN controller to choose an item on the display screen. Highlight an item on the display using the main directional buttons 2 or the center dial 3 . Then press the ENTER button 1 to select the item or perform the action. The BACK button 4 has two functions: ● Go back to the - 2009 Nissan Armada | Owner's Manual - Page 193
changes made during setup. 3. UP/DOWN Movement Indicator: Shows that the NISSAN controller may be used to move UP/DOWN on the screen and select more options. control system → Audio, climate control temperature settings, average fuel economy and distance to empty → Audio 4-4 Monitor, climate, - 2009 Nissan Armada | Owner's Manual - Page 194
may continue to be displayed. ● When driving uphill or rounding curves, the fuel in the tank shifts, which may momentarily change the display. Average fuel economy (MPG or L/100 km) The Average Fuel Economy is calculated based on fuel consumption since the last reset. The display is updated every 30 - 2009 Nissan Armada | Owner's Manual - Page 195
1 minute. The light will remain on after 1 minute. Contact your NISSAN dealer as soon as possible for tire replacement and/or system resetting. ● Replacing tires with those not originally specified by NISSAN could affect the proper operation of the TPMS. LHA0922 LHA0923 Fuel economy record Press - 2009 Nissan Armada | Owner's Manual - Page 196
reset. ● Average Speed - Average speed driven (MPH or km/h) since the last reset. Maintenance items Press the INFO button and select the "Maintenance" key using the NISSAN controller; the maintenance information will be displayed on the screen. Monitor, climate, audio, phone and voice recognition - 2009 Nissan Armada | Owner's Manual - Page 197
interval To reset the reminder schedule (distance) to 0 mi (km), select the "Reset Distance" key using the NISSAN controller. LHA0926 LHA0839 Changing the maintenance interval Select one of the "Reminder (1 - 4)" keys using the NISSAN controller and press the ENTER button to display the - 2009 Nissan Armada | Owner's Manual - Page 198
maintenance interval is set again. LHA0927 WHA0937 Type A Type B HOW TO USE THE SETTING BUTTON When the SETTING button is pressed, the SETTINGS screen will appear on the display. You can select and/or adjust several functions, features and modes that are available for your vehicle. Use the NISSAN - 2009 Nissan Armada | Owner's Manual - Page 199
or the "Contrast" key to adjust the brightness or contrast of the map background. Use the NISSAN controller to adjust the brightness to darker or brighter and the contrast to lower or higher. The new settings are automatically saved when you exit the setting screen by pressing the BACK button or any - 2009 Nissan Armada | Owner's Manual - Page 200
" will appear and the "Display ON" key will be automatically turned on (no amber indicator). Background color: Select the "Background Color" key; the display color changes between day and night. The new settings are automatically saved when you exit the setting screen by pressing the BACK button or - 2009 Nissan Armada | Owner's Manual - Page 201
illuminated), daylight savings time is on. To turn off the daylight savings time, touch the "ON" key; the amber indicator light will disappear. ● Atlantic ● Newfoundland ● Aleutian ● Hawaii ● Alaska LHA0933 Time Zone: Select the "Time Zone" key; the Time Zone screen will appear. Select one of - 2009 Nissan Armada | Owner's Manual - Page 202
pressing the ENTER button. The comfort and convenience option screen will be displayed. You can set the following operating conditions by selecting the desired item using the NISSAN controller, then pressing the ENTER button. The indicator light (box at the right of the selected item) alternately - 2009 Nissan Armada | Owner's Manual - Page 203
Reply: Select to change the sound of the Intelligent Key mode used when a door handle request switch is pushed to lock. LHA0939 LHA0940 Auto Interior Illumination: Select to turn on or turn off the illumination of the interior lights when any door is unlocked. Auto Headlights Sensitivity: Select - 2009 Nissan Armada | Owner's Manual - Page 204
change the sound of the Intelligent Key mode used when a door handle request switch is pushed to unlock. Select to turn off all sounds made when a door handle to change using the NISSAN controller. Select Language: Select the "English" key, the "Français" key or the "Español" key to change the - 2009 Nissan Armada | Owner's Manual - Page 205
the or the will change the display to the day display. The brightness can then be night adjusted using the NISSAN controller. The display brightness Select Units: Select the "US" (mi, °F, MPG) key or the "Metric" (km, °C, L/100 km) key to change the units shown on the display. OFF button for - 2009 Nissan Armada | Owner's Manual - Page 206
COLOR SCREEN WITH NAVIGATION SYSTEM (if so equipped) 9. BACK (previous) button (P. 4-18) 10. ROUTE button* 11. ZOOM IN button* 12. MAP button* 13. ZOOM OUT button* *For Navigation system control buttons, refer to the separate Navigation System Owner's Manual DEST button* 3. NISSAN controller (P. 4-18 - 2009 Nissan Armada | Owner's Manual - Page 207
the changes made during setup. For the VOICE button 5 functions, refer to the separate Navigation System Owner's Manual. perform the action. The BACK button 4 has two functions: ● Go back to the previous display (cancel). ● ALWAYS give your full attention to driving. ● Avoid using vehicle features - 2009 Nissan Armada | Owner's Manual - Page 208
this system, the same operations as those for the NISSAN controller are possible using the touch screen operation. Selecting the Inputting characters: Touch the letter or number key 1 . There are some options available when inputting characters. ● Uppercase: Shows uppercase characters. ● Lowercase: - 2009 Nissan Armada | Owner's Manual - Page 209
Interior Illumination, etc.). 3. UP/DOWN Movement Indicator: Shows that the NISSAN controller may be used to move UP/DOWN on the screen and select more options temperature settings, average fuel economy and distance to empty → Audio, climate control temperature settings and Navigation System → Audio - 2009 Nissan Armada | Owner's Manual - Page 210
shows vehicle and navigation information for your convenience. The information shown on the screen should be a guide to determine the condition of the vehicle. See the following for details. Fuel economy Press the INFO button, then select the "Fuel Economy" key using the NISSAN controller and press - 2009 Nissan Armada | Owner's Manual - Page 211
1 minute. The light will remain on after 1 minute. Contact your NISSAN dealer as soon as possible for tire replacement and/or system resetting. ● Replacing tires with those not originally specified by NISSAN could affect the proper operation of the TPMS. LHA0894 LHA0895 Fuel economy record Press - 2009 Nissan Armada | Owner's Manual - Page 212
reset. ● Average Speed - Average speed driven (MPH or km/h) since the last reset. Maintenance items Press the INFO button and select the "Maintenance" key using the NISSAN controller; the maintenance information will be displayed on the screen. Monitor, climate, audio, phone and voice recognition - 2009 Nissan Armada | Owner's Manual - Page 213
interval To reset the reminder schedule (distance) to 0 mi (km), select the "Reset Distance" key using the NISSAN controller. LHA0898 LHA0839 Changing the maintenance interval Select one of the "Reminder (1 - 4)" keys using the NISSAN controller and press the ENTER button to display the - 2009 Nissan Armada | Owner's Manual - Page 214
OFF (indicator light not illuminated). ● The maintenance interval is set again. LHA0908 Traffic Info Refer to the separate Navigation System Owner's Manual for information NISSAN Voice Recognition system" in this section. Navigation version Refer to the separate Navigation System Owner's Manual - 2009 Nissan Armada | Owner's Manual - Page 215
can select and/or adjust several functions, features and modes that are available for your vehicle. Use the NISSAN controller to select each item to be . Use the NISSAN controller to adjust the brightness to darker or brighter and the contrast to lower or higher. The new settings are automatically - 2009 Nissan Armada | Owner's Manual - Page 216
indicator). Background color: WHA0823 Select the "Background Color" key; the display color changes between day and night. The new settings are key using the NISSAN controller and pressing the ENTER button. On-screen Clock: When this item is enabled (indicator light illuminated), a clock - 2009 Nissan Armada | Owner's Manual - Page 217
the daylight saving time, touch the "ON" key; the amber indicator light will disappear. LHA0905 ● Atlantic ● Newfoundland ● Hawaii ● Alaska After selection/settings, press the BACK button or any other mode button to accept the changes. Time Zone: Select the "Time Zone" key; the Time Zone screen - 2009 Nissan Armada | Owner's Manual - Page 218
off the illumination of the interior lights when any door is unlocked. Auto Headlights Sensitivity: Select to adjust the sensitivity of the automatic headlights higher (right) or lower (left). Auto Headlights Off Delay: Select to change the duration of the automatic headlight off timer from 0, 30 - 2009 Nissan Armada | Owner's Manual - Page 219
to off, all the doors will be unlocked after the door unlock operation is performed once. Intelligent Key Lock / Unlock: Select to turn on or turn off the door lock/unlock function by pushing the door handle request switch. Intelligent Key Lock Reply: Select to change the sound of the Intelligent - 2009 Nissan Armada | Owner's Manual - Page 220
please use the French Owner's Manual. To obtain a French Owner's Manual, please see "Owner's Manual/Service Manual Order Information" in the "Technical and consumer information" section. Select Units: Select the "US" (mi, °F, MPG) key or the "Metric" (km, °C, L/100 km) key to change the units shown - 2009 Nissan Armada | Owner's Manual - Page 221
With Navigation System" later in this section. OFF BUTTON To change the display brightness, press the OFF button. Pressing the button again will change the display to the day or the night display. The brightness can then be adjusted using the NISSAN controller. If no operation is performed within - 2009 Nissan Armada | Owner's Manual - Page 222
the rearview camera. The rearview camera is installed beside the lift gate handle. CAUTION There is a plastic cover over the camera. are indicated as reference distances to objects. The lines and colors in the display indicate distances from the back bumper line A in the illustration. 1 2 3 4 1.5 - 2009 Nissan Armada | Owner's Manual - Page 223
may take some time until the screen changes. Objects on the screen may be light from the bumper. This is not a malfunction. ● The screen may flicker under fluorescent light. This is not a malfunction. ● The colors affected. ● Do not use body wax on the camera window. If body wax does get on the - 2009 Nissan Armada | Owner's Manual - Page 224
VENTS LHA1030 Adjust air flow direction for the driver's and passenger's side vents 1 , center vents 2 , and rear passengers' vents 3 and 4 by moving the vent slide and/or vent assemblies. For the driver's and passenger's side vents 1 , open or close by using the dial. Move the dial position to - 2009 Nissan Armada | Owner's Manual - Page 225
mode for long periods as it may cause the interior air to become stale and the windows to fog up. Start the engine and operate the controls to button 2. A/C ON/OFF button 3. Fan speed control (increase) 4. Front window defroster button 5. MODE button 6. Passenger's temperature control dial/ DUAL - 2009 Nissan Armada | Owner's Manual - Page 226
the passenger compartment to prevent fogging in defrost, floor or def/floor modes. to recirPush the air recirculation button culate interior air inside the vehicle. Push the AUTO button to return to automatic mode. Air flow control Pressing the MODE button manually controls air flow and selects - 2009 Nissan Armada | Owner's Manual - Page 227
put anything on or around this sensor. Rear seat temperature and fan speed can be controlled from both the front seat overhead console controls A or the rear seat overhead console controls B . Press the REAR CTRL button to transfer control of the rear climate functions to the rear passengers. To - 2009 Nissan Armada | Owner's Manual - Page 228
system. See "Air conditioner system refrigerant and oil recommendations" in the "Technical and consumer information" section of this manual. LHA0861 WHA1129 A NISSAN dealer is able to service your "environmentally friendly" air conditioning system. 1. 2. 3. Rear fan speed control dial Rear - 2009 Nissan Armada | Owner's Manual - Page 229
buildings, bridges, mountains and other external influences. Intermittent changes in reception quality normally are caused by these external influences , electrical power lines, electric signs and even traffic lights. Radio reception Your NISSAN radio system is equipped with state-of-the-art - 2009 Nissan Armada | Owner's Manual - Page 230
radio mode will be skipped unless an optional satellite receiver and antenna are installed and an XM * satellite radio service subscription is active. Satellite radio is not available in Alaska, Hawaii and Guam. Satellite radio performance may be affected if cargo carried on the roof blocks the - 2009 Nissan Armada | Owner's Manual - Page 231
) Terms: ● MP3 - MP3 is short for Moving Pictures Experts Group Audio Layer 3. MP3 is the most well- rate: 128 kbps) with virtually no perceptible loss in quality. MP3 compression removes the redundant and irrelevant parts of a sound signal that the human ear doesn't hear. CompactFlash (CF) player - 2009 Nissan Armada | Owner's Manual - Page 232
called a multisession. ● ID3/WMA Tag - The ID3/WMA tag is the part of the encoded MP3 or WMA file that contains information about the digital music file such as song title, artist, album title, encoding bit rate, track time duration, etc. ID3 tag information is displayed on the Album - 2009 Nissan Armada | Owner's Manual - Page 233
● If there is a file in the top level of the disc, "Root Folder" is displayed. ● The playback order is the order in which the files were written by the writing software. Therefore, the files might not play in the desired order. 4-44 Monitor, climate, audio, phone and voice recognition systems - 2009 Nissan Armada | Owner's Manual - Page 234
Specification chart: Supported media Supported file systems Version Sampling frequency Bit rate Version Sampling frequency Bit rate CD, CD-R, CD-RW, CF CD, CD-R, CD-RW: ISO9660 LEVEL1, ISO9660 LEVEL2, Apple ISO, Romeo, Joliet * ISO9660 Level 3 (packet writing) is not supported. CompactFlash card: - 2009 Nissan Armada | Owner's Manual - Page 235
Troubleshooting guide: Symptom Cause and Countermeasure Check if the CD/CF was inserted correctly. Check if the CD/CF is scratched or dirty. Check if there is condensation inside the player. If there is, wait until the condensation is gone (about 1 hour) before using the player high bit rate data. - 2009 Nissan Armada | Owner's Manual - Page 236
LHA0944 1. 2. 3. 4. 5. 6. RADIO AM·FM button* PRESET A·B·C button RPT button speaker control button RDM button PAUSE·MUTE button 7. 8. 9. 10. 11. 12. REAR CTRL button SCAN button TRACK button SEEK/CAT button TUNE/FLDR and AUDIO control knob CD load button 13. Station and CD select (1 - 6) - 2009 Nissan Armada | Owner's Manual - Page 237
adjusts the sound level between the front and rear speakers and Balance adjusts the optional satellite receiver and antenna are installed and an XM satellite radio service subscription is active. Satellite radio is not available in Alaska, Hawaii and Guam. Speed Sensitive Volume (SSV): To change - 2009 Nissan Armada | Owner's Manual - Page 238
color screen without navigation system" heading earlier in this section. WHA0941 WHA0928 For information on how to use the NISSAN controller, see "How to use the NISSAN key, then press the ENTER button. If the amber indicator light is displayed, the precision phased audio is enabled. Pressing the - 2009 Nissan Armada | Owner's Manual - Page 239
radio operation FM/AM/SAT band select: Pressing the RADIO AM·FM button will change the band as follows: AM ←→ FM or SAT* (satellite, if so mode will be skipped unless an optional satellite receiver and antenna are installed and an XM satellite radio service subscription is active. Satellite radio is - 2009 Nissan Armada | Owner's Manual - Page 240
automatically change from stereo to monaural reception. TUNE/FLDR (Tuning) knob: To manually tune for Radio Data System, and is a data information service transmitted by some radio stations on the FM band ( facing up. The compact disc will be guided automatically into the slot and start playing. If - 2009 Nissan Armada | Owner's Manual - Page 241
disc is skipped through, the first track will be played.) The NISSAN controller can also be used to select tracks when a CD is button: When the RPT button is pressed while the compact disc is played, the play pattern can be changed as follows: CD: ALL DISC RPT → 1 DISC RPT→ 1 TRK RPT → ALL DISC RPT - 2009 Nissan Armada | Owner's Manual - Page 242
currently being accessed will be repeated. RDM button: When the RDM button is pressed while the compact disc is played, the play pattern can be changed as follows: CD: ALL DISC MIX → 1 DISC MIX → ALL DISC MIX MP3/WMA CD: ALL DISC MIX → 1 DISC MIX → 1 FOLDER MIX → ALL DISC MIX ALL - 2009 Nissan Armada | Owner's Manual - Page 243
1 is located below the air conditioner controls. The AUX audio input jack accepts any standard analog audio input, such as from a portable cassette tape player, MP3 player or a laptop computer. Press the DISC·AUX button to play a compatible device when it is plugged into the AUX jack. 4-54 Monitor - 2009 Nissan Armada | Owner's Manual - Page 244
WHA0945 1. 2. 3. 4. 5. 6. PRESET A·B·C button DISC/AUX button speaker control button REAR CTRL button SCAN·RPT button TRACK button 7. 8. 9. 10. 11. 12. SEEK/CAT button TUNE/FLDR and AUDIO control knob CompactFlash insert slot Station select (1 - 6) buttons CD eject button VOL/ON·OFF control knob - 2009 Nissan Armada | Owner's Manual - Page 245
adjusts the sound level between the front and rear speakers and Balance adjusts the optional satellite receiver and antenna are installed and an XM satellite radio service subscription is active. Satellite radio is not available in Alaska, Hawaii and Guam. Speed Sensitive Volume (SSV): To change - 2009 Nissan Armada | Owner's Manual - Page 246
clock, see "Clock" under the "Control panel buttons - color screen without navigation system" heading earlier in this section. LHA0900 WHA0942 Precision phased key again will turn off the precision phased audio; the indicator light will disappear. When this item is turned on, super high pitch - 2009 Nissan Armada | Owner's Manual - Page 247
AM/SAT band select: Pressing the RADIO AM·FM button will change the band as follows: AM ←→ FM or SAT* (satellite satellite radio mode will be skipped unless an optional satellite receiver and antenna are installed and an XM satellite radio service subscription is active. Satellite radio is not - 2009 Nissan Armada | Owner's Manual - Page 248
SAT station band. 3. Tune to the desired station using manual, SEEK or SCAN tuning. Press and hold any of the Radio Data System, and is a data information service transmitted by some radio stations on the FM band facing up. The compact disc will be guided automatically into the slot and start playing - 2009 Nissan Armada | Owner's Manual - Page 249
is skipped through, the first track will be played.) The NISSAN controller can also be used to select tracks when a CD : When the SCAN·RPT button is pressed while the compact disc is being played, the play pattern can be changed as follows: CD: 1 DISC RPT → 1 TRK RPT → 1 DISC RDM → 1 DISC RPT MP3 - 2009 Nissan Armada | Owner's Manual - Page 250
located below the air conditioner controls. The AUX audio input jack accepts any standard analog audio input, such as from a portable cassette tape player, MP3 player or a laptop computer. Press the DISC/AUX button to play a compatible device when it is plugged into the AUX jack. COMPACTFLASH (CF - 2009 Nissan Armada | Owner's Manual - Page 251
system will turn on. If another audio source is playing and a CF card is inserted, press the DISC/AUX button repeatedly until the center display changes to the CompactFlash mode. WHA0953 WHA0954 CF display mode While listening to CF certain text might be able to be displayed. Depending on how the - 2009 Nissan Armada | Owner's Manual - Page 252
NISSAN controller, see "How to use the NISSAN controller" earlier in this section. Folder selection: To change The system has a 9.3 gigabyte (GB) storage capacity. The following CDs can be recorded in the Music inserted to eject the CF card. Troubleshooting messages: The following messages will be - 2009 Nissan Armada | Owner's Manual - Page 253
(70°C)] could affect the performance of the hard-disk. For information on playing CDs, see "Compact Disc (CD) player operation" earlier in this section. 2. Touch the "REC" key the Music Box. ● The skip, fast forward and rewind features are disabled while the CD is recording. ● The recording process - 2009 Nissan Armada | Owner's Manual - Page 254
the track, touch the "Text" key on the screen or use the NISSAN controller and press the ENTER button. The track name and album title are sounds, the behind the track number. The Music Box audio system cannot perform recording under the following conditions: ● There is not enough space in the - 2009 Nissan Armada | Owner's Manual - Page 255
how to use the NISSAN controller, see "How to use the NISSAN controller" earlier in this section. Play mode selection: To change to another album or the current playlist will be played randomly. Music Box menu There are some options available during playback. Touch the "Menu" key, then select one of - 2009 Nissan Armada | Owner's Manual - Page 256
● Play by Category Plays music from one of the following categories: - My Favorites - Hit Songs - Kids' Songs - Rarely Played ● Search Artists Displays a list of artists in alphabetical order. Selecting an artist displays all of the tracks by the artist and starts playing the first track. WHA1206 - 2009 Nissan Armada | Owner's Manual - Page 257
Female Artist, Group and Duo) - Category (Rock, Pop, Latin, Jazz, R&B, Hip Hop, Club/Dance, Punk, Reggae, Folk, Blues, Country, Metal, Easy Listening, New Age, Soundtrack, Gospel & Religious, World, Classical, Children's and Other) ● Search Keywords Input a search keyword using the keypad displayed - 2009 Nissan Armada | Owner's Manual - Page 258
R&B, Hip Hop, Club/Dance, Punk, Reggae, Folk, Blues, Country, Metal, Easy Listening, New Age, Soundtrack, Gospel & Religious, World, Classical, Children's being played. Restoring deleted data Deleted music data can be restored by performing the following: 1. Touch the "Menu" key and then the touch - 2009 Nissan Armada | Owner's Manual - Page 259
LHA0964 LHA0965 LHA0962 You can also listen to the beginning of each track that has been deleted by performing the following: 1. Touch the "Menu" key and then the "Music Box System Info." key on the screen. 2. Touch the "Deleted Items" key and then the " - 2009 Nissan Armada | Owner's Manual - Page 260
fully guaranteed. ● The service of the Gracenote Database on the Internet may be stopped without prior notice for maintenance. You agree that you information ("Gracenote Data") from online servers ("Gracenote Servers") and to perform other functions. You may use Gracenote Data only by means of the - 2009 Nissan Armada | Owner's Manual - Page 261
from the Gracenote Servers or to change data categories for any cause new enhanced or additional data types or categories that Gracenote may provide in the future and is free to discontinue its online services CD/CF (CompactFlash ) CARE AND CLEANING CD: ● Handle a CD by its edges. Do not bend the - 2009 Nissan Armada | Owner's Manual - Page 262
record cleaner or alcohol intended for industrial use. ● A new disc may be rough on the inner and outer edges. cards. Refer to the CompactFlash Manual for more details. card Owner's LHA1002 CF cards: CAUTION Do not force the CompactFlash card into the CompactFlash player slot. Forcing the CF card - 2009 Nissan Armada | Owner's Manual - Page 263
audio system on. MODE select switch Push the mode select switch to change the mode in the following sequence: PRESET A → PRESET B → PRESET C → Music Box** (if so equipped) → CD* → CompactFlash * (if so equipped) → DVD* (if so equipped) → AUX***. *These modes are only available when compatible media - 2009 Nissan Armada | Owner's Manual - Page 264
(radio): While in one of the preset radio station banks (A, or B or C), push the tuning switch for less than 1.5 seconds to change to the next preset station in memory. Seek tuning (radio): or for more Push the tuning switch than 1.5 seconds to seek the next or previous - 2009 Nissan Armada | Owner's Manual - Page 265
included if the vehicle is equipped with the DVD entertainment system. Most portable radio headphones work player, if the rear passengers turn off the rear speakers and are using headphones they may choose to listen to a different media than the front changed if the REAR CTRL is enabled and the rear audio - 2009 Nissan Armada | Owner's Manual - Page 266
window, be careful not to scratch or damage the window antenna. Lightly wipe along the antenna with a dampened soft cloth. MODE button: The MODE button allows the rear passengers to change between AM, FM, CD, DVD and AUX. The media options are listed on the face plate of the rear audio controls - 2009 Nissan Armada | Owner's Manual - Page 267
so that full attention may be given to vehicle operation. ● Do not attempt to modify the system to display a movie on the front screen while the movies in the front display, stop the vehicle in a safe location, move the shift selector to the P (Park) position and apply the parking brake. CAUTION ● - 2009 Nissan Armada | Owner's Manual - Page 268
DIGITAL VIDEO DISC (DVD) PLAYER CONTROLS 1. EJECT button: When the button is pressed with the DVD loaded, it will be ejected. The display will show the eject symbol in the upper left corner of the display for 4 seconds button is pressed. once the If the DVD is not loaded, the display will show "NO - 2009 Nissan Armada | Owner's Manual - Page 269
button MODE button SUBTITLE button AUDIO button ANGLE button CLEAR button PAUSE button PLAY button FAST FORWARD/FAST REVERSE button MENU button NAVIGATION keys BACK button NUMERIC KEYPAD LHA0315 REMOTE CONTROL Refer to "Remote control operation" later in this section for the function of each - 2009 Nissan Armada | Owner's Manual - Page 270
period. To prevent the battery from being discharged, keep the power supply turned off when not in use. NOTE: For optimum infrared headphone performance, increase the volume on the rear seat controller to the maximum level and adjust the infrared headphone volume using the volume control on the - 2009 Nissan Armada | Owner's Manual - Page 271
printed on the top of the DVD. This vehicle-installed DVD player cannot play DVDs with a region code other than 1 or ALL. WARNING The driver must not attempt to operate the DVD System or wear the headphones while the vehicle is in motion so that full attention may be given to vehicle operation - 2009 Nissan Armada | Owner's Manual - Page 272
, color, contrast and black level, select each key using the NISSAN controller and press the ENTER button. Then you can adjust each item using the NISSAN controller. After changes have been made press the BACK button to save the settings. PLAYING A DIGITAL VERSATILE DISC (DVD) With the DVD player - 2009 Nissan Armada | Owner's Manual - Page 273
the vehicle in a safe location and apply the parking brake for the front seat occupants to operate the DVD drive while watching the images. Press the DISC/AUX button on the instrument panel and turn the display to the DVD mode. When a DVD is loaded, it will be replayed automatically. The operation - 2009 Nissan Armada | Owner's Manual - Page 274
"Settings" key to adjust the following settings while playing a DVD. When all the changes have been made, press BACK button to save all the settings. NOTE: If the display in your vehicle is not touch screen enabled; use the NISSAN controller and the ENTER button to operate the following functions - 2009 Nissan Armada | Owner's Manual - Page 275
shown. For details, see the instructions attached to the DVD. If the DVD contains different angles (such as moving images), the current image angle can be switched to another one. Choose a different angle by touching the "-" key or the "+" key; the angle will change if available. Angle Mark: When - 2009 Nissan Armada | Owner's Manual - Page 276
jacks are located on the front of the DVD player, which is located inside the center console. NTSC and PAL compatible devices such as video games, camcorders and portable video players can be connected to the auxiliary jacks. The auxiliary jacks are color coded for identification purposes. ● Yellow - 2009 Nissan Armada | Owner's Manual - Page 277
remote control only turns the rear display on or off. Insert the DVD into the slot with the label side facing up. The DVD will be guided automatically into the slot. If the DVD player is off and a DVD is inserted, the DVD player will automatically turn on. MODE select button: Press the MODE button - 2009 Nissan Armada | Owner's Manual - Page 278
and time position. If the STOP button is pressed again when the player is already in Stop mode, it will reinitialize the pointer to the instructions. MENU: If the media is in PLAY mode and the MENU button is pressed, the DVD menu will appear on the screen. Use the Navigation Keys to navigate - 2009 Nissan Armada | Owner's Manual - Page 279
monitor screen as it may become dirty or damaged. LHA0049 HOW TO HANDLE THE DVD CAUTION ● Handle a DVD by its edges. Never touch the surface of the disc. ● AND MAINTENANCE Use a lightly dampened, lint free cloth to clean the surfaces of your NISSAN Mobile Entertainment System (DVD player face, - 2009 Nissan Armada | Owner's Manual - Page 280
● A new disc may be rough on its inner and outer edges. Remove the rough edges using the side of a pen or pencil as illustrated. ● Never attempt to use a DVD that has been cracked, deformed, or repaired using adhesive. Doing so may cause damage to the equipment. ● Handle the DVD carefully to avoid - 2009 Nissan Armada | Owner's Manual - Page 281
NISSAN dealer for further assistance. 6. Re-program the radio presets. LHA0318 SAA0723 Remote control and headphones battery replacement Replace the battery as follows: 1. Open the lid. 2. Replace batteries with new ones. ● Size AA (remote control) ● Size distances to the DVD player or not at - 2009 Nissan Armada | Owner's Manual - Page 282
from the CB radio chassis to the body. ● For details, consult a NISSAN dealer. ● Do not ground electrical accessories directly to the battery terminal. Doing control system" in the "Maintenance and do-it-yourself" section later in this manual. ● Use electrical accessories with the engine running to - 2009 Nissan Armada | Owner's Manual - Page 283
If you are unable to devote full attention to vehicle operation while talking on the phone, pull off the road to a safe location and stop your vehicle. CAUTION To avoid discharging the vehicle battery, use a phone after starting the engine. WHA0975 Your NISSAN is equipped with the Bluetooth Hands - 2009 Nissan Armada | Owner's Manual - Page 284
following conditions: - Your vehicle is outside of the cellular service area. - Your vehicle is in an area where it Troubleshooting guide" in this section. You can also visit www.nissanusa.com/bluetooth for troubleshooting Owner's Manual regarding the telephone charges, cellular phone antenna and body - 2009 Nissan Armada | Owner's Manual - Page 285
licensed to Visteon. ● Keep the interior of the vehicle as quiet as possible available so full attention may be given to vehicle operation. Giving voice commands To operate NISSAN Voice Recognition, Operating tips To get the best performance out of the NISSAN Voice Recognition system, observe the - 2009 Nissan Armada | Owner's Manual - Page 286
Phonebook, New entry" rather than "Phonebook." Wait for the voice feedback prompt then say "New entry". How to say numbers NISSAN Voice Recognition command). ● Say "pause" for a 2 second pause (available only when storing a phone book number). ● You can say "star" for "*" and "pound" for "#" at any - 2009 Nissan Armada | Owner's Manual - Page 287
system announces the current language and gives you the option to change the language to Spanish (in Spanish) or French System with NISSAN Voice Recognition. For additional command options, refer to using English, Spanish or French. To change the language, perform the following. 1. Press and hold the - 2009 Nissan Armada | Owner's Manual - Page 288
pairing procedure of the cellular phone varies according to each cellular phone model. See the cellular phone Owner's Manual for details. You can also visit www.nissanusa.com/bluetooth for instructions on pairing NISSAN recommended cellular phones. When prompted for a Passkey code, enter "1234" from - 2009 Nissan Armada | Owner's Manual - Page 289
, see "List of voice commands" in this section. For additional command options, see "List of voice commands" later in this section. LIST OF VOICE COMMANDS Main Menu "Call" or "Call International" "Phone Book" "Memo Pad" "Setup" If you want to go back to the previous command, you can say "Go - 2009 Nissan Armada | Owner's Manual - Page 290
entries. When prompted by the system, say the name of the phone book entry you wish to call. The system acknowledges the name. If to speak the number. During a call During a call there are several command options button on the steering available. Press the wheel to mute the receiving voice and - 2009 Nissan Armada | Owner's Manual - Page 291
The transfer procedure varies according to each cellular phone. See the cellular phone Owner's Manual for details. You can also visit www.nissanusa.com/bluetooth for instructions on transferring phone numbers from NISSAN recommended cellular phones. The system repeats the number and prompts you for - 2009 Nissan Armada | Owner's Manual - Page 292
Owner's Manual for details. You can also visit www.nissanusa.com/bluetooth for instructions on transferring phone numbers from NISSAN Names command to hear all the names and locations in the phone book. The system recites the phone book entries but does not include the actual phone numbers. When the - 2009 Nissan Armada | Owner's Manual - Page 293
choose from the following commands: ● "New phone" - Refer to "Pairing procedure VR session. If the memo pad is full, the system asks if you wish to Use the Setup command to change options associated with the Bluetooth Hands- The pairing procedure must be performed when the vehicle is stationary. - 2009 Nissan Armada | Owner's Manual - Page 294
a new phone. "Change priority" D Use the Change Priority command to change the priority priority level. The system then gives you the option to delete a specific phone, all phones or listen receive calls using NISSAN Voice Recognition. Also, you will not have access to the Phone Book. You can still - 2009 Nissan Armada | Owner's Manual - Page 295
number of commands, the users can create a voice model of their own voice that is stored in the system. The system is the SA mode, the system instructs the trainer to say the following phrases. (The system will prompt you for each phrase.) ● phone book new entry ● dial three oh four - 2009 Nissan Armada | Owner's Manual - Page 296
phone ● dial eight three zero five one ● Home ● four three pause two nine pause zero ● delete redial number ● phone book list names ● call eight oh five four one ● Correction ● setup change ring tone ● dial seven four oh one eight ● setup main menu ● Delete ● dial nine seven two six six ● memo - 2009 Nissan Armada | Owner's Manual - Page 297
TROUBLESHOOTING GUIDE The system should respond correctly to all voice commands without difficulty. If problems are encountered, try the following solutions. Where the solutions are listed by number, try each solution in turn, starting with number 1, until the problem is resolved. Symptom Solution - 2009 Nissan Armada | Owner's Manual - Page 298
If you are unable to devote full attention to vehicle operation while talking on the phone, pull off the road to a safe location and stop your vehicle. CAUTION To avoid discharging the vehicle battery, use a phone after starting the engine. WHA0977 Your NISSAN is equipped with the Bluetooth Hands - 2009 Nissan Armada | Owner's Manual - Page 299
: - Your vehicle is outside of the cellular service area. - Your vehicle is in an area where Troubleshooting guide" later in this section. You can also visit www.nissanusa.com/bluetooth for troubleshooting phone owner's manual regarding the telephone charges, cellular phone antenna and body, - 2009 Nissan Armada | Owner's Manual - Page 300
Corporation. VOICE COMMANDS You can use voice commands to operate various Bluetooth Hands-Free Phone System features using the NISSAN Voice Recognition system. For more details, see "NISSAN Voice Recognition System" in this section. LSU0001 PAIRING PROCEDURE 1. Press the PHONE button on the - 2009 Nissan Armada | Owner's Manual - Page 301
key, and press the ENTER button then follow the instructions in Step 2. LSU0002 LSU0003 2. Select the "None (Add New)" key from the name list of the phones, Owner's Manual for details. You can also visit www.nissanusa.com/bluetooth or call the NISSAN Consumer Affairs Department for instructions - 2009 Nissan Armada | Owner's Manual - Page 302
the ENTER button. 3. Select one of the "None (Add New)" keys from the name list of the phonebook and press the cellular phone manufacturer. See the cellular phone owner's manual for more details. 6. After the dialing supported by the Voice Recognition system. For more information, see "NISSAN Voice - 2009 Nissan Armada | Owner's Manual - Page 303
each cellular phone. See the cellular phone owner's manual for more details. Copy from Outgoing Call of the following options for Step 4 above. Enter Data by Keypad: Input the name and phone number manually using the keypad will change to the Call in Progress screen. 4-114 Monitor, climate - 2009 Nissan Armada | Owner's Manual - Page 304
perform one of the following to finish the call: a. Select the "Hang up" key on the Call in Progress screen and press the ENTER button. b. Press the wheel. switch on the steering ● Dial (Keypad): Input the phone number manually of the following options instead of "Call display will change to phone - 2009 Nissan Armada | Owner's Manual - Page 305
sent using Voice Recognition. Cancel Mute: This will appear after the "Mute" key is touched. Mute will be cancelled. DURING A CALL There are some options available during a call. Select one of the following displayed on the screen, if necessary: Hang up: Finish the call. Use Handset: Transfer the - 2009 Nissan Armada | Owner's Manual - Page 306
LSU0009 LHA0978 LHA0979 ENDING A CALL To finish the call, perform one of the following procedures: ● Select the "Hang cellular phone also varies according to each cellular phone. See your cellular phone Owner's Manual for more details. ● Delete Downloaded Phonebook: Delete all of the downloaded - 2009 Nissan Armada | Owner's Manual - Page 307
the priority of the phones on the shown list. The system shows the priority level of each phone. Select phone to change priority. Then, select another phone to swap priority levels. ● Remove Paired Phone: Delete a registered cellular phone from the paired list. 4-118 Monitor, climate, audio, phone - 2009 Nissan Armada | Owner's Manual - Page 308
be connected to the system. ● Edit Phone Name: If you would like to change the way your phone's name is displayed, select this key; a character input screen button, then highlight "Volume and Beeps" using the NISSAN controller and press the ENTER button. Monitor, climate, audio, phone and - 2009 Nissan Armada | Owner's Manual - Page 309
best recognition performance. For the voice commands for the navigation system, refer to the Navigation System Owner's Manual of Guide, which contains basic instructions and tutorials for several voice commands. NISSAN VOICE RECOGNITION STANDARD MODE The Standard Mode enables control of navigation - 2009 Nissan Armada | Owner's Manual - Page 310
You can skip steps 1 to 3 by pressing switch and saying "Help". the 4. Highlight the "User Guide" key using the NISSAN controller and press the ENTER button. 5. Highlight an item using the NISSAN controller and press the ENTER button. Available items: ● Getting Started Describes the basics of how to - 2009 Nissan Armada | Owner's Manual - Page 311
or "Placing Calls", you can view tutorials on how to perform these operations using Voice Recognition. LSU0014 LSU0015 Getting started Before using User Guide. 1. Highlight "Getting Started" and press the ENTER button. 2. You can confirm the page by scrolling the screen using the NISSAN controller - 2009 Nissan Armada | Owner's Manual - Page 312
, voice commands will not be accepted. Please wait until the NISSAN Voice Recognition initialization is completed. BEFORE STARTING LSU0080 To get the best recognition performance from Voice Recognition, observe the following: ● The interior of the vehicle should be as quiet as possible. Close the - 2009 Nissan Armada | Owner's Manual - Page 313
oh oh". 500, 700, and 900 are also supported. Examples: ● 1-800-662-6200 - "One this method of phone digit entry can improve recognition performance. NOTE: When speaking a house number, speak Navigation, Information or Help?" 3. After the tone sounds and the icon on the to , speak screen changes - 2009 Nissan Armada | Owner's Manual - Page 314
Navigation Information Help ACTION Displays Phone function commands. Displays Navigation function commands. Displays Vehicle Information. Displays User Guide. Navigation in the Address Book. Sets a route to a previous destination. Phone Command: COMMAND Dial Number Change Number Redial Phonebook - 2009 Nissan Armada | Owner's Manual - Page 315
Information Command: (if so equipped) COMMAND Traffic Info. Fuel Economy Trip Computer Maintenance ACTION Turns the traffic information system on and off. Displays Fuel Economy information. Displays Trip information. Displays Maintenance information. 4-126 Monitor, climate, audio, phone and voice - 2009 Nissan Armada | Owner's Manual - Page 316
Voice command examples Some basic voice command examples are described here. For navigation system commands, see the separate Navigation System Owner's Manual. WHA1109 LSU0017 Example 1 - Placing a call to the phone number 800-662-6200: 1. Press the steering wheel. switch located on the 2. The - 2009 Nissan Armada | Owner's Manual - Page 317
LSU0018 LSU0019 LSU0020 4. Say "Dial Number". 5. Say "800". 6. The system announces, "Please say the next three digits or dial, or say change number." 7. Say "662". 4-128 Monitor, climate, audio, phone and voice recognition systems - 2009 Nissan Armada | Owner's Manual - Page 318
plus (+) need to be entered. ● If you say "Change Number" during phone number entry, the system will automatically request prompts. ● Do not add a "1" in front of the area code when speaking phone numbers. LSU0021 LSU0022 8. performance. Monitor, climate, audio, phone and voice recognition systems - 2009 Nissan Armada | Owner's Manual - Page 319
the phone number 011-81-111-222-3333: 1. Press the steering wheel. switch located on the 2. The system announces, "Would you like to access Phone, Navigation, Information or Help?" 3. Say "Phone". 4. Say "International Call". 4-130 Monitor, climate, audio, phone and voice recognition systems - 2009 Nissan Armada | Owner's Manual - Page 320
NISSAN VOICE RECOGNITION ALTERNATE COMMAND MODE The Alternate Command Mode enables control of the Audio, Climate Control and Display systems as well as additional commands for the Vehicle Information, Phone and Navigation Please review the success rate may will change to show more options. LSU0023 - 2009 Nissan Armada | Owner's Manual - Page 321
menu" later in this section for an explanation of the options. Displaying the command list If you are controlling the system by voice commands for the first time or do not know the appropriate voice command, perform the following procedure for displaying the voice command list (available only - 2009 Nissan Armada | Owner's Manual - Page 322
can skip steps 1 to 3 if you say "Help". 4. Highlight the "Command List" key using the NISSAN controller and press the ENTER button. WHA1126 LSU0028 Only manual controls such as the touchscreen can navigate the command list menu. As an alternative to the voice command "Help", you may access the - 2009 Nissan Armada | Owner's Manual - Page 323
controller and press the ENTER button. The command list for the category selected is shown. 6. If necessary, scroll the screen using the NISSAN controller to view the entire list. 7. Press the BACK button to return to the previous screen. 4-134 Monitor, climate, audio, phone and voice recognition - 2009 Nissan Armada | Owner's Manual - Page 324
map scale to a smaller number. Changes the map scale to a larger number. Shows or hides the points of interests on the displays. Turns the navigation voice guidance on or off. Repeats the last navigation voice guidance. Stores the current location to the Address Book. Monitor, climate, audio, phone - 2009 Nissan Armada | Owner's Manual - Page 325
Phone Command: COMMAND Redial Dial Number Phonebook Outgoing Calls Incoming Calls International Call ACTION Makes a call to the last dialed number. Makes a call to a spoken phone number up to 10 digits. Makes a call to a contact that is stored in the Phonebook. Shows the last 5 outgoing phone calls. - 2009 Nissan Armada | Owner's Manual - Page 326
Vehicle Information Command: COMMAND Traffic Info Fuel Economy Trip Computer Maintenance Tire Pressure ACTION Turns the traffic information system on and off. Displays Fuel Economy information. Displays Trip information. Display Maintenance information. Displays the Tire Pressure screen. Climate - 2009 Nissan Armada | Owner's Manual - Page 327
how to use voice commands by accessing a simplified User Guide, which contains basic instructions and tutorials for several voice commands. 1. Press the INFO button on the instrument panel. 2. Highlight the "Others" key using the NISSAN controller and press the ENTER button. 3. Highlight the "Voice - 2009 Nissan Armada | Owner's Manual - Page 328
the System to Your Voice Tutorial for adapting the system to your voice. Before starting To get the best performance from NISSAN Voice Recognition, observe the following: ● Keep the interior of the vehicle as quiet as possible. Close the windows to eliminate the surrounding noises (traffic noises - 2009 Nissan Armada | Owner's Manual - Page 329
NISSAN controller and press the ENTER button. Then select the "Voice Recognition" key using the NISSAN ". 500, 700, and 900 are also supported. Examples: ● 1-800-662-6200 - changes from a command. to , speak 4. Once a command is recognized, the system will announce the recognized command and perform - 2009 Nissan Armada | Owner's Manual - Page 330
improve recognition performance. NOTE: Guide: The user guide provides basic instructions for using Voice Recognition and accessing some voice commands. NOTE: The user guide change to show more options. Minimize Voice Feedback: Reduces the amount of the information spoken for each voice instruction - 2009 Nissan Armada | Owner's Manual - Page 331
and press the ENTER button. 5. Select a category to be learned by the system from the following list and then press the ENTER button. ● Navigation ● Audio ● Phone ● Vehicle Info. ● Others The voice commands in the category are displayed. 4-142 Monitor, climate, audio, phone and voice recognition - 2009 Nissan Armada | Owner's Manual - Page 332
you repeat a command after a tone. This command is also displayed on the screen. 8. After the tone sounds and the icon on the to , speak screen changes from the command that the system requested. 9. When the system has recognized the voice command, the voice of the user is learned. switch or the - 2009 Nissan Armada | Owner's Manual - Page 333
TROUBLESHOOTING GUIDE The system should respond correctly to all voice commands without difficulty. If problems are encountered, follow the solutions given in this guide was originally stored. See "Bluetooth Hands-Free Phone System with Navigation System" in this section. 2. Replace one of the - 2009 Nissan Armada | Owner's Manual - Page 334
-in schedule ...5-21 Increasing fuel economy...5-21 Using four wheel drive (4WD) ...5-22 Transfer case shifting procedures ...5-22 Parking/parking on hills...5-28 Power steering ...5-29 Brake system ...5-29 Brake precautions ...5-29 Anti-lock Braking System (ABS)...5-30 Vehicle Dynamic Control (VDC - 2009 Nissan Armada | Owner's Manual - Page 335
entry into the vehicle. ● The exhaust system and body should be inspected by a qualified mechanic whenever: a. The vehicle is raised for service. b. You suspect that exhaust fumes are entering into the passenger compartment. c. You notice a change in the sound of the exhaust system. d. You have had - 2009 Nissan Armada | Owner's Manual - Page 336
leaded gasoline will seriously reduce the three-way catalyst's ability to help reduce exhaust pollutants. ● Keep your engine tuned up. Malfunctions in the ignition, fuel injection, or electrical systems can cause overrich fuel flow into the three-way catalyst, causing it to overheat. Do not keep - 2009 Nissan Armada | Owner's Manual - Page 337
not a substitute for proper tire maintenance, and it is the driver light illuminates in low ambient temperature, check the tire pressure for all 4 tires. ● The Tire and Loading Information label (also referred to as the vehicle placard or tire inflation pressure label) is located in the driver's door - 2009 Nissan Armada | Owner's Manual - Page 338
light illuminates while driving, avoid sudden steering maneuvers or abrupt braking "In case of emergency" section for changing a flat tire.) ● When a light will flash for approximately 1 minute. The light will remain on after 1 minute. Contact your NISSAN This device complies with Part 15 of the FCC - 2009 Nissan Armada | Owner's Manual - Page 339
system" section of this manual, and also instruct your passengers to do procedure is only a general guide. The vehicle must be driven not overreact. 2. Do not apply the brakes. 3. Maintain a firm grip on the handling and stability of the vehicle, especially at highway speeds. 5-6 Starting and - 2009 Nissan Armada | Owner's Manual - Page 340
traffic if possible. 5. Lightly apply the brake pedal to gradually stop the vehicle. 6. Turn on the hazard warning flashers and either contact a roadside emergency service to change the tire or see "Changing a flat tire" in the "In case of emergency" section of this manual. NISSAN is committed to - 2009 Nissan Armada | Owner's Manual - Page 341
excessively, do not exceed the rated capacity of the roof rack and evenly distribute the load. Secure heavy loads in the cargo area as far forward and as your NISSAN is more affected by strong side winds. Slower speeds ensure better vehicle control. ● Do not drive beyond the performance capability - 2009 Nissan Armada | Owner's Manual - Page 342
may be required. See "Periodic maintenance" in the "NISSAN Service and Maintenance Guide." WARNING ● Never remove or turn the key to the LOCK position while driving. The steering wheel will lock (for models with a steering lock mechanism). This may cause the driver to lose control of the - 2009 Nissan Armada | Owner's Manual - Page 343
switch is in the ON position and the foot brake pedal is depressed. There is an OFF position in is OFF, the steering wheel is not locked (for models with a steering wheel lock mechanism). In order for the even using the mechanical key. LSD0171 LSD2001 NISSAN INTELLIGENT KEY™ (if so equipped) The - 2009 Nissan Armada | Owner's Manual - Page 344
may not function. ● If the Intelligent Key is placed near the door or window outside the vehicle, the Intelligent Key may function. ON (Normal operating position) D : This position turns on the ignition system and the electrical accessories. START E : This position starts the engine. As soon as the - 2009 Nissan Armada | Owner's Manual - Page 345
brake pedal is depressed. There is an OFF position between the LOCK and ON positions. The OFF position is indicated by a "1" on the ignition switch. For models without NISSAN This position turns on the ignition system and the electrical accessories. START: (4) This position starts the engine. As soon - 2009 Nissan Armada | Owner's Manual - Page 346
NISSAN lights are clean. ● Visually inspect tires for their appearance and condition. Also check tires for proper inflation. ● Check that all doors lights and audible reminders" in the "Instruments and controls" section of this manual. STARTING THE ENGINE 1. Apply the parking brake to the floor) and - 2009 Nissan Armada | Owner's Manual - Page 347
depress the accelerator pedal all the way to the floor and hold it. Crank the engine for 5 to can also shift manually. As driving conditions change and engine coolant soon by a NISSAN dealer. See "Check engine light" in the "Instruments and controls " section of this manual. CAUTION Do not - 2009 Nissan Armada | Owner's Manual - Page 348
the "In case of emergency" section of this manual. AUTOMATIC TRANSMISSION WARNING ● Do not depress the performance and driving enjoyment. Starting the vehicle 1. After starting the engine, fully depress the foot brake with the engine oil pressure warning light on could cause serious damage to - 2009 Nissan Armada | Owner's Manual - Page 349
. D (Drive): Use this position for all normal forward driving. 4 (Fourth gear): Use this position for driving up and down long slopes where engine braking would be advantageous. Do not downshift into the 4 position at speeds over the following and do not exceed the following speeds in the 4 position - 2009 Nissan Armada | Owner's Manual - Page 350
or slow driving through deep snow, sand or mud, or for maximum engine braking on steep downhill grades. Do not downshift into the 1 position at speeds over ignition switch is placed in the ON position (for models with a steering lock mechanism). This allows the vehicle to be moved if the - 2009 Nissan Armada | Owner's Manual - Page 351
(for models with floor. This shifts the transmission down into a lower gear, depending on the vehicle speed. WARNING ● Be sure the parking brake is fully released before driving. Failure to do so can cause brake NISSAN brake pedal is depressed, the stop lights may not work. Malfunctioning stop lights - 2009 Nissan Armada | Owner's Manual - Page 352
off and have the system checked by a NISSAN dealer. ● The SET indicator light may blink when the cruise control ON·OFF switch P (Park) position. 3. Firmly depress the parking brake pedal and it will release. 4. Before driving, be sure the brake warning light goes out. 1. 2. 3. 4. ACCEL/RES switch - 2009 Nissan Armada | Owner's Manual - Page 353
below the set speed. ● you move the shift selector to N (Neutral). To reset at a slower cruising speed, use one of the following three methods. ● Lightly tap the brake pedal. When the vehicle attains the desired speed, push the COAST/SET switch and release it. ● Push and hold the COAST/SET switch - 2009 Nissan Armada | Owner's Manual - Page 354
idling. ● Keep your engine tuned up. ● Follow the recommended periodic maintenance schedule. ● Keep the tires inflated to the correct pressure. Low tire pressure increases tire wear and lowers fuel economy. ● Keep the front wheels in correct alignment. Improper alignment increases tire wear and - 2009 Nissan Armada | Owner's Manual - Page 355
may cause unnecessary noise, tire wear and increased fuel consumption. If the 4WD warning light turns on when you are driving on dry hard brake pedal depressed, and shift the 4WD shift switch to 2WD. ● If the warning light is still on after the above operation, have your vehicle checked by a NISSAN - 2009 Nissan Armada | Owner's Manual - Page 356
PERFORM THIS OPERATION WHEN DRIVING STRAIGHT. AUTO Rear wheels 2WD 4 wheels 4H Neutral *1 May blink 4LO 4 wheels Illuminated For driving on dry, paved roads (Economy , DEPRESSED THE BRAKE PEDAL AND MOVED THE SHIFT SELECTOR TO NEUTRAL. *3 *1: The transfer 4LO position indicator light may blink. - 2009 Nissan Armada | Owner's Manual - Page 357
not be shifted between 4H and 4LO at low ambient temperatures and the transfer 4LO position indicator light may blink even when the 4WD shift switch is shifted. After driving for a while you can change the 4WD transfer case between 4H and 4LO. When driving on rough roads, ● Set the 4WD shift - 2009 Nissan Armada | Owner's Manual - Page 358
on steep downhill grades. Use the engine brake and low automatic transmission gears (D1 or D2) for engine braking. ● Do not operate the 4WD shift set to the AUTO position, distribution of torque to the front and rear wheels changes automatically, depending on road conditions encountered [ratio; 0 - 2009 Nissan Armada | Owner's Manual - Page 359
may become difficult to turn. When the vehicle is driven, the 4WD shift indicator light should change to AUTO. 4WD shift indicator light The 4WD shift indicator light is located in the vehicle information display. The light should turn off within 1 second after turning the ignition switch to the ON - 2009 Nissan Armada | Owner's Manual - Page 360
goes off after a while, you can continue driving. A large difference between the diameters of front and rear wheels will make the warning light blink slowly (about once per two seconds). Change the 4WD shift switch into 2WD and do not drive fast. ● Shifting between 4H and 4LO is not recommended - 2009 Nissan Armada | Owner's Manual - Page 361
checked by a NISSAN dealer as soon as possible. ● The transfer case may be damaged if you continue driving with the warning light blinking. WSD0050 WARNING as it can go and cannot be moved without depressing the foot brake pedal. ● Never leave the engine running while the vehicle is unattended - 2009 Nissan Armada | Owner's Manual - Page 362
overheat the brakes, wear out the brake pads faster, and reduce gas mileage. To help reduce brake wear and to prevent the brakes from overheating, reduce speed and downshift to a lower gear before going down a slope or long grade. Overheated brakes may reduce braking performance and could result - 2009 Nissan Armada | Owner's Manual - Page 363
off while driving, the power assist for the brakes will not work. Braking will be harder. This procedure is described in the vehicle service manual and can be performed by a NISSAN dealer. ANTI-LOCK BRAKING SYSTEM (ABS) WARNING ● The Anti-lock Braking System (ABS) is a sophisticated device, but it - 2009 Nissan Armada | Owner's Manual - Page 364
NISSAN dealer. The Vehicle Dynamic Control (VDC) system uses various sensors to monitor driver inputs and vehicle motion. Under certain driving conditions, the VDC System helps to perform the following functions: ● Controls brake while driving. Self-test feature The ABS includes electronic sensors - 2009 Nissan Armada | Owner's Manual - Page 365
. This could adversely affect vehicle handling performance, and the SLIP indicator may indicaflash or both the SLIP and tor lights may illuminate. ● If brake related parts such as brake pads, rotors and calipers are not NISSAN recommended or are extremely deteriorated, the VDC system my not operate - 2009 Nissan Armada | Owner's Manual - Page 366
NISSAN recommended ones are used, the VDC system may not operate properly and the SLIP indicator may flash or both the indicator lights may SLIP and illuminate. ● The VDC this may include reduced performance or a false activation driver of obstacles near the rear bumper when the shift selector is in - 2009 Nissan Armada | Owner's Manual - Page 367
light on the switch will illuminate when the system is turned off. If the indicator light performance or a false activation. ● This system is not designed to prevent contact with small or moving objects. The Front Sonar System (FSS) sounds a tone to warn the driver of obstacles near the front bumper - 2009 Nissan Armada | Owner's Manual - Page 368
the indicator light illuminates when the FSS is not turned off, it may indicate a malfunction in the FSS. Keep the FSS sensors (located on the front bumper fascia) . For details, see "Changing engine coolant" in the "Maintenance and do-it-yourself" section of this manual. ANTI-FREEZE In the winter - 2009 Nissan Armada | Owner's Manual - Page 369
Maintenance and do-ityourself" section of this manual brake while on the ice, and avoid any sudden steering maneuvers. ● Do not use the cruise control on slippery roads. ● Snow can trap dangerous exhaust gases under your vehicle. Keep snow clear of the exhaust extension cord rated for at least NISSAN - 2009 Nissan Armada | Owner's Manual - Page 370
appropriate timer to turn the engine block heater on. 6. Before starting the engine, unplug and properly store the cord to keep it away from moving parts. Starting and driving 5-37 - 2009 Nissan Armada | Owner's Manual - Page 371
MEMO 5-38 Starting and driving - 2009 Nissan Armada | Owner's Manual - Page 372
of emergency Flat tire ...6-2 Tire Pressure Monitoring System (TPMS)...6-2 Changing a flat tire ...6-2 Jump starting ...6-8 Push starting...6-10 If your vehicle overheats ...6-10 Towing your vehicle ...6-11 Towing recommended by NISSAN ...6-12 Vehicle recovery (freeing a stuck vehicle) ...6-13 - 2009 Nissan Armada | Owner's Manual - Page 373
warning light illuminates while driving, avoid sudden steering maneuvers or abrupt braking, reduce light will remain on after 1 minute. Contact your NISSAN dealer as soon as possible for tire replacement and/or system resetting. CHANGING A FLAT TIRE If you have a flat tire, follow the instructions - 2009 Nissan Armada | Owner's Manual - Page 374
1 at both the front and back of the wheel diagonally opposite the flat tire 2 to prevent the vehicle from moving when it is jacked up. Getting the spare tire and tools 1. Lift the luggage board in the cargo area and remove the jack tool kit A from the storage area. See "Cargo area storage bin" in - 2009 Nissan Armada | Owner's Manual - Page 375
, located directly above the spare tire. 5. Fit the square end of the jack rod into the square hole of the wheel nut wrench to form a handle. 6. Seat the T-shaped end of the jack rod into the T-shaped opening of the tire winch. Apply pressure to keep the jack rod engaged in - 2009 Nissan Armada | Owner's Manual - Page 376
designed for lifting only your vehicle during a tire change. ● Use the correct jack-up points. Never use any other part of the vehicle for jack support. ● Never specific vehicle model and jack type. Carefully read the caution label attached to the jack body and the following instructions. 1. Loosen - 2009 Nissan Armada | Owner's Manual - Page 377
side of the frame. The jack should be used on firm and level ground. 3. Install the assembled jack rod into the jack as shown. 4. To lift the vehicle, securely hold the jack lever and rod. Carefully raise the vehicle until the tire clears the ground. 5. Remove the wheel nuts and then - 2009 Nissan Armada | Owner's Manual - Page 378
. WCE0063 Installing the spare tire The spare tire is designed for emergency use. See specific instructions under the heading "Wheels and tires" in the "Maintenance and do-it-yourself" section of this manual. 1. Clean any mud or dirt from the surface between the wheel and hub. 2. Carefully put - 2009 Nissan Armada | Owner's Manual - Page 379
instructions and precautions below must be followed. If the battery of a vehicle equipped with the NISSAN battery must be rated at 12 volts. Use of an improperly rated battery can damage instructions under the heading "Wheels and tires" in the "Maintenance and do-it-yourself" section of this manual - 2009 Nissan Armada | Owner's Manual - Page 380
parts . CAUTION WCE0054 WARNING Always follow the instructions below. Failure to do so could parking brake. Move the shift selector to P (Park). Switch off all unnecessary electrical systems (lights, ( ) to body ground (for example, strut mounting bolt, engine lift bracket, etc.) - not - 2009 Nissan Armada | Owner's Manual - Page 381
oil pressure/engine coolant temperature high indicator light), or if you feel a lack 1. Move the vehicle safely off the road, apply the parking brake and move the shift selector to P (Park). Do not control to high speed. CAUTION Automatic transmission models cannot be push-started or tow-started - 2009 Nissan Armada | Owner's Manual - Page 382
could damage your vehicle. Towing instructions are available from a NISSAN dealer. Local service operators are generally familiar with the consumer information" section of this manual. WARNING ● Never ride in a vehicle that is being towed. ● Never get under your vehicle after it has been lifted by - 2009 Nissan Armada | Owner's Manual - Page 383
tow the vehicle with the front wheels raised always use towing dollies under the rear wheels. ● When towing automatic transmission models with the front wheels on the ground or mechanism (for models with a steering lock mechanism). ACE1037 TOWING RECOMMENDED BY NISSAN 6-12 In case of emergency - 2009 Nissan Armada | Owner's Manual - Page 384
WCE0162 LCE0083 Four-wheel drive models NISSAN recommends that towing dollies be used when towing your vehicle or personal injury or death when recovering a stuck vehicle: ● Contact a professional towing service to recover the vehicle if you have any questions regarding the recovery procedure. ● - 2009 Nissan Armada | Owner's Manual - Page 385
instructions. ● Always pull the recovery device straight out from the front Parts of your vehicle could also overheat and be damaged. If your vehicle is stuck in sand, snow, mud, etc., use the following procedure: 1. Turn off the Vehicle Dynamic Control System (VDC). 2. Make sure the area in front - 2009 Nissan Armada | Owner's Manual - Page 386
alloy wheels ...7-3 Chrome parts ...7-3 Tire dressings ...7-3 Cleaning interior...7-4 Air fresheners ...7-4 Floor mats ...7-4 Seat belts ...7-5 Corrosion protection ...7-5 Most common factors contributing to vehicle corrosion ...7-5 Environmental factors influence the rate of corrosion ...7-5 To - 2009 Nissan Armada | Owner's Manual - Page 387
helps retain new vehicle appearance. Polishing is recommended to remove built-up wax residue and to avoid a weathered appearance before re-applying wax. A NISSAN dealer can assist you in choosing the proper product. ● Wax your vehicle only after a thorough washing. Follow the instructions supplied - 2009 Nissan Armada | Owner's Manual - Page 388
are available at a NISSAN dealer or any automotive accessory store. CAUTION When PARTS Clean all chrome parts regularly with a nonabrasive chrome polish to maintain the finish. TIRE DRESSINGS NISSAN with an oil-based tire dressing. ● Apply a light coat of tire dressing to help prevent it from - 2009 Nissan Armada | Owner's Manual - Page 389
floor mat on top of another floor mat in the driver front position. ● Use only genuine NISSAN floor mats specifically designed for use in your vehicle model. See your NISSAN dealer for more information. ● Properly position the mats in the floorwell using the floor mat positioning aid. See Floor mat - 2009 Nissan Armada | Owner's Manual - Page 390
This vehicle includes two driver's side front floor mat brackets and one passenger's side front floor mat bracket to help keep your floor mats in place. Genuine NISSAN floor mats have been specially designed for your vehicle model. The driver's side floor mat has two grommet holes incorporated in - 2009 Nissan Armada | Owner's Manual - Page 391
accelerate the rate of corrosion to those parts which are components such as the exhaust system, fuel and brake lines, brake cables, floor pan and fenders. soon as possible. ● Keep drain holes at the bottom of the doors open to avoid water accumulation. ● Check the underbody for accumulation of - 2009 Nissan Armada | Owner's Manual - Page 392
) ...8-27 NISSAN Intelligent Key™ (if so equipped) ...8-28 Lights ...8-29 Headlights ...8-29 Fog lights (if so equipped) ...8-30 Exterior and interior lights...8-31 Wheels and tires ...8-35 Tire pressure...8-35 Tire labeling...8-39 Types of tires...8-41 Tire chains ...8-42 Changing wheels and - 2009 Nissan Armada | Owner's Manual - Page 393
the maintenance chain. Scheduled maintenance For your convenience, both required and optional scheduled maintenance items are described and listed in your "NISSAN Service and Maintenance Guide". You must refer to that guide to ensure that necessary maintenance is performed on your NISSAN at regular - 2009 Nissan Armada | Owner's Manual - Page 394
NISSAN dealer immediately. Keep the floor mat away from the pedal. Brakes Check that the brakes do not pull the vehicle to one side when applied. Parking brake Check the parking brake The maintenance items listed here should be checked on a regular basis, such as when performing periodic maintenance, - 2009 Nissan Armada | Owner's Manual - Page 395
seems unusual or there is a smell of exhaust fumes, immediately have the exhaust system inspected by a NISSAN dealer. See the carbon monoxide warning in the "Starting and driving" section of this manual. Fluid leaks Check under the vehicle for fuel, oil, water or other fluid leaks after the vehicle - 2009 Nissan Armada | Owner's Manual - Page 396
ignition switch is in the ON position. This "Maintenance and do-it-yourself" section gives instructions regarding only those items which are relatively easy for an owner to perform. You should be aware that incomplete or improper servicing may result in operating difficulties or excessive emissions - 2009 Nissan Armada | Owner's Manual - Page 397
ENGINE COMPARTMENT CHECK LOCATIONS 1. 2. 3. 4. 5. 6. 7. 8. 9. 10. 11. 12. Battery Fuse/fusible link box Transmission dipstick Engine oil filler cap Brake fluid reservoir Windshield-washer fluid reservoir Air cleaner Drive belt location Radiator cap Power steering fluid reservoir Engine oil dipstick - 2009 Nissan Armada | Owner's Manual - Page 398
factory-fill coolant. Refer to the Nissan Service and Maintenance Guide for more details. CAUTION ● When adding or replacing coolant, be sure to use only Genuine NISSAN Long Life Antifreeze/Coolant (blue) or equivalent. Genuine NISSAN Long Life Antifreeze/Coolant (blue) is pre-diluted to provide - 2009 Nissan Armada | Owner's Manual - Page 399
of the factory-fill coolant. Refer to the NISSAN Service and Maintenance Guide for more details. The engine coolant reservoir is NISSAN dealer can change the engine coolant. The service procedure can be found in the NISSAN Service Manual. Improper servicing can result in reduced heater performance - 2009 Nissan Armada | Owner's Manual - Page 400
ENGINE OIL LEVEL 1. Park the vehicle on a level surface and apply the parking brake. 2. Start the engine and let it idle until it reaches operating temperature. 3. Turn to add some oil between oil maintenance intervals or during the break-in period, depending on the severity of operating conditions - 2009 Nissan Armada | Owner's Manual - Page 401
Capacities and recommended fuel/lubricants" in the "Technical and consumer information" section of this manual for drain and refill capacity. The drain and refill capacity of children. WDI0504 CHANGING ENGINE OIL 1. Park the vehicle on a level surface and apply the parking brake. 2. Start the - 2009 Nissan Armada | Owner's Manual - Page 402
NISSAN new vehicle limited warranty. The specified automatic transmission fluid is also described on caution labels located in the engine compartment. CHANGING ENGINE OIL FILTER 1. Park the vehicle on a level surface and apply the parking brake oil may be hot. Maintenance and do-it-yourself 8-11 - 2009 Nissan Armada | Owner's Manual - Page 403
FLUID For further brake fluid specification information, refer to "Capacities and recommended fuel/lubricants" in the "Technical and consumer information" section of this manual. CAUTION ● DO NOT OVERFILL. ● Recommended fluid is NISSAN PSF or equivalent. Genuine WARNING ● Use only new fluid from - 2009 Nissan Armada | Owner's Manual - Page 404
to mix the washer fluid concentrate and water. LDI0374 LDI0375 BRAKE FLUID Check the brake fluid level in the reservoir. If the fluid level is below the MIN line or the brake warning light comes on, add Genuine NISSAN Super Heavy Duty Brake Fluid or equivalent DOT 3 fluid up to the MAX line - 2009 Nissan Armada | Owner's Manual - Page 405
working on or near a battery, always wear suitable eye protection and remove all jewelry. ● Battery posts, terminals and related accessories contain lead and lead compounds. Wash hands after handling. ● Keep battery out of the reach of children. ● Do not tip the battery. Keep the vent caps tight and - 2009 Nissan Armada | Owner's Manual - Page 406
section of this manual. If the engine does not start by jump starting, the battery may have to be replaced. Contact a NISSAN dealer. LDI0706 CAUTION ● Do not ground accessories directly to the battery the battery and controls voltage generated by the generator. Maintenance and do-it-yourself 8-15 - 2009 Nissan Armada | Owner's Manual - Page 407
the negative battery cable. If you add electrical accessories to your vehicle, be sure to ground them to a suitable body ground such as the frame or engine block and tension in accordance with the maintenance schedule found in the "NISSAN Service and Maintenance Guide". WDI0661 1. 2. 3. 4. 5. - 2009 Nissan Armada | Owner's Manual - Page 408
brake is engaged securely. CAUTION Be sure to use the correct socket to remove the spark plugs. An incorrect socket can damage the spark plugs. If replacement is required, see your NISSAN it according to the maintenance log shown in the "NISSAN Service and Maintenance Guide." To remove the air - 2009 Nissan Armada | Owner's Manual - Page 409
new air cleaner, make sure the air cleaner cover is seated in the housing and latch the clips. To replace the filter, perform removed. ● Never pour fuel into the throttle body or attempt to start the NISSAN Service and Maintenance Guide" for change intervals. 8-18 Maintenance and do-it-yourself - 2009 Nissan Armada | Owner's Manual - Page 410
filter cover. 6. Install the glove box assembly. 7. Fill out the date information on the small replacement label and attach it to the glove box lid. Maintenance and do-it-yourself 8-19 - 2009 Nissan Armada | Owner's Manual - Page 411
pressure. WDI0408 REPLACING Replace the wiper blades if they are worn. 1. Lift the wiper arm away from the windshield. 2 CAUTION Worn windshield wiper wiper arm to remove. Remove the wiper blade. 3 4. Insert the new wiper blade onto the wiper arm until it clicks into place. 5. Rotate wiper blade - 2009 Nissan Armada | Owner's Manual - Page 412
WDI0629 If you wax the surface of the hood, be careful not to let wax get into the windshield washer nozzle A . This may cause clogging or improper windshield washer operation. If wax gets into the nozzle, remove it with a needle or small pin B . Maintenance and do-it-yourself 8-21 - 2009 Nissan Armada | Owner's Manual - Page 413
LDI0379 Rear window wiper blade 1 Lift the wiper arm away from the rear window. Push the wiper blade in and pivot until the blade becomes free. Insert a new blade onto the wiper arm and snap into place. 2 3 8-22 Maintenance and do-it-yourself - 2009 Nissan Armada | Owner's Manual - Page 414
the appropriate maintenance schedule information in the "NISSAN Service and Maintenance Guide". FUSES Self-adjusting brakes Your vehicle is equipped with self-adjusting brakes. The front and rear disc-type brakes self-adjust every time the brake pedal is applied. WARNING See a NISSAN dealer for - 2009 Nissan Armada | Owner's Manual - Page 415
the tab and lifting the cover up. fuse pocket as shown in the illustration. This will not affect the performance of the fuse. Make sure the fuse is installed in the fuse CAUTION Never use a fuse of a higher or lower amperage rating than specified on the fuse box cover. This could damage the - 2009 Nissan Armada | Owner's Manual - Page 416
the headlight switch are OFF. 2. Open the glove box to access the fuse box cover. Fusible links If the electrical equipment does not operate and fuses are in good condition, check the fusible links. If any of these fusible links are melted, replace with only Genuine NISSAN parts. Maintenance and - 2009 Nissan Armada | Owner's Manual - Page 417
the battery or removed parts. WDI0452 LDI0456 Type A 5. If the fuse is open A , replace it with an equivalent good fuse B . 6. Push the fuse box cover to install. 7. If a new fuse also opens, have the electrical system checked and repaired by a NISSAN dealer. Type B 8-26 Maintenance and do-it - 2009 Nissan Armada | Owner's Manual - Page 418
could cause a malfunction. ● When changing the battery, do not let removed for any reason other than replacement, perform step 5. ● An improperly disposed battery in the keyfob as follows: 1 2 3 Install a new battery C with the "+" facing down. ● The capacity. Maintenance and do-it-yourself 8-27 - 2009 Nissan Armada | Owner's Manual - Page 419
cause undesired operation of the device. NISSAN INTELLIGENT KEY™ (if so equipped) the upper part from the lower part. Use a cloth to protect the casing. 3. Replace the battery with a new one. capacity. ● Make sure that the + side faces the bottom of the case. WDI0620 8-28 Maintenance and do-it - 2009 Nissan Armada | Owner's Manual - Page 420
of time as dust, moisture and smoke may enter the headlight body and affect the performance of the headlight. ● Aiming is not necessary after replacing the bulb. When aiming adjustment is necessary, contact a NISSAN dealer. WDI0621 4. Close the lid securely as illustrated C D . 5. Operate the - 2009 Nissan Armada | Owner's Manual - Page 421
the bulb out of the fog light for a long period of time as dust, moisture and smoke may enter the fog light body and affect the performance of the fog light. 1. Disconnect the negative (-) battery cable. 2. The fog light is accessible in front of the front tire and behind the bumper. 3. Disconnect - 2009 Nissan Armada | Owner's Manual - Page 422
AND INTERIOR LIGHTS Item Headlight assembly* High Low Park/Turn Sidemarker Side turn signal light* (if so equipped) Front fog light Puddle lamp Room/map lights Personal lights Footwell* Glove box light* Vanity mirror light Step light Cargo light High-mounted stop light* Rear combination light Tail - 2009 Nissan Armada | Owner's Manual - Page 423
2. 3. 4. Room/map light Front personal lights Step light Puddle lamp/Side turn signal light (if so equipped) 5. High-mount stoplight 6. Cargo light 7. License plate light 8. Rear combination light 9. Headlight assembly 10. Fog light WDI0263 Replacement procedures All other lights are either type - 2009 Nissan Armada | Owner's Manual - Page 424
LDI0364 LDI0385 Personal lights Use a cloth 1 to protect the housing. Vanity mirror Use a cloth 1 to protect the housing. LDI0389 Map lights Use a cloth 1 to protect the housing. Maintenance and do-it-yourself 8-33 - 2009 Nissan Armada | Owner's Manual - Page 425
LDI0341 LDI0388 WDI0233 Step light Use a cloth 1 to protect the housing. Puddle light Use a cloth 1 to protect the housing. Cargo light Use a cloth 1 to protect the housing. 8-34 Maintenance and do-it-yourself - 2009 Nissan Armada | Owner's Manual - Page 426
, see "Flat tire" in the "In case of emergency" section of this manual. TIRE PRESSURE Tire Pressure Monitoring System (TPMS) This vehicle is equipped with the (for example a flat tire while driving). Maintenance and do-it-yourself 8-35 LDI0384 License plate light WDI0403 Rear combination - 2009 Nissan Armada | Owner's Manual - Page 427
handling. WARNING ● Improperly inflated tires can fail suddenly and cause an accident. ● The Gross Vehicle Weight Rating (GVWR) is located on the F.M.V.S.S./C.M.V.S.S. certification label. The vehicle weight capacity or if the vehicle strikes a curb while parking. 8-36 Maintenance and do-it-yourself - 2009 Nissan Armada | Owner's Manual - Page 428
Tire and loading information label 1 4 Seating capacity: The maximum number of occupants that can be seated in the vehicle. Vehicle load limit: See loading information in the "Technical and consumer information" section. Original tire size: The size of the tires originally installed on the vehicle - 2009 Nissan Armada | Owner's Manual - Page 429
the gauge stem to release pressure. Recheck the pressure and add or release air as needed. LDI0393 Size Front Original Tire: P265/70R18 P275/60R20 Rear Original Tire: P265/70R18 P275/60R20 Spare Tire: P265/ pressure, reposition the gauge to eliminate this leakage. 8-38 Maintenance and do-it-yourself - 2009 Nissan Armada | Owner's Manual - Page 430
can be used to identify the tire in case of a recall. 1. P: The "P" indicates the tire is designed for support. You may not find this information on all tires because it is not required by law. 7. H: Tire speed rating. You should not drive the vehicle faster than the tire speed rating. Maintenance - 2009 Nissan Armada | Owner's Manual - Page 431
is the greatest amount of air pressure that should be put in the tire. Do not exceed the maximum permissible inflation pressure. 5 Maximum load rating new tire (example: DOT XX XX XXX XXXX) 1. DOT: Abbreviation for the "Department Of Transportation". The symbol can be placed above, below or to the - 2009 Nissan Armada | Owner's Manual - Page 432
tires on some models to provide superior performance on dry roads. Summer tire performance is substantially reduced in snow and ice. Summer tires do not have the tire traction rating "M&S" on the tire sidewall. If you plan to operate your vehicle in snowy or icy conditions, NISSAN recommends the use - 2009 Nissan Armada | Owner's Manual - Page 433
addition, drive at a reduced speed. Otherwise, your vehicle may be damaged and/or vehicle handling and performance may be adversely affected. Tire chains must be installed only on the rear wheels and not on the front wheels. Do not use tire chains on dry roads. Driving with chains in such conditions - 2009 Nissan Armada | Owner's Manual - Page 434
cuts are found, the tire(s) should be replaced. ● Improper service of the spare tire may result in serious personal injury. If it is necessary to repair the spare tire, contact a NISSAN dealer. ● For additional information regarding tires, refer to "Important Tire Safety - 2009 Nissan Armada | Owner's Manual - Page 435
and consumer information" section of this manual. WARNING ● The use of tires other than those recommended or the mixed use of tires of different brands, construction (bias, bias-belted or radial), or tread patterns can adversely affect the ride, braking, handling, VDC system, ground clearance, body - 2009 Nissan Armada | Owner's Manual - Page 436
recommended that all four tires be replaced with tires of the same size, brand, construction and tread pattern. The tire pressure and wheel alignment should also be checked and corrected as necessary. Contact a NISSAN dealer. ● Do not use abrasive cleaners when washing the wheels. ● Inspect wheel - 2009 Nissan Armada | Owner's Manual - Page 437
MEMO 8-46 Maintenance and do-it-yourself - 2009 Nissan Armada | Owner's Manual - Page 438
consumer information Capacities and recommended fuel/lubricants ...9-2 Fuel recommendation (without Flexible Fuel Vehicle option)...9-3 Flexible fuel vehicle (FFV) fuel for inspection/maintenance (I/M) test ...9-32 Event Data Recorders (EDR)...9-33 Owner's Manual/Service Manual order information - 2009 Nissan Armada | Owner's Manual - Page 439
and transfer case durability, and may damage the transfer case, which is not covered by the NISSAN new vehicle limited warranty. *8: For further details, see "Changing engine oil" in the "Maintenance and do-it-yourself" section. *9: For hot climates, viscosity SAE 80W-90 is suitable for ambient - 2009 Nissan Armada | Owner's Manual - Page 440
system components and is not covered by the NISSAN new vehicle limited warranty. Reformulated gasoline Some fuel suppliers are now producing reformulated gasolines. These gasolines are specially designed to reduce vehicle emissions. NISSAN supports efforts towards cleaner air and suggests that you - 2009 Nissan Armada | Owner's Manual - Page 441
not specifically designed for E-85 fuel can damage fuel system components and is not covered by the NISSAN new vehicle limited warranty. CAUTION Use of other fuels such as Fuel Methanol may cause powertrain damage or a loss of vehicle performance. Octane rating tips Using unleaded gasoline with - 2009 Nissan Armada | Owner's Manual - Page 442
and may also affect the warranty coverage. Maintenance If you operate your vehicle using E-85 fuel, follow the correct maintenance log shown in the "NISSAN Service and Maintenance Guide". Ethanol Fuel (E-85) E-85 is a mixture of approximately 85% fuel ethanol and 15% unleaded gasoline. WARNING - 2009 Nissan Armada | Owner's Manual - Page 443
and viscosity engine oil to ensure satisfactory engine life and performance. See "Capacities and recommended fuel/lubricants" earlier in this section. NISSAN recommends the use of an energy conserving oil in order to improve fuel economy. Select only engine oils that meet the American Petroleum - 2009 Nissan Armada | Owner's Manual - Page 444
more frequent oil and filter changes: ● repeated short distance driving at cold outside temperatures ● driving in dusty conditions ● extensive idling ● towing a trailer ● stop and go commuting Refer to the "NISSAN Service and Maintenance Guide" for the maintenance schedule. CAUTION The use of any - 2009 Nissan Armada | Owner's Manual - Page 445
SPECIFICATIONS ENGINE Model Type Cylinder arrangement Bore x Stroke Displacement Firing order Idle speed A/T ( 3.858 x 3.622 (98 x 92) cu in (cm3) 338.78 (5,552) 1-8-7-3-6-5-4-2 Standard Model DILFR5A-11 in (mm) 0.043 (1.1) Timing chain FFV Model DILFR5A-11D 9-8 Technical and consumer information - 2009 Nissan Armada | Owner's Manual - Page 446
/70R18 P275/60R20 Spare tire Full size DIMENSIONS AND WEIGHTS Overall length Overall width Overall height 2wd with roof rack 4wd with roof rack Front Track 18 inch tire 20 " on the center pillar between the lb (kg) driver's side front and rear lb (kg) doors. Technical and consumer information 9-9 - 2009 Nissan Armada | Owner's Manual - Page 447
When planning to drive your NISSAN vehicle in another country, you should first find out if the fuel available is suitable for your vehicle's engine. Using fuel with an octane rating that is too low may ) The vehicle identification number is located as shown. 9-10 Technical and consumer information - 2009 Nissan Armada | Owner's Manual - Page 448
GVWR), Gross Axle Weight Rating (GAWR), month and year of manufacture, Vehicle Identification Number (VIN), etc. Review it carefully. EMISSION CONTROL INFORMATION LABEL The emission control information label is attached to the underside of the hood as shown. Technical and consumer information 9-11 - 2009 Nissan Armada | Owner's Manual - Page 449
to the underside of the hood as shown. Use the following steps to mount the front license plate: 1. Make holes on the plastic finisher at the location mark (small dimple) using a 0.20 in (5 mm) drill. Apply light pressure to the drill. Install the license plate holder using the two screws provided - 2009 Nissan Armada | Owner's Manual - Page 450
(load) limit specified for the front or rear axle. This information is located on the F.M.V.S.S./C.M.V.S.S. certification label. ● GCWR (Gross Combined Weight rating) - The maximum total weight rating of the vehicle, passengers, cargo, and trailer. ● Vehicle Capacity Weight, Load limit, Total load - 2009 Nissan Armada | Owner's Manual - Page 451
of occupants and cargo" on the Tire and Loading Information label. Do not exceed the number of occupants shown as "Seating Capacity" on the Tire and Loading Information label. To get "the combined weight of occupants and cargo", add the weight of - 2009 Nissan Armada | Owner's Manual - Page 452
vehicle. Consult this manual to determine how this reduces the available cargo and luggage load capacity of your vehicle. when securing cargo. Do not apply a total load of more than 110 lbs. (490 N) to a single metal floor tie-down hook when securing cargo. Technical and consumer information 9- - 2009 Nissan Armada | Owner's Manual - Page 453
stop or collision, unsecured cargo could cause personal injury. ● Do not load your vehicle any heavier than the GVWR or the maximum front and rear GAWRs. If you do, parts of your vehicle can break, tire damage could occur, or it can change the way your vehicle handles. This could result in loss - 2009 Nissan Armada | Owner's Manual - Page 454
and other parts of your vehicle wear in at the heavier loads. Your new vehicle was designed to be used primarily to carry passengers and cargo. Remember that towing a trailer places additional loads on your vehicle's engine, drive train, steering, braking and other systems. A NISSAN Towing Guide - 2009 Nissan Armada | Owner's Manual - Page 455
of this manual. LTI0162 WTI0160 The GCWR equals the combined weight of the towing vehicle (including passengers and cargo) plus the total trailer load. Towing loads greater than these or using improper towing equipment could adversely affect vehicle handling, braking and performance. The ability - 2009 Nissan Armada | Owner's Manual - Page 456
the rating. Additional passengers, cargo and/or optional equipment, such as the trailer hitch, will add weight to the vehicle and reduce your vehicle's maximum towing capacity and trailer tongue load. The vehicle and trailer need to be weighed to confirm the vehicle is within the GVWR, Front GAWR - 2009 Nissan Armada | Owner's Manual - Page 457
the required ratings. 900 lb. (409 kg) Available tongue weight / 8,750 lb. (3969 kg) = Available capacity 10 % tongue weight The available towing capacity may be less than the maximum towing capacity due to the passenger and cargo load in the vehicle. 9-20 Technical and consumer information - 2009 Nissan Armada | Owner's Manual - Page 458
a proper ball mount and hitch ball that is rated for the trailer to be towed. Genuine NISSAN ball mounts and hitch balls are available from your NISSAN dealer. If your vehicle is not equipped with the optional trailer tow package, check the towing capacity of your bumper hitch or receiver-type frame - 2009 Nissan Armada | Owner's Manual - Page 459
hitch system. General set-up instructions are as follows: 1. Park unloaded vehicle on a level surface. With the ignition on and the doors closed, allow the vehicle to stand for several minutes so that it can level. 2. Measure the height of a reference point on the front and rear bumpers - 2009 Nissan Armada | Owner's Manual - Page 460
utility vehicles are available at a NISSAN dealer. ● The hitch should not be attached to or affect the operation of the impactabsorbing bumper. ● Do not use axle-mounted hitches. ● Do not modify the vehicle exhaust system, brake system, etc. to install a trailer hitch. ● To reduce the possibility of - 2009 Nissan Armada | Owner's Manual - Page 461
the trailer lights to the vehicle. Adapters are available at NISSAN dealers as well as auto parts stores and hitch retailers. Trailer brakes When towing the hitch, not to the vehicle bumper or axle. The safety chains can be attached to the bumper if the hitch ball is mounted to the bumper. Be - 2009 Nissan Armada | Owner's Manual - Page 462
an aftermarket brake controller. To install the electric trailer brake controller jumper harness, perform the following procedure: 1. Open the driver door. Move the seat to the rearmost position. 2. Apply the parking brake to access the jumper harness connector. Technical and consumer information - 2009 Nissan Armada | Owner's Manual - Page 463
marked with a white tag with "elec brake conn". 4. Peel off the tape and connect the jumper harness to the connector 2 . 5. Release the parking brake. 6. Install the aftermarket electric trailer brake controller according to the manufacturer's instructions. 9-26 Technical and consumer information - 2009 Nissan Armada | Owner's Manual - Page 464
front half and 40% is in the back half. Also make sure the load is balanced side to side. ● Check your hitch, trailer tire pressure, vehicle tire pressure, trailer light which is free from traffic. Steering stability and braking performance will be somewhat different than under normal driving - 2009 Nissan Armada | Owner's Manual - Page 465
km) that you do tow, do not drive over 50 MPH (80 km/h). ● Have your vehicle serviced more often than at intervals specified in the recommended Maintenance Schedule in the "NISSAN Service and Maintenance Guide". ● When making a turn, your trailer wheels will be closer to the inside of the turn than - 2009 Nissan Armada | Owner's Manual - Page 466
the trailer lights may burn out. When towing a trailer, final drive gear oil should be replaced and transmission oil/fluid should be changed more frequently. For additional information, see the "Maintenance and do-it-yourself" section earlier in this manual. Tow mode includes the following features - 2009 Nissan Armada | Owner's Manual - Page 467
Temperature A Treadwear The treadwear grade is a comparative rating based on the wear rate of the tire when tested under controlled conditions on may have poor traction performance. WARNING Do not use this vehicle for snowplowing. Installing a snowplow may affect vehicle handling. This may cause - 2009 Nissan Armada | Owner's Manual - Page 468
NISSAN vehicle is covered by the following emission warranties: For USA 1. Emission Defects Warranty 2. Emissions Performance ● Nissan North America, Inc. Consumer Affairs recall and remedy campaign. However, NHTSA cannot become involved in individual problems between you, your dealer, or NISSAN - 2009 Nissan Armada | Owner's Manual - Page 469
problems between you, your dealer, or NISSAN. You may contact Transport Canada's Defect Investigations and Recalls Division toll free at 1-800-333-0510. You may also report safety defects online at: https://wwwapps.tc.gc.ca/Saf-SecSur/7/PCDB-BDPP/Index.aspx. 9-32 Technical and consumer information - 2009 Nissan Armada | Owner's Manual - Page 470
performed brake pedal NISSAN Service Manuals for the 1999 model year and prior, see a NISSAN dealer, or contact: 1-800-247-5321 For current pricing and availability of genuine NISSAN Owner's Manuals for this model year and prior, see a NISSAN dealer, or contact: 1-800-247-5321 Technical and consumer - 2009 Nissan Armada | Owner's Manual - Page 471
representative will assist you. Also available are genuine NISSAN Service and Owner's Manuals for older NISSAN models. nor does NISSAN's warranty apply to damage caused by a non-genuine part. Using Genuine NISSAN Parts can help protect your personal safety, preserve your warranty protection and - 2009 Nissan Armada | Owner's Manual - Page 472
light)...8-31 Brake system ...5-29 Brake warning light ...2-14 Brake wear indicators ...2-20, 8-23 Parking brake operation ...5-18 Self-adjusting brakes ...8-23 Brakes ...8-23 Break-in schedule ...5-21 Brightness control Instrument panel ...2-33 Brightness/contrast button ...4-16, 4-32 Bulb check - 2009 Nissan Armada | Owner's Manual - Page 473
20 Cleaning exterior and interior ...7-2 Clock ...4-49, 4-57 (models with navigation system) ...4-11, 4-27 Clock set ...4-11, 4-27 C.M.V.S.S. certification label ...9-11 Cold weather driving ...5-35 Compact disc (CD) player ...4-59 CompactFlash (CF) player ...4-61 Console box...2-40, 2-47 Control - 2009 Nissan Armada | Owner's Manual - Page 474
tire ...6-2 Floor mat positioning aid ...7-5 Fluid Brake fluid ...8-12 Capacities and recommended fuel/lubricants ...9-2 Engine coolant...8-7 Engine oil ...8-9 Power steering fluid ...8-12 Windshield-washer fluid...8-13 F.M.V.S.S. certification label...9-11 Fog light switch ...2-34 Front air bag - 2009 Nissan Armada | Owner's Manual - Page 475
18 Brake light (See stop light) ...8-31 ...3-2 ...8-26 ...3-17 ...3-7 Bulb check/instrument panel ...2-13 Bulb replacement ...8-31 Charge warning light ...2-15 Fog light switch ...2-34 Headlight and turn signal switch ...2-30 Headlight control switch ...2-30 Headlights ...8-29 Interior light...2-56 - 2009 Nissan Armada | Owner's Manual - Page 476
Owner's manual order form ...Owner's manual/service manual order information ...9-4 . .2-5 . .9-2 .8-10 .8-11 . .8-9 . .8-9 . .9-6 .2-16 . .9-6 .3-35 .3-35 .6-10 .9-33 .9-33 P Parking Parking brake operation ...5-18 Parking/parking on hills ...5-28 Pedal position adjustment...3-31 Personal lights - 2009 Nissan Armada | Owner's Manual - Page 477
...3-37 Front seats ...1-2 Heated seats ...2-35 Manual front seat adjustment ...1-2 Second row captain's chair adjustment ...1-5 Security indicator light...2-20 Security system (NISSAN vehicle immobilizer system), engine start ...2-27, 3-4, 5-12 Self-adjusting brakes ...8-23 Service manual order - 2009 Nissan Armada | Owner's Manual - Page 478
16 Air bag warning light ...1-68, 2-18 Anti-lock brake warning light ...2-14 Battery charge warning light ...2-15 Brake warning light ...2-14 Engine oil pressure low/engine coolant temperature high warning light ...2-16 Hazard warning flasher switch ...2-34 Low fuel warning light ...2-16, 2-18, 2-24 - 2009 Nissan Armada | Owner's Manual - Page 479
When traveling or registering your vehicle in another country ...Windows Locking passengers' windows ...Manual vent windows ...Power rear windows ...Power vent windows...Power windows ...Rear power windows ...Windshield wiper and washer switch ...Windshield-washer fluid...Wiper Rear window wiper - 2009 Nissan Armada | Owner's Manual - Page 480
be used, because this will damage the three-way catalyst. For additional information, see "Capacities and recommended fuel/lubricants in the "Technical and consumer information" section of this manual. RECOMMENDED NEW VEHICLE BREAK-IN PROCEDURE: During the first 1,200 miles (2,000 km) of vehicle - 2009 Nissan Armada | Owner's Manual - Page 481
Printing : July 2010 (15) Publication No.: OM1E TA60U0 Printed in U.S.A. '11 TA60-D
-
 1
1 -
 2
2 -
 3
3 -
 4
4 -
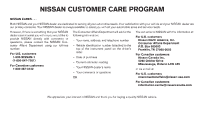 5
5 -
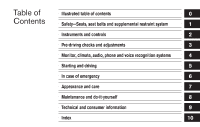 6
6 -
 7
7 -
8
-
9
-
10
-
11
-
12
-
13
-
14
-
15
-
16
-
17
-
18
-
19
-
20
-
21
-
22
-
23
-
24
-
25
-
26
-
27
-
28
-
29
-
30
-
31
-
32
-
33
-
34
-
35
-
36
-
37
-
38
-
39
-
40
-
41
-
42
-
43
-
44
-
45
-
46
-
47
-
48
-
49
-
50
-
51
-
52
-
53
-
54
-
55
-
56
-
57
-
58
-
59
-
60
-
61
-
62
-
63
-
64
-
65
-
66
-
67
-
68
-
69
-
70
-
71
-
72
-
73
-
74
-
75
-
76
-
77
-
78
-
79
-
80
-
81
-
82
-
83
-
84
-
85
-
86
-
87
-
88
-
89
-
90
-
91
-
92
-
93
-
94
-
95
-
96
-
97
-
98
-
99
-
100
-
101
-
102
-
103
-
104
-
105
-
106
-
107
-
108
-
109
-
110
-
111
-
112
-
113
-
114
-
115
-
116
-
117
-
118
-
119
-
120
-
121
-
122
-
123
-
124
-
125
-
126
-
127
-
128
-
129
-
130
-
131
-
132
-
133
-
134
-
135
-
136
-
137
-
138
-
139
-
140
-
141
-
142
-
143
-
144
-
145
-
146
-
147
-
148
-
149
-
150
-
151
-
152
-
153
-
154
-
155
-
156
-
157
-
158
-
159
-
160
-
161
-
162
-
163
-
164
-
165
-
166
-
167
-
168
-
169
-
170
-
171
-
172
-
173
-
174
-
175
-
176
-
177
-
178
-
179
-
180
-
181
-
182
-
183
-
184
-
185
-
186
-
187
-
188
-
189
-
190
-
191
-
192
-
193
-
194
-
195
-
196
-
197
-
198
-
199
-
200
-
201
-
202
-
203
-
204
-
205
-
206
-
207
-
208
-
209
-
210
-
211
-
212
-
213
-
214
-
215
-
216
-
217
-
218
-
219
-
220
-
221
-
222
-
223
-
224
-
225
-
226
-
227
-
228
-
229
-
230
-
231
-
232
-
233
-
234
-
235
-
236
-
237
-
238
-
239
-
240
-
241
-
242
-
243
-
244
-
245
-
246
-
247
-
248
-
249
-
250
-
251
-
252
-
253
-
254
-
255
-
256
-
257
-
258
-
259
-
260
-
261
-
262
-
263
-
264
-
265
-
266
-
267
-
268
-
269
-
270
-
271
-
272
-
273
-
274
-
275
-
276
-
277
-
278
-
279
-
280
-
281
-
282
-
283
-
284
-
285
-
286
-
287
-
288
-
289
-
290
-
291
-
292
-
293
-
294
-
295
-
296
-
297
-
298
-
299
-
300
-
301
-
302
-
303
-
304
-
305
-
306
-
307
-
308
-
309
-
310
-
311
-
312
-
313
-
314
-
315
-
316
-
317
-
318
-
319
-
320
-
321
-
322
-
323
-
324
-
325
-
326
-
327
-
328
-
329
-
330
-
331
-
332
-
333
-
334
-
335
-
336
-
337
-
338
-
339
-
340
-
341
-
342
-
343
-
344
-
345
-
346
-
347
-
348
-
349
-
350
-
351
-
352
-
353
-
354
-
355
-
356
-
357
-
358
-
359
-
360
-
361
-
362
-
363
-
364
-
365
-
366
-
367
-
368
-
369
-
370
-
371
-
372
-
373
-
374
-
375
-
376
-
377
-
378
-
379
-
380
-
381
-
382
-
383
-
384
-
385
-
386
-
387
-
388
-
389
-
390
-
391
-
392
-
393
-
394
-
395
-
396
-
397
-
398
-
399
-
400
-
401
-
402
-
403
-
404
-
405
-
406
-
407
-
408
-
409
-
410
-
411
-
412
-
413
-
414
-
415
-
416
-
417
-
418
-
419
-
420
-
421
-
422
-
423
-
424
-
425
-
426
-
427
-
428
-
429
-
430
-
431
-
432
-
433
-
434
-
435
-
436
-
437
-
438
-
439
-
440
-
441
-
442
-
443
-
444
-
445
-
446
-
447
-
448
-
449
-
450
-
451
-
452
-
453
-
454
-
455
-
456
-
457
-
458
-
459
-
460
-
461
-
462
-
463
-
464
-
465
-
466
-
467
-
468
-
469
-
470
-
471
-
472
-
473
-
474
-
475
-
476
-
477
-
478
-
479
-
480
-
481
 |
 |

2011
ARMADA
OWNER’S
MANUAL
For your safety, read carefully and keep in this vehicle.