2009 Suzuki XL7 Owner's Manual
2009 Suzuki XL7 Manual
2009 Suzuki XL7 manual content summary:
- 2009 Suzuki XL7 | Owner's Manual - Page 1
2007 OWNER'S MANUAL Keep With Vehicle At All Times. Contains Important Information On Safety, Operation & Maintenance. Part No. 99011-78J00-03E September, 2006 - 2009 Suzuki XL7 | Owner's Manual - Page 2
Prepared by September, 2006 Part No. 99011-78J00-03E Printed in U.S.A. TP270 - 2009 Suzuki XL7 | Owner's Manual - Page 3
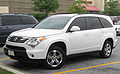
This owner's manual applies to the XL7 series: NOTE: The illustrated model is one of the XL7 series. © COPYRIGHT SUZUKI MOTOR CORPORATION 2006 - 2009 Suzuki XL7 | Owner's Manual - Page 4
to our growing family. Your choice was a wise one; SUZUKI products are a great value that will give you years of driving pleasure. This Owner's Manual was prepared to help you have a safe, enjoyable, and trouble-free experience with your SUZUKI. In it you will learn about the vehicle's operation - 2009 Suzuki XL7 | Owner's Manual - Page 5
SERVICE STATION GUIDE 1. 2. 3. 4. 5. 6. 7. 8. 9. Fuel (see section 5) Engine hood (see section 5) Tire changing tools (see section 5) Engine oil dipstick (see section 5) Engine coolant (see section 5) Windshield washer fluid (see section 5) Battery (see section 5) Tire pressure (see tire - 2009 Suzuki XL7 | Owner's Manual - Page 6
Proposition 65 Warning SEATS AND RESTRAINT SYSTEMS FEATURES AND CONTENTS INSTRUMENT PANEL DRIVING YOUR VEHICLE SERVICE AND APPEARANCE CARE MAINTENANCE SCHEDULE GENERAL INFORMATION INDEX 1 2 3 4 5 6 7 8 WARNING Engine exhaust, some of its constituents, and certain product components contain or - 2009 Suzuki XL7 | Owner's Manual - Page 7
difficult to read, have it corrected by your SUZUKI dealer. 1. Airbag warning labels (on both sunvisors) 2. Jacking warning label 3. Brake fluid cap message 4. Surge tank cap message 5. Dynamo meter warning label 6. Air conditioner warning label 7. Battery label 8. Air bag warning tag 9. Side air - 2009 Suzuki XL7 | Owner's Manual - Page 8
to make the same or similar changes to vehicles previously built or sold. IF YOU HAVE ANY PROBLEMS WITH YOUR SUZUKI: Please review the New Vehicle Warranty Information booklet supplied with your SUZUKI. Should you have a question or problem regarding the warranty or service of your vehicle, please - 2009 Suzuki XL7 | Owner's Manual - Page 9
IMPORTANT WARNING/CAUTION/NOTE Please read this manual and follow its instructions carefully. To emphasize special information, the symbol 's ignition system, resulting in vehicle performance problems. Consult your SUZUKI dealer or qualified service technician for advice on installing such mobile - 2009 Suzuki XL7 | Owner's Manual - Page 10
Features and Controls in Section 2 • Instrument Panel Overview in Section 3 • Climate Controls in Section 3 • Warning Lights, gauges and Indicators in Section 3 • Audio System(s) in Section 3 • Engine Compartment Overview in Section 5 These are some examples of vehicle symbols you may find on your - 2009 Suzuki XL7 | Owner's Manual - Page 11
0-4 - 2009 Suzuki XL7 | Owner's Manual - Page 12
SEATS AND RESTRAINT SYSTEMS SEATS AND RESTRAINT SYSTEMS Front Seats ...1-1 Rear Seats ...1-6 Safety Belts ...1-9 Child Restraints ...1-18 Airbag System ...1-33 Restraint System Check ...1-42 1 - 2009 Suzuki XL7 | Owner's Manual - Page 13
the driver's seat only when the vehicle is not moving. Driver Seat Height Adjuster Power Seat 1618867 1407195 If your vehicle has a manual driver seat height adjuster, it is located on the outboard side of the seat near the front of the seat cushion. To raise the seat, move the lever upward - 2009 Suzuki XL7 | Owner's Manual - Page 14
on the front of the driver seat lower cushion on the inboard side. Turn the knob clockwise or counterclockwise to increase or decrease the lumbar support. If your vehicle has heated seats, the switches are located on the instrument panel near the climate controls. The ignition must be on for - 2009 Suzuki XL7 | Owner's Manual - Page 15
SEATS AND RESTRAINT SYSTEMS Driver's seat with manual recline and manual height adjuster shown Passenger seat with folding seatback option it will not be against your body. Instead, it will be in front of you. In a crash, you could go into it, receiving neck or other injuries. The lap belt cannot do - 2009 Suzuki XL7 | Owner's Manual - Page 16
To do this, press the button, located on the top of the seatback, and pull them out from the seatback. Store the head rest, front side facing up, in the compartment behind is at the same height as the top of the occupant's head. This position reduces the chance of a neck injury in a crash. 1-4 - 2009 Suzuki XL7 | Owner's Manual - Page 17
"Where Are the Airbags?" in this section and refer to "Loading Your Vehicle" in "Your Driving, the Road, and Your Vehicle" in the "Driving Your Vehicle" section. 1618866 1618864 3) Lift the recliner lever, located on the outboard side of the seat, up fully and fold the seatback forward until it - 2009 Suzuki XL7 | Owner's Manual - Page 18
located the child comfort guide, and the front seatbacks are Manual Reclining Seatbacks" in this section. WARNING If the seatback is not locked, it could move forward in a sudden stop or crash crash. The person wearing the belt could be seriously injured. After raising the rear seatback, always check - 2009 Suzuki XL7 | Owner's Manual - Page 19
do the following: 1) Lift and hold the lever located on top of the seatback. 2) Tilt the seatback crash. To fold and tumble the seat, do the following: 1) Make sure that there is nothing under, in front of, or on the seat. 1831564 3) Use the pullstrap to release the rear of the seat from the floor - 2009 Suzuki XL7 | Owner's Manual - Page 20
is folded, or folded and tumbled. This could cause injury in a sudden stop or crash. If the vehicle has a third row seat, the seatback(s) can be folded. Folding pull on the seatback to make sure it is locked. 2) Lift the lever, located on the top of the seatback on the outboard side of the seat and - 2009 Suzuki XL7 | Owner's Manual - Page 21
killed. In the same crash, you might not be, if you are buckled up. Always fasten your safety belt, and check that your passengers' belts are fastened properly too. Take the simplest vehicle. Suppose it is just a seat on wheels. WARNING It is extremely dangerous to ride in a cargo area, inside or - 2009 Suzuki XL7 | Owner's Manual - Page 22
bones take the forces. That is why safety belts make such good sense. Questions and Answers About Safety Belts Question: Will I be they work with safety belts - not instead of them. Every airbag system ever offered for sale has required the use of safety belts. Even if you are in a vehicle that has - 2009 Suzuki XL7 | Owner's Manual - Page 23
adjustment could reduce the effectiveness of the safety belt in a crash. Refer to "Shoulder Belt Height Adjustment" in this section. How to Wear Safety Belts Properly This part is only for people of adult size. Be aware that there are special things to know about safety belts and children. And - 2009 Suzuki XL7 | Owner's Manual - Page 24
You can be seriously hurt if your shoulder belt is too loose. In a crash, you would move forward too much, which could increase injury. The shoulder belt You can be seriously hurt if your lap belt is too loose. In a crash, you could slide under the lap belt and apply force at your abdomen. This - 2009 Suzuki XL7 | Owner's Manual - Page 25
injured if your belt is buckled in the wrong place like this. In a crash, the belt would go up over your abdomen. The belt forces would be properly, or ask your dealer to fix it. WARNING You can be seriously injured if you wear the shoulder belt under your arm. In a crash, your body would move - 2009 Suzuki XL7 | Owner's Manual - Page 26
vehicle. Shoulder Belt Height Adjustment Before you begin to drive, move the shoulder belt height adjuster to the height that is right for you. Adjust the height so that the the fetus will not be hurt in a crash. For pregnant women, as for anyone, the key to making safety belts effective is - 2009 Suzuki XL7 | Owner's Manual - Page 27
" in this section. The right front passenger's safety belt works the same rest on the stitching on the safety belt, near the guide loop. 1378723 1378907 Rear Seat Passengers It is very important for rear seat are hurt more often in crashes than those who are wearing safety belts. Rear passengers who - 2009 Suzuki XL7 | Owner's Manual - Page 28
the safety belt: 1) Remove the guide from its storage clip on the back of the seatback. Answer: The belt is over an armrest. WARNING You can be seriously injured if your belt goes over an armrest like this. The belt would be much too high. In a crash, you can slide under the - 2009 Suzuki XL7 | Owner's Manual - Page 29
belt edges together so that you can take them out of the guide. Slide the guide back onto its storage clip located on the seatback. WARNING A safety belt that is not properly worn may not provide the protection needed in a crash. The person wearing the belt could be seriously injured. The shoulder - 2009 Suzuki XL7 | Owner's Manual - Page 30
new parts for your safety belt system. Refer to "Replacing Restraint System Parts After a Crash" in this section. Child Restraints Older Children According to accident statistics, children are safer when properly restrained in the rear seating positions than in the front your dealer will instruction - 2009 Suzuki XL7 | Owner's Manual - Page 31
other children. Neither the distance traveled nor the age and size of the traveler changes the need, for everyone, to use safety restraints. In shoulder belt still is on the child's shoulder, so that in a crash the child's upper body would have the restraint that belts provide. 1379303 Wherever - 2009 Suzuki XL7 | Owner's Manual - Page 32
does not weigh much - until a crash. During a crash a baby will become so heavy it is not possible to hold it. For example, in a crash at only 25 mph (40 km/h), particular restraint should take into consideration not only the child's weight, height, and age but also whether or not the restraint will - 2009 Suzuki XL7 | Owner's Manual - Page 33
instructions that come with the restraint state the weight and height limitations support, including support crash forces can be distributed across the strongest part of an infant's body, the back and shoulders. Infants always should be secured in appropriate infant restraints. 1379317 An infant car - 2009 Suzuki XL7 | Owner's Manual - Page 34
seat (B) provides restraint with the seating surface against the back of the infant. The harness system holds the infant in place and, in a crash, acts to keep the infant positioned in the restraint. A forward-facing child seat (C-E) provides restraint for the child's body with the harness and - 2009 Suzuki XL7 | Owner's Manual - Page 35
in a crash if the child restraint is not properly secured in the vehicle. Make sure the child restraint is properly installed in the vehicle using the vehicle's safety belt or LATCH system, following the instructions that came with that restraint, and also the instructions in this manual. To help - 2009 Suzuki XL7 | Owner's Manual - Page 36
in accordance with the child restraint manufacturers instructions, secure it in the second row. If you need to secure more than one child restraint in the rear seat, review the following illustrations. NOTE: Depending on where you place the child restraint or the size of the child restraint, you may - 2009 Suzuki XL7 | Owner's Manual - Page 37
SEATS AND RESTRAINT SYSTEMS Configurations for Use of Three Child Restraints 1507697 1507698 A. Occupant prohibited B. Child restraint using LATCH A. Child restraint using LATCH B. No occupant recommended C. Child restraint or occupant using safety belt 1507710 A. Child restraint or occupant - 2009 Suzuki XL7 | Owner's Manual - Page 38
to secure the restraint, following the instructions that came with that restraint, and also the instructions in this manual. When installing a child restraint with (LATCH) The LATCH system holds a child restraint during driving or in a crash. This system is designed to make installation of a child - 2009 Suzuki XL7 | Owner's Manual - Page 39
anchor located on the same side of the vehicle as the seating position where the child restraint will be placed. Do not secure a child restraint in the right front passenger's position or the third row, if a national or local law requires that the top tether be attached, or if the instructions that - 2009 Suzuki XL7 | Owner's Manual - Page 40
not be able to protect the child correctly. In a crash, the child could be seriously injured or killed. Make instructions that came with that restraint, and also the instructions in this manual. attach the child restraint at the proper anchor location. This system is designed to make installation of - 2009 Suzuki XL7 | Owner's Manual - Page 41
restraint manufacturer instructions and the instructions in this manual. 1. instructions will show you how. Securing a Child Restraint in a Rear Seat Position There is limited instructions that came with your child restraint to see if there is enough room to secure your seat properly. If the length - 2009 Suzuki XL7 | Owner's Manual - Page 42
, and the position that you are using has a top tether anchor, attach and tighten the top tether to the top tether anchor. Refer to the instructions that came with the child restraint and to "Lower Anchors and Tethers for Children (LATCH)" in this section. 7) Push and pull the child restraint in - 2009 Suzuki XL7 | Owner's Manual - Page 43
in this section and "Passenger Airbag Status Indicator" in "Warning Lights, Gages, and Indicators" in the "Instrument Panel" section for . If you need to secure a forward-facing child restraint in the right front seat, always move the front passenger seat as far back as it will go. It is better to - 2009 Suzuki XL7 | Owner's Manual - Page 44
when and as the instructions say. 1) Your vehicle has a right front passenger's frontal airbag. Manual Seats" in this section. When the passenger sensing system has turned off the right front passenger's frontal airbag, the off indicator in the passenger airbag status indicator should light - 2009 Suzuki XL7 | Owner's Manual - Page 45
restraint in a rear seat position in the vehicle if one is available and check with your dealer. To remove the child restraint, if the top tether is attached to passenger seated directly behind the driver and for the right front passenger and the passenger seated directly behind that passenger. For - 2009 Suzuki XL7 | Owner's Manual - Page 46
replace them. Frontal airbags for the driver and right front passenger are designed to deploy in moderate to severe frontal and near frontal crashes. They are not designed to inflate in rollover, rear crashes, or in many side crashes. And, for some unrestrained occupants, frontal airbags may provide - 2009 Suzuki XL7 | Owner's Manual - Page 47
you if there is an electrical problem. Refer to "Airbag Readiness Light" in "Warning Lights, Gages, and Indicators" in the "Instrument Panel" section for more information. 1177656 The driver's airbag is in the middle of the steering wheel. 809967 The right front passenger's airbag is in the - 2009 Suzuki XL7 | Owner's Manual - Page 48
for the driver and the person seated directly behind the driver is located in the ceiling above the side windows. The roof-mounted rollover airbag for the right front passenger and the person directly behind that passenger is located in the ceiling above the side windows. If your vehicle has - 2009 Suzuki XL7 | Owner's Manual - Page 49
and an airbag, and do not attach or put anything on the steering wheel hub or on or near any other airbag covering. And, if your could inflate at a different crash speed than if the vehicle goes straight into the object. The frontal airbags (driver and right front passenger) are not intended to - 2009 Suzuki XL7 | Owner's Manual - Page 50
, and related hardware are all part of the airbag modules inside the steering wheel and in the instrument panel in front of the right front passenger. For vehicles with roofmounted rollover airbags, the airbag modules are located in the ceiling of the vehicle, near the side windows. If your vehicle - 2009 Suzuki XL7 | Owner's Manual - Page 51
system will not be there to help protect you in another crash. A new system will include airbag modules and possibly other parts. The service manual for your vehicle covers the need to replace other parts. • Your vehicle has a crash sensing and diagnostic module which records information after - 2009 Suzuki XL7 | Owner's Manual - Page 52
front passenger takes his/her weight off of the seat for a period of time. • The right front passenger problem with the airbag system or the passenger sensing system. When the right front passenger's frontal airbag has been turned off by the passenger sensing system, the off indicator will light - 2009 Suzuki XL7 | Owner's Manual - Page 53
system. If this ever happens, have the vehicle serviced promptly, because an adult-size person sitting in the right front passenger's seat may not have the protection of the frontal airbag. Refer to "Airbag Readiness Light" in "Warning Lights, Gages, and Indicators" in the "Instrument Panel" section - 2009 Suzuki XL7 | Owner's Manual - Page 54
If you add things that change your vehicle's frame, bumper system, height, front end or side sheet Service and Appearance Care" section for more information. Torn or frayed safety belts may not protect you in a crash. They can rip apart under impact forces. If a belt is torn or frayed, get a new - 2009 Suzuki XL7 | Owner's Manual - Page 55
passenger's safety belt retractor assembly. Be sure to do so. Then the new retractor assembly will be there to help protect you in a collision. After a crash you may need to replace the driver and front passenger's safety belt retractor assemblies, even if the frontal airbags have not deployed. The - 2009 Suzuki XL7 | Owner's Manual - Page 56
FEATURES AND CONTROLS FEATURES AND CONTROLS Keys ...2-1 Doors and Locks ...2-5 Windows ...2-8 Theft-Deterrent Systems ...2-9 Daily Inspection Checklist ...2-11 Starting and Operating Your Vehicle ...2-12 Mirrors ...2-20 Storage Areas ...2-21 Sunroof ...2-24 2 - 2009 Suzuki XL7 | Owner's Manual - Page 57
Check to determine if battery replacement or resynchronization is necessary. Refer to "Battery Replacement" and "Resynchronization" under "Remote Keyless Entry (RKE) System Operation" in this section. • If you are still having trouble, see your dealer or a qualified technician for service Canada. - 2009 Suzuki XL7 | Owner's Manual - Page 58
unlock button to unlock the driver's door. If the button is pressed again within five seconds, all remaining doors, and the liftgate, will unlock. The interior lamps will come on and stay on for 20 seconds or until the ignition is turned on. If enabled through the DIC, the parking lamps - 2009 Suzuki XL7 | Owner's Manual - Page 59
Panel" section for instructions on how to match RKE transmitters to your vehicle. Battery Replacement Under normal use, the battery in your RKE transmitter should last about four years. The battery is weak if the transmitter will not work at the normal range in any location. If you have to - 2009 Suzuki XL7 | Owner's Manual - Page 60
in view when doing so. Check local regulations for any requirements on fuel, do not use the remote start feature. The vehicle may run out of fuel. To start the engine seconds, if the vehicle's lights are not visible. The vehicle position to drive the vehicle. To manually shut off the engine after a - 2009 Suzuki XL7 | Owner's Manual - Page 61
. • The engine coolant temperature is too high. • The oil pressure is low manually lock or unlock your vehicle. From the outside, use the key in the driver's door. From the inside, use the lock control on the door. Power Door Locks The power door lock switches are located on the driver's and front - 2009 Suzuki XL7 | Owner's Manual - Page 62
section for more information on DIC programming. The rear door security locks are located on the inside edge of each rear door. You must open the using the remote keyless entry transmitter, the front door power lock switch, or by lifting the rear door manual lock. 2) Open the door from the outside - 2009 Suzuki XL7 | Owner's Manual - Page 63
. Liftgate Operation with Loss of Power The liftgate is equipped with an electric latch. If the battery is disconnected or has low voltage, the liftgate will not open. 1799191 Use a tool to push the service release lever located on the latch until you hear or feel the gate release. The liftgate - 2009 Suzuki XL7 | Owner's Manual - Page 64
. When there are children in the rear seat use the window lockout button to prevent unintentional operation of the windows. 1235612 The window switches are located on each side of the shift lever on the center console. To lower a window, press the switch down. To raise a window, pull the switch up - 2009 Suzuki XL7 | Owner's Manual - Page 65
FEATURES AND CONTROLS will go all the way down. To stop the window from lowering, lift the switch all the way up and release it. Window Lockout The driver's window switches also include a lockout switch. Press the left side of the switch to prevent rear passengers from using their window switches. - 2009 Suzuki XL7 | Owner's Manual - Page 66
Breakers" in "Electrical System" in the "Service and Appearance Care" section. If the engine still does not start with the other key, your vehicle needs service. If your vehicle does start, the first key may be faulty. See your dealer who can service the PASS-Key® III+ to have a new key made. In - 2009 Suzuki XL7 | Owner's Manual - Page 67
to the "ON" or "START" position. 12)Check all gauges. 13)Make sure that the BRAKE light turns off when the parking brake is released. Once a week, or each time you fill your fuel tank, perform the following under-hood checks: 1) 2) 3) 4) 5) 6) Engine oil level Coolant level Brake fluid level Power - 2009 Suzuki XL7 | Owner's Manual - Page 68
get new brake linings. • Do not tow a trailer during break-in. Refer to "Towing a Trailer" in "Towing" in the "Driving Your engine is running. But even when the engine is not running, you can use RUN to operate your electrical accessories and to display some warning and indicator lights. The battery - 2009 Suzuki XL7 | Owner's Manual - Page 69
and transaxle. Also, always remember to lock the doors. The battery could be drained if you leave the key in the ignition engine. Do not race the engine immediately after starting it. Operate the engine and transaxle gently until Retained Accessory Power (RAP) The vehicle has Retained Accessory - 2009 Suzuki XL7 | Owner's Manual - Page 70
to work with the electronics in your vehicle. If you add electrical parts or accessories, you could change the way the engine operates. Before adding electrical equipment, check with your dealer. If you do not, your engine might not perform properly. Any resulting damage would not be covered - 2009 Suzuki XL7 | Owner's Manual - Page 71
Driving, the Road, and Your Vehicle" in the "Driving Your Vehicle" section. NEUTRAL (N): In this position, the engine does not connect with the wheels. engine is not running at high speeds when shifting your vehicle. DRIVE (D): This position is for normal driving. It provides the best fuel economy - 2009 Suzuki XL7 | Owner's Manual - Page 72
(M): This position, available on the models with the Manual Shift Mode (MSM), allows you to change gears similar to a manual transaxle. If your vehicle has this feature, see "Manual Shift Mode (MSM)". To use this feature, do the following: 1) Move the shift lever from DRIVE (D) to the left into the - 2009 Suzuki XL7 | Owner's Manual - Page 73
light is off before driving. CAUTION If you attempt a third gear start while trailering or towing a heavy load, you will notice reduced engine the vehicle is moving select the desired drive gear. Shifting Into Park (P) WARNING 1722713 The parking brake lever is located to the right of the driver's - 2009 Suzuki XL7 | Owner's Manual - Page 74
to the desired drive gear. 5) Have your vehicle fixed as soon as you can. WARNING It can be dangerous to leave your vehicle with the engine running. Your and you do not shift your transaxle into PARK (P) properly, the weight of the vehicle may put too much Parking Over Things That Burn Shifting - 2009 Suzuki XL7 | Owner's Manual - Page 75
setting. One place this can happen is a garage. Exhaust - with CO - can come in easily. NEVER park in a garage with the engine running. Another closed-in place can be a blizzard. Refer to "Winter Driving" in "Your Driving, the Road, and Your Vehicle" in the "Driving Your Vehicle" section. 2-19 - 2009 Suzuki XL7 | Owner's Manual - Page 76
Manual Rearview Mirror To adjust the angle of the mirror, move the mirror to a position that allows you see to out of the back window. To adjust the height of the mirror, adjust the arm that connects the mirror to the windshield. To reduce glare from lights by driving the your current location and - 2009 Suzuki XL7 | Owner's Manual - Page 77
display, and the new zone number will located in a removable tray. To remove the tray, press the tab located at the front Check your inside mirror or glance over your shoulder before changing lanes. Sunglasses Storage Compartment 1262035 Your vehicle may have a sunglasses storage compartment located - 2009 Suzuki XL7 | Owner's Manual - Page 78
storage area. Use the top lever on the front of the console to open it. There is and so forth - the wind can catch it as you drive along. This can cause you to lose control. What you Handles There are assist handles with garment hooks located above the rear passenger doors. 1768137 Press the - 2009 Suzuki XL7 | Owner's Manual - Page 79
loading your vehicle. For more information on vehicle capacity and loading, refer to "Loading Your Vehicle" in "Your Driving, the Road, and Your Vehicle" in the "Driving Your Vehicle" section. To prevent damage or loss of cargo as you are driving, check now and then to make sure the luggage carrier - 2009 Suzuki XL7 | Owner's Manual - Page 80
If your vehicle has this feature, the sunroof switch is located on the headliner above the rearview mirror. The ignition must be in RUN or ACC, or Retained Accessory Power (RAP) must be active, to operate the sunroof. Refer to "Retained Accessory Power (RAP)" in this section for more information - 2009 Suzuki XL7 | Owner's Manual - Page 81
FEATURES AND CONTROLS MEMO 2-25 - 2009 Suzuki XL7 | Owner's Manual - Page 82
INSTRUMENT PANEL INSTRUMENT PANEL Instrument Panel Overview ...3-1 Climate Controls ...3-10 Warning Lights, Gages, and Indicators ...3-15 Driver Information Center (DIC) ...3-27 Audio System(s) ...3-39 3 - 2009 Suzuki XL7 | Owner's Manual - Page 83
INSTRUMENT PANEL Instrument Panel Overview 1732990 3-1 - 2009 Suzuki XL7 | Owner's Manual - Page 84
to "Instrument Panel Brightness" in this section. L. Hood Release. Refer to "Hood Release" in "Checking Things Under M. N. O. the Hood" in the "Service and Appearance Care" section. Tilt Wheel Lever. Refer to "Tilt Wheel" in this section. Horn. Refer to "Horn" in this section. Climate Controls (If - 2009 Suzuki XL7 | Owner's Manual - Page 85
problem. The front and rear turn signal lamps will flash on and off. Tilt Wheel Your vehicle has a tilt wheel that allows you to adjust the steering wheel. Turn Signal/Multifunction Lever 1223926 The hazard warning flasher button is located Lane-Change Signals. Refer to "Turn and Lane-Change - 2009 Suzuki XL7 | Owner's Manual - Page 86
of the turn or lane change. To signal a lane change, raise or lower the lever until the arrow check the fuse, refer to "Fuses and Circuit Breakers" in "Electrical System" in the "Service and Appearance Care" section and for burnedout bulbs. 1799557 When the high beams are on, this light - 2009 Suzuki XL7 | Owner's Manual - Page 87
buttons are located in the Checking Things Under the Hood" in the "Service drive safely at a steady speed. So, do not use your cruise control on winding roads or in heavy traffic. Cruise control can be dangerous on slippery roads. On such roads, fast changes in tire traction can cause excessive wheel - 2009 Suzuki XL7 | Owner's Manual - Page 88
and the Traction Control System (TCS) begins to limit wheel spin, the cruise control will automatically disengage. Refer to "Traction Control System (TCS)" in "Your Driving, the Road, and Your Vehicle" in the "Driving Your Vehicle" section. When road conditions allow, the cruise control can be used - 2009 Suzuki XL7 | Owner's Manual - Page 89
trouble and do not use cruise control on steep hills. Ending Cruise Control There are three ways to end cruise control: • Step lightly on the brake pedal. • Press the cancel button on the steering wheel front of your vehicle during the day. DRL can be helpful in many different driving The engine is - 2009 Suzuki XL7 | Owner's Manual - Page 90
better visibility in foggy or misty conditions. Instrument Panel Brightness This feature controls the brightness of the instrument panel lights. 1788862 808603 The button for your fog lamps is located on the center console; to the right of the rear wipe and rear wash switches and above the shift - 2009 Suzuki XL7 | Owner's Manual - Page 91
Lamp" in this section. loads, and loads plugged into accessory power outlets. EPM works to prevent excessive discharge of the battery. It does this by balancing the generator's output and the vehicle's electrical needs. It can increase engine idle speed to generate more power, whenever needed. It - 2009 Suzuki XL7 | Owner's Manual - Page 92
. Do not use equipment exceeding maximum amperage rating of 20 amperes. Check with your dealer before adding electrical equipment. When adding electrical equipment, be sure to follow the installation instructions included with the equipment. Climate Controls Automatic Climate Control System With - 2009 Suzuki XL7 | Owner's Manual - Page 93
floor, but can change modes automatically as the vehicle warms up to maintain the chosen temperature setting. The length of time needed to warm the interior interior air to cool the car faster. The indicator light on the recirculation button lights back to AUTO operation. Manual Operation (Fan): Turn - 2009 Suzuki XL7 | Owner's Manual - Page 94
idling or after turning off the engine. This is normal. (Heated fog or frost from the windshield more quickly. When either of these modes or the floor mode is selected, the system runs the air conditioning compressor and cancels recirculation mode to dry the air; however, the recirculation light - 2009 Suzuki XL7 | Owner's Manual - Page 95
light engine. Outlet Adjustment Use the louvers located on the air outlets to change SUZUKI approved hood deflectors that could adversely affect the performance of the system. • Keep the path under the front located on the rear of the center floor console. The system can be controlled from the front - 2009 Suzuki XL7 | Owner's Manual - Page 96
floor outlets, as well as the headliner outlets. The rear system floor outlets are located near third row seats. The flow can be divided between vent and floor the filter. To change the passenger compartment 7) Install a new passenger compartment air filter located in the rear of the engine com- 3-14 - 2009 Suzuki XL7 | Owner's Manual - Page 97
with your vehicle. When one of the warning lights comes on and stays on when you are driving, or when one of the gages shows there may be a problem, check the section that tells you what to do about it. Please follow this manual's advice. Waiting to do repairs can be costly and even dangerous - 2009 Suzuki XL7 | Owner's Manual - Page 98
. The system checks the airbag's electrical system for malfunctions. The light tells you if there is an electrical problem. The system check includes the airbag sensor, the airbag modules, the wiring and the crash sensing and diagnostic module. CAUTION If you operate the engine with the tachometer - 2009 Suzuki XL7 | Owner's Manual - Page 99
the symbol for on and off, for several seconds as a system check. Then, after several more seconds, the status indicator will light either ON or OFF, or either the on or off symbol to let you know the status of the right front passenger's frontal airbag. There is a label on your sun visor - 2009 Suzuki XL7 | Owner's Manual - Page 100
your dealer for service. WARNING If the off indicator and the airbag readiness light ever come on together, it means that something may be wrong with the airbag system. If this ever happens, have the vehicle serviced promptly, because an adult-size person sitting in the right front passenger seat - 2009 Suzuki XL7 | Owner's Manual - Page 101
Your Vehicle" section. 812700 Your vehicle has a battery warning light. If this light comes on while you are driving, be sure to turn off accessories such as the radio and climate control system. Have your vehicle serviced right away. The SERVICE BATTERY CHARGING SYSTEM message may also appear in - 2009 Suzuki XL7 | Owner's Manual - Page 102
it might not be covered by your warranty. Never drive with the engine coolant temperature warning light on. 1545635 Your vehicle has a traction control system warning light. This light will come on when your traction control system is limiting wheel spin. You may feel or hear the system working - 2009 Suzuki XL7 | Owner's Manual - Page 103
for the life of the vehicle, helping to produce a cleaner environment. The check engine light comes on to indicate that there is a problem and service is required. Malfunctions often will be indicated by the system before any problem is apparent. This may prevent more serious damage to your vehicle - 2009 Suzuki XL7 | Owner's Manual - Page 104
the electrical system dries out. A few driving trips should turn the light off. Have you recently changed brands of fuel? If so, be sure to fuel your vehicle with quality fuel. Refer to "Gasoline Octane" in "Fuel" in the "Service and Appearance Care" section. Poor fuel quality will cause your engine - 2009 Suzuki XL7 | Owner's Manual - Page 105
require at least one full tank of the proper fuel to turn the light off. If none of the above steps have made the light turn off, your dealer can check the vehicle. Your dealer has the proper test equipment and diagnostic tools to fix any mechanical or electrical problems that may have developed - 2009 Suzuki XL7 | Owner's Manual - Page 106
for more information. Reduced Engine Power Light Fog Lamp Light 806876 If this light comes on and stays on for 30 seconds, it means that service is required for your vehicle. After having the oil changed you will need to reset the light. Refer to "Engine Oil" in "Checking Things Under the Hood - 2009 Suzuki XL7 | Owner's Manual - Page 107
. Service All-Wheel Drive Light Door Ajar Light 1710820 This light is located in the center of your instrument panel cluster. This light and the SERVICE ALL WHEEL DRIVE message in the Driver Information Center (DIC) will come on and stay on to indicate that there may be a problem with the drive - 2009 Suzuki XL7 | Owner's Manual - Page 108
turn the ignition off. For your fuel tank capacity, refer to "Capacities and Specifications" in the "Service and Appearance Care" section. 1406936 This light is located below the fuel gage. This light also comes on when the fuel tank is low on fuel. When you add fuel the light should go off. If it - 2009 Suzuki XL7 | Owner's Manual - Page 109
the outside air temperature when viewing the trip and fuel information. If there is a problem with the system that controls the temperature display, the numbers will be replaced with dashes. If this occurs, have the vehicle serviced by your dealer. If an abnormal temperature reading is displayed for - 2009 Suzuki XL7 | Owner's Manual - Page 110
ECONOMY Press the trip/fuel button until AVG ECONOMY displays. This display shows the approximate average miles per gallon (mpg) fuel economy over recent driving history and the amount of fuel remaining in the fuel tank. This estimate will change if driving conditions change. For example, if driving - 2009 Suzuki XL7 | Owner's Manual - Page 111
change your oil as soon as possible. Refer to "Engine Oil" in "Checking Things Under the Hood" in the "Service and Appearance Care" section. In addition to the engine oil life system monitoring the oil life, additional maintenance is recommended in the Maintenance Schedule in this manual. Refer - 2009 Suzuki XL7 | Owner's Manual - Page 112
the message stays on, see your dealer right away. Refer to "All-Wheel Drive (AWD) System" in "Your Driving, the Road, and Your Vehicle" in the "Driving Your Vehicle" section and "AllWheel Drive Disabled Light" in this section for more information. BATTERY SAVER ACTIVE This message displays when the - 2009 Suzuki XL7 | Owner's Manual - Page 113
reminder to the Safety Belt Reminder Light in the instrument panel cluster. Refer to "Safety Belt Reminder Light" in this section. CHANGE ENGINE OIL SOON This message displays when service is required for the vehicle. See your dealer. Refer to "Engine Oil" in "Checking Things Under the Hood" in the - 2009 Suzuki XL7 | Owner's Manual - Page 114
cluster. Refer to "Oil Pressure Light" in this section. Stop the vehicle immediately, as engine damage can result from driving a vehicle with low oil pressure. Have the vehicle serviced by your dealer as soon as possible when this message is displayed. PASSENGER DOOR FRONT/REAR OPEN This message - 2009 Suzuki XL7 | Owner's Manual - Page 115
the generator and battery charging systems. Driving with this problem could drain the vehicle's battery. Turn off all unnecessary accessories. Stop and turn off the vehicle as soon as it is safe to do so. Have the electrical system checked by your dealer immediately. Connecting a battery charger to - 2009 Suzuki XL7 | Owner's Manual - Page 116
in "Your Driving, the Road, and Your Vehicle" in the "Driving Your Vehicle" section for more information. • The battery is low. • There is an ESC system failure. See your dealer for service. STARTING DISABLD (Disabled) SERVICE THRTTLE (Throttle) This message displays if the starting of the engine is - 2009 Suzuki XL7 | Owner's Manual - Page 117
button. Refer to "Traction Control System (TCS)" in "Your Driving, the Road, and Your Vehicle" in the "Driving Your Vehicle" section for more information. • The battery is low. • There is a TCS failure. See your dealer for service. TRACTION CONTROL ON This message displays when the Traction Control - 2009 Suzuki XL7 | Owner's Manual - Page 118
doors will unlock when the vehicle is shifted into PARK (P). • NO CHANGE: No change will be made to this feature. The current setting will remain. Choose no feedback when you press the lock button on the RKE transmitter. • LIGHTS ONLY: The exterior lamps will flash when you press the lock button on - 2009 Suzuki XL7 | Owner's Manual - Page 119
exterior lamps will not flash when you press the unlock button on the RKE transmitter. • LIGHTS ON (default): The exterior lamps will flash when you press the unlock button on the RKE transmitter. • NO CHANGE: No change will be made to this feature. The current setting will remain. Choose one of the - 2009 Suzuki XL7 | Owner's Manual - Page 120
lights will remain on for 20 seconds or until the lock button on the RKE transmitter is pressed, or the vehicle is no longer off. Refer to "Remote Keyless Entry (RKE) System Operation" in "Keys" in the "Features and Controls" section for more information. • NO CHANGE: No change the engine from - 2009 Suzuki XL7 | Owner's Manual - Page 121
familiarize yourself with its features. Driving without distraction is a necessity for a safer driving experience. Refer to "Defensive Driving" in "Your Driving, the Road, and Your Vehicle" in the "Driving Your Vehicle" section. By taking a few moments to read this manual and get familiar with your - 2009 Suzuki XL7 | Owner's Manual - Page 122
is turned off. Refer to "Retained Accessory Power (RAP)" in "Starting and , you can also press the SEEK, FWD (forward), or REV (reverse) buttons change the date default setting from month/day/year to day/ month/year, follow these instructions: 1) Press the clock button and then the pushbutton located - 2009 Suzuki XL7 | Owner's Manual - Page 123
the setting. You can also adjust the setting by pressing either the SEEK, FWD (forward), or REV (reverse) buttons. The display shows the current bass or previous volume setting whenever the radio is turned on. You can still manually adjust the volume by using the volume knob. Finding a Station BAND: - 2009 Suzuki XL7 | Owner's Manual - Page 124
FWD, dealer for service. Loc (Locked): new track starts to play, the track number appears on the display. The CD player can play the smaller 3 inch (8 cm) single CDs with an adapter ring. Full-size ejecting. If these problems occur, check the bottom surface only CDs in good condition without any - 2009 Suzuki XL7 | Owner's Manual - Page 125
FWD CHECK driving on a very rough road. When the road becomes dealer when reporting the problem. Using the Auxiliary Input Jack Your radio system has an auxiliary input jack located on the lower right side of the faceplate. This is not an audio output; do not plug the headphone set into the front - 2009 Suzuki XL7 | Owner's Manual - Page 126
1546891 XMTM Satellite Radio Service XMTM is a satellite radio service that is based in the 48 contiguous United States and Canada. XMTM offers a large for road and wind noise as you speed up or slow down while driving. That way, the volume level should sound about the same as you drive. To - 2009 Suzuki XL7 | Owner's Manual - Page 127
steering wheel controls (if equipped). Refer to "Defensive Driving" in "Your Driving, the Road, and Your Vehicle" in the "Driving Your Vehicle Press the pushbutton located below the FAV 1-6 label. 3) Select the desired number of favorites pages by pressing the pushbutton located below the displayed - 2009 Suzuki XL7 | Owner's Manual - Page 128
adjust the highlighted setting by pressing either the SEEK, FWD (forward), or REV (reverse) button until the to the manual mode, press the EQ button until Manual displays or start to manually adjust the bass setup menu. 2) Press the pushbutton located below the XM CAT label. 3) Turn the tune - 2009 Suzuki XL7 | Owner's Manual - Page 129
dealer for service. If any error occurs repeatedly or if an error cannot be corrected, contact your dealer new track starts to play, the track number appears on the display. The CD player can play the smaller 3 inch (8 cm) single CDs with an adapter ring. Full-size problems occur, check good - 2009 Suzuki XL7 | Owner's Manual - Page 130
FWD CHECK DISC driving on a very rough road. When the road dealer when reporting the problem. Using the Auxiliary Input Jack Your radio system has an auxiliary input jack located on the lower right side of the faceplate. This is not an audio output; do not plug the headphone set into the front - 2009 Suzuki XL7 | Owner's Manual - Page 131
player, connect a 3.5 mm (1/8 inch) cable to the radio's front auxiliary input jack. When a device is connected, press the radio radio station. XMTM Satellite Radio Service XMTM is a satellite radio service that is based in the 48 contiguous United States and Canada. XMTM offers a large variety of - 2009 Suzuki XL7 | Owner's Manual - Page 132
to compensate for road and wind noise as driving speed changes. That way, the volume level should sound about the same as you drive. To activate SCV steering wheel controls, if the vehicle has them. Refer to "Defensive Driving" in "Your Driving, the Road, and Your Vehicle" in the "Driving Your - 2009 Suzuki XL7 | Owner's Manual - Page 133
located below the FAV 1-6 label. 3) Select the desired number of favorites pages by pressing the pushbutton located and classical. Selecting MANUAL or changing bass or treble, returns the EQ to the manual bass and treble adjusted by pressing either the SEEK, FWD (forward), or REV (reverse) button - 2009 Suzuki XL7 | Owner's Manual - Page 134
the FWD located below the XM dealer for service. If any error occurs repeatedly or if an error cannot be corrected, contact your dealer new track starts to play, the track number appears on the display. The CD player can play the smaller 3 inch (8 cm) single CDs with an adapter ring. Full-size - 2009 Suzuki XL7 | Owner's Manual - Page 135
and/or difficulty in loading and ejecting. If these problems occur, check the bottom surface of the CD. If the track. The elapsed time of the track displays. FWD (Fast Forward): Press and hold this button to While using the CD player, use only CDs in good condition without any label, load one CD at a - 2009 Suzuki XL7 | Owner's Manual - Page 136
CD slot, XMTM, FM/AM, Front Auxiliary Jack, or Rear Auxiliary problems. • It is very hot. When the temperature returns to normal, the CD should play. • You are driving on a very rough road. When the road good CD. If any error occurs repeatedly or if an error cannot be corrected, contact your dealer - 2009 Suzuki XL7 | Owner's Manual - Page 137
options, such as: DVD slot, CD slot, Front Auxiliary, and Rear Auxiliary (if available). Refer this knob to change tracks on a CD or DVD, to manually tune a radio station, or to change clock or date is playing the copyright information or the previews. FWD (Fast Forward): Press this button to fast - 2009 Suzuki XL7 | Owner's Manual - Page 138
the pushbutton located under the play/pause symbol tag displayed on the radio. If the DVD still does not play, refer to the on-screen instructions, if on when the DVDA is inserted into the DVD slot. It must be manually turned on by the rear seat occupant through the remote control power button. - 2009 Suzuki XL7 | Owner's Manual - Page 139
audio stream changing. Inserting pushbutton located under eject problems. Driving" in "Your Driving, the Road, and Your Vehicle" in the "Driving Your Vehicle" section for more information on driver distraction. To use a portable audio player, connect a 1/8 inch (3.5 mm) cable to the radio's front - 2009 Suzuki XL7 | Owner's Manual - Page 140
slot, CD slot, Front Auxiliary, and Rear Auxiliary it easy to find songs while driving. Organize songs by albums using subfolders. The system can support up to eight subfolders deep confusion in trying to locate a particular folder during playlists or sessions, minimize the length of the file, folder, - 2009 Suzuki XL7 | Owner's Manual - Page 141
change and compressed audio files, but no folders, all files are located under the root folder. The folder down and the folder new track starts to play, the track number and song title appears on the display. The CD player can play the smaller 3 inch (8 cm) single CD-Rs with an adapter ring. Full-size - 2009 Suzuki XL7 | Owner's Manual - Page 142
in loading and ejecting. If these problems occur, check the bottom surface of the CD of the file appears on the display. FWD (Fast Forward): Press and hold this or album. Press the pushbutton located below the music navigator label. player, use only CDs in good condition without any label, load one - 2009 Suzuki XL7 | Owner's Manual - Page 143
change from playback by artist to playback by album, press the pushbutton located makes it easy to find songs while driving. Organize songs by albums using one Avoid subfolders. The system can support up to eight subfolders deep, may not work. • Minimize the length of the file, folder or playlist - 2009 Suzuki XL7 | Owner's Manual - Page 144
length of only playlists and compressed audio files, but no folders, all files are located under the root folder. The folder down and the folder up buttons new folder, the display does not automatically show the new folder name unless the folder mode was chosen as the default display. The new track - 2009 Suzuki XL7 | Owner's Manual - Page 145
new track starts to play, the track number and song title displays. The CD player can play the smaller 3 inch (8 cm) single CD-Rs with an adapter ring. Full-size . If these problems occur, check the bottom surface the file displays. FWD (Fast Forward): Press only CDs in good condition without any - 2009 Suzuki XL7 | Owner's Manual - Page 146
desired artist is displayed. To change from playback by artist to playback by album, press the pushbutton located below the Sort By label. button cycles through all available options, such as: DVD slot, CD slot, Front Auxiliary, and Rear Auxiliary (if available). Refer to "Using the Auxiliary Input - 2009 Suzuki XL7 | Owner's Manual - Page 147
30 seconds. The system is functioning correctly, but the vehicle is in a location that is blocking the XMTM signal. When you move into an open area, XM Acquiring channel audio (after four second delay) Channel not in service Channel no longer available Channel Off Air Channel Unavail No Artist - 2009 Suzuki XL7 | Owner's Manual - Page 148
in another vehicle. For security purposes, XMTM receivers cannot be swapped between vehicles. If this message appears after having your vehicle serviced, check with your dealer. If tuned to channel 0, this message alternates with the XMTM Radio eight digit radio ID label. This label is needed to - 2009 Suzuki XL7 | Owner's Manual - Page 149
system, including tips on helping to reduce distractions while driving, see the Navigation System Manual. system is above -4°F (-20°C) or below system works with the vehicle's audio system. The DVD player is part of the front radio. The RSE system includes a radio with a DVD player, a video display - 2009 Suzuki XL7 | Owner's Manual - Page 150
remote control becomes lost or damaged, a new universal remote control can be purchased. If battery compartment. 3) Replace the battery door and tighten the door screw. 1676611 The A/V jacks are located on the rear of the floor 's instructions for proper usage. The A/V jacks are color coded - 2009 Suzuki XL7 | Owner's Manual - Page 151
connect an external auxiliary device to the color-coded A/V jacks and turn both the language can be changed from the on screen setup menu. To change any feature, the wireless or wired headphones. The front seat passengers will be able to listen the remote control. They are located at the rear of the - 2009 Suzuki XL7 | Owner's Manual - Page 152
console and press the desired button. Direct sunlight or very bright light may affect the ability of the RSE transmitter to receive signals from remote control does not seem to be working, the batteries may need to be replaced. See "Battery Replacement" later in this section. Objects blocking the - 2009 Suzuki XL7 | Owner's Manual - Page 153
nine. Press this button before entering the number. Battery Replacement To change the remote control batteries, do the following: 1) Remove the battery compartment door located on the bottom of the remote control. 2) Replace the two batteries in the compartment. Make sure that they are installed - 2009 Suzuki XL7 | Owner's Manual - Page 154
in accessory. Check the display mode settings in the setup menu by pressing the display menu button on the remote control. Check the auxiliary input connections at both devices. Check to make sure there is no obstruction between the remote control and the transmitter window. Check the batteries to - 2009 Suzuki XL7 | Owner's Manual - Page 155
are disc load or eject problems. Disc Format Error: This message can be adjusted at the steering wheel. They include the following: (Next Recognition" in the Navigation System manual for more information. SRCE (Source your vehicle has these features, DVD, front auxiliary, and rear auxiliary. (Volume - 2009 Suzuki XL7 | Owner's Manual - Page 156
obstructed. Radio Reception XMTM Satellite Radio Service XMTM Satellite Radio Service gives digital radio reception from coast-to-coast in the 48 contiguous United States, and in Canada. You may experience interference with satellite radio signals, while driving near tall buildings or through hilly - 2009 Suzuki XL7 | Owner's Manual - Page 157
INSTRUMENT PANEL MEMO 3-75 - 2009 Suzuki XL7 | Owner's Manual - Page 158
DRIVING YOUR VEHICLE DRIVING YOUR VEHICLE Your Driving, the Road, and Your Vehicle ...4-1 Towing ...4-20 4 - 2009 Suzuki XL7 | Owner's Manual - Page 159
Drunken Driving WARNING Defensive driving really means "Be ready for anything." On city streets, rural roads, or good medical, psychological, and developmental reasons for these laws. The obvious way to eliminate the leading highway safety problem is for people never to drink alcohol and then drive - 2009 Suzuki XL7 | Owner's Manual - Page 160
is some general information on the problem. The Blood Alcohol Concentration (BAC) of someone who is drinking depends upon four things: • The amount of alcohol consumed • The drinker's body weight • The amount of food that is consumed before and during drinking • The length of time it has taken the - 2009 Suzuki XL7 | Owner's Manual - Page 161
If your vehicle's engine ever stops while you are driving, brake normally but Suzuki accessories can affect your vehicle's performance. Refer to "Accessories and Modifications" in "Service" in the "Service and Appearance Care" section. Braking Refer to "Brake System Warning Light" in "Warning Lights - 2009 Suzuki XL7 | Owner's Manual - Page 162
the engine and begin to drive away, ABS will check itself. You may hear a momentary motor or clicking noise while this test is going on, and you may even notice that the brake pedal moves a little. This is normal. 1527213 1527212 807057 If there is a problem with ABS, this warning light will - 2009 Suzuki XL7 | Owner's Manual - Page 163
, you may not have traction control and your vehicle should be serviced by a dealer. Adding non-SUZUKI accessories can affect your vehicle's performance. Refer to 1545635 This light will come on when your traction control system is limiting wheel spin. You may feel or hear the system working, but - 2009 Suzuki XL7 | Owner's Manual - Page 164
go, and slow down. Speed limit signs near curves warn that you should adjust your speed. Of course, the posted speeds are based on good weather and road conditions. Under less 1710823 This light will come on along with the ALL WHEEL DRIVE OFF message when the rear drive system is overheating. This - 2009 Suzuki XL7 | Owner's Manual - Page 165
. Refer to "Accessories and Modifications" in "Service" in the "Service and Appearance Care" section. 811539 from a possible collision. Then steer around the problem, to the left or right depending on the space available. Off-Road Recovery You may find that your vehicle's right wheels have dropped - 2009 Suzuki XL7 | Owner's Manual - Page 166
Drive ahead. Look down the road check the blind spot. • Check your vehicle's mirrors, glance over your shoulder, and start your left lane change signal before moving out of the right lane to pass. When you are far enough ahead of the passed vehicle to see its front review what driving experts wheels - 2009 Suzuki XL7 | Owner's Manual - Page 167
wheels are rolling, you will have steering control. Remember: Any Anti-Lock Brake System (ABS) helps avoid only the braking skid. • Slow down, especially on higher speed roads. Your vehicle's headlamps can light up only much road have less trouble adjusting to night. But if you are driving, do not - 2009 Suzuki XL7 | Owner's Manual - Page 168
brake pedal lightly until the brakes work normally. Driving too fast through large water puddles or even going through some car 1527470 Rain and wet roads can mean driving trouble. On a wet road, you cannot stop, accelerate, or turn as well because your tire-toroad traction is not as good as on - 2009 Suzuki XL7 | Owner's Manual - Page 169
start to move, check both ways for vehicles that have not cleared the intersection or may be running the red light. CAUTION If you drive too quickly through deep puddles or standing water, water can come in through the engine's air intake and badly damage the engine. Never drive through water that - 2009 Suzuki XL7 | Owner's Manual - Page 170
• Wiper Blades: Are they in good shape? • Fuel, Engine Oil, Other Fluids: Have you checked all levels? • Lamps: Are they all working? Are the lenses clean? • Tires: They are vitally important to a safe, trouble-free trip. Is the tread good enough for long-distance driving? Are the tires all inflated - 2009 Suzuki XL7 | Owner's Manual - Page 171
, and you could crash and be injured. What can you do about highway hypnosis? First, be aware that it can happen. Then here are some tips: • Make sure your vehicle is well ventilated, with a comfortably cool interior. • Keep your eyes moving. Scan the road ahead and to the sides. Check your vehicle - 2009 Suzuki XL7 | Owner's Manual - Page 172
road. Drive at speeds that let you stay in your own lane. • As you go over the top of a hill, be alert. There could be something in your lane, like a stalled car or an accident. • You may see highway signs on mountains that warn of special problems drive on. But wet ice can be even more trouble - 2009 Suzuki XL7 | Owner's Manual - Page 173
adjust your driving to the road conditions. Under certain conditions, you may want to turn the traction system off, such as when driving through deep snow bags, rags, floor mats - anything you can wrap around yourself or tuck under your clothing to keep warm. You can run the engine to keep warm, - 2009 Suzuki XL7 | Owner's Manual - Page 174
spinning the wheels as little as possible. Release the accelerator pedal while you shift, and press lightly on the front or rear Gross Axle Weight Rating (GAWR). If you do, parts on your vehicle can break, and it can change the way your vehicle handles. These could cause you to lose control and crash - 2009 Suzuki XL7 | Owner's Manual - Page 175
you the Gross Vehicle Weight Rating (GVWR) and the Gross Axle Weight Rating (GAWR) for the front and rear axles. See "Certification/Tire Label" later in this section. Steps for Determining Correct Load Limit 1) Locate the statement "The combined weight of occupants and cargo should never exceed XXX - 2009 Suzuki XL7 | Owner's Manual - Page 176
DRIVING YOUR VEHICLE Example 1 Example 2 Example 3 1273153 1273154 1273155 Item A Descripion Maximum Vehicle Capacity Weight for Example 1 = Subtract Occupant Weight 150 lbs (68 kg) x 2 = Available Occupant and Cargo Weight = Total 1000 lbs (453 kg) 300 lbs (136 kg) 700 lbs (317 kg) Item A - 2009 Suzuki XL7 | Owner's Manual - Page 177
. The label shows the size of your original tires and the inflation pressures needed to obtain the gross weight capacity of your vehicle. This is called the Gross Vehicle Weight Rating (GVWR). The GVWR includes the weight of the vehicle, all occupants, fuel, and cargo. The Certification/Tire label - 2009 Suzuki XL7 | Owner's Manual - Page 178
all-wheel-drive vehicle with two or four wheels on the ground or a front-wheel-drive vehicle if all four wheels will be on the ground. If you have an all-wheel-drive vehicle or a front-wheel-drive vehicle, it was not designed to be towed with all of its wheels on the ground. It can be towed with car - 2009 Suzuki XL7 | Owner's Manual - Page 179
the trailering capacity of your vehicle, you should read the information in "Weight of the Trailer" that appears later in this section. Trailering is different than just driving your vehicle by itself. Trailering means changes in handling, acceleration, braking, durability, and fuel economy. Suc - 2009 Suzuki XL7 | Owner's Manual - Page 180
use a properly mounted, weight-carrying hitch and sway control of the proper size. This equipment is very important for proper vehicle loading and good handling when you're driving. If you are using a weight-carrying or a weight-distributing hitch, the trailer tongue weight (A) should be 10 percent - 2009 Suzuki XL7 | Owner's Manual - Page 181
road if it becomes separated from the hitch. Instructions about safety chains may be provided by the hitch cause unconsciousness or death. Refer to "Engine Exhaust" in "Starting and Operating Your window in the rear or another opening, drive with your front, main heating or cooling system on and - 2009 Suzuki XL7 | Owner's Manual - Page 182
with the added weight of the trailer. And always keep in mind that the vehicle you are driving is now a good deal longer and not nearly as responsive as your vehicle is by itself. Before you start, check all trailer hitch parts and attachments, safety chains, electrical connector, lamps, tires - 2009 Suzuki XL7 | Owner's Manual - Page 183
transaxle fluid, engine oil, belts, cooling system and brake system. Each of these is covered in this manual, and the Index will help you find them quickly. If you are trailering, it is a good idea to review these sections before you start your trip. Check periodically to see that all hitch nuts and - 2009 Suzuki XL7 | Owner's Manual - Page 184
CARE SERVICE AND APPEARANCE CARE Service ...5-1 Fuel ...5-2 Checking Things Under the Hood ...5-5 All-Wheel Drive ...5-22 Bulb Replacement ...5-23 Windshield Wiper Blade Replacement ...5-25 Tires ...5-26 Appearance Care ...5-48 Vehicle Identification ...5-52 Electrical System ...5-53 Capacities and - 2009 Suzuki XL7 | Owner's Manual - Page 185
and function with other systems on your vehicle. Your Suzuki dealer can accessorize your vehicle using genuine Suzuki accessories. When you go to your Suzuki dealer and ask for Suzuki accessories, you will know that Suzuki-trained and supported service technicians will perform the work using genuine - 2009 Suzuki XL7 | Owner's Manual - Page 186
may fail a smog-check test. Refer to "Malfunction Indicator Lamp" in "Warning Lights, Gages, and Indicators" in the "Instrument Panel" section. If this occurs, return to your authorized dealer for diagnosis. If it is determined that the condition is caused by the type of fuel used, repairs may not - 2009 Suzuki XL7 | Owner's Manual - Page 187
a major oil company that does business in the country where you will be driving. Filling the Tank WARNING Fuel vapor burns violently and a fuel fire can cause bad injuries. To help avoid injuries to you and others, read and follow all the instructions on the pump island. Turn off your engine when - 2009 Suzuki XL7 | Owner's Manual - Page 188
. Filling a Portable Fuel Container CAUTION If you need a new fuel cap, be sure to get the right type. Your dealer can get one for you. If you get the wrong type, it may not fit properly. This may cause your malfunction indicator lamp to light and may damage your fuel tank and emissions system - 2009 Suzuki XL7 | Owner's Manual - Page 189
electric fan. Hood Release To open the hood, do the following: Before closing the hood, be sure all the filler caps are on properly. Then pull the hood down and close it firmly. 1617949 WARNING Things that burn can get on hot engine parts and start a fire. These include liquids like fuel, oil - 2009 Suzuki XL7 | Owner's Manual - Page 190
of View). Refer to "Power Steering Fluid" in this section. C. Engine Oil Fill Cap (Out of View). Refer to "When to Add Engine Oil" under "Engine Oil" in this section. D. Engine Oil Dipstick. Refer to "Checking Engine Oil" under "Engine Oil" in this section. E. Brake Fluid Reservoir. Refer to "Brake - 2009 Suzuki XL7 | Owner's Manual - Page 191
SERVICE AND APPEARANCE CARE Engine Oil Checking Engine Oil It is a good idea to check your engine oil every time you get fuel. In order to get an accurate reading, the oil must be warm and the vehicle must be on level ground. The engine oil dipstick handle is a yellow loop. Refer to "Engine - 2009 Suzuki XL7 | Owner's Manual - Page 192
symbol on the front of the oil container. Engine Oil Life System When to Change Engine Oil Your vehicle has a computer system that lets you know when to change the engine oil and filter. This is based on engine revolutions and engine temperature, and not on mileage. Based on driving conditions, the - 2009 Suzuki XL7 | Owner's Manual - Page 193
it to a place that collects used oil. If you have a problem properly disposing of your used oil, ask your dealer, a service station, or a local recycling center for help. Engine Air Cleaner/Filter The engine air cleaner/filter is located in the engine compartment on the passenger's side of the - 2009 Suzuki XL7 | Owner's Manual - Page 194
/filter is off, a backfire can cause a damaging engine fire. And, dirt can easily get into your engine, which will damage it. Always have the air cleaner/filter in place when you are driving. 1733570 2) Disconnect the air flow sensor electrical connector. 3) Loosen the screws on the clamps holding - 2009 Suzuki XL7 | Owner's Manual - Page 195
premature engine, heater core, or radiator corrosion. In addition, the engine coolant may require changing sooner, at the first maintenance service after add coolant when it is low. If you have a problem with engine overheating, refer to "Engine Overheating" in this section. A 50/50 mixture of clean - 2009 Suzuki XL7 | Owner's Manual - Page 196
SERVICE AND APPEARANCE CARE If you have to add coolant more than four times a year, have your dealer check your cooling system. "Engine Compartment Overview" in this section for more information on location. Engine Overheating There is a coolant temperature gage and a warning light on the - 2009 Suzuki XL7 | Owner's Manual - Page 197
CAUTION After driving in the overheated engine protection operating mode, to avoid engine damage, allow the engine to cool before attempting any repair. The engine oil will be severely degraded. Repair the cause of coolant loss, change the oil and reset the oil life system. Refer to "Engine Oil" in - 2009 Suzuki XL7 | Owner's Manual - Page 198
Cap If there seems to be no leak, with the engine on, check to see if the electric engine cooling fans are running. If the engine is overheating, the fans should be running. If the fans are not running, the vehicle needs service. How to Add Coolant to the Coolant Recovery Tank WARNING An electric - 2009 Suzuki XL7 | Owner's Manual - Page 199
SERVICE AND APPEARANCE CARE WARNING You can be burned if you spill coolant on hot engine parts. Coolant contains ethylene glycol and it will burn if the engine parts are hot enough. Do not spill coolant on a hot engine. When the coolant level in the coolant recovery tank is at the cold fill line, - 2009 Suzuki XL7 | Owner's Manual - Page 200
tank cap and the pressure cap. 7) If the coolant in the recovery tank is constantly low, you should have your dealership service department inspect the vehicle for leaks. How to Check Power Steering Fluid To check the power steering fluid, do the following: 1) Turn the key off and let the engine - 2009 Suzuki XL7 | Owner's Manual - Page 201
SERVICE AND APPEARANCE CARE Brakes CAUTION • When using concentrated washer fluid, follow the manufacturer's instructions for adding water. • Do not mix water with ready-to-use washer fluid. Water can cause the solution to freeze and damage your washer fluid tank and other parts of the washer system - 2009 Suzuki XL7 | Owner's Manual - Page 202
always be replaced as complete axle sets. Brake Pedal Travel See your dealer if the brake pedal does not return to normal height, or if there is a Battery Your vehicle has a maintenance free battery. When it is time for a new battery, get one that has the replacement number shown on the original - 2009 Suzuki XL7 | Owner's Manual - Page 203
AND APPEARANCE CARE For battery replacement, see your dealer or the service manual. Jump Starting If your vehicle's battery has run down, you may want to use another vehicle and some jumper cables to start your vehicle. Be sure to use the following steps - 2009 Suzuki XL7 | Owner's Manual - Page 204
engine is running. WARNING Using a match near a battery can cause battery gas to explode. People have been hurt doing this, and some have been blinded. Use a flashlight if you need more light. Be sure the battery has enough water. You do not need to add water to the battery installed in your new - 2009 Suzuki XL7 | Owner's Manual - Page 205
to the negative (-) terminal location on the vehicle with the good battery. Use a remote negative (-) terminal 1737506 9) Connect the other end of the negative (-) cable at least 18 inches (45 cm) away from the dead battery, but not near engine parts that move. The electrical connection is just as - 2009 Suzuki XL7 | Owner's Manual - Page 206
cable from the vehicle with the good battery. 4) Disconnect the red positive (+) cable from the other vehicle. 5) Return the fuse block cover to its originalposition. All-Wheel Drive If you have an all-wheel-drive vehicle, be sure to perform the lubricant checks described in this section. However - 2009 Suzuki XL7 | Owner's Manual - Page 207
SERVICE AND APPEARANCE CARE How to Check Lubricant AWD Differential Case Bulb Replacement For the proper type of replacement bulbs, refer to "Replacement Bulbs" in this section. For any bulb changing procedure not listed in this section, contact your dealer could indicate a problem; check and have - 2009 Suzuki XL7 | Owner's Manual - Page 208
SERVICE AND Number 921 168 3057K For replacement bulbs not listed here, contact your dealer. 1802297 2) 3) 4) 5) 6) 7) 8) 9) Remove the taillamp the taillamp assembly. Pull the bulb out of the bulb socket. Push the new bulb into the bulb socket. Insert the bulb socket into the taillamp assembly - 2009 Suzuki XL7 | Owner's Manual - Page 209
SERVICE length, refer to "Normal Maintenance Replacement Parts" in "Maintenance Schedule" in the "Maintenance Schedule" section. Here's how to replace the windshield wiper blades: 1) Make sure the front arm. 4) Push the new wiper blade securely on up the release clip, located at the connecting point of - 2009 Suzuki XL7 | Owner's Manual - Page 210
new vehicle comes with high-quality tires made by a leading tire manufacturer. If you ever have questions about your tire warranty and where to obtain service, see your Suzuki tire's width, height, aspect ratio, construction type, and service description. See the "Tire Size" illustration later in - 2009 Suzuki XL7 | Owner's Manual - Page 211
a tire's width, height, aspect ratio, construction type, and service description. The letter T as the first character in the tire size means the tire is for temporary use only. TPC Spec (Tire Performance Criteria Specification): Original equipment tires designed to SUZUKI's specific tire performance - 2009 Suzuki XL7 | Owner's Manual - Page 212
has built up heat from driving. Refer to "Inflation - Tire Pressure" in this section. Curb Weight: This means the weight of a motor vehicle with standard and optional equipment including the maximum capacity of fuel, oil, and coolant, but without passengers and cargo. DOT Markings: A code molded - 2009 Suzuki XL7 | Owner's Manual - Page 213
of curb weight, accessory weight, vehicle capacity weight, and production options weight. Normal Occupant Weight: The number of occupants a vehicle is designed to seat multiplied by 150 lbs (68 kg). Refer to "Loading Your Vehicle" in "Your Driving, the Road, and Your Vehicle" in the "Driving Your - 2009 Suzuki XL7 | Owner's Manual - Page 214
curb weight, accessory weight, occupant weight, and cargo weight. Vehicle Placard: A label permanently attached to a vehicle showing the vehicle's capacity weight and the original equipment tire size handling • Reduced fuel economy If your tires have Check Use a good quality pocket-type gage to check - 2009 Suzuki XL7 | Owner's Manual - Page 215
to check tire pressure levels. TPMS sensors are mounted onto each tire and wheel assembly, except for the spare tire. The TPMS sensors monitor the air pressure in your vehicle's tires and transmit tire pressure readings to a receiver located in the vehicle. Low Tire Pressure Warning Light 1198521 - 2009 Suzuki XL7 | Owner's Manual - Page 216
be matched to the new tire/wheel position. The sensors are matched, to the tire/wheel positions, in the following order: driver side front tire, passenger side front tire, passenger side rear tire, and driver side rear tire using a TPMS diagnostic tool. See your SUZUKI dealer for service. The TPMS - 2009 Suzuki XL7 | Owner's Manual - Page 217
" in "Your Driving, the Road, and Your Vehicle" in the "Driving Your Vehicle" section. Tire Inspection and Rotation Tires should be rotated every 5000 to 8000 miles (8000 to 13000 km). Any time you notice unusual wear, rotate your tires as soon as possible and check wheel alignment. Also check for - 2009 Suzuki XL7 | Owner's Manual - Page 218
" in this section. Make certain that all wheel nuts are properly tightened. Refer to "Wheel Nut Torque" under "Capacities and Specifications" in this section. When It Is Time for New Tires because of the size or location of the damage. Buying New Tires The original equipment tires installed on - 2009 Suzuki XL7 | Owner's Manual - Page 219
may increase the chance that you will crash and suffer serious injury. Only use Suzuki specific wheel and tire systems developed for your vehicle, and have them properly installed by a Suzuki certified technician. Refer to "Buying New Tires" and "Accessories and Modifications" in this section for - 2009 Suzuki XL7 | Owner's Manual - Page 220
car tires must meet under the Federal Motor Vehicle Safety Standard No. 109. Grades B and A represent higher levels of performance on the laboratory test wheel checked. If you notice your vehicle vibrating when driving on a smooth road, your tires and wheels may need to be rebalanced. See your dealer - 2009 Suzuki XL7 | Owner's Manual - Page 221
for use on your vehicle and tire size combination and road conditions. Follow that manufacturer's instructions. To help avoid damage to your vehicle, drive slowly, readjust or remove the device if it is contacting your vehicle, and do not spin your vehicle's wheels. If you do find traction devices - 2009 Suzuki XL7 | Owner's Manual - Page 222
road if possible. Changing a Flat Tire If a tire goes flat, avoid further tire and wheel damage by driving slowly change a tire. Removing the Spare Tire and Tools To access the tools, do the following: 1) Locate the jack and wheel wrench, which are located on the passenger's side of the rear cargo - 2009 Suzuki XL7 | Owner's Manual - Page 223
wrench. Remove the wheel wrench from the bag. The following instructions explain how to remove the underbody-mounted spare underneath your vehicle. 1751347 CAUTION If you remove or restow a tire from/to the storage position under the vehicle while it is supported by a jack, you could damage the - 2009 Suzuki XL7 | Owner's Manual - Page 224
SERVICE AND APPEARANCE CARE Removing the Flat Tire and Installing the Spare Tire 1399879 809981 1587905 1) Use the wheel wrench to loosen all the wheel nuts. Do not remove them yet. 2) Attach the wheel wrench to the jack bolt head and rotate the wheel wrench clockwise. That will raise the lift - 2009 Suzuki XL7 | Owner's Manual - Page 225
the road tire to clear the ground. 7) Remove all of the wheel nuts. 8) Remove the flat tire. WARNING Rust or dirt on the wheel, or on the parts to which it is fastened, can make the wheel nuts become loose after time. The wheel could come off and cause an accident. When you change a wheel, remove - 2009 Suzuki XL7 | Owner's Manual - Page 226
sure to get new SUZUKI original equipment wheel nuts. Stop somewhere as soon as you can and have the nuts tightened with a torque wrench to the proper torque specification. Refer to "Capacities and Specifications" in this section for wheel nut torque specification. WARNING Never use oil or grease - 2009 Suzuki XL7 | Owner's Manual - Page 227
SERVICE "Storing a Flat or Spare Tire and Tools" in this section for instructions on storing the spare tire correctly. To release the spare tire from on the hoist drive nut and turn the wrench counterclockwise until approximately 6 inches (15 cm) of cable is exposed. 3) Attach the wheel wrench to the - 2009 Suzuki XL7 | Owner's Manual - Page 228
SERVICE AND APPEARANCE CARE Storing a Compact Spare Tire WARNING Storing a jack, a tire, from under the vehicle. 9) Reach under the vehicle and remove the wheel wrench and jack. 10)Tilt the retainer and slip it through the wheel opening when the spare tire has been completely lowered. 11)Turn the - 2009 Suzuki XL7 | Owner's Manual - Page 229
Pull the secondary retainer (C) through the wheel. The secondary retainer is located under the secondary latch spring and is smaller than the spare tire retainer to allow it to fit through the road wheel center cap hole. 4) Place the wheel wrench (A) onto the hoist drive nut. 5) Raise the tire fully - 2009 Suzuki XL7 | Owner's Manual - Page 230
Sized Flat Tire To store a full-sized flat tire do the following: 1) Remove the tire storage bag and cable package from the jack storage area. 2) If your vehicle has aluminum wheels, remove the center cap by tapping the back of the cap with the wheel stem pointing toward the front of the vehicle. If - 2009 Suzuki XL7 | Owner's Manual - Page 231
to replace the spare with a full-size tire as soon as you can. The spare will last longer and be in good shape in case you need it again vehicle through an automatic car wash with guide rails. The compact spare can get caught on the rails. That can damage the tire and wheel, and maybe other parts - 2009 Suzuki XL7 | Owner's Manual - Page 232
instructions on the label. While cleaning your vehicle's interior, maintain adequate ventilation by opening your vehicle's doors and windows. Dust may be removed from small buttons and knobs using a small brush with soft bristles. Your SUZUKI dealer used on floor carpet and carpeted floor mats. For - 2009 Suzuki XL7 | Owner's Manual - Page 233
SERVICE AND APPEARANCE CARE • For solid dry soils: remove as much as possible and then vacuum. To clean, use the following instructions to be used, test a small hidden weaken them. In a crash, they might not be able change the appearance and feel of your interior depth of color, gloss retention, - 2009 Suzuki XL7 | Owner's Manual - Page 234
clearcoat gives more depth and gloss to the colored basecoat. Always use waxes and polishes that are non-abrasive and made for a basecoat/clearcoat paint finish. Foreign materials such as calcium chloride and other salts, ice melting agents, road oil and tar, tree sap, bird droppings, chemicals from - 2009 Suzuki XL7 | Owner's Manual - Page 235
SERVICE AND APPEARANCE CARE clean water. After rinsing thoroughly, dry with a soft clean towel. A wax may then be applied. Do not take the vehicle through an automatic car wash that has silicone carbide tire cleaning brushes. These brushes can also damage the surface of these wheels. SUZUKI dealer. - 2009 Suzuki XL7 | Owner's Manual - Page 236
Wheel Cleaner Finish Enhancer Usage Interior and exterior polishing cloth. Removes tar, road oil, and asphalt. Use on chrome or stainless steel. Removes soil and black foaming shampoo. Cleans and lightly waxes. Biodegradable and appears on a plate in the front corner of the instrument panel, on - 2009 Suzuki XL7 | Owner's Manual - Page 237
Vehicle Identification Number (VIN) Model designation Paint information Production options and special equipment Electrical System Add-On Electrical Equipment CAUTION Do not add anything electrical to your vehicle unless you check with your dealer first. Some electrical equipment can damage your - 2009 Suzuki XL7 | Owner's Manual - Page 238
SERVICE AND APPEARANCE CARE Instrument Panel Fuse Block The instrument panel fuse block is located on the passenger's side of the center console, to the left of the glove box near the floor. Fuses 11 12 13 SPARE SPARE SPARE 1808062 Usage Passenger's Side Turn Signal Amplifier Steering Wheel - 2009 Suzuki XL7 | Owner's Manual - Page 239
SERVICE AND APPEARANCE CARE Engine Compartment Fuse Block Relays RAP RLY REAR DEFOG RLY Circuit Breakers PWR WNDW PWR SEATS EMPTY Misc. PLR Usage Retained Accessory Power Relay Rear Defogger Relay Fuses 1 2 3 4 5 Usage Power Windows Power Seats Empty Usage Fuse Puller 1739443 Usage Cooling Fan 2 - 2009 Suzuki XL7 | Owner's Manual - Page 240
Fuel Pump Rear Accessory Power Outlet All-Wheel Drive Regulated Voltage Control Passenger's Side Trailer Stoplamp, Turn Signal Spare Front, Rear Washer Rear Defogger Anti-lock Brake System Motor Battery Main 2 Daytime Running Lamps Fog Lamps Climate Control System Blower Battery Main 1 Electric - 2009 Suzuki XL7 | Owner's Manual - Page 241
System Front and Rear Climate Control System Fuel Tank Transaxle Fluid Wheel Nut Torque 12.7 qt 13.1 qt 18.5 gal 4.1 qt 100 lb ft 12.0 L 12.4 L 70.0 L 3.9 L 140 N·m Capacities English Metric For the air conditioning system refrigerant charge amount, see the refrigerant caution label located under - 2009 Suzuki XL7 | Owner's Manual - Page 242
MAINTENANCE SCHEDULE MAINTENANCE SCHEDULE Maintenance Schedule ...6-1 Scheduled Maintenance except CANADA ...6-3 For CANADA Scheduled Maintenance ...6-8 Owner Checks and Services ...6-13 6 - 2009 Suzuki XL7 | Owner's Manual - Page 243
vehicle in good condition, be sure to maintain your vehicle properly. This schedule is for vehicles that: • carry passengers and cargo within recommended limits. You will find these limits on the Tire and Loading Information label. Refer to "Loading Your Vehicle" in "Your Driving, the Road, and - 2009 Suzuki XL7 | Owner's Manual - Page 244
whenever the oil is changed. Refer to "Engine Oil Life System" in "Checking Things Under the Hood" in the "Service and Appearance Care" section for information on the Engine Oil Life System and resetting the system. For ALL except CANADA When the change engine oil light and/or CHANGE ENGINE OIL SOON - 2009 Suzuki XL7 | Owner's Manual - Page 245
Scheduled Maintenance except CANADA Instruction Maintenance I Maintenance II • Change engine oil and filter if the light/message has not come on at all for one year. Change engine oil and filter. • Refer to "Engine Oil" in "Checking Things Under the Hood" in the "Service and Appearance Care - 2009 Suzuki XL7 | Owner's Manual - Page 246
/Filter" in "Checking Things Under the Inspect engine air cleaner filHood" in the "Service and Appearance Care" section. • ter. If necessary, replace filter. • If you drive regularly under dusty conditions, inspect the filter at each engine oil change. • Visually inspect front and rear suspension - 2009 Suzuki XL7 | Owner's Manual - Page 247
MAINTENANCE SCHEDULE Service Instruction Maintenance I Maintenance II • Lubricate all key lock Replace the air filter, if necessary. • If you drive regularly under dusty conditions, the filter may require • replacement more often. • Check system for interference or binding and for damaged or missing - 2009 Suzuki XL7 | Owner's Manual - Page 248
required services Service Inspect fuel system for damage or leaks. Inspect exhaust system for loose or damaged components. Replace engine air cleaner filter. • Refer to "Engine Air Cleaner/Filter" in "Checking Things Under the Hood" in the "Service and Appearance Care" section. • Change automatic - 2009 Suzuki XL7 | Owner's Manual - Page 249
hoses. • Clean radiator, condenser, pressure cap, and filler neck. • Pressure test the cooling system and pressure cap. • Visually inspect belt for fraying, excessive cracks, or obvious Inspect engine accessory drive damage. belt. An Emission Control Service. • Replace belt if necessary. • • 6-7 - 2009 Suzuki XL7 | Owner's Manual - Page 250
MAINTENANCE SCHEDULE For CANADA Scheduled Maintenance Instruction • Change engine oil and filter if the light/message has not come on at all for 10 months. Change engine oil and filter. • Refer to "Engine Oil" in "Checking Things Under the Hood" in the "Service and Appearance Care" section. • If - 2009 Suzuki XL7 | Owner's Manual - Page 251
SCHEDULE Instruction • Refer to "Engine Air Cleaner/Filter" in "Checking Things Under the Hood" in the Inspect engine air cleaner fil"Service and Appearance Care" section. ter. If necessary, replace filter. • If you drive regularly under dusty conditions, inspect the filter at each engine oil change - 2009 Suzuki XL7 | Owner's Manual - Page 252
as winter road salt. • Applying silicone grease on weatherstrips with a clean cloth will make them last longer, seal better, and not stick or squeak. • Replace the air filter, if necessary. • If you drive regularly under dusty conditions, the filter may require replacement more often. • Check system - 2009 Suzuki XL7 | Owner's Manual - Page 253
damaged components. Replace engine air cleaner filter. Change automatic transaxle fluid. Replace spark plugs. An Emission Control Service. • Refer to "Engine Air Cleaner/Filter" in "Checking Things Under the Hood" in the "Service and Appearance Care" section. Instruction 40000 • • 80000 Kilometers - 2009 Suzuki XL7 | Owner's Manual - Page 254
. • Inspect hoses. • Clean radiator, condenser, pressure cap, and filler neck. • Pressure test the cooling system and pressure cap. • Visually inspect belt for fraying, Inspect engine accessory drive excessive cracks, or obvious belt. An Emission Control Service. damage. • Replace belt if necessary - 2009 Suzuki XL7 | Owner's Manual - Page 255
dealer can assist you with these checks and services. Be sure any necessary repairs are completed at once. Whenever any fluids or lubricants are added to your vehicle, make sure they are the proper ones, as shown in "Recommended Fluids and Lubricants" in this section. Check and Service Engine oil - 2009 Suzuki XL7 | Owner's Manual - Page 256
tire is stored securely. Refer to "Changing a Flat Tire" in "Tires" in the "Service and Appearance Care" section. Tire Wear Inspection Tire rotation may be required for high mileage highway drivers prior to the Engine Oil Life System service notification. Check the tires for wear and, if necessary - 2009 Suzuki XL7 | Owner's Manual - Page 257
dealer for service. WARNING When you are doing this check, your vehicle could begin to move. You or others could be injured and property could be damaged. Make sure there is room in front parking brake. • To check the parking brake's holding ability: With the engine running and transaxle in NEUTRAL - 2009 Suzuki XL7 | Owner's Manual - Page 258
your dealer. Usage Engine Oil Engine Coolant engine is an SAE 5W-30 synthetic oil or an SAE 0W-30 oil. 50/50 mixture of clean, drinkable water and use only DEX-COOL® Coolant. Delco® Supreme 11 Brake Fluid or equivalent DOT-3 brake fluid. Use only T-IV Automatic Transmission Fluid (Part No. SUZUKI - 2009 Suzuki XL7 | Owner's Manual - Page 259
your dealer. Part Engine Air Cleaner/Filter Engine Oil Filter Passenger Compartment Air Filter Element Replacement Battery Spark Plugs SUZUKI Part No. 13780-78J00 16510-78J00 95861-78J00 33610-78J00 1119A-78J00 38340-78J00 38340-78J10 38820-78J00 Engine Drive Belt Routing 3.6L V6 Engine 1686383 - 2009 Suzuki XL7 | Owner's Manual - Page 260
Record except CANADA After the scheduled services are performed, record the date, odometer reading, who performed the service, and the type of services performed in the boxes provided. Refer to "Maintenance Requirements" in this section. Any additional information from "Owner Checks and Services" in - 2009 Suzuki XL7 | Owner's Manual - Page 261
MAINTENANCE SCHEDULE MEMO 6-19 - 2009 Suzuki XL7 | Owner's Manual - Page 262
GENERAL INFORMATION GENERAL INFORMATION Identification Numbers ...7-1 Safety Certification Label ...7-1 Emission Compliance Label (for U.S.A.) ...7-2 Warranties ...7-2 On-Board Vehicle Computers and Event Data Recorders ...7-2 Reporting Safety Defects ...7-3 7 - 2009 Suzuki XL7 | Owner's Manual - Page 263
Identification Number (VIN) may be found in the location shown in the above illustrations. This number is used to register the vehicle. It is also used to assist your dealer when ordering parts or referring to special service information. The engine serial number is stamped on the cylinder block as - 2009 Suzuki XL7 | Owner's Manual - Page 264
vehicle: • New Vehicle Limited Warranty • Limited Warranty For SUZUKI Parts or Accessories • Emission Components Defect Warranty • Emission Performance Warranty 60A412 The EPA emission compliance label is located under the hood. It provides much of the information needed to perform an engine tune - 2009 Suzuki XL7 | Owner's Manual - Page 265
and may be used to improve crash performance of future vehicles and driving safety. Unlike the data recorders recall and remedy campaign. However, NHTSA cannot become involved in individual problems between you, your dealer, or American Suzuki Motor Corp. To contact NHTSA, you may call the Vehicle - 2009 Suzuki XL7 | Owner's Manual - Page 266
's address listed in your Warranty Information booklet. For vehicles registered for use and principally operated in Canada please contact Suzuki Canada Inc. at 1-905889-2677 extension 2254 or write to: Suzuki Canada Inc. Customer Relations 100 East Beaver Creek Road Richmond Hill, On L4B 1J6 7-4 - 2009 Suzuki XL7 | Owner's Manual - Page 267
GENERAL INFORMATION MEMO 7-5 - 2009 Suzuki XL7 | Owner's Manual - Page 268
Care of Your CDs and DVDs ...3-74 Cargo Lamp ...3-9 Carrier Assembly-Differential (Rear Drive Module) ...5-22 Center Console Storage Area ...2-22 Change Engine Oil Light ...3-24 Changing a Flat Tire ...5-38 Checking the Restraint Systems ...1-42 Checking Things Under the Hood ...5-5 Chemical Paint - 2009 Suzuki XL7 | Owner's Manual - Page 269
Wet Roads ...4-10 Drunken Driving ...4-1 F Fabric/Carpet ...5-48 Filling a Portable Fuel Container ...5-4 Filling the Tank ...5-3 Finish Care ...5-50 Finish Damage ...5-51 Fog Lamp Light ...3-24 Fog Lamps ...3-8 For CANADA Scheduled Maintenance ...6-8 Freeway Driving ...4-11 Front Seats ...1-1 Fuel - 2009 Suzuki XL7 | Owner's Manual - Page 270
Mountain Roads ...4-13 Hood Release ...5-5 Horn ...3-3 How Does an Airbag Restrain? ...1-38 How to Wear Safety Belts Properly ...1-11 M Maintenance Record except CANADA ...6-18 Maintenance Requirements ...6-1 Maintenance Schedule ...6-1 Malfunction Indicator Lamp ...3-21 Manual Lumbar ...1-2 Manual - 2009 Suzuki XL7 | Owner's Manual - Page 271
/Radio System ...3-67 New Vehicle Break-In ...2-12 Crash ...1-43 Reporting Safety Defects ...7-3 Restraint System Check ...1-42 Retained Accessory Power (RAP) ...2-13 Right Front Passenger Position ...1-15 Running the Engine While Parked ...2-19 O Off-Road Recovery ...4-7 Oil Pressure Light - 2009 Suzuki XL7 | Owner's Manual - Page 272
Right Front Seat Position ...1-31 Securing an Add-on Child Restraint in the Vehicle ...1-23 Securing the Child Within the Child Restraint ...1-23 Security Light ...3-24 Service ...5-1 Service All-Wheel Drive Light ...3-25 Service Parts Identification Label ...5-53 Service Vehicle Soon Light ...3-26 - 2009 Suzuki XL7 | Owner's Manual - Page 273
Lights, Gages, and Indicators ...3-15 Warranties ...7-2 Washing Your Vehicle ...5-49 Weatherstrips ...5-49 What Makes an Airbag Inflate? ...1-38 What Will You See After an Airbag Inflates? ...1-38 Wheel Alignment and Tire Balance ...5-36 Wheel Replacement ...5-37 When It Is Time for New Tires - 2009 Suzuki XL7 | Owner's Manual - Page 274
" symbol Standard: GM6094M Viscosity: SAE 5W-30 For further details, see "Engine Oil" in the "SERVICE AND APPEARANCE CARE" section. Brake and clutch fluid: DOT3 Tire cold pressure: See the "Tire Information Label" located on the driver's door lock pillar. XL7 99011-78J00-03E Printed in U.S.A.
-
 1
1 -
 2
2 -
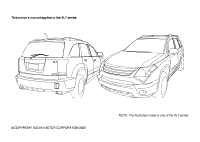 3
3 -
 4
4 -
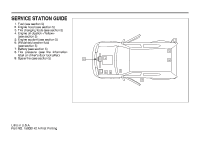 5
5 -
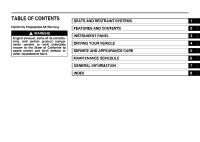 6
6 -
 7
7 -
8
-
9
-
10
-
11
-
12
-
13
-
14
-
15
-
16
-
17
-
18
-
19
-
20
-
21
-
22
-
23
-
24
-
25
-
26
-
27
-
28
-
29
-
30
-
31
-
32
-
33
-
34
-
35
-
36
-
37
-
38
-
39
-
40
-
41
-
42
-
43
-
44
-
45
-
46
-
47
-
48
-
49
-
50
-
51
-
52
-
53
-
54
-
55
-
56
-
57
-
58
-
59
-
60
-
61
-
62
-
63
-
64
-
65
-
66
-
67
-
68
-
69
-
70
-
71
-
72
-
73
-
74
-
75
-
76
-
77
-
78
-
79
-
80
-
81
-
82
-
83
-
84
-
85
-
86
-
87
-
88
-
89
-
90
-
91
-
92
-
93
-
94
-
95
-
96
-
97
-
98
-
99
-
100
-
101
-
102
-
103
-
104
-
105
-
106
-
107
-
108
-
109
-
110
-
111
-
112
-
113
-
114
-
115
-
116
-
117
-
118
-
119
-
120
-
121
-
122
-
123
-
124
-
125
-
126
-
127
-
128
-
129
-
130
-
131
-
132
-
133
-
134
-
135
-
136
-
137
-
138
-
139
-
140
-
141
-
142
-
143
-
144
-
145
-
146
-
147
-
148
-
149
-
150
-
151
-
152
-
153
-
154
-
155
-
156
-
157
-
158
-
159
-
160
-
161
-
162
-
163
-
164
-
165
-
166
-
167
-
168
-
169
-
170
-
171
-
172
-
173
-
174
-
175
-
176
-
177
-
178
-
179
-
180
-
181
-
182
-
183
-
184
-
185
-
186
-
187
-
188
-
189
-
190
-
191
-
192
-
193
-
194
-
195
-
196
-
197
-
198
-
199
-
200
-
201
-
202
-
203
-
204
-
205
-
206
-
207
-
208
-
209
-
210
-
211
-
212
-
213
-
214
-
215
-
216
-
217
-
218
-
219
-
220
-
221
-
222
-
223
-
224
-
225
-
226
-
227
-
228
-
229
-
230
-
231
-
232
-
233
-
234
-
235
-
236
-
237
-
238
-
239
-
240
-
241
-
242
-
243
-
244
-
245
-
246
-
247
-
248
-
249
-
250
-
251
-
252
-
253
-
254
-
255
-
256
-
257
-
258
-
259
-
260
-
261
-
262
-
263
-
264
-
265
-
266
-
267
-
268
-
269
-
270
-
271
-
272
-
273
-
274
 |
 |
Part No. 99011-78J00-03E
September, 2006
OWNER’S MANUAL
Keep With Vehicle At All Times.
Contains Important Information
On Safety, Operation & Maintenance.
2007