AIWA IC-DP200 Operating Instructions
AIWA IC-DP200 Manual
 |
View all AIWA IC-DP200 manuals
Add to My Manuals
Save this manual to your list of manuals |
AIWA IC-DP200 manual content summary:
- AIWA IC-DP200 | Operating Instructions - Page 1
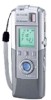
111 OPERATING INSTRUCTIONS MANUAL DE INSTRUCCIONES MODE D'EMPLOI -DP200 IC Recorder Grabador En Circuito Integrado ENGLISH ESPACIOL FRANcAIS OWNER'S RECORD For your convenience, record the model number and the - AIWA IC-DP200 | Operating Instructions - Page 2
. This equipment generates, uses, and can radiate radio frequency energy and, if not installed and used in accordance with the instructions, may cause harmful interference to radio communications. However, there is no guarantee that interference will not occur in a particular installation - AIWA IC-DP200 | Operating Instructions - Page 3
handled properly. Product misuse can result in personal injury from fire or electrical shock. Read and abide by the safety instructions to avoid accidents. The safety instructions are divided into two levels according to the magnitude of accidents that are anticipated if the product is not handled - AIWA IC-DP200 | Operating Instructions - Page 4
• Remove batteries from the product before leaving it out of service for prolonged period. If Electrolyte Leaks Wipe off the electrolyte thoroughly Check Components 5 PC Hardware/Software Requirements 7 About This Instruction Manual 7 View Online Help 7 Installing the Batteries 8 Setting - AIWA IC-DP200 | Operating Instructions - Page 5
the PC 51 Viewing Thumbnails of Image Files 53 Viewing and Editing Image Files 54 Erasing Files 60 Miscellaneous 62 Care 62 Troubleshooting 62 Specifications 67 Component Names and Functions 68 I Key Features • IC voice recorder with a built-in 310,000pixel digital camera Stores as - AIWA IC-DP200 | Operating Instructions - Page 6
IC Recorder may be lost when it is subjected to repair. About Software Bundled with This IC Recorder • Duplication of the software and the instruction manual that come with this product in whole or in part and lease on the software without approval of the copyright holders is prohibited by copyright - AIWA IC-DP200 | Operating Instructions - Page 7
color or higher *1 The NEC PC98-NX Series and Macintosh PCs are not supported. *2 More hard disk space may be needed, depending on the sizes of been transferred to a PC may be referred to as "files" in this instruction manual. "View Online Help ■ To view Online Help, install IC-DP200 Manager ( - AIWA IC-DP200 | Operating Instructions - Page 8
without batteries installed. If this screen appears, set the clock by following step 3 and later in the "Setting the Time and Date" section of this manual. • Manganese batteries cannot be used with this IC Recorder. Be sure to use alkaline batteries. • It may happen that the display window is not - AIWA IC-DP200 | Operating Instructions - Page 9
'Setting the Time and Date The first thing you have to do with your IC Recorder is to set the time and date, after which each message will be recorded with its time and date of recording or shooting registered. 4 Choose digits for the year by pressing the IN or NI button while the year indicator is - AIWA IC-DP200 | Operating Instructions - Page 10
Introduction 7 Press the button to accept the month. The date indicator will flash next. Likewise, set date, hours, and minutes in that order. When the minutes are set The IC Recorder exits Setup mode automatically and returns to the normal screen display. (Example: 3:50 p.m., September 20) - AIWA IC-DP200 | Operating Instructions - Page 11
on, the state of the IC Recorder, in which it is off (with the display window cleared), is referred to as standby state in this manual. li m z r 0 0 x ENGLISH 11 - AIWA IC-DP200 | Operating Instructions - Page 12
of the components and images appearing in the display window, see the "Component Names and Functions" section (page 68) of this manual. 'Voice mode and Camera I mode This IC Recorder supports two modes of operation: Voice mode, in which voice can be recorded and/or played, and Camera mode, in which - AIWA IC-DP200 | Operating Instructions - Page 13
"Changing Recording modes" (page 17), "Changing Microphone Sensitivity" (page 17), and "Recording with V-SENSOR" (page 18) sections of this manual. I Screen Transitions Each time you press the DISPLAY button, screen transitions occur, in the following sequence: Current time indicator Record/image - AIWA IC-DP200 | Operating Instructions - Page 14
Recording/Playing Messages Typical Voice Mode Displays (Recording) Current time indicator Current time and date Record number indicator Current record number 1 Recording date/ Memory status time indicator indicator Time 2 and date at Current record which recording started number 110 WA HQ - AIWA IC-DP200 | Operating Instructions - Page 15
I Changing Folders In Voice mode, two folders (A and B) can be used selectively. Each folder can hold up to 100 messages as voice files. To change folders Press the ♦ button with the IC Recorder stopped. Name of the folder selected eng HQ re r U : 1-1 r u E Total numbero messages recorded in the - AIWA IC-DP200 | Operating Instructions - Page 16
Recording/Playing Messages Notes • Sound is recorded in monaural. • Sound output from the built-in speaker is suppressed while the IC recorder is recording. To listen to sound while it is being recorded, connect commercially available headphones or earphones to the headphone jack. • Volume - AIWA IC-DP200 | Operating Instructions - Page 17
I Changing Recording modes The recording mode can be selected between HQ and LP. HQ (high-quality recording): Up to 60 minutes of recording LP (Long-play recording): Up to 4 hours 20 minutes of recording 1 Hold the MENU/PAUSE button pressed for about 1 second with the IC Recorder stopped. 2 Pressthe - AIWA IC-DP200 | Operating Instructions - Page 18
Recording/Playing Messages I Recording with V-SENSOR A certain level of voice input or higher to the IC Recorder automatically starts recording and automatically stops recording when the voice input falls. Use this feature to record meetings where silence occurs intermittently to cut the recording - AIWA IC-DP200 | Operating Instructions - Page 19
! Other Functions Useful for Recording Indexing in the Middle of Recording Indexing in the middle of recording facilitates the work of locating scenes of interest at a later time. To index Press the INDEX button while recording is in progress or paused. The record number will be incremented - AIWA IC-DP200 | Operating Instructions - Page 20
Recording/Playing Messages Play To 0 jack Record/Play lamp MENU/PAUSE button 1 I Basic Operations Stop playing Pause Playing Press the ►/■ button. Press the MENU/ PAUSE button. The Record/Play lamp starts flashing in orange. To resume playback, press the MENU/ PAUSE button again or press the 0. - AIWA IC-DP200 | Operating Instructions - Page 21
I Cueing Messages Press the IN or ►►1 button with the IC Recorder playing or stopped. Hold the 144 or ►N button pressed with the IC Recorder stopped to cue continuously. Return to the Press the IN button. beginning of the current message. Return to the Press the IN button beginning of repeatedly - AIWA IC-DP200 | Operating Instructions - Page 22
Recording/Playing Messages ! Play an interval of a Message Repeatedly (A-8 Repeat Playback) You can listen to that interval of a message falling between two specified points (A-B) repeatedly. 1 While the IC Recorder is playing a message, press the A button where you want the message to start - AIWA IC-DP200 | Operating Instructions - Page 23
Erasing Ma go Note Messages once erased cannot be restored. Safeguard important messages from accidental erasure by attaching a priority mark (*) to them (page 25). Erasing One Message At a Time 4 Press the ERASE button again during repeat playback. The message is erased and the record numbers of - AIWA IC-DP200 | Operating Instructions - Page 24
Recording/Playing Messages ! Erasing AllMessages in a Folder At Once 5 2,3 0 0 To cancel the procedure Press any button other than the ERASE button while "ALL" is flashing. The erasing procedure will be canceled and the playback stops. The erasing procedure will also be canceled if you do not - AIWA IC-DP200 | Operating Instructions - Page 25
Attaching the Priority Mark A priority mark (*) attached to a message protects the message from being erased accidentally. Safeguard valuable messages against accidental erasure by attaching this priority mark to them. Attaching a Priority Mark While Recording 1 Press the V/PRIORITY button while - AIWA IC-DP200 | Operating Instructions - Page 26
Recording/Playing Messages Editing This IC Recorder allows you to divide a prerecorded message into two parts by assigning an additional index, join these two parts together to reconstruct one message by deleting the index, and move message from one folder to the other. 'Dividing a Message I ( - AIWA IC-DP200 | Operating Instructions - Page 27
! Joining Messages (Deleting the Index) You can join two messages with consecutive record numbers to reconstruct one message. 1 Of the two messages to be joined, select the one having the higher record number, while the IC Recorder is stopped. 2 Hold the ERASE button pressed for about 1 second while - AIWA IC-DP200 | Operating Instructions - Page 28
Recording/Playing Messages Notes • You cannot join two messages with nonconsecutive record numbers. • You cannot join two messages that have been recorded in different recording modes (HO/LP). • The remaining recording time may not allow two messages to be joined, with "CAN Not" appearing in the - AIWA IC-DP200 | Operating Instructions - Page 29
an external microphone is connected to the IC Recorder, recording with the builtin microphone is disabled. I Recording with an Apparatus Supporting a Headphone Jack I (stereo miniplug) Headphone stereo, o To the EXT.MIC (external microphone) jack To the T headphone jack stereo radio cassette - AIWA IC-DP200 | Operating Instructions - Page 30
Recording/Playing Messages ! Recording with an Apparatus Supporting anEarphone Jack (monaural miniplug) To the EXT.MIC ( the IC Recorder, identify the kind of connecting cord required by referring to the instruction manual supplied with that apparatus. • Do NOT use a connecting cord of any kind - AIWA IC-DP200 | Operating Instructions - Page 31
Shooting Pictures With the built-in digital camera in the IC Recorder, you can easily take snapshots. You can attach a voice memo to each picture you take, thereby making a record of the date and place of photography, the name of a person in the picture. Pictures taken are saved in internal memory - AIWA IC-DP200 | Operating Instructions - Page 32
Shooting Pictures Shooting Shutter lamp 2 1,3 Checking How Many More Pictures Can Be Taken A look at the memory status bar in the display window will show you roughly how many more pictures you can take. As more images are recorded, the memory status bar is erased segment by segment from right to - AIWA IC-DP200 | Operating Instructions - Page 33
If Pictures Cannot Be Taken, Short Beeps Are Sounded, Even When the SHUTTER Button Is Pressed The IC Recorder is not ready, or otherwise is not prepared, for taking pictures. Make sure that the Shutter lamp is lit in green before taking pictures. You will also hear short beeps when you press the - AIWA IC-DP200 | Operating Instructions - Page 34
Shooting Pictures Erasing Images Note Images once erased cannot be restored. Safeguard important images from accidental erasure by attaching a priority mark (*) to them (page 36). 'Erasing One Image At a Time 2,3 1 Press the IN or 1+1 button to select an image to erase. 2 Hold the ERASE button - AIWA IC-DP200 | Operating Instructions - Page 35
I Erasing AllImages At Once 1,2 1 While holding the ERASE button pressed, hold the REC/STOP button pressed for about 3 seconds. "ALL ERASE" will appear in the display window, with "ALL" flashing for 10 seconds. To cancel the procedure Press any button other than the ERASE button while "ALL" is - AIWA IC-DP200 | Operating Instructions - Page 36
Shooting Pictures 'Attaching the Priority Mark A priority mark (*) attached to an image protects the image from being erased accidentally. Safeguard valuable images against accidental erasure by attaching the priority mark to them. 1 With the IC Recorder stopped, press the Nil or NI button to select - AIWA IC-DP200 | Operating Instructions - Page 37
Playing a Voice Memo 1 Press the Ili or NI button to select an image for which to play a voice memo. 2 Press theii./M button. You can cue, fast-forward and rewind, and repeat-play voice memos in the same way as with regular messages. Notes • Voice memos are recorded in LP mode. • The V-SENSOR - AIWA IC-DP200 | Operating Instructions - Page 38
Connecting the IC Recorder to a PC The IC-DP200 Manager software included with the IC Recorder allows you to transfer the messages and images recorded with the unit to a PC for storage. It works in conjunction with included utilities to play stored messages, display and edit images, and compose - AIWA IC-DP200 | Operating Instructions - Page 39
7 Click on Next on the Select Program Manager Group screen. Click on Back to return to the previous screen if you wish to change some settings. 8 Click on Next on the Start Installation screen. Copying of the files needed for installation begins. 9 Click on Finish on the Installation Complete screen - AIWA IC-DP200 | Operating Instructions - Page 40
Connecting the IC Recorder to a PC I Uninstalling IC-1)12200 Manager 1 Click on Start on the Desktop, point to Programs, AIWA, and IC-DP2OO, and then click on Uninstall. The Select Uninstall Method screen is displayed. WkanimIlte AMAIC.DIS206vren4,Tv Toaanatoonisolonvicalvwaft saltma alade. - AIWA IC-DP200 | Operating Instructions - Page 41
Add New Hardware Wizard (Found New Hardware Wizard for Windows 2000) is displayed, install the USB driver as instructed in the "Installing the USB Driver" section (page 42) of this manual. • An IC Recorder connected to a PC via a USB cable draws power from the PC. IlDisconnecting the IC Recorder - AIWA IC-DP200 | Operating Instructions - Page 42
) may be displayed. If the wizard is displayed, loadthe includedinstallation CD-ROM into the CD-ROM drive of your PC and install the USB driver manually as instructed below. Windows 98/98SE 1 Click on Next on the Add New Hardware Wizard screen. 2 Choose "Search for the best driver for your device - AIWA IC-DP200 | Operating Instructions - Page 43
Windows Me 1 Select "Specify the location of the driver (Advanced)", then click on Next on the Add New Hardware Wizard screen. 2 Select "Search for the best driver for your device(Recommended)" on the search for new drivers screen, check "Specify a location:", then click on Browse. 3 Choose the - AIWA IC-DP200 | Operating Instructions - Page 44
Connecting the IC Recorder to a PC Windows 2000 Professional 1 Click on Next on the Found New Hardware Wizard screen. 2 Choose "Search for a suitable driver for my device (recommended)" on the Install Hardware Device Drivers screen, then click on Next. 3 Choose "CD-ROM drives" on the Locate Driver - AIWA IC-DP200 | Operating Instructions - Page 45
4 Make sure that "USB Flash Memory Controller Driver: Win98 (01/04/28)" is displayed under the "Universal Serial Bus controllers" in the Device Manager screen. Devce.M.thge, Pao-r.,:e sixt Vow de•irn E , kpe levicer by garreckin CL,F,CPA ▪ E. sk doves ▪ L. splay adapter's Dopy did, - AIWA IC-DP200 | Operating Instructions - Page 46
Connecting the IC Recorder to a PC Launching 1C-0P200 Manager 1 Connect the IC Recorder to a PC via the included USB cable (page 40). 2 Click on on the Desktop. IC-DP200 Manager launches to open a main window. Exiting IC-DP200 Manager Either click on Xi in the upper-right corner of the main window - AIWA IC-DP200 | Operating Instructions - Page 47
Window Menu Size++ Choose this option to widen the recorder operation panel upward. Size-Choose this option to widen the PC operation window downward. About Menu About IC-DP200 Manager Displays version information. ® Drive Selection list Select the desired drive from the list. ® Tool buttons (Voice - AIWA IC-DP200 | Operating Instructions - Page 48
Connecting the IC Recorder to a PC CI Recorder operation buttons 4 :} (Upload button) Transfers data stored in the IC Recorder to the folder selected from the folder list. (Download button) Retransfers voice data that has been transferred to the PC to the IC Recorder. A (Voice A Folder button) - AIWA IC-DP200 | Operating Instructions - Page 49
File-Naming Convention Files that are displayed by IC-DP200 Manager are named according to the following naming convention: File before transfer A0001. cvh 4 File after transfer A092001001.cvh TT a, File type : Voice file : Image file 0 Recorder folder name A: Folder A B: Folder B P: Camera folder - AIWA IC-DP200 | Operating Instructions - Page 50
Connecting the IC Recorder to a PC Transferring Files Recorded or Shot with theICRecorder to thePC(Upload) 1 Select a drive from the Drive Selection list in the PC operation window and then select a destination folder from the folder list. 2 Click on JR or to select the folder on this IC - AIWA IC-DP200 | Operating Instructions - Page 51
Playing Voice Files Transferred on the PC 1 Select a drive from the Drive Selection list in the PC operation window and then select the folder from the folder list that holds the voice file to play. 2 Double-click on the voice file to play in the file list. Voice Player launches to load the file. 3 - AIWA IC-DP200 | Operating Instructions - Page 52
mode are converted to an executable file format, your mailer may not allow executable files to be sent or received. • For instructions on how to send email created, refer to the instruction manual for your mailer. (Send Mail button) Click on it to launch the default mailer in your PC and send the - AIWA IC-DP200 | Operating Instructions - Page 53
Viewing Thumbnails of image Files You can view thumbnails of image files that have been transferred. 1 Click on CI in the PC operation window or choose Image Window from the Programs Menu. Image Window launches. 2 Select the folder holding the files you want to view in the left pane of Image Window. - AIWA IC-DP200 | Operating Instructions - Page 54
Connecting the IC Recorder to a PC Viewing andEdiling Image Fifes You can view transferred images and edit them in a variety of ways, such as copying, zoom in and out, rotation and flipping, trimming, contrast and brightness adjustment, sharpening, and edge detection. You may also convert them to - AIWA IC-DP200 | Operating Instructions - Page 55
File Property Displays information about an open image file, including the file format, file name, creation time and date, and size. Exit Exits Image Viewer. Edit Menu Undo Reverses the most recently performed action. Copy Copies an open image or a selection of an image. Paste Pastes a copy of an - AIWA IC-DP200 | Operating Instructions - Page 56
Connecting the IC Recorder to a PC Rotate canvas Rotate - Rotate Select r 1811. r Right QN Cancel Rotates an open image. Left Rotates the image 90 degrees counterclockwise. 180° Rotates the image 180 degrees. Right Rotates the image 90 degrees clockwise. Mirror =II IIIIIIIIIIII1IIMI= Mirror - AIWA IC-DP200 | Operating Instructions - Page 57
View Menu Tool Bar Click on the command to check it and the tool bar will be displayed. To clear the tool bar, click on the command again to uncheck it. Status Bar Click on the command to check it and the status bar will be displayed at the bottom of the screen, displaying image information, mouse - AIWA IC-DP200 | Operating Instructions - Page 58
Connecting the IC Recorder to a PC D (Select Copy Region button) Copies a selection of an image to be trimmed. k, (Copy Region button) Pastes a selection of an image to a new window. ill (Bright/Contrast button) Adjusts the brightness and contrast of an image. a' (Color Balance button) Adjusts the - AIWA IC-DP200 | Operating Instructions - Page 59
(Play button) to play the voice memo. I Cutting Out an Unwanted Part of an Image (Trimming) 1 Launch an Image Viewer to display an imagefile as instructed in the "Viewing an Image File" section. 2 Click on on the tool bar. 3 Drag on the image to select the area to copy. 4 Click on - AIWA IC-DP200 | Operating Instructions - Page 60
recipient's address, subject, and body text, then click on the button assigned sending e-mail function. Note For instructions on how to send e-mail created, refer to the instruction manual of your mailer. Erasing Files The erasing procedures described in the following sections can be performed in - AIWA IC-DP200 | Operating Instructions - Page 61
I ErasingFiles Stored on the IC Recorder 1 Click on A • , or au in the main window to select a folder on the IC Recorder from which to erase files. 2 Click on the file or files to erase from the recorder file list. You can select multiple files by clicking on them while holding down the CTRL key. - AIWA IC-DP200 | Operating Instructions - Page 62
thinner, benzene, or alcohol, as cleaning fluids. They will harm the surfaces Of the IC Recorder. Troubleshooting Before calling us for services, please check the items listed below. If your problem persists, consult the store where you purchased the IC-DP200 IC Recorder or your nearest Aiwa dealer - AIWA IC-DP200 | Operating Instructions - Page 63
Symptom Action Unable to record up to • Voice and images are stored in shared memory. As more the maximum images are recorded, therefore, the time available for recording time, or recording voice decreases according to the number of remaining recording images recorded. time has diminished • - AIWA IC-DP200 | Operating Instructions - Page 64
Miscellaneous Symptom Noises Recording won't complete Recorded sound is low as a whole Recorded music sounds erratic The IC Recorder takes time before it is ready for shooting when switched to Camera mode Recorded images appear dark The clock in the display window appears like this Action • Noise - AIWA IC-DP200 | Operating Instructions - Page 65
Symptom The recording time and date display appears like this O alio HQ FIEC DATE Action • If the clock has not been set, the display window won't display the recording/shooting time and date when it is set to the recording time and date display. -+ Set the clock. E F Pressing the menu button - AIWA IC-DP200 | Operating Instructions - Page 66
the USB cable while a data transfer is in progress. The IC Recorder would become inoperable. If the IC Recorder gets inoperable, reset the recorder as instructed in the "If the IC Recorder Malfunctions or the Display is Abnormal - How to reset" section (page 10). If the IC Recorder still fails to - AIWA IC-DP200 | Operating Instructions - Page 67
Specifications Storage media Built-in flash memory (16 MB) Frequency range 500 to 3,500 Hz Microphone Built-in electret condenser microphone (monaural) Maximum working output 100 mW (8 SI) (EIAJ) Input terminal External microphone jack (monaural minijack) Output terminal Headphone jack (stereo - AIWA IC-DP200 | Operating Instructions - Page 68
Miscellaneous Component Names and Functions 2 11 3 4 5 6 4 7 8 9 D Record/Play lamp Lights in red when the IC Recorder is recording and in green when it is playing. It flashes in orange when the IC Recorder has recoding/playback paused. ® Built-in microphone ® DISPLAY button Each time - AIWA IC-DP200 | Operating Instructions - Page 69
C) NH button • Press this button with the IC Recorder playing or stopped to cue the current message or the previous message. • Hold this button pressed with the IC Recorder stopped to cue messages continuously. • Hold this button pressed with the IC Recorder playing to rewind the current message. • - AIWA IC-DP200 | Operating Instructions - Page 70
Miscellaneous a Hand strap grip Attach the hand strap included to this grip. 18 19 si9 It Viewfinder window 11$ Speaker 1# Battery compartment Load two size AAA (LR03) alkaline batteries. USB connector Connectthe Series B (small) connector of the USB cable included to the USB connector of the IC - AIWA IC-DP200 | Operating Instructions - Page 71
I Display Window 1 8 9 10 2 11 3 I I I11 13 _I I_ LI 4 o I n =1i I LI 5 AC1>BE V- EN 7 ® Voice mode indicator • Displayed when the IC Recorder is running in Voice mode. • Displayed when the IC Recorder is recording or playing a voice memo, or stopped in Camera mode. 0 Camera mode - AIWA IC-DP200 | Operating Instructions - Page 72
IC-DP200 Manager License Agreement You may use IC-DP200 Manager and all associated programs and documentation (hereinafter referred to as the Software) only if you agree to the terms and conditions outlined below. Once you commence using the Software, the terms of this License Agreement shall be in
-
 1
1 -
 2
2 -
 3
3 -
 4
4 -
 5
5 -
 6
6 -
 7
7 -
8
-
9
-
10
-
11
-
12
-
13
-
14
-
15
-
16
-
17
-
18
-
19
-
20
-
21
-
22
-
23
-
24
-
25
-
26
-
27
-
28
-
29
-
30
-
31
-
32
-
33
-
34
-
35
-
36
-
37
-
38
-
39
-
40
-
41
-
42
-
43
-
44
-
45
-
46
-
47
-
48
-
49
-
50
-
51
-
52
-
53
-
54
-
55
-
56
-
57
-
58
-
59
-
60
-
61
-
62
-
63
-
64
-
65
-
66
-
67
-
68
-
69
-
70
-
71
-
72
 |
 |

111
OPERATING
INSTRUCTIONS
MANUAL
DE
INSTRUCCIONES
MODE
D'EMPLOI
OWNER'S
RECORD
For
your
convenience,
record
the
model
number
and
the
serial
t
number
(you
will
find
them
in
the
battery
compartment
of
your
set)
in
the
space
provided
below,
Please
refer
them
when
you
contact
;;
your
Aiwa
dealer
in
case
of
difficulty.
Model
No.
Serial
No.
IC-DP200
-DP200
IC
Recorder
Grabador
En
Circuito
Integrado
ENGLISH
ESPACIOL
FRANcAIS