AIWA NSX-999 Operating Instructions
AIWA NSX-999 Manual
 |
View all AIWA NSX-999 manuals
Add to My Manuals
Save this manual to your list of manuals |
AIWA NSX-999 manual content summary:
- AIWA NSX-999 | Operating Instructions - Page 1
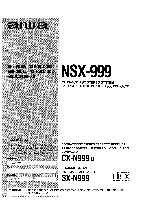
NSX-999 COMPACT DISC STEREO SYSTEM SISTEMAESTEREOFONICODE DISCOCOMPACTO COMPACT DISC STEREO CASSETTE RECEIVER RADIOCASSETTE COMPACTO ESTEREO CON DISCO CX-N999U SPEAKER SYSTEM SISTEMA DE ALTAVOCES SX=N999 tniit DIGITALAUDIO ;',":%; WARNING: TO REDUCE THERISKOFFIREOR ,p.;~f--,jj:"~"By$',;;'-j - AIWA NSX-999 | Operating Instructions - Page 2
Aiwa NSX-999 Congratulations on your purchase of an Aiwa Stereo System. To optimize the performance of this system, please take the time to read through these Operating Instructions and become fdmiliar with the operating procedures. About the layout of this manual This manual contains instructions - AIWA NSX-999 | Operating Instructions - Page 3
Bienvenido a Aiwa NSX-999 Muchas gracias porsu acertadacompra del Sistema Estereofonico de Aiwa. Para obtener el optimo funcionamiento de su sistema, skvase leer detenidamente este manual instrucciones y familiaricese con Ios procedimientos de operation. Formato de este manual Este manual contiene - AIWA NSX-999 | Operating Instructions - Page 4
WHOLE TAPE 5O RECORDING FROM A CD 52 Al EDIT RECORDING 54 PROGRAMMED EDIT RECORDING 58 TIMER 62 SETTING THE TIMER 62 SETTING THE SLEEP TIMER 64 KARAOKE 66 MICROPHONE MIXING 66 USEFUL FUNCTIONS FOR KARAOKE 68 CARE AND MAINTENANCE 7O SPECIFICATIONS 72 TROUBLESHOOTING GUIDE 76 PARTS AND - AIWA NSX-999 | Operating Instructions - Page 5
DE LA CINTA 37 OPERAClONES BASICAS 37 RECEPCION DE LA RADIO 41 SINTONIZACION MANUAL 4l MEMORIZATION DE EMISORAS 41 SINTONIZACION DE UNA EMISORA MEMORIZADA .....43 OTRAS 67 FONCTIONS UTILES POUR KARAOKE 69 SOINS ET ENTRETIEN 7l SPECIFICATIONS 73 EN CAS DE PROBLEME 77 NOMENCLATURE 79 5 - AIWA NSX-999 | Operating Instructions - Page 6
curves, and 4 changeable equalization curves that can be preset manually. Enjoying Karaoke You can connect two microphonesfor duets, echo part on multi audio discs or tapes, so that the accompaniment is heard from both speakers. You can also use the AUTO MULTIPLEX function to reduce the vocal part - AIWA NSX-999 | Operating Instructions - Page 7
Usted puede usar tambien la funcion de AUTO VOCAL FADER para reducir la parte vocal solamente cuando este cantando con el mlcrofono conectado. Funcion de MULTIPLEX sonore reelle saris Ie besoin de connecter des encemtes surround, II y a quatre modes DSP preregles possedant des courbes d'egalisatlon - AIWA NSX-999 | Operating Instructions - Page 8
is not ON. q If the AC cord is broken or damaged, or if the wires are exposed, contact your dealer or an Aiwa service station and have it replaced or repaired immediately. On condensation When the room is heated, you sometimes see water drops on your windows; this is called condensation. This can - AIWA NSX-999 | Operating Instructions - Page 9
utilizaci6n. Si se presenta algun problems, desconecte el cord6n de contacter Immediatement Ie revendeur ou un centre de service Aiwa pour Ie faire remplacer ou reparer. Condensation Lorsqu deplace d'un endroit froid a un endroit chaud. q ii est utilise clans une piece oh Ie Ie chauffagevient juste - AIWA NSX-999 | Operating Instructions - Page 10
the speaker cords to the speakers. 2 Connect the speaker cords with the unit. Connect the right speaker to the@ and @ R terminals, and the left speaker to in the display window (DEMO mode). This demonstration can be canceled. Refer to "DEMO (DEMONSTRATION) MODE" on page 16. Also, the II SET DXton - AIWA NSX-999 | Operating Instructions - Page 11
visualizadora (Modo DEMO). Esta demostracion puede cancel arse. Refierase al "MODO DEMO (DEMOSTRACION)" en la pagina 17. Ademas de esto, parpadea el boton II SET para informarle que debe ajustarse la hors. Refierase a "AJUSTE DEL RELOJ" pagina 21. En caso del uso con un equipo optional, conecte el - AIWA NSX-999 | Operating Instructions - Page 12
in a T-shape and attach the ends to the wall with the cellophane tape. q For AM reception, find the best position and fix this antenna vertically stereo system itself, or close to the AC cord or speaker cords, since noise will be picked up. CONNECTING AN OUTDOOR ANTENNA For better FM reception, use - AIWA NSX-999 | Operating Instructions - Page 13
AM. . Ne pas mettre I'antenne cadre AM pres d'un tourne-disque, d'un Iecteur de disques compacts, d'un televiseur ou de la chalne stereo ni pres du cordon secteur ou des cordons d'enceinte; elle pourrait capter des parasites. CONNEXION D'UNE ANTENNE EXTERIEURE Pour obtenir une meilleure reception FM - AIWA NSX-999 | Operating Instructions - Page 14
. q Use surround speakers with an impedance of 16 ohms (Aiwa SX- R220, etc.). CONNECTING A SUPER WOOFER Connecting a super woofer increases the realism of low-frequency sounds. Connect a super woofer speaker with a built-in amplifier to the SUPER WOOFER terminal. + u Refer to the operating manual of - AIWA NSX-999 | Operating Instructions - Page 15
VIDEO/AUX. Use un cable Aiwa SX-R220, etc.). CONEXION DE UN ALTAVOZ DE SUPER GRAVE La conexion de un altavoz de super grave aumenta el realismo de Ios sonidos a baja frecuencia. Conecte un altavoz de super grave con amplificador integrado al terminal SUPER WOOFER. + u Refierase al manual SPEAKERS - AIWA NSX-999 | Operating Instructions - Page 16
the unit. After use Press the POWER button to turn off the power. The display changes to clock or II SET button flashes to guide you in setting the current time. Headphones Connect headphones to the PHONES jack with a stereo standard plug (06.3 mm/'/, inch). No sound is heard from the speakers - AIWA NSX-999 | Operating Instructions - Page 17
m~me maniere. q Ne pas effectuer cette operation pendant I'enregistrement. Guide par eclakage+ u Chaque fois qu'on appuie sur une des touches la touche II SET clignote pour guider clans Ie reglage de I'heure courante. Utilisation d'un casque Brancher un casque muni d'une fiche stereo standard (6,3 - AIWA NSX-999 | Operating Instructions - Page 18
, such as direct sunlight. q other remote controls are used nearby (television etc.). CASSEITE TAPES Usable tapes For playback, use normal (type I), CrO, (type U), and metal (type IV) tapes. II For recording, use normal (type I) and CrOz (type II) tapes. The proper bias and equalization to - AIWA NSX-999 | Operating Instructions - Page 19
el boton TUNER/BAND, el boton TAPE/ DECK 1/2 o el boton CD. Al presionar el boton CD o el boton TAPE/DECK 1/2 estando conectada la alimentacion de I), CrO, (tipo II) y cinta metalica (tipo IV). Para la grabacion, utilice Ias cintas normales (tipo I) y CrO, (tipo II). Se seleccionan automaticamente la - AIWA NSX-999 | Operating Instructions - Page 20
indicates one second. To correct the current time+ u Press the CLOCK button on the remote control. The clock is displayed for 4 seconds. Within this period, press the II SET button and continue by folIowing steps 2 to 5. To display the current time while the power is on Press the CLOCK button on the - AIWA NSX-999 | Operating Instructions - Page 21
segundos. Para obtener la indication mas exacta del reloj, presione el boton II SET en el preciso memento que se de la sehal horaria oficial. Cada + DOWN ou > UP pour specifier Ies minutes. 5 Appuyer sur la touche II SET pour regler Ies minutes et terminer Ie reglage. Les minutes arri+tent de - AIWA NSX-999 | Operating Instructions - Page 22
. When using the remote control Press off position, to suit your preference. SUPER T-BASS - For louder deep bass+ MANUAL button of the GEQ so that ROCK, POP, JAZZ or CLASSIC in the display is surrounded by red, and press the ROCK, POP, JAZZ or CLASSIC button of the GEQ. + u To select with the remote - AIWA NSX-999 | Operating Instructions - Page 23
la clarte des sons de haute frequence. II permet egalement d'obtenir une voix plus claire la position de repos, comme on prefere. SUPER T-BASS - Pour des basses plus graves et Mas presencia en la parte vocal yen la gama media PROGRAMMED Appuyer sur la touche PRGM/MANUAL du GEQ de maniere que ROCK, - AIWA NSX-999 | Operating Instructions - Page 24
Press the GEQ PRGM/MANUAL button so that one of the GEQ Ml to M4 indicators in the display is surrounded by red. 2 Press one of the GEQ Ml -M4 buttons. To select with the remote control Press the GE(2 MANU button repeatedly until the desired equalization curve is displayed. THE DSP (DIGITAL SIGNAL - AIWA NSX-999 | Operating Instructions - Page 25
de frecuencia. Para seleccionar una curva de ecua[izacion manualmente programada 1 Presione el boton GEQ PRGM/MANUAL de forma que en el visualizador se rodee en rojo uno de Ios indicadores GEQ Ml a M4 comme on prefere. q L'egaliseur graphique n'est pas mis hors service en mettant Ie DSP hors - AIWA NSX-999 | Operating Instructions - Page 26
is monaural A simulated stereo effect can be obtained by selecting the LIVE and MOVIE modes. The other modes. keep the source monaural. PRESETTING A DSP SURROUND SOUND MANUALLY 1 Press the PRGMIMANUAL button of the DSP so that one of the DSP Ml to M4 indicators in the display is surrounded by red - AIWA NSX-999 | Operating Instructions - Page 27
OFF soit affiche. Quand la source musicale est monophonique Un effet stereo simule peut 6tre obtenu en selectionnant Ies modes LIVE et MOVI selectionner un son d'ambiance DSP preregle manuellement 1 Appuyer sur la touche PRGM/MANUAL du DSP de maniere qu'un des indicateurs DSP Ml a M4 sur I' - AIWA NSX-999 | Operating Instructions - Page 28
CD is displayed. If you press the button with power off The power is turned on and CD is displayed. If Music calendar Note that only the first 20 tracks are displayed, even if the disc contains 21 tracks or more of the skipped tray number goes out in the display. To stop play Press the s button. To - AIWA NSX-999 | Operating Instructions - Page 29
s . Para cesar y abrir la bandeja al mismo tiempo, presione el boton A OPEN/CLOSE. Para hater una pausa Presione el boton II. Parpadea el boton II. Para reanudar la reproduction, boton. presione nuevamente el mismo 0 Numero du disque s61ectionne @ Temps de lecture total du disque selectionne - AIWA NSX-999 | Operating Instructions - Page 30
the CD EDIT/REMAIN button during playback. The amount of time remaining until all tracks finish playing is displayed. To restore the play time display, press it again. When using the remote control, press the EDIT/REMAIN button. Searching for a particular point in a track You can locate a particular - AIWA NSX-999 | Operating Instructions - Page 31
OPERACIONES BASICAS OPERATIONS DE BASE Para verificar el tiempo restante Presione et boton CD EDIT/REMAIN durante la reproduction. Se visualizaeltiempoque queda hastaquetermine la reproduction de todas Ias canciones. Para restablecer a la indication del tiempo de reproduction, presione otra vez el - AIWA NSX-999 | Operating Instructions - Page 32
the tracks on the selected disc or on all discs in the compartment can be played repeatedly. Press the REPEAT button on the remote control to display q, before or during play. + u To repeat only selected tracks Program the desired tracks before selecting repeat play. (See page 34.) To cancel repeat - AIWA NSX-999 | Operating Instructions - Page 33
SELECCION DIRECTA DE UNA CANCION SELECTION DIRECTE D'UNE PLAGE Usted puede seleccionar directamente cualquier cancion de cualquier disco e iniciar la reproduction. + u 1 Presione uno de Ios botones DISC DIRECT PLAY para seleccionar un disco. El disco seleccionado se indica en rojo en el - AIWA NSX-999 | Operating Instructions - Page 34
. To check the program Each time the + DOWN or * UP button is pressed before playing, a disc number, a track number, and a program number will be displayed. To clear the program Press the s CLEAR button before playing or press the A OPEN/ CLOSE button. To add tracks to the program Before playing - AIWA NSX-999 | Operating Instructions - Page 35
REPRODUCTION PROGRAMADA LECTURE PROGRAMMED El reproductorde discos compactos tiene una funcion de memoria que Ie permite reproducer hasta 30 canciones de tres discos en cualquier orden. 1 Presione el boton PRGM en el modo de parada. El indicador PRGM parpadea en et visualizador. 2 Presione uno de - AIWA NSX-999 | Operating Instructions - Page 36
sides. 1 Press the TAPE/ DECK 1/2 button. TAPE is displayed. If you press the button with power off The power is turned on and TAPE is displayed. If a tape is loaded, play begins pause (deck 2 only) Press the II button. The II button flashes. To resume play, press it again. To be continued. 3b - AIWA NSX-999 | Operating Instructions - Page 37
II. Para reanudar la reproduction, presione otra vez el mismo boton Il. Continua, Sur la platine 1, Ies cassettes sent toujours Iues sur Ies deux faces. Sur la platine 2, on peut selectionner Ie mode d'inversion pour Iire une face ou Ies deux. 1 Appuyer sur la touche TAPE/DECK 1/2. TAPE service. - AIWA NSX-999 | Operating Instructions - Page 38
is set to 0000. The counter is also set to 0000 when a cassette holder is opened. Usable tapes Use normal (type I), Cr02 (type II) or metal (type IV) tapes. DOLBY NR system The Dolby Noise Reduction system reduces tape hiss noise. For optimum performance, press the DOLBY NR button to turn the 00 NR - AIWA NSX-999 | Operating Instructions - Page 39
utilizable UtiliceIascintas normales (tipo I), CrOz (tipo II) o Ias metalicas (tipo IV). Sistema en blanco ruidoso. q una cinta con Iarga parte de bajo nivel de sonido. q una cinta grabada arr~t, selectionner une platine en appuyant sur la touche TAPE/DECK 1/2, puis appuyer sur la touche 1 CLEAR - AIWA NSX-999 | Operating Instructions - Page 40
number is assigned to the station. Use the preset number to tune in to a preset station directly. (See "TUNING IN TO A PRESET STATION".) 1 Select band and station. See "MANUAL TUNING". 2 Press the II SET button to store the station. Information in the display+ u @ The frequency Q The preset number - AIWA NSX-999 | Operating Instructions - Page 41
est affiche pendant deux second es. Pendant la reception FM stereo, ([I@Il)est affiche. Pour rechercher une station rapidement ( Para memorizar una emisora, use el ntimero de presintonizacion para y una emisora. Vease KSINTONIZACION MANUAL", 2 Presione el boton II SET para memorizar una emisora. - AIWA NSX-999 | Operating Instructions - Page 42
numeric buttons and the +1 O button on the remote control to select a preset number. + u The The II SET button flashes for 4 seconds. Go to step 3 within these 4 seconds. 3 Press the II SET display. + u To change the AM tuning interval The AM tuning interval is factory-set to 10 kHz. If you use - AIWA NSX-999 | Operating Instructions - Page 43
el numero correspondiente a la emisora que desea borrar. 2 Presione el boton s CLEAR. El boton II SET parpadea durante 4 segundos. Prosiga al paso 3 dentro de estos 4 segundos. 3 Presione el boton II SET. El numero memorizado parpadea y Iuego se apaga. Los ntimeros memorizados de todas Ias emisoras - AIWA NSX-999 | Operating Instructions - Page 44
button. The power is turned on (direct play function). 2 Play the external source. Refer to the operating instructions of the connected equipment. To change a source name in the display The source name in the display can be changed to VIDEO, AUX, or TV. + u With the power on, press the POWER button - AIWA NSX-999 | Operating Instructions - Page 45
ECOUTE D'AUTRES SOURCES 1 Presione el boton VIDEO/AUX. Se conecta la alimentaclon (funcion de reproduction directs). 2 Reproduzca la fuente externa. Refierase al manual de instrucciones del equipo conectado, Para cambiar un nombre de la fuente sonora en el visualizador El nombre de la fuente en el - AIWA NSX-999 | Operating Instructions - Page 46
tape to the point where recording will start. q Use normal (type I) or Cr02 (type II) tapes. 1 Insert the tape recording. When you use the remote control to start recording display for 4 seconds and the tape runs without recording. After 4 seconds the deck enters recording pause mode. 2 Press the II - AIWA NSX-999 | Operating Instructions - Page 47
de grabacion en pausa. 2 lPara reanudar la grabacion, presione e! boton II. Para insertar un espacioen blancode menosde4segundos Despues de presionar el boton q touche DOLBY NR pour mettre Ie reducteur de bruit DOLBY en service. L'indicateur 00 NR s'allume. Pour enregistrersans Ie reducteurde bruit - AIWA NSX-999 | Operating Instructions - Page 48
with the exposed side down. 4 Check if "TAPE 1" is displayed in the display. If it is not displayed, press the TAPE/DECK 1/2 button. 5 Press the q REC/REC MUTE button to start recording. Playing and recording starl simultaneously. When you use the remote control to start recording, first press the - AIWA NSX-999 | Operating Instructions - Page 49
Uti[ice cintas normales (tipo I) o CrO, (tipo II). 1 Presione el boton TAPE/DECK 1/2. Siesta insertado un cassette de cinta Al presionar el boton TAPE/DECK 1/2 con la alimentacion desconectada, la reproduction inicia por enregistree avec BBE, il est conseillede mettre Ie systeme BBE hors service. 49 - AIWA NSX-999 | Operating Instructions - Page 50
original tape. 1 Press the TAPE/DECKl/2 button. If a tape is inserted When pressing the TAPE/DECKl/2 is displayed. dub at high speed: Press the HIGH button. H-DUB is displayed. The tapes are tape is broken off. q If the leader segment of the dubbing tape is longer than that of the original tape - AIWA NSX-999 | Operating Instructions - Page 51
de prevention contra borradura, no podra efectuarse la grabacion. . Si la parte extrema de la cinta a copiarse es mas Iarga que la de Iacinta originale. 1 Appuyer sur la touche TAPE/DECK 1/2. Si une cassette est en place Quand on appuie sur la touche TAPE/DECK 1/2 avec I'alimentation toupee, - AIWA NSX-999 | Operating Instructions - Page 52
Use normal (type I) or CrOz (type II) tapes. 1 Insert the tape to be recorded on into deck 2. Press the EJECT A mark to open the cassette holder. Insert the tape recorded if the tape is long enough. When you use the remote control to . (See "PROGRAMMED PLAY.) To record part of the CD When the q REC/ - AIWA NSX-999 | Operating Instructions - Page 53
punto de iniciode la grabacion. q Use cintas normales (tipo I) o CrOz (Vease "REPRODUCTION PROGRAMADA.) Para grabar parte del disco compacto Al presionar el normales (type I) ou CrOz (type II). 1 Inserer la cassette a enregistrer Ie reducteur de bruit DOLBY en service. L'indicateur 00 NR s'ailume. - AIWA NSX-999 | Operating Instructions - Page 54
time it is pressed, the display changes. ~Al EDIT- PRGM EDIT7 I I When using the remote control, press the EDIT/REMAIN but- ton. 4 Select a disc by pressing one of the DISC DIRECT PLAY buttons. If only one disc is loaded, skip this step. 5 Press the + DOWN or* the tape length. UP button to - AIWA NSX-999 | Operating Instructions - Page 55
GRABACION CON EDICION Al ENREGISTREMENTAVEC MONTAGE ET CALCUL DU TEMPS La "funcion Al EDIT Ie permite grabar discos compactos sin que se preocupe de la duraci6n de la cinta y de Ias canciones. Cuando inserte un disco compacto, el aparato calcula automaticamente la duration de Ias canciones. Si es - AIWA NSX-999 | Operating Instructions - Page 56
the edit program Before recording, press the CD EDIT/REMAIN button. The program for one side of the tape is displayed each time the button is pressed. + u @ Time remaining on the tape @ Tape side @ Total number of programmed tracks @ Program tracks To check the order of the programmed tracks Before - AIWA NSX-999 | Operating Instructions - Page 57
GRABACION CON EDICION Al ENREGISTREMENTA VEC MONTAGE ET CALCUL DU TEMPS Para borrar el programa de edition Antes de la grabacion, presione dos veces el boton s CLEAR de manera que se apague la indication "EDIT", o presione el boton 4 OPEN/CLOSE. Para verificar el programa de edition Antes de la - AIWA NSX-999 | Operating Instructions - Page 58
CD EDIT/REMAIN button twice. EDIT lights up and PRGM flashes in "the display. Each time it is pressed, the display changes. Al EDIT - PRGM EDIT When using the remote control, press the EDIT/REMAIN button. 4 Press the 4 DOWN or* the tape length. UP button to designate Enter a length from 10 to 99 - AIWA NSX-999 | Operating Instructions - Page 59
GRABACION CON EDICION PROGRAMADA Esta funcion Ie permite programar Ias canciones a grabarse de todos Ios discos contenidos en el compartimiento de discos, en cualquier orden. El tiempo remanente de cada cara de la cinta se visualiza cuando usted programa Ias canciones. 1 Inserte et cassette de cinta - AIWA NSX-999 | Operating Instructions - Page 60
B. After confirming 3 in the display, repeat steps 5 and 6 for side B. 10 Press the q REC/REC MUTE button to start recording. The tape is rewound to the beginning of the front side, plays through the leader for 10 seconds, and then recording starts. When you use the remote control to start recording - AIWA NSX-999 | Operating Instructions - Page 61
GRABACION CON EDICION PROGRAMADA ENREGISTREMENTA VEC MONTAGE PROGRAMME 9 I%ograme Ias canciones a grabarse en la cara B. [)espues de confirmar ] en el visualizador, repita Ios pasos 5 y 6 para la cara B. ~ 10 Presione el boton. grabacion. REC/REC MUTE para iniciar la La cinta se reenrolla al - AIWA NSX-999 | Operating Instructions - Page 62
remote control to select timer playback mode or timer recording mode. Each time it is pressed, ~ or ~@~c IS displayed. ~Timer playback mode+@ ~can;:. Timer recording mode The II a tape, or tune in to a station. ~cc ,n timer recording mode After the preparation for each source, set the tape to - AIWA NSX-999 | Operating Instructions - Page 63
ou - UP et sur la touche II SET pour specifier I'heure de la mise sous tension par la minuterie. Apres la specification de I'heure de la mise sous tension Si on a selectionne Ie mode enregistrement commande par la minuterie & I%tape 1 Seuie la fonction TUNERou VI DEO/AUX peut &reselectionnee. Si - AIWA NSX-999 | Operating Instructions - Page 64
timer standby mode temporarily Press the TIMER button on the remote control so that ~ or ~~c goes out in the display. To restore timer standby mode, press the TIMER button to display ~ or ,$c. Using the unit while the timer is set You can use the unit normally after setting the timer. Before turning - AIWA NSX-999 | Operating Instructions - Page 65
que este desconectada la alimentaci6n. . El equipo conectado no puede conectarse y desconectarse mediante el temporizador integrado de este aparato. Use un temporizador externo. AJUSTE DEL CRONODESCONECTADOR (Operando s610 con el control remoto) Con el usodel cronodesconectador, la alimentacion se - AIWA NSX-999 | Operating Instructions - Page 66
connecting two microphones simultaneously The use of unidirectional type microphones (Aiwa DM-HI 8, DMH15, etc.) is recommended to prevent howling. ECHOING THE SOUND -+ u You can get an echo sound while using the microphone. First, press the MIC ECHO button to display "E-ON". Then, adjust the echo - AIWA NSX-999 | Operating Instructions - Page 67
control MIC MIXING hacia la position MIN. En la conexion de dos microfonos al mismo tiempo Se recomienda utilizar microfonos del tipo unidirectional (Aiwa DM-H18, DM-H15,etc.) para evitar chillidos. Pour chanter avec accompagnement par une source musicale, on peut brancher jusqu'a deux microphones - AIWA NSX-999 | Operating Instructions - Page 68
can use discs or tapes as Karaoke sources. q VOCAL FADER function This function makes the singer's voice on ordinary discs or tapes softer than the accompaniment. q MULTIPLEX function This function mutes the vocal part on multi audio discs, so that the accompaniment is output through both speakers - AIWA NSX-999 | Operating Instructions - Page 69
bajo que el acompahamiento musical. q Funcion de MULTIPLEX Estafuncion silencia la parte vocal de Ios discos de audio mtiltiple de manera que se oiga pour repasser au son normal. ~ Quand Ies fonctions Karaoke sent en service, la source sonore est entendue en monophonic, m~me si elle est - AIWA NSX-999 | Operating Instructions - Page 70
parts are completely dried before inserting tapes. Care of discs q Before playing a disc, wipe it from the center out with a cleaning cloth. + u q After playing a disc, store it in its case. Do not leave the disc in places that are hot or humid. Care of tapes q Store tapes in their cases after use - AIWA NSX-999 | Operating Instructions - Page 71
CIJIDADO Y MANTENIMIENTO SOINS ET ENTRETIEN De vezen cuando efecttie ei servicio de mantenimiento y cuidado del software para conservarlos siempre condiciones. del aparato en optimas Para Iimpiar el gabinete Utilice un paho suave Iigeramente remojado con una solution de detergence suave. No - AIWA NSX-999 | Operating Instructions - Page 72
minutes maximum FTC RULE 120 watts per channel, Min. RMS at 6 ohms, from 40 Hz to 12 kHz, with no more than 1% Total Harmonic Distortion 0.1 % (85 W, 1 kHz, 6 ohms, DINAUDIO) VI DEO/AUX: 150 mV (adjustable) MIC: 1.0 mV/10 k.Q SUPER WOOFER :2.7 V 4 tracks, 2 channels CrOz tape: 50 - 16000 Hz Normal - AIWA NSX-999 | Operating Instructions - Page 73
1 kHz, 6ohms, AUDIO DIN) VI DEO/AUX: 150 mV (reglabie) MIC: 1,0 mV/10 kfl SUPER WOOFER: 2,7 V 4 pistes, 2 canaux Bande CrOz 50 - 16000 Hz Bande normale: 50-15000 Hz 60 dB (Reducteur de bruit Dolby en service, bande CrOz, niveau de crete) 4,8 cm/s Polarisation CA Effacement CA 1 servomoteur CC 1 t6te - AIWA NSX-999 | Operating Instructions - Page 74
dB) SPEAKER SYSTEM (These values are for one speaker.) Cabinet type 3 way, bass reflex (magnetism sealed type) Speaker 140 mm (.55/8h) CXXIe type Woofer 60 mm AM loop antenna (1 i r Speaker cords (2) Remote control (1) Specifications and external appearance subject to change without notice. - AIWA NSX-999 | Operating Instructions - Page 75
SPECIFICATIONS cSeccion del reproductor de discos compactos> Disco Disco compacto Metodo de exploration Explorador optico sin contacto Laser (aPliCacion del laser de semiconductor) Laser de agudos tipo conico 60 mm Altavoz de super agudos tipo ceramico 20 mm lmpedancia 6 ohmios Potencia - AIWA NSX-999 | Operating Instructions - Page 76
76 - AIWA NSX-999 | Operating Instructions - Page 77
DE PROBLEME Si la unidad no funciona como se ha descrito en este manual de guide suivant. GENERALITIES II n'y a pas de son. q Le cordon secteur est-il branche correctement ? q N'y a-t-ii pas -elle pas Iue avec Ie mode reducteur de bruit Dolby en service ? q La tiMe de lecture n'est-elle pas sale - AIWA NSX-999 | Operating Instructions - Page 78
the black circles. The illustrations areclassified according to their functions. The instructions in this manual refer mainly to the buttons on the main unit. Buttons on the remote control with the same names as those on the main unit can be used as well. CD function Funcion de discos compactos (CD - AIWA NSX-999 | Operating Instructions - Page 79
Las instrucciones descritas en este manual se refieren principalmente a Ios clans Ies illustrations suivantes. Les instructions concernant chaque touche se trouvent aux II s CLEAR @-@ - I?l - AIWA NSX-999 | Operating Instructions - Page 80
the laws on copyright relating to recordings from discs, radio or external tape for the country in which the machine is being used. DERECHOS DE AUTOR SirVase observar Ias Ieyes de derechos de autor relacionadas double-D DO sent des marques de Dolby Laboratories Licensing Corporation. AIWA C~O.,LTDm
-
 1
1 -
 2
2 -
 3
3 -
 4
4 -
 5
5 -
 6
6 -
 7
7 -
8
-
9
-
10
-
11
-
12
-
13
-
14
-
15
-
16
-
17
-
18
-
19
-
20
-
21
-
22
-
23
-
24
-
25
-
26
-
27
-
28
-
29
-
30
-
31
-
32
-
33
-
34
-
35
-
36
-
37
-
38
-
39
-
40
-
41
-
42
-
43
-
44
-
45
-
46
-
47
-
48
-
49
-
50
-
51
-
52
-
53
-
54
-
55
-
56
-
57
-
58
-
59
-
60
-
61
-
62
-
63
-
64
-
65
-
66
-
67
-
68
-
69
-
70
-
71
-
72
-
73
-
74
-
75
-
76
-
77
-
78
-
79
-
80
 |
 |
NSX-999
COMPACT
DISC STEREO SYSTEM
SISTEMAESTEREOFONICODEDISCOCOMPACTO
COMPACT
DISC STEREO
CASSETTE
RECEIVER
RADIOCASSETTE
ESTEREO
CON
DISCO
COMPACTO
CX-N999
U
SPEAKER
SYSTEM
SISTEMA
DE ALTAVOCES
SX=N999
tniit
DIGITALAUDIO
‘“:%;
WARNING:
TO
REDUCE
THERISKOFFIREOR
ELECTRIC
SHOCK,DONOTEXPOSE
THISAPPLIANCE
;,
.~j“B;’j
‘;
p-,:“y,-,
TO
RAIN
OR
MOISTURE.
,;f-j~$
-.-”..~
.‘
....
,,-=~
8“s’.
ww-----.-s’3
...8,
6,..-#------