ASRock S330 User Manual
ASRock S330 Manual
 |
View all ASRock S330 manuals
Add to My Manuals
Save this manual to your list of manuals |
ASRock S330 manual content summary:
- ASRock S330 | User Manual - Page 1
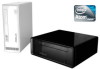
NetTop S330 Series User Manual Version 1.0 Published April 2009 Copyright©2009 ASRock INC. All rights reserved. 1 - ASRock S330 | User Manual - Page 2
any form or by any means, except duplication of documentation by the purchaser for backup purpose, without written consent of ASRock Inc. Products and corporate names appearing in this manual may or may not be registered trademarks or copyrights of their respective companies, and are used only for - ASRock S330 | User Manual - Page 3
you read the following safety instructions. Setting up your system Read and follow all instructions in the documentation before you operate If you encounter the following technical problems with the product, unplug the power cord and contact a qualified service technician or your retailer. • The - ASRock S330 | User Manual - Page 4
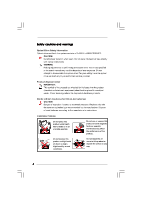
than those specified in the user's manual may result in hazardous laser exposure the optical drive serviced only by an authorized service provider. Product Lithium Cautions (for lithium-ion batteries) CAUTION! Danger of according to the manufacturer's instructions. Installation Notices Do not - ASRock S330 | User Manual - Page 5
System Quick Installation ...System Components Reinstallation ...Driver Installation ...UTILITY MEMU ...5.1 Instant Boot ...5.1.1 Introduction ...5.1.2 Installation ...5.2 ASRock OC Tuner ...5.2.1 Introduction ...5.2.2 Installation ...6.1 Introduction ...6.1.1 BIOS Menu Bar ...6.1.2 Navigation Keys - ASRock S330 | User Manual - Page 6
7 Software Support ...39 7.1 Install Operating System ...7.2 Support CD Information ...7.2.1 Running Support CD ...7.2.2 Drivers Menu ...7.2.3 Utilities Menu ...7.2.4 Contact Information ...39 39 39 39 39 39 6 - ASRock S330 | User Manual - Page 7
.com If you require technical support related to this product, please visit our website for specific information about the model you are using. www.asrock.com/support/index.asp 1.1 Package Contents ASRock NetTop S330 Series ASRock Support CD ASRock Quick Start Guide One AC Power Cord One AC - ASRock S330 | User Manual - Page 8
330 (Dual-Core CPU) Intel® 945GC + ICH7 DDR2 533MHz support up to 4GB * (2xDIMM Slots, Dual Channel) Intel® GMA950, support Windows® VistaTM and Windows® VistaTM 64-bit. WARNING Please realize that there is a certain risk involved with overclocking, including adjusting the setting in the BIOS - ASRock S330 | User Manual - Page 9
1.3 System Motherboard Components 14 1 2 3 4 11 5 6 7 9 8 1. DC-In jack 2. Audio connectors 3. LAN & USB connectors 4. USB connectors 5. Northbridge heatsink 6. System fan connector 7. Display (VGA) port connector 8. CPU fan connector 9. - ASRock S330 | User Manual - Page 10
NOTE. 1. SATA and Power Connections SATA & Power Connections HDD ODD Connect to ODD Connect to HDD Connect to SATA Connector (12) Connect to ATX5V Power Connector (13) Connect to SATA Connector (14) 2. System Memory Socket Connection 2 2 1 1 1 1 Installing a memory module Removing a memory - ASRock S330 | User Manual - Page 11
1.4 Rear Panel Connectinos 15 16 17 21 20 MP3 19 18 15. DC-In jack 16. Mic In (Pink): Microphone 17. Front L/R Out (Lime): Stereo speakers or headphones 18. Display (VGA) port: VGA monitor 19. USB2.0 ports: USB devices 20. LAN (RJ-45) port: Local Area Network 21. Line In (Blue): External audio - ASRock S330 | User Manual - Page 12
1.5 System Chassis Opening the system chassis 1. Remove the screws on the backside. 2. Slide the top panel backwards. 22 24 23 22. Optical Disc Drive 23. Drive activity indicator 24. Power ON/OFF button with status indicator 12 - ASRock S330 | User Manual - Page 13
1.6 Internal System Components Optical disc & Hard disk drives The optical disc and hard disc drives are mounted in a drive cage. The cage can be removed by removing the top screws. 27 25 26 25. System Cooling Fan 26. Optical Disc Drive 27. Hard Disc Drive 13 - ASRock S330 | User Manual - Page 14
Chapter 2 System Quick Installation 1. Connecting USB Devices (USB2.0 Ports) 2. Connecting VGA Monitor (Display (VGA) Port) 3. Connecting the Network (LAN (RJ-45) Port) 4. Connecting Microphone (Mic In Port) 14 - ASRock S330 | User Manual - Page 15
5. Connecting Stereo Speakers or Headphones (Front L/R Out Port) 6. Connecting External Audio Device (Line In Port) 7. Connecting Power (DC-In Jack Port) 8. Power on the System (Power Switch) 15 - ASRock S330 | User Manual - Page 16
Chapter 3 System Components Reinstallation 1. Remove the cover screws on the rear panel. Note: For safety reasons, please ensure that the power cord is disconnected before opening the case. 2. Slide the side cover toward the rear panel. 3. Pull the side cover upwards. 4. To change the storage - ASRock S330 | User Manual - Page 17
5. Pull ODD / HDD rack backwards and take it out from the bay. 6. Unscrew the screws from the side of ODD / HDD rack, and change your required ODD / HDD. 7. Refer to above steps to place the new ODD / HDD to the chassis. Replace the side cover and fasten the screws. 17 - ASRock S330 | User Manual - Page 18
system, please insert the support CD to your optical drive first. Then, the drivers compatible to your system can be auto-detected and listed on the support CD driver page. Please follow the order from up to bottom side to install those required drivers. Therefore, the drivers you install can work - ASRock S330 | User Manual - Page 19
meu shows the applications and other software that this product supports. 5.1 Instant Boot 5.1.1 Introduction Instant Boot, a user- can still keep your data safe even there is a power cut. Also, the Windows® update speed will become faster. * This function is applicable ONLY to single user - ASRock S330 | User Manual - Page 20
. A. Install Instant Boot driver from ASRock support CD, or you may click following link to get the latest utility and BIOS: http://www.asrock.com/feature/InstantBoot/download.asp B. Execute the Instant Boot installation program under Windows®. Please follow the instructions on Instant Boot setup - ASRock S330 | User Manual - Page 21
d. Click "Install" to begin installing Instant Boot driver. e. Click "Finish" to complete and exit the setup. C. After the installation is completed, you will find an ASRock Instant Boot icon on the Windows® desktop. D. Double click ASRock Instant Boot icon on the desktop, then Instant Boot main - ASRock S330 | User Manual - Page 22
OC Tuner. A. Install ASRock OC Tuner driver from ASRock support CD, or you may click following link to get the latest utility: http://www.asrock.com/feature/OCTuner/download.asp B. Execute the ASRock OC Tuner installation program under Windows®. Please follow the instructions on Instant Boot setup - ASRock S330 | User Manual - Page 23
need, and click "Next". c. Select the start menu folder. You may choose a different folder if you need, and click "Next". d. Click "Install" to begin installing ASRock OC Tuner driver. e. Click "Finish" to complete and exit the setup. 23 - ASRock S330 | User Manual - Page 24
C. After the installation is completed, you will find an ASRock OC Tuner icon on the Windows® desktop. D. Double click ASRock OC Tuner icon on the desktop, then ASRock OC Tuner main menu will pop up. Auto apply when program starts If you check this button, it will save your settings when you close - ASRock S330 | User Manual - Page 25
Overclocking - In the Overclocking section, there are CPU and PCIE chapters for parameter settings adjustment in pursuit of optimal system performance. Under the CPU chapter, you are able to fine-tune the CPU frequency and CPU ratio by clicking the "Up/Down" arrows at the display panel. After - ASRock S330 | User Manual - Page 26
default system device to locate and load the Operating System Security To set up the security features Exit To exit the current screen or the BIOS SETUP UTILITY Use < > key or < > key to choose among the selections on the menu bar, and then press to get into the sub screen - ASRock S330 | User Manual - Page 27
. Use [+] or [-] to configure system Time. Main Smart System Overview System Time System Date BIOS Version Processor Type [14:00:09] [Tue 04/21/2009] : A945GC P1.00 : Intel (R) Atom (TM) CPU 330 @ 1.60GHz (64bit) : 1600MHz Processor Speed Microcode Update : 106C2/213 : 1024KB Cache Size Total - ASRock S330 | User Manual - Page 28
Exit system setup after saving the changes. F10 key can be used for this operation. Main Smart Advanced Smart Settings Save Changes and Exit Load BIOS Defaults Load Performance Setup Default Enter F1 F9 F10 ESC Select Screen Select Item Go to Sub Screen General Help Load Defaults Save and Exit - ASRock S330 | User Manual - Page 29
section may cause the system to malfunction. 6.4.1 CPU Configuration BIOS SETUP UTILITY Advanced CPU Configuration Overclock Mode CPU Frequency (MHz Overclock Mode. The default value is [Auto]. Cnfiguration options: [Auto], [Manual] and [Optimized]. CPU Frequency (MHz) Use this option to adjust CPU - ASRock S330 | User Manual - Page 30
of this motherboard. CPU Thermal supports Hyper-Threading technology and an operating system that includes optimization for this technology, such as Microsoft® Windows® XP. Set to [Enabled] if using Microsoft® Windows® XP, or Linux kernel version 2.4.18 or higher. 6.4.2 Chipset Configuration BIOS - ASRock S330 | User Manual - Page 31
Configuration options: [Auto] and [Manual]. Internal Graphics Mode Select If you architecture that offers breakthrough performance for the motherboard through efficient memory utilization. In Fixed mode will not be used under Windows® VistaTM OS because the driver will intelligently detect physical - ASRock S330 | User Manual - Page 32
Onboard GPU Clock Select [Normal] or [Overclock] for onboard GPU clock. The default value is [Normal]. Onboard HD Audio Select [Auto], [Enabled] or [Disabled] for the onboard HD Audio feature. OnBoard Lan This allows you to enable or disable the "OnBoard Lan" feature. VCORE Voltage Use this to - ASRock S330 | User Manual - Page 33
Configuration BIOS SETUP UTILITY Advanced ACPI Settings Suspend To RAM Check Ready RAM This field allows you to select whether to auto-detect or disable the Suspend-to-RAM feature. Select [Auto] will enable this feature if the system supports motherboard to submit Windows® VistaTM certification. 33 - ASRock S330 | User Manual - Page 34
Copyright 1985-2005, American Megatrends, Inc. SATA Configuration Use this item to enable or disable the "SATA Configuration" feature. 6.4.5 PCIPnP Configuration BIOS SETUP UTILITY Advanced Advanced PCI / PnP Settings PCI Latency Timer [32] Value in units of PCI clocks for PCI device latency timer - ASRock S330 | User Manual - Page 35
Use this item to enable or disable the USB 2.0 support. 6.5 Boot Screen In this section, it will display the available devices on your system for you to configure the boot settings and the boot priority. BIOS SETUP UTILITY Advanced Boot Security Exit Main Smart Boot Settings Boot Settings - ASRock S330 | User Manual - Page 36
6.5.1 Boot Settings Configuration BIOS SETUP UTILITY Boot Boot Settings Configuration Full Screen Logo AddOn ROM Display Boot From Onboard LAN Bootup Num-Lock [Enabled] [Enabled] [Disabled] [On] Disabled: Displays - ASRock S330 | User Manual - Page 37
section, you may set or change the supervisor/user password for the system. For the user password, you may also clear it. BIOS SETUP UTILITY Advanced Boot Security Exit Main Smart Security Settings Supervisor Password : Not Installed User Password : Not Installed Change Supervisor Password Change - ASRock S330 | User Manual - Page 38
and exit setup?" Select [OK] to save the changes and exit the BIOS SETUP UTILITY. Discard Changes and Exit When you select this option, it message, "Discard changes and exit setup?" Select [OK] to exit the BIOS SETUP UTILITY without saving any changes. Discard Changes When you select this option - ASRock S330 | User Manual - Page 39
1 Install Operating System This system supports various Microsoft® Windows® operating systems: XP / XP 64-bit / VistaTM / VistaTM 64-bit. Refer to your OS documentation for more information. 7 . 2 Support CD Information The Support CD contains necessary drivers and useful utilities that enhance the
-
 1
1 -
 2
2 -
 3
3 -
 4
4 -
 5
5 -
 6
6 -
 7
7 -
8
-
9
-
10
-
11
-
12
-
13
-
14
-
15
-
16
-
17
-
18
-
19
-
20
-
21
-
22
-
23
-
24
-
25
-
26
-
27
-
28
-
29
-
30
-
31
-
32
-
33
-
34
-
35
-
36
-
37
-
38
-
39
 |
 |

1
NetTop S330 Series
User Manual
Version 1.0
Published April 2009
Copyright©2009 ASRock INC. All rights reserved.