ASRock Vision HT 321B Barebone User Manual
ASRock Vision HT 321B Barebone Manual
 |
View all ASRock Vision HT 321B Barebone manuals
Add to My Manuals
Save this manual to your list of manuals |
ASRock Vision HT 321B Barebone manual content summary:
- ASRock Vision HT 321B Barebone | User Manual - Page 1
Vision HT Series User Manual Version 1.0 Published April 2012 Copyright©2011 ASRock INC. All rights reserved. 1 - ASRock Vision HT 321B Barebone | User Manual - Page 2
any form or by any means, except duplication of documentation by the purchaser for backup purpose, without written consent of ASRock Inc. Products and corporate names appearing in this manual may or may not be registered trademarks or copyrights of their respective companies, and are used only for - ASRock Vision HT 321B Barebone | User Manual - Page 3
problems with the product, unplug the power cord and contact a qualified service technician or your retailer. • The power cord or plug is damaged. • Liquid has been spilled into the system. • The system does not function properly even if you follow the operating instructions. • The system - ASRock Vision HT 321B Barebone | User Manual - Page 4
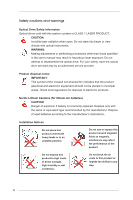
drives sold with this system contains a CLASS than those specified in the user's manual may result in hazardous laser exposure. have the optical drive serviced only by an authorized service provider. Product disposal according to the manufacturer's instructions. Installation Notices Do not place - ASRock Vision HT 321B Barebone | User Manual - Page 5
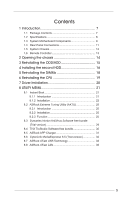
Contents 7 1.2 Specifications 8 1.3 System Motherboard Components 9 1.4 Rear Panel Connections 11 1.5 System Chassis 12 1.6 Remote Controller 13 Instant Boot 21 8.1.1 Introduction 21 8.1.2 Installation 22 8.2 ASRock Extreme Tuning Utility (AXTU 25 8.2.1 Introduction 25 8.2.2 Installation - ASRock Vision HT 321B Barebone | User Manual - Page 6
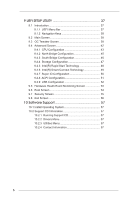
Event Monitoring Screen 53 9.6 Boot Screen 54 9.7 Security Screen 55 9.8 Exit Screen 56 10 Software Support 57 10.1 Install Operating System 57 10.2 Support CD Information 57 10.2.1 Running Support CD 57 10.2.2 Drivers Menu 57 10.2.3 Utilities Menu 57 10.2.4 Contact Information 57 6 - ASRock Vision HT 321B Barebone | User Manual - Page 7
product, please visit our website for specific information about the model you are using. www.asrock.com/support/index.asp 1.1 Package Contents ASRock Vision HT Series ASRock Support CD ASRock Quick Start Guide One AC Power Cord One AC/DC Adapter One DVI to D-Sub Adapter Remote Controller SATA - ASRock Vision HT 321B Barebone | User Manual - Page 8
Specifications * For barebone systems, CPU, memory, HDDs and ODDs may not be included. Processor Intel® Mobile Ivy Bridge Processor. Supports 3rd Generation Intel® Corei7/i5/i3 Dual-Core Chipset Mobile Ivy Bridge Processor Family Mobile Intel® HM77 chipset Memory Supports DDR3 1600 - ASRock Vision HT 321B Barebone | User Manual - Page 9
1.3 System Motherboard Components 1. SATA 3.0 connector: For HDD SATA data cables 2. SATA 3.0 connector: For HDD SATA data cables 3. ATX5V output power connector for slim ODD & 2.5" HDD 4. SATA - ASRock Vision HT 321B Barebone | User Manual - Page 10
NOTE. 1. SATA and Power Connections 2. Fan Connection 10 - ASRock Vision HT 321B Barebone | User Manual - Page 11
1.4 Rear Panel 14. HDMI connector 15. eSATA2 connector 16. DVI-I port 17. USB3.0 ports: USB devices 18. Mic In (Pink): Microphone 19. Optical S/PDIF Out port 20. DC-In jack 21. Side port for side speakers 22. Center/LFE (Orange): Center / subwoofer speakers 23. Front L/R Out (Lime): Stereo speakers - ASRock Vision HT 321B Barebone | User Manual - Page 12
1.5 System Chassis 27. Headphone 28. Microphone 29. USB3.0 ports: USB devices 30. 4-in-1 Card reader (MMC/SD3.0/MS/MS Pro) 31. Power ON/OFF button with status indicator 32. Slot-in Optical Disc Drive 12 - ASRock Vision HT 321B Barebone | User Manual - Page 13
1.6 Remote Controller Some remote controller functions listed above are only available with the relative hardware equipments. If the hardware equipments you adopt are not compatible with the system, you are not allowed to use these functions. This product is designed to meet MCE standards. 13 - ASRock Vision HT 321B Barebone | User Manual - Page 14
Chapter 2 Opening the chassis 1. Press the button on the rear I/O to open the top side of the chassis. 2. After the chassis is opened, you will see the top shield inside the chassis. 3. Unscrew the screws on the corners of the top shield. 4. Carefully remove the top shield. 14 - ASRock Vision HT 321B Barebone | User Manual - Page 15
Chapter 3 Reinstalling the ODD/HDD 1. After you remove the top shield, you will see the ODD/HDD bracket. 2. Disconnect the ODD/HDD SATA power cable, and take out the ODD/HDD bracket. 3. Unscrew the screws from the side of the ODD / HDD rack, and change your required ODD / HDD. 15 - ASRock Vision HT 321B Barebone | User Manual - Page 16
Chapter 4 Installing the second HDD 1. Please follow steps 1 to 3 on page 15 to remove the ODD and the first HDD in advance. Then install the second HDD and fasten the screws to the rack. 2. Place the first HDD to the rack and fasten the screws from both sides. 3. Place the ODD to the rack and - ASRock Vision HT 321B Barebone | User Manual - Page 17
4. Connect one end of the SATA and power cables to the HDDs and the other end to the motherboard. 5. Connect one end of the SATA and power cables to the ODD and the other end to SATA2_1 and J1 connectors on the motherboard. 6. Replace the side cover and fasten the screws. 17 - ASRock Vision HT 321B Barebone | User Manual - Page 18
Chapter 5 Reinstalling the DIMMs 1. Unlock the DIMM slot by pressing the retaining clips outward to change the DIMM. 18 - ASRock Vision HT 321B Barebone | User Manual - Page 19
Chapter 6 Reinstalling the CPU 1. Unscrew the screws of the CPU fan. 2. Rotate the screw on the top of the CPU socket. 3. Now you can reinstall a new CPU to the system. 19 - ASRock Vision HT 321B Barebone | User Manual - Page 20
Chapter 7 Driver Installation To install the drivers to your system, please insert the support CD to your optical drive first. Then, the drivers compatible to your system can be auto-detected and listed on the support CD driver page. Please follow the order from top to bottom to install those - ASRock Vision HT 321B Barebone | User Manual - Page 21
and other software that this product supports. 8.1 Instant Boot 8.1.1 Introduction Instant Boot, a user-friendly tool that allows you to turn on your PC in just a few seconds, provides a much more efficient way to save energy, time, money, and improves the system's running speed *. It is applicable - ASRock Vision HT 321B Barebone | User Manual - Page 22
Install Instant Boot driver from ASRock's support CD, or you may click the following link to get the latest utility and BIOS: http://www.asrock.com/feature/InstantBoot/download.asp B. Execute the Instant Boot installation program under Windows®. Please follow the instructions on Instant Boot's setup - ASRock Vision HT 321B Barebone | User Manual - Page 23
the setup. C. After the installation is completed, you will find an ASRock Instant Boot icon on Windows® desktop. D. Double click ASRock Instant Boot's icon on the desktop, then Instant Boot's main menu When you want to shut down the computer, please select "Shut Down" from Windows® "Start menu". 23 - ASRock Vision HT 321B Barebone | User Manual - Page 24
G. The system will restart automatically. After entering into the OS the system will shutdown again. H. Next time when you turn on your system, you can enjoy Instant Boot. 24 - ASRock Vision HT 321B Barebone | User Manual - Page 25
the frequency of accessing your SSDs or HDDs in order to extend their lifespan. 8.2.2 Installation When you install the all-in-one driver into your system from the ASRock support CD, ASRock Extreme Tuning Utility (AXTU) will be auto-installed as well. After the installation, you will find the icon - ASRock Vision HT 321B Barebone | User Manual - Page 26
ratio. In Fan & Te m p e r a t u r e , t h e r e a r e C P U temperature and CPU fan speed. You may find out if there's any abnormal situations occuring to your system's temperature. In Voltage, there are many respective voltages. Fan Control In the Fan Control section, there are two major chapters - ASRock Vision HT 321B Barebone | User Manual - Page 27
, or even cause damage to your hardware devices. It should be done at your own risk and expense. ASRock is not responsible for possible damages caused by overclocking and and overvoltage. If system hangs after overclocking, please remove the AC power cord and plug the AC power cord again before you - ASRock Vision HT 321B Barebone | User Manual - Page 28
XFast RAM XFast RAM fully utilizes the memory space that cannot be used under Windows® OS 32-bit CPU. It also shortens the loading time of previously visited websites, making web surfing faster than ever. And it also boosts the speed of Adobe Photoshop 5 times faster. Another advantage is that it - ASRock Vision HT 321B Barebone | User Manual - Page 29
protection. Norton Internet Security can stop online identity theft, viruses, spyware, bots and more. Stop attacks before they get on your PC, deliver clear threat and performance explanations, identify unsafe web sites right in your search results, and use intelligence-driven Norton Insight Network - ASRock Vision HT 321B Barebone | User Manual - Page 30
8.4 THX TruStudio Software free bundle After you install THX audio driver from our support CD, there will be a THX icon shown on the Windows® task bar. Click the THX icon on the Windows® task bar, you will see the - ASRock Vision HT 321B Barebone | User Manual - Page 31
the App Charger driver makes your iPhone charge much quicker from your computer and up to 40% faster than before*. ASRock App Charger allows you to quickly charge many Apple devices simultaneously and even supports continuous charging when your PC enters into Standby mode (S1), Suspend to RAM(S3 - ASRock Vision HT 321B Barebone | User Manual - Page 32
8.6 CyberLink MediaEspresso 6.5 (Trial version) CyberLink MediaEspresso 6.5 trial now supports Intel® Quick Sync Video hardware transcoding and is optimized for second generation Core i7, i5, and i3 processors to accelerated conversion of all your favorite - ASRock Vision HT 321B Barebone | User Manual - Page 33
the world's fastest USB data transfer speed. As we know, Windows® only assigns 10% of the system's resource for each USB device. However, ASRock XFast USB Technology creates a QOS (Quality of Service) to make USB devices more efficient. It changes the USB protocol from single task to multi task to - ASRock Vision HT 321B Barebone | User Manual - Page 34
Please read the procedures below carefully before you install ASRock XFast USB Technology. A. Install ASRock XFast USB driver from ASRock's support CD. When you install the all-in-one driver to your system from ASRock's support CD, ASRock XFast USB driver will be auto-installed as well. You may - ASRock Vision HT 321B Barebone | User Manual - Page 35
D. Then, you will see ASRock XFast USB user interface as below. You can also double-click the "XFast USB" icon to show this interface. Please choose "Turbo" to enable ASRock XFast USB Technology. The detailed information of your USB device can also be found in this user interface. 35 - ASRock Vision HT 321B Barebone | User Manual - Page 36
8.8 ASRock XFast LAN LAN Application Prioritization You can configure your application priority ideally and/or add new programs. Lower Latency in Game After setting online game's - ASRock Vision HT 321B Barebone | User Manual - Page 37
9.1 Introduction This section explains how to use the UEFI SETUP UTILITY to configure your system. The UEFI chip on the motherboard stores the UEFI SETUP UTILITY. You may run the UEFI SETUP UTILITY when you start up the computer. Please press or during the Power-On-Self-Test (POST) to - ASRock Vision HT 321B Barebone | User Manual - Page 38
Screen or exit the current screen 9.2 Main Screen When you enter the UEFI SETUP UTILITY, the Main screen will appear and display the system overview. OMG(Online Management Guard) Administrators are able to establish an internet curfew or restrict internet access at specified times via OMG. You - ASRock Vision HT 321B Barebone | User Manual - Page 39
and select [Auto], you need to set the "Power Schemes" as "Portable/Laptop" to enable this function. If you install Windows® VistaTM / 7 and want CPU does not support Intel SpeedStep technology. Please note that enabling this function may reduce CPU voltage and lead to system stability or - ASRock Vision HT 321B Barebone | User Manual - Page 40
OverClocking Support. The default value is [Disabled]. DRAM Timing Configuration DRAM Frequency If [Auto] is selected, the motherboard will detect the memory module(s) inserted and assigns appropriate frequency automatically. CAS# Latency (tCL) Use this item to change CAS# Latency (tCL) Auto/Manual - ASRock Vision HT 321B Barebone | User Manual - Page 41
. The default is [Auto]. CAS Write Latency (tCWL) Use this item to change CAS# Write Latency (tCWL) Auto/Manual setting. The default is [Auto]. ODT WR (CHA) Use this item to change ODT WR (CH A) setting. The default is [Auto]. ODT WR (CHB) Use - ASRock Vision HT 321B Barebone | User Manual - Page 42
may cause the system to malfunction. allows you to update system UEFI without entering operating systems first like MS-DOS must use FAT32/16/12 file system. If you execute Instant Flash UEFI, and reboot your system after UEFI update process . In other words, the system can auto-detect the latest - ASRock Vision HT 321B Barebone | User Manual - Page 43
9.4.1 CPU Configuration Intel Hyper Threading Technology To enable this feature, it requires a computer system with an Intel processor that supports Hyper-Threading technology and an operating system that includes optimization for this technology, such as Microsoft® Windows® XP / VistaTM / 7. Set to - ASRock Vision HT 321B Barebone | User Manual - Page 44
prevent data pages from being used by malicious software to execute code. This option will be hidden if the current CPU does not support No-Excute Memory Protection. Intel Virtualization Technology When this option is set to [Enabled], a VMM (Virtual Machine Architecture) can utilize the additional - ASRock Vision HT 321B Barebone | User Manual - Page 45
9.4.2 North Bridge Configuration VT-d Use this to enable or disable Intel® VT-d technology (Intel® Virtualization Technology for Directed I/O). The default value of this feature is [Disabled]. Share Memory This allows you to set onboard VGA share memory feature. DVMT Memory Use this to - ASRock Vision HT 321B Barebone | User Manual - Page 46
. If [Power Off] is selected, the AC/power remains off when the power recovers. If [Power On] is selected, the AC/power resumes and the system starts to boot up when the power recovers. Good Night LED Enable this option to turn off Power LED and Lan LED when the - ASRock Vision HT 321B Barebone | User Manual - Page 47
select SATA mode. Configuration options: [IDE Mode], [AHCI Mode] and [RAID]. The default value is [AHCI Mode]. AHCI (Advanced Host Controller Interface) supports NCQ and other new features that will improve SATA disk performance but IDE mode does not have these advantages. SATA Aggressive Link Power - ASRock Vision HT 321B Barebone | User Manual - Page 48
5-6 seconds. The default is [Enabled]. Entry After Select a time to enable RTC wake timer at S3 entry. The default is [10 minutes]. Active Page Threshold Support This allows you to enable or disable Active Page Threshold - ASRock Vision HT 321B Barebone | User Manual - Page 49
or disable Intel(R) Smart Connect Technology. Intel(R) Smart Connect Technology keeps your e-mail and social networks, such as Twitter, Facebook, etc. updated automatically while the computer is in sleep mode. The default is [Enabled]. 49 - ASRock Vision HT 321B Barebone | User Manual - Page 50
9.4.7 Super IO Configuration CIR Controller Use this item to enable or disable the CIR controller. 50 - ASRock Vision HT 321B Barebone | User Manual - Page 51
disable the Suspend-toRAM feature. Select [Auto] will enable this feature if the OS supports it. Check Ready Bit Use this item to enable or disable the feature Check Ready to enable or disable onboard LAN to turn on the system from power-soft-off mode. CIR Power On Use this item to enable or disable - ASRock Vision HT 321B Barebone | User Manual - Page 52
9.4.9 USB Configuration Legacy USB Support Use this option to select legacy support for USB devices. There are two configuration options: [Enabled] and [UEFI Setup Only]. The default value is [Enabled]. [Enabled] - Enables support for legacy USB. [UEFI Setup Only] - USB devices are allowed to use - ASRock Vision HT 321B Barebone | User Manual - Page 53
to set the CPU fan speed. Configuration options: [Full On], [SMART FAN Manual] and [Automatic mode]. The default is value [Automatic mode]. Dehumidifier Function ". When enabling Dehumidifier Function, the computer will power on automatically to dehumidify the system after entering S4/S5 state. 53 - ASRock Vision HT 321B Barebone | User Manual - Page 54
to adjust AddOn ROM Display. If you enable the option "Full Screen Logo" but you want to see the AddOn ROM information when the system boots, please select [Enabled]. Configuration options: [Enabled] and [Disabled]. The default value is [Enabled]. Boot From Onboard LAN Use this item to enable or - ASRock Vision HT 321B Barebone | User Manual - Page 55
9.7 Security Screen In this section, you may set or change the supervisor/user password for the system. For the user password, you may also clear it. 55 - ASRock Vision HT 321B Barebone | User Manual - Page 56
9.8 Exit Screen Save Changes and Exit When you select this option, it will pop-out the following message, "Save configuration changes and exit setup?" Select [OK] to save the changes and exit the UEFI SETUP UTILITY. Discard Changes and Exit When you select this option, it will pop-out the following - ASRock Vision HT 321B Barebone | User Manual - Page 57
contains necessary drivers and useful utilities that enhance the system features. 10.2.1 Running The Support CD To begin using the support CD, insert the CD into your CD-ROM drive. The CD automatically displays the Main Menu if "AUTORUN" is enabled in your computer. If the Main Menu does not appear
-
 1
1 -
 2
2 -
 3
3 -
 4
4 -
 5
5 -
 6
6 -
 7
7 -
8
-
9
-
10
-
11
-
12
-
13
-
14
-
15
-
16
-
17
-
18
-
19
-
20
-
21
-
22
-
23
-
24
-
25
-
26
-
27
-
28
-
29
-
30
-
31
-
32
-
33
-
34
-
35
-
36
-
37
-
38
-
39
-
40
-
41
-
42
-
43
-
44
-
45
-
46
-
47
-
48
-
49
-
50
-
51
-
52
-
53
-
54
-
55
-
56
-
57
 |
 |

1
Vision HT Series
User Manual
Version 1.0
Published April 2012
Copyright©2011 ASRock INC. All rights reserved.