ATI 100-505139 Installation Instructions
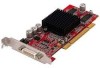
ATI 100-505139 - FireMV 2200 PCI 64M DDVI Manual
 |
UPC - 727419412858
View all ATI 100-505139 manuals
Add to My Manuals
Save this manual to your list of manuals |
ATI 100-505139 manual content summary:
- ATI 100-505139 | Installation Instructions - Page 1
on-screen instructions. 4. Open the Windows® Control Panel > Display to configure your display settings. Troubleshooting If you experience any problems during installation, double check the steps above. Troubleshooting information may be found on the ATI web site at ati.com/FireMV. Your ATI FireMV - ATI 100-505139 | Installation Instructions - Page 2
PCI slot for PCI card. • 128MB of system memory (256MB recommended for better performance). • CD drive or Internet connection for software driver installation. • Supported operating systems: - Windows® 2000 with Service Pack 1 (or higher) or Windows® XP Warranty Information Should your ATI FireMV
-
 1
1 -
 2
2
 |
 |

FireMV
TM
2200
Connecting the Monitor(s)
Your FireMV™ 2200 can drive up to two display devices
simultaneously (analog or digital) and will allow for
independent resolutions.
1.
Plug the Y-cable into the DMS-59 connector on the
FireMV™ 2200. Connect the DVI-I cable of your
monitor to the DVI-I “1” connector on the Y-cable.
To
connect a VGA monitor to a DVI-I connector, use the
included DVI-I-to-VGA adapter.
2.
If using a second display, plug it in to the DVI-I “2”
connector on the Y-cable, using the DVI-I-to-VGA
adapter if necessary. For more information consult
your FireMV™ 2200 User Guide on the installation
CD.
Installing the Card
1.
Turn off your computer and monitor(s).
2.
Disconnect any existing monitor cable(s) from the
back of your computer.
3.
Remove the computer cover. If necessary, consult
your computer manual for assistance.
4.
Discharge any static electricity by touching the metal
surface of the computer chassis.
5.
Remove any existing graphics card(s) from your
computer. Save any screws used to secure the card.
6.
Locate the PCI or PCI Express™ (PCIe) X16 slot, if
necessary, remove the metal backplate cover and
save any screws.
7.
Align your FireMV™ card with the PCI or PCI
Express™ X16 slot, then press it in firmly until the
card is fully seated. When handling the card, hold it by
its edges, and avoid touching its circuitry.
8.
Replace the screws on the top of bracket to fasten the
card in place.
Installing the Software Drivers
1.
Turn on your computer and display device(s).
2.
Insert the FireMV™ installation CD.
3.
Click on “Install Software” and follow the on-screen
instructions.
4.
Open the Windows® Control Panel > Display to
configure your display settings.
Troubleshooting
If you experience any problems during installation, double
check the steps above.
Troubleshooting information may be found on the ATI web
site at ati.com/FireMV.
Your ATI FireMV™ installation CD contains a User’s Guide
in Portable Document Format (PDF). The User’s Guide
describes in detail the features and functions of your ATI
FireMV™ card and the associated software.
Don’t forget to register your new product at:
ati.com/FireMV
FireMV
TM
2400
Connecting the Monitor(s)
Your FireMV™ 2400 can drive up to four display devices
simultaneously (analog or digital) and will allow for
independent resolutions.
1.
Plug the Y-cable into the VHDCI “A” connector on the
FireMV™ 2400. Connect the first DVI-I cable from
your monitor to the to the DVI-I “Mon 1” connector on
the Y-cable.
Connect the second DVI-I cable from
your second monitor to the DVI-I “Mon 2” connector
on the Y-cable.To connect a VGA monitor to a DVI-I
connector, use the included adapter.
2.
Plug the Y-cable into the VHDCI “B” connector on the
FireMV™ 2400. Connect the third DVI-I cable from
your monitor to the DVI-I “Mon 3” connector on the Y-
cable. Connect the fourth DVI-I cable from your fourth
monitor to the DVI-I “Mon 4” connector on the Y-cable.
To connect a VGA monitor to a DVI-I connector, use
the included adapter.