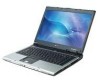
Acer 5601AWLMi User Manual
Acer 5601AWLMi - Aspire - Core Duo 1.6 GHz Manual
 |
UPC - 099802642181
View all Acer 5601AWLMi manuals
Add to My Manuals
Save this manual to your list of manuals |
Acer 5601AWLMi manual content summary:
- Acer 5601AWLMi | User Manual - Page 1
Aspire Series Generic User Guide - Acer 5601AWLMi | User Manual - Page 2
Rights Reserved. Aspire Series Generic User Guide Original Issue: 04/2009 Changes may be made periodically to the information in this publication without obligation to notify any person of such revisions or changes. Such changes will be incorporated in new editions of this manual or supplementary - Acer 5601AWLMi | User Manual - Page 3
power supply unit before connecting the power cord to the AC power outlet. Unplug the power cord before removing the power supply unit in the slots. CAUTION for Listening To protect your hearing, follow these instructions. • Increase the volume gradually until you can hear clearly and comfortably. - Acer 5601AWLMi | User Manual - Page 4
sporting, exercising, or any vibrating environment which will probably cause unexpected short current or damage rotor devices, HDD, Optical drive, and even exposure risk from lithium battery pack. • The bottom surface, areas around ventilation openings and AC adapter may get hot. To avoid injury - Acer 5601AWLMi | User Manual - Page 5
controls that are covered by the operating instructions, since improper adjustment of other controls may result in damage and will often require extensive work by a qualified technician to restore the product to normal condition. Guidelines for safe battery usage This notebook uses a Lithium-ion - Acer 5601AWLMi | User Manual - Page 6
pack The notebook uses lithium batteries. Replace the battery with the same type as that which came bundled with your product. Use of another battery may present a risk of fire or explosion. Warning! Batteries may explode if not handled properly. Do not disassemble or dispose of them in fire. Keep - Acer 5601AWLMi | User Manual - Page 7
in use and/or before servicing. • To avoid the remote risk of electric shock from lightning, do not connect the telephone line to this equipment wireless or radio transmitting devices when using your laptop under the following conditions. These devices may include, but are not limited to: wireless - Acer 5601AWLMi | User Manual - Page 8
messages may be delayed until such a connection is available. Ensure that the above separation distance instructions are followed until the transmission is completed . Some digital wireless devices may interfere with some hearing aids. If interference occurs, consult your service provider. Vehicles - Acer 5601AWLMi | User Manual - Page 9
wireless telephone network, and may be illegal. Potentially explosive environments Switch off your device when in any area with a potentially explosive atmosphere and obey all signs and instructions refueling points such as near gas pumps at service stations. Observe restrictions on the use of radio - Acer 5601AWLMi | User Manual - Page 10
acer-group.com/public/Sustainability/ sustainability01.htm Mercury advisory For bulb-inside projectors or electronic products containing an nonLED-backlit-LCD Acer is committed to offer products and services Wake the computer from sleep mode by pushing keyboard or moving mouse. • Computers will save - Acer 5601AWLMi | User Manual - Page 11
working backward • stand up and walk around regularly to remove the strain on your leg muscles • take short shrugging your shoulders • install the external display, keyboard and mouse properly and within comfortable reach • excessive room lighting, poorly focused screens, very small typefaces and low - Acer 5601AWLMi | User Manual - Page 12
by: • placing your display in such a way that the side faces the window or any light source • minimizing room light by using drapes, shades or blinds light sources, such as open windows, for extended periods of time. Developing good work habits Develop the following work habits to make your computer - Acer 5601AWLMi | User Manual - Page 13
instructions on how to use Adobe Reader, access the Help and Support menu. Basic care and tips for using your computer Turning your computer on and off To turn on the computer, simply press and release the power button below the LCD screen beside the easy-launch buttons. Please refre to "Quick Guide - Acer 5601AWLMi | User Manual - Page 14
the power off, do any of the following: • Use the Windows shutdown command Click on Start then click on Shut Down. • Use of your AC adapter Here are some ways to take care of your AC adapter: • Do not connect the adapter to any other device. • Do not step on the power cord or place heavy objects - Acer 5601AWLMi | User Manual - Page 15
of the same kind as replacements. Turn the power off before removing or replacing batteries. • Do not tamper with batteries. Keep them away from children. • Dispose of used batteries according to local regulations. Recycle if possible. Cleaning and servicing When cleaning the computer, follow - Acer 5601AWLMi | User Manual - Page 16
xvi - Acer 5601AWLMi | User Manual - Page 17
xiv Taking care of your battery pack xv Cleaning and servicing xv Touchpad 1 Touchpad basics (with fingerprint reader) 1 Touchpad basics (with two-click buttons) 2 Using the keyboard 3 Lock keys and embedded numeric keypad* 3 Windows keys 4 Audio 5 Acer PureZone (only for certain - Acer 5601AWLMi | User Manual - Page 18
19 Live Update: 19 Albums 21 Editing Pictures 21 Slideshow settings 21 Music 21 Online Media (only for certain models) 22 YouTube 22 Flickr 22 Battery pack 23 Battery pack characteristics 23 Maximizing the battery's life 23 Installing and removing the battery pack 24 - Acer 5601AWLMi | User Manual - Page 19
40 BIOS utility 41 Boot sequence 41 Enable disk-to-disk recovery 41 Password 41 Using software 42 Playing DVD movies 42 Frequently asked questions 43 Requesting service 46 International Travelers Warranty (ITW) 46 Before you call 46 Troubleshooting 47 Troubleshooting tips - Acer 5601AWLMi | User Manual - Page 20
Bio-Protection fingerprint reader (3) supporting Acer FingerNav 4-way control function (only for certain models) to scroll up or down and move left or right a page. This fingerprint reader or button mimics your cursor pressing on the right scroll bar of Windows applications. Function Left button - Acer 5601AWLMi | User Manual - Page 21
not increase the touchpad's responsiveness. Note: By default, vertical and horizontal scrolling is enabled on your touchpad. It can be disabled under Mouse settings in Windows Control Panel. - Acer 5601AWLMi | User Manual - Page 22
Windows, function and special keys. Lock keys and embedded numeric keypad* The keyboard to connect an external keypad. Scroll Lock When Scroll Lock is on, the screen moves one line up or down when + you press the up or down arrow keys respectively. Scroll Lock does not work - Acer 5601AWLMi | User Manual - Page 23
(if you are connected to a network domain), or switch users (if you're not connected to a network domain) < > + : Minimizes all windows < > + + : Open Windows Mobility Center < > + : Display the System Properties dialog box < > + : Restore minimized windows to the desktop - Acer 5601AWLMi | User Manual - Page 24
Acer PureZone technology supports Acoustic Echo Cancellation, Beam Forming and Noise Suppression for pure sound recording. To set up your microphone, run the Acer HD Audio Manager by double-clicking the Acer HD Audio Manager icon in the system tray of your Windows system. The Acer Dolby Headphone, - Acer 5601AWLMi | User Manual - Page 25
game consoles into Dolby Digital for easy connection to home theater systems through a Headphone Dolby Headphone creates a personal surround sound experience using any set of headphones stage enhancer, which produces a wide stereo image and improves the separation of instruments without diminishing - Acer 5601AWLMi | User Manual - Page 26
package integrated with the Microsoft Windows operating system. Utilizing the uniqueness of one's fingerprint, Acer Bio-Protection Fingerprint Solution incorporates protection against unauthorized access to your computer with centralized password management via Password Bank; easy music player - Acer 5601AWLMi | User Manual - Page 27
is a handy utility that offers four pre-defined display settings so you can view multiple windows on the same screen. To access this function, please go to Start, All Programs and click on Acer GridVista. You may choose any one of the four display settings indicated below: 12 2 13 1 3 2 13 - Acer 5601AWLMi | User Manual - Page 28
schedule or as you need to. To start Acer Backup Manager, press the Acer Backup Manager key above the keyboard. Alternatively, you can go to Start > All Programs > Acer Backup Manager > Acer Backup Manager. This will open the Welcome screen; from this screen you will be taken through the three steps - Acer 5601AWLMi | User Manual - Page 29
: keyboard, mouse, hard disk, peripherals connected to the computer, and video memory. supports the advanced configuration and power interface (ACPI), which allows for maximum power conservation and maximum performance at the same time. Windows handles all power-saving chores for your computer. Acer - Acer 5601AWLMi | User Manual - Page 30
Management is a tool to quickly restore the system. You can back up/restore the factory default image, and reinstall applications and drivers. Note: All of the following content is for general reference only. Actual product specifications may vary. Acer eRecovery Management consists of the following - Acer 5601AWLMi | User Manual - Page 31
> Acer > Acer eRecovery Management. 2 Acer eRecovery Management opens to the Backup page. 3 Select the type of backup (factory default or drivers and applications) you would like to burn to disc. 4 Follow the instructions on screen to complete the process. Note: Create a factory default image when - Acer 5601AWLMi | User Manual - Page 32
and drivers for your Acer system. 1 Click on Start, All Programs, Acer, Acer eRecovery Management. 2 Switch to the Restore page by clicking Restore. 3 You can choose to restore the system from a factory default image or reinstall applications and drivers. 4 Follow the instructions on screen to - Acer 5601AWLMi | User Manual - Page 33
IDE1*, then press the ENTER key. Windows will be installed from the recovery disc. 9 Insert the second recovery disc when prompted, then follow the onscreen prompts to complete the restore. 10 Remove the recovery disc from the optical drive once the restore is complete. Do this before rebooting your - Acer 5601AWLMi | User Manual - Page 34
system will reboot. 7 When you reboot, Windows will be installed from the recovery disc. 8 Insert the second recovery disc when prompted, then follow the onscreen prompts to complete the restore. 9 Remove the recovery disc from the optical drive once the restore is complete. Do this before rebooting - Acer 5601AWLMi | User Manual - Page 35
connect to other devices wirelessly to share media content • Advanced - change settings, update your Arcade software, view the help file and About information • Albums - view photos stored on your hard disk or removable detailed information on the features of Acer Arcade, please refer to the Arcade Help - Acer 5601AWLMi | User Manual - Page 36
the Cinema function of Acer Arcade Deluxe. This player has the features and controls of a typical DVD player. When you insert a disk into the DVD drive, the movie begins playing automatically. To control the movie, the pop-up player control panel appears at the bottom of the window when you move the - Acer 5601AWLMi | User Manual - Page 37
you to the Cinema main screen. At the bottom of the screen are buttons that allow you to resume the movie from the point it was stopped, restart the movie from the beginning or eject the disk. Videos: Click Videos to watch a video clip stored on your hard drive. Note: The Video feature is - Acer 5601AWLMi | User Manual - Page 38
wireless adaptor active before you can use HomeMedia. Advanced This section contains the settings in Acer Arcade Deluxe that allow you to finetune its performance to suit your machine and your personal preferences. Live Update: Click Live Update to connect to the Internet to check for, and download - Acer 5601AWLMi | User Manual - Page 39
speakers, Dolby Surround, or Virtual Surround Sound if you are using headphones. You can select from a variety of Virtual Surround Sound settings to your slideshow when viewing photos. DVD: Acer Arcade Deluxe has several features and technologies to extend battery life while watching DVD movies. On - Acer 5601AWLMi | User Manual - Page 40
vendor information for Acer Arcade Deluxe. Albums Acer Arcade Deluxe lets you view digital photos individually or as a slideshow, from any available drive on your computer and contrast) pictures to improve the appearance of your images. Slideshow settings To change slideshow settings refer to the - Acer 5601AWLMi | User Manual - Page 41
certain models) Online Media gives you easy access to photos and videos uploaded to the popular Flickr and YouTube websites. Note: You need to be connected to the Internet to use the Online Media function. YouTube You can view the 30 most viewed video clips on YouTube by selecting YouTube from - Acer 5601AWLMi | User Manual - Page 42
the following characteristics: • Employs current battery technology standards. • Delivers a battery-low warning. The battery is recharged whenever you connect the computer to the AC adapter. Your computer supports charge-in-use, enabling you to recharge the battery while you continue to operate the - Acer 5601AWLMi | User Manual - Page 43
the faster it will reach the end of its effective life. A standard computer battery has a life span of about 300 charges. Installing and removing the battery pack Important! Before removing the battery from the unit, connect the AC adapter if you want to continue using your computer. Otherwise, turn - Acer 5601AWLMi | User Manual - Page 44
25 To remove a battery pack: 1 Slide the battery release latch to release the battery. 2 Pull the battery from the battery bay. Charging the battery To charge the battery, first make sure that it is correctly installed in the battery bay. Plug the AC adapter into the computer, and connect to a mains - Acer 5601AWLMi | User Manual - Page 45
-low warning When using battery power pay attention to the Windows power meter. Warning: Connect the AC adapter as soon as possible after the battery-low warning appears. Data will be lost if the battery to become fully depleted and the computer shuts down. When the battery-low warning appears, the - Acer 5601AWLMi | User Manual - Page 46
external accessories: 1 Save any open files. 2 Remove any media, floppy disks or compact disks from the drive(s). 3 Shut down the computer. 4 Close the display cover. 5 Disconnect the cord from the AC adapter. 6 Disconnect the keyboard, pointing - Acer 5601AWLMi | User Manual - Page 47
battery remove the media can damage the drive head. • Pack the computer in a protective case that can prevent the computer from sliding around and cushion it if it should fall. Caution: Avoid packing items next to the top cover of the computer. Pressure against the top cover can damage the screen - Acer 5601AWLMi | User Manual - Page 48
temperature, and inspect the screen for condensation before turning on up a home office If you frequently work on your computer at home, you may also want to add an external keyboard, monitor or mouse. Traveling with battery pack(s) • Additional printer driver files if you plan to use another printer - Acer 5601AWLMi | User Manual - Page 49
items with you: • AC adapter • Power cords that are appropriate for the country to which you are traveling • Spare, fully-charged battery packs • Additional printer driver files if you plan to use another printer • Proof of purchase, in case you need to show it to customs officials • International - Acer 5601AWLMi | User Manual - Page 50
hardware and software locks - a security notch and passwords. Using a computer security lock The notebook comes with Password prevents unauthorized entry into the BIOS utility. Once set, you must enter this password to gain access to the BIOS utility. See "BIOS utility" on page 41. • User Password - Acer 5601AWLMi | User Manual - Page 51
32 Entering passwords When a password is set, a password prompt appears in the center of the display screen. • When the Supervisor Password is set, a prompt appears when you press to enter the BIOS utility at boot-up. • Type the Supervisor Password and press to access the BIOS utility - Acer 5601AWLMi | User Manual - Page 52
Connectivity options Ports allow you to connect peripheral devices to your computer as you would with a desktop PC. For instructions on how to connect modem. To use the fax/data modem port, connect a phone cable from the modem port to a telephone jack. Warning! Please make sure that the cable you - Acer 5601AWLMi | User Manual - Page 53
your computer to an Ethernet-based network. To use the network feature, connect an Ethernet cable from the Ethernet (RJ-45) port on the chassis of the computer to a network jack or hub on your network. Consumer Infrared (CIR) (only for certain models) The computer's Consumer Infrared (CIR) port - Acer 5601AWLMi | User Manual - Page 54
-speed serial bus which allows you to connect USB peripherals without taking up precious system resources. IEEE 1394 port (only for certain models) The computer's IEEE 1394 port allows you to connect to an IEEE 1394compatible device like a video camera or digital camera. See your video or digital - Acer 5601AWLMi | User Manual - Page 55
enhances the usability and expandability of your computer. ExpressCards support a vast number of expansion options, including flash memory card adapters, TV-tuners, Bluetooth connectivity and IEEE 1394B adapters. ExpressCards support USB 2.0 and PCI Express applications. Important! There are two - Acer 5601AWLMi | User Manual - Page 56
Push the card gently into the slot and release to pop out the card. Then pull the card free from the slot. Installing memory Follow these steps to install memory: 1 Turn off the computer, unplug the AC adapter (if connected) and remove the battery pack. Then turn the computer over to access its base - Acer 5601AWLMi | User Manual - Page 57
it down until it clicks into place. 4 Replace the memory cover and secure it with the screw. 5 Reinstall the battery pack, and reconnect the AC adapter. 6 Turn on the computer. The computer automatically detects and reconfigures the total memory size. Please consult a qualified technician or contact - Acer 5601AWLMi | User Manual - Page 58
services in digital format. It is gradually replacing analog broadcasts in many countries. The DVB-T digital antenna can be used with Windows Media Center to watch local DVB-T digital TV broadcasts on your notebook PC. To connect the digital antenna 1 Plug the antenna cable into the RF jack - Acer 5601AWLMi | User Manual - Page 59
to an external antenna or cable socket) to watch TV on your computer. Connecting antenna cables To connect your cables: 1 Plug the antenna connector into the RF jack of your computer. 2 Connect the other end to your TV cable, using the cable converter if necessary. Important! Please ensure you - Acer 5601AWLMi | User Manual - Page 60
disk-to-disk recovery (hard disk recovery), activate the BIOS utility, then select Main from the categories listed at the top of the screen. Find D2D Recovery at the bottom of the screen and use the and keys to set this value to Enabled. Password To set a password on boot, activate the - Acer 5601AWLMi | User Manual - Page 61
the region code. DVD disks are divided into 6 regions. Once your DVD drive is set to a region code, it will play DVD disks of that region after which the last region code set will remain permanent. Recovering your hard disk does not reset the number of times the region code has been set. Refer to - Acer 5601AWLMi | User Manual - Page 62
Connect the AC adapter to recharge the battery pack. • Make sure that the AC adapter is properly plugged into the computer and to the power outlet. • If it is lit, check the following: • Is a non-bootable (non-system) disk in the external USB floppy drive? Remove or replace muted. In Windows, look at - Acer 5601AWLMi | User Manual - Page 63
to a USB port on the computer. If it works, contact your dealer or an authorized service center as the internal keyboard cable may be loose. The printer does not work. Check the following: • Make sure that the printer is connected to a power outlet and that it is turned on. • Make sure that the - Acer 5601AWLMi | User Manual - Page 64
steps below to rebuild your C: drive. (Your C: drive will be reformatted and all data will be erased.) It is important to back up all data files before using this option. Before performing a restore operation, please check the BIOS settings. 1 Check to see if Acer disk-to-disk recovery is enabled - Acer 5601AWLMi | User Manual - Page 65
you call Please have the following information available when you call Acer for online service, and please be at your computer when you call. With your support, we can reduce the amount of time a call takes and help solve your problems efficiently. If there are error messages or beeps reported by - Acer 5601AWLMi | User Manual - Page 66
connected Contact your dealer or an authorized service center. Keyboard interface error Contact your dealer or an authorized service center. Memory size mismatch Press (during POST) to enter the BIOS utility, then press Exit in the BIOS utility to reboot. If you still encounter problems - Acer 5601AWLMi | User Manual - Page 67
and, if not installed and used in accordance with the instructions, may cause harmful interference to radio communications. However, there is the receiver is connected. • Consult the dealer or an experienced radio/television technician for help. Notice: Shielded cables All connections to other - Acer 5601AWLMi | User Manual - Page 68
provide this information to your telephone company. If your telephone equipment causes harm to the telephone network, the telephone company may discontinue your service temporarily. If possible, they will notify you in advance. But, if advance notice is not practical, you will be notified as soon as - Acer 5601AWLMi | User Manual - Page 69
you an opportunity to maintain uninterrupted telephone service. If this equipment should fail to operate line to determine if it is causing the problem. If the problem is with the equipment, discontinue use and contact TBR 21"] for single terminal connection to the Public Switched Telephone Network - Acer 5601AWLMi | User Manual - Page 70
will work correctly any single manual call initiation support pulse dialing. 7 Use of pulse dialing, when this equipment is connected problems occur, the user should NOT contact the telecom Fault Service. 8 This equipment may not provide for the effective hand-over of a call to another device connected - Acer 5601AWLMi | User Manual - Page 71
used in such a manner that the potential for human contact during normal operation is minimized as follows: 1 Users are requested to follow the RF safety instructions on wireless option devices that are included in the user's manual of each RF option device. - Acer 5601AWLMi | User Manual - Page 72
Card built in to the screen section and all persons. Note: The wireless Mini PCI adapter implements a transmission diversity function. The function does not emit radio frequencies simultaneously from both antennas. One of the antennas is selected automatically or manually (by users) to ensure good - Acer 5601AWLMi | User Manual - Page 73
viewing distance Design inclination angle Design azimuth angle Viewing direction range class Screen tilt angle Design screen illuminance Reflection class of LCD panel (positive and negative polarity) Image polarity Reference white: Pre-setting of luminance and color temperature @ 6500K (tested
-
 1
1 -
 2
2 -
 3
3 -
 4
4 -
 5
5 -
 6
6 -
 7
7 -
8
-
9
-
10
-
11
-
12
-
13
-
14
-
15
-
16
-
17
-
18
-
19
-
20
-
21
-
22
-
23
-
24
-
25
-
26
-
27
-
28
-
29
-
30
-
31
-
32
-
33
-
34
-
35
-
36
-
37
-
38
-
39
-
40
-
41
-
42
-
43
-
44
-
45
-
46
-
47
-
48
-
49
-
50
-
51
-
52
-
53
-
54
-
55
-
56
-
57
-
58
-
59
-
60
-
61
-
62
-
63
-
64
-
65
-
66
-
67
-
68
-
69
-
70
-
71
-
72
-
73
 |
 |

Aspire Series
Generic User Guide