Acer AST180-UA380B Aspire T160 User Guide EN
Acer AST180-UA380B Manual
 |
View all Acer AST180-UA380B manuals
Add to My Manuals
Save this manual to your list of manuals |
Acer AST180-UA380B manual content summary:
- Acer AST180-UA380B | Aspire T160 User Guide EN - Page 1
Aspire series User's Guide - Acer AST180-UA380B | Aspire T160 User Guide EN - Page 2
Copyright© 2005 Acer Incorporated All Rights Reserved Aspire series User's Guide Changes may be made periodically to the information in this publication without obligation to notify any person of such revisions or changes. Such changes will be incorporated in new editions of this manual or - Acer AST180-UA380B | Aspire T160 User Guide EN - Page 3
5 Starting your computer 5 Shutting down your computer 5 System upgrade 6 Opening the computer 6 Setting up new components 6 Troubleshooting 7 Taking care of your computer 9 Important tips 9 Cleaning and servicing 9 To clean your computer and keyboard 9 To clean your - Acer AST180-UA380B | Aspire T160 User Guide EN - Page 4
English Notices Disposal instructions . Do not throw this electronic device into the trash when discarding. To minimize pollution and ensure LAWS. FOR MORE INFORMATION, CONTACT THE ELECTRONIC INDUSTRIES ALLIANCE AT WWW.EIAE.ORG. FOR LAMP-SPECIFIC DISPOSAL INFORMATION, CHECK WWW.LAMPRECYCLE.ORG. - Acer AST180-UA380B | Aspire T160 User Guide EN - Page 5
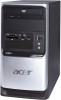
computer consists of the following: Front panel Icon Description Power button Microphone jack Speaker or headphone jack Icon Description Floppy drive (selected models only) Optical drive (selected models only) Media card reader (selected models only) USB port IEEE 1394 port (selected - Acer AST180-UA380B | Aspire T160 User Guide EN - Page 6
high-performance processor • Expandable system memory • Power management functionality • 3.5" inch floppy drive (optional) • Multimedia card reader (optional) • CD-ROM, DVD-ROM, CD-RW (52X/24X), DVD/CD-RW combo or DVD writer (optional) • High-capacity, PATA / SATA HDD (optional) • Supports USB - Acer AST180-UA380B | Aspire T160 User Guide EN - Page 7
the PS/2 keyboard port or USB port on the back panel of the system. Speakers For systems bundled with speakers, before powering on the system, connect the speaker cable to the audio-out (external speaker) port on the back panel of the system. Note: All images are for reference purposes only. Actual - Acer AST180-UA380B | Aspire T160 User Guide EN - Page 8
peripheral equipment through these I/O ports. Your system can also support an optional high-speed fax/data modem or an additional LAN (local area network) card. Furthermore, the system is compatible with Microsoft® Windows® XP operating systems. Necessary to know before setup Selecting a location - Acer AST180-UA380B | Aspire T160 User Guide EN - Page 9
following items are missing or appear damaged, contact your dealer immediately: • Aspire series • PS/2 or USB keyboard (manufacturing option) • PS/2 or Guide and Starter poster Other user documentation and third-party software. Connecting peripherals After everything is connected, plug the power - Acer AST180-UA380B | Aspire T160 User Guide EN - Page 10
part will operate within your Aspire series system. In order to ensure proper setup and installation, please refer to the instructions provided with your new components. Probable upgrades are: - Upgrade to high-capacity HDD - Expand high-level memory - Upgrade from a CD-ROM drive to CD-RW, DVD-ROM - Acer AST180-UA380B | Aspire T160 User Guide EN - Page 11
: • Is a non-bootable (non-system) floppy disk in the floppy drive? If yes, remove or replace it with a system floppy disk and press + + to restart your computer. Q: Nothing appears on the screen. A: Your computer's power management function automatically blanks the screen to save - Acer AST180-UA380B | Aspire T160 User Guide EN - Page 12
English 8 Troubleshooting A: Check the following: • The drive cannot read the information on the good floppy disk, CD or DVD, there may be a problem with the drive. Contact your dealer or technical support center for assistance. Q: System cannot write to floppy disk, hard disk or optical disk - Acer AST180-UA380B | Aspire T160 User Guide EN - Page 13
Please read the instructions listed in this section. Following these instructions will help you drivers to see if you can select other settings to make viewing the screen more comfortable. Cleaning and servicing To clean your computer and keyboard 1 Turn off the computer and unplug the power - Acer AST180-UA380B | Aspire T160 User Guide EN - Page 14
keep your screen clean. For cleaning instructions, refer to the documentation that came with your monitor. When to contact a service technician • If you drop and may also access the Acer Web site (www.acersupport.com) for information on how and where to contact the service centers available in your - Acer AST180-UA380B | Aspire T160 User Guide EN - Page 15
conformity for EU countries Acer hereby declares that this terminal connection to the Public Switched Telephone Network (PSTN). However, due to differences between problems, you should contact your equipment supplier in the first instance. Important safety instructions Read these instructions - Acer AST180-UA380B | Aspire T160 User Guide EN - Page 16
work by a qualified technician to restore the product to normal condition. e If the product has been dropped or the case has been damaged. f If the product exhibits a distinct change in performance, indicating a need for service. 12 Use only the proper type of power supply cord set (provided in your - Acer AST180-UA380B | Aspire T160 User Guide EN - Page 17
English 13 certified, type SPT-2, rated 7A 125V minimum, VDE approved or its equivalent. Maximum length is 15 feet (4.6 meters). 13 Always disconnect all telephone lines from the wall outlet before serving or disassembling this equipment. 14 Avoid using a telephone line (other than the cordless - Acer AST180-UA380B | Aspire T160 User Guide EN - Page 18
English 14 Lithium battery statement CAUTION Danger of explosion if battery is incorrectly replaced. Replace only with the same or equivalent type recommended by the manufacturer. Dispose of used batteries according to local regulations. Recycle if possible. ADVARSEL! Lithiumbatteri - - Acer AST180-UA380B | Aspire T160 User Guide EN - Page 19
English 15 Laser compliance statement The CD or DVD drive used with this computer is a laser product. The CD or DVD drive's classification label (content shown below) is located on the drive. CLASS 1 LASER PRODUCT CAUTION: INVISIBLE LASER RADIATION WHEN OPEN. AVOID EXPOSURE TO BEAM. APPAREIL A - Acer AST180-UA380B | Aspire T160 User Guide EN - Page 20
product: Model: Acer Inc. 8F, 88, Sec. 1, Hsin Tai Wu Rd. Hsichih, Taipei Hsien 221 Taipei, Taiwan Personal computer Aspire series Conforms to 1999 Conductive disturbance EN61000-4-8: 1993/A1: 2001 AS/NZS 61000.4.8: 2002 Power frequency magnetic field EN61000-4-11: 1994/A1: 2001 AS/NZS 61000 - Acer AST180-UA380B | Aspire T160 User Guide EN - Page 21
1998 Limits for voltage fluctuations and flicker in Pass low-voltage supply systems Conforms to the Low Voltage Directive 73/23/EEC as attested -European single terminal connection to the Public Switched Telephone Network (PSTN). We, Acer Inc., hereby declare that the equipment bearing the trade - Acer AST180-UA380B | Aspire T160 User Guide EN - Page 22
/Importer is responsible for this declaration: Product name: Model: Name of responsible party: Address of responsible party: Contact person: Tel: Fax: Personal computer Aspire series Acer America Corporation 2641 Orchard Parkway San Jose, CA 95134 USA Mr. Young Kim 408-922-2909 408-922-2606
-
 1
1 -
 2
2 -
 3
3 -
 4
4 -
 5
5 -
 6
6 -
 7
7 -
8
-
9
-
10
-
11
-
12
-
13
-
14
-
15
-
16
-
17
-
18
-
19
-
20
-
21
-
22
 |
 |

Aspire
series
User's Guide