Acer Altos S700F User Manual
Acer Altos S700F Manual
 |
View all Acer Altos S700F manuals
Add to My Manuals
Save this manual to your list of manuals |
Acer Altos S700F manual content summary:
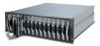
- Acer Altos S700F | User Manual - Page 1
Altos S700 Series User's Guide - Acer Altos S700F | User Manual - Page 2
© 2002 Acer Incorporated All Rights Reserved. Altos S700 Series User's Guide Changes may be made periodically to the information in this publication without obligation to notify any person of such revision or changes. Such changes will be incorporated in new editions of this manual or supplementary - Acer Altos S700F | User Manual - Page 3
vii Conventions Used In This User Guide vii European Community Statement xv Introduction 21 Configuration Rules 23 Supported Host Bus Adapters 24 Supported Cables 25 Copper Cables 37 Disk Drive Spin Up Sequence 38 Altos S700 Series RAID Controller Introduction 41 RAID - Acer Altos S700F | User Manual - Page 4
a Power Source 57 Connecting an AC Power Source 57 Disk Drive Spin Up Sequence 58 Overview 61 LS Module 62 LS Module Features 62 Altos S700 Enclosure LEDs 63 Disk Drive LEDs 65 Power Supply LEDs 67 Advanced Cooling Module (ACM) LEDs 68 RAID Controller LEDs 69 Location of - Acer Altos S700F | User Manual - Page 5
Disk Drives Power Supply Temperature Humidity Altitude Operational Shock Operational Vibration Regulatory Agency Compliance Equipment and parts necessary for upgrade Upgrading from JBOD to RAID Installing the Battery Backup Unit v 92 92 92 92 92 93 93 93 103 103 104 - Acer Altos S700F | User Manual - Page 6
vi Contents - Acer Altos S700F | User Manual - Page 7
S7001.003, AS.S7001.004, AS.S7001.005, AS.S7001.006. Audience This Installation Guide is intended for use by the person installing and operating the Altos S700 Series. This Installation Guide describes the operation of the Altos S700 Series only. For details relating to the host system, refer to the - Acer Altos S700F | User Manual - Page 8
installation. This device generates, uses, and can radiate radio frequency energy, and if not installed and used in accordance with the instructions, may cause harmful interference to radio communications. However, there is no guarantee that interference will not occur in a particular installation - Acer Altos S700F | User Manual - Page 9
ix Use conditions This part complies with Part 15 of the FCC Rules. Operation is subject to the following two conditions: (1) this device may not cause harmful interference, and (2) this device must accept any interference received, including interference that may cause undesired operation. Notice: - Acer Altos S700F | User Manual - Page 10
x Important safety information Only a technically qualified person shall access, integrate, configure, and service this product. Intended application uses This product was evaluated as Information Technology Equipment (ITE), which may be installed in offices, schools, computer rooms, and similar - Acer Altos S700F | User Manual - Page 11
system, when installed in the rack, must not go below 10 °C (50 °F) or rise above 35 °C (95 °F). Extreme fluctuations in temperature may cause a variety of problems in system, and safety limits may be broken. • Lifting and Moving Do not attempt to lift or move the - Acer Altos S700F | User Manual - Page 12
the rack manufacturer's safety and installation instructions for proper rack installation. The following additional rack safety installation measures shall be considered: • Anchor the equipment rack The equipment rack must be anchored to an unmovable suitable support to prevent the rack from falling - Acer Altos S700F | User Manual - Page 13
safety instructions Read these instructions carefully. Save these instructions for future reference. 1 Follow all warnings and instructions marked Refer all servicing to qualified service personnel. 11 Unplug this product from the wall outlet and refer servicing to qualified service personnel under - Acer Altos S700F | User Manual - Page 14
the product exhibits a distinct change in performance, indicating a need for service. 12 Replace the battery with the same type as the product's battery of used batteries promptly. Dispose of used batteries according to manufacturer's instructions. 14 Use only the proper type of power supply cord set - Acer Altos S700F | User Manual - Page 15
xv European Community Statement This equipment complies with the following European directives: EMC Directive 89/336/EEC and amending Directives 92/31/EEC and 93/ 68/EEC Low Voltage Directive 73/23/EEC. - Acer Altos S700F | User Manual - Page 16
xvi - Acer Altos S700F | User Manual - Page 17
Chapter 1 Introduction - Acer Altos S700F | User Manual - Page 18
This Chapter introduces the Altos S700 Series. The main features of the Series are described along with a list of the models that are available. - Acer Altos S700F | User Manual - Page 19
, high performance storage solution that evolves to meet your changing needs. Based on a modular, "building block" enclosure design, the Altos S700 Series offers exceptional scalability. Each enclosure supports up to 14 disk drives, in a dense 3U form factor. As your storage needs grow, simply add - Acer Altos S700F | User Manual - Page 20
3U form factor. • Scalable to 112 drives, support for 15K rpm drives. • Enhanced enclosure services (SES) monitoring and reporting. • No single supplies. Disk Drive Carrier The disk drive carrier supports one inch, SCA-2 direct attach disk drives. The Altos S700 Series can hold up to fourteen disk - Acer Altos S700F | User Manual - Page 21
5 Caution: Power supply cords shall have conductors with a crosssectional area not less than 4mm2. This cross-sectional area corresponds to a minimum 10AWG wire. Cooling System Cooling is provided by the two Advanced Cooling Modules (ACMs) located at the rear of the enclosure. Each of the ACM - Acer Altos S700F | User Manual - Page 22
6 Chapter 1 Introduction I/O Option Modules The two rear I/O option slots (A and B) can contain a range of different option modules. The LS module will detect the type of option module installed. 1 1 2 2 I 0 I 0 I/O Option Slot B I/O Option Slot A Note: The above illustration shows the - Acer Altos S700F | User Manual - Page 23
RAID Controller The Altos S700 RAID Controller is a high performance controller, providing two host fibre channel and two device fibre channel interfaces. It is an intelligent, caching controller that supports RAID levels 0, 1, 3, 5, 0+1, and JBOD. The controller enables multiple hosts to access - Acer Altos S700F | User Manual - Page 24
8 Figure 1-1: Altos S700 Series Tower Model Chapter 1 Introduction - Acer Altos S700F | User Manual - Page 25
9 Figure 1-2: Altos S700 Series Rack Model - Acer Altos S700F | User Manual - Page 26
10 Chapter 1 Introduction - Acer Altos S700F | User Manual - Page 27
Chapter 2 Installation and Setup - Acer Altos S700F | User Manual - Page 28
describes the installation and set up of the Altos S700 Series. Important safety instructions are discussed along with the electrical, mechanical and environmental precautions that need to be taken. Items that need to be set prior to operating the Altos S700 enclosure are also described here. Note - Acer Altos S700F | User Manual - Page 29
13 Safety Statements The following safety statements must be read before you install or operate the Altos S700 Series. For language translations of these statements refer to Appendix B. Caution: This equipment is intended only for installation in a restricted access location. Caution: Before - Acer Altos S700F | User Manual - Page 30
14 Chapter 2 Installation and Setup Warning: A possible shock hazard may exist in the area of the fan connection. Warning: Disconnect the power cords before removing a power supply from the enclosure. - Acer Altos S700F | User Manual - Page 31
When you receive your system, visually inspect the exterior of the packaging for any signs of damage. If any damage is found the carrier and Acer should be informed immediately, and they will advise you of the appropriate action. The cartons are sealed using packaging tape which should be cut open - Acer Altos S700F | User Manual - Page 32
air vents are blocked, and that the system is a minimum of one meter from a solid surface such as a wall or partition. Air flow through the Altos S700 Series is from front to rear. Mechanical Loading Consideration should be given to the loading of any equipment racks. To maintain a low centre of - Acer Altos S700F | User Manual - Page 33
17 least one other person when installing an enclosure. This is necessary to prevent personal injury and damage to the enclosure. - Acer Altos S700F | User Manual - Page 34
18 Chapter 2 Installation and Setup Electrical Considerations When installing the Altos S700 Series the following electrical considerations must be applied. Circuit Overloading Care should be taken to ensure that the current does not exceed the rating - Acer Altos S700F | User Manual - Page 35
19 Setting Fibre Channel Loop Speed (2Gb or 1Gb) The Altos S700 Series can be operated with fibre channel loop speeds of either 2Gb (default) or 1Gb. The loop speed is set through the use of a - Acer Altos S700F | User Manual - Page 36
20 Chapter 2 Installation and Setup Figure 2-1 Location of Jumpers on LS Module - Acer Altos S700F | User Manual - Page 37
modules. Caution: Enclosures operating in split loop mode can not be daisy chained to other enclosures. Setting Up Split Loop Operation To operate the Altos S700 Series enclosure in split fibre channel loop mode, follow this procedure: 1 Remove the LS module from the front of the enclosure. 2 On the - Acer Altos S700F | User Manual - Page 38
22 3 Replace the LS module. Chapter 2 Installation and Setup - Acer Altos S700F | User Manual - Page 39
23 Configuration Rules These rules must be applied when implementing the Altos S700 Series configurations: • When daisy chaining, both 2Gb enclosures must be configured identically connector and a RS232 port • 2Gb RAID requires two LSMs. • 2Gb RAID supports autonegiotate - operates at 1Gb or 2Gb. - Acer Altos S700F | User Manual - Page 40
24 Chapter 2 Installation and Setup Supported Host Bus Adapters Contact your sales person for a list of approved Host Bus Adapters. - Acer Altos S700F | User Manual - Page 41
25 Supported Cables Warning: Only the following APPROVED cables must be used with the Altos S700 Series enclosures. This section lists the cables that must be used with the Altos S700 Series enclosure. Failure to adhere to these guidelines may cause the enclosure to operate incorrectly. Copper - Acer Altos S700F | User Manual - Page 42
26 Chapter 2 Installation and Setup Optical Cables The following Fibre Channel Optical cables are available from Acer. Please contact your sales person for more details of approved cables: • CA.S7002.005 : 0.3m, 2Gb FC optical cable • CA.S7002.006 : 10m, 2Gb FC - Acer Altos S700F | User Manual - Page 43
Chapter 3 JBOD Configurations - Acer Altos S700F | User Manual - Page 44
This Chapter describes the procedure for connecting your Altos S700 Series JBOD system to a host computer(s). Detailed information on how to configure and daisy chain enclosures is also provided along with instructions on how to set the enclosure ID. - Acer Altos S700F | User Manual - Page 45
Enclosure ID Each of the fourteen disk drive slots of the Altos S700 Series has a unique identifier assigned to it. This ID. The enclosure ID is set using the enclosure ID switch, located on the rear of the Altos S700 (see Figure 3-1). Note: The enclosure ID must be set prior to powering on the - Acer Altos S700F | User Manual - Page 46
30 Chapter 3 JBOD Configurations Figure 3-1 Location of Enclosure ID Switch 1 1 2 2 I 0 I 0 Enclosure ID Switch 1 This enclosure ID switch can be set to 0 through 7. The graphic below shows the slot number and location. Slot location when viewed from the front of the enclosure LSM Slot 0 - Acer Altos S700F | User Manual - Page 47
31 The fourteen disk drive slots (0 to 13), will be assigned an identifier based on the enclosure ID and the slot number as shown below. Enclosure ID Drive Slot 0 1 2 3 4 5 6 7 Slot 0 Slot 1 Slot 2 Slot 3 Slot 4 Slot 5 Slot 6 Slot 7 Slot 8 Slot 9 Slot 10 Slot 11 Slot 12 Slot 13 3 18 33 - Acer Altos S700F | User Manual - Page 48
JBOD Configurations Configurations This section describes the procedures for cabling the main configurations of the Altos S700 Series JBOD. Note: The following configuration procedures refer to connecting the Altos S700 Series directly to the host system. It is also possible to connect the system - Acer Altos S700F | User Manual - Page 49
JBOD Configurations There are two JBOD configurations covered in this Installation Guide: • Dual FC Loop mode (including how to daisy host: Note: You will need two HBA's in your host system, or a single HBA with support for two connections. A hub, switch or two hosts with HBA may also be used. 1 - Acer Altos S700F | User Manual - Page 50
34 Chapter 3 JBOD Configurations Figure 3-2 Connecting dual FC Loop configuration to a host To HBA To HBA 1 1 2 2 I 0 I 0 See Appendix C for Loop Diagram. To daisy chain enclosures together, connect link cables from the bottom connectors on the I/O modules of the first enclosure to the top - Acer Altos S700F | User Manual - Page 51
Figure 3-3 Daisy chaining dual FC Loop enclosures To HBA 1 2 35 To HBA 1 2 0 0 I I 1 1 2 2 0 0 I I To next enclosure See Appendix C for Loop Diagram. To next enclosure Caution: When daisy chaining enclosures, you must ensure that each enclosure has a unique Enclosure ID. Quad Loop - Acer Altos S700F | User Manual - Page 52
36 Chapter 3 JBOD Configurations This section describes the procedure for connecting the enclosure in quad loop mode. For this configuration there must be two LS modules and two I/O modules installed in the enclosure. 1 Remove both LS modules from the enclosure and install a jumper, at jumper - Acer Altos S700F | User Manual - Page 53
37 Connecting a Power Source The Altos S700 enclosure supports dual AC power supplies. Only one power supply is required for normal operation. However, a second, optional power supply may be added to provide a redundant power - Acer Altos S700F | User Manual - Page 54
numeric SEL_ID of the disk drive. Once the enclosure is powered up and all 14 drives are spun up as depicted above, the enclosure will support immediate drive spin up with two power supplies present. Modulo 8 The drive spin up sequence above uses modulo 8 to calculate the spin up delay. Modulo - Acer Altos S700F | User Manual - Page 55
Chapter 4 RAID Configurations - Acer Altos S700F | User Manual - Page 56
This chapter describes how to set up, configure and use the Altos S700 Series RAID Controller. Some general information about the RAID controller is also provided. - Acer Altos S700F | User Manual - Page 57
Altos S700 RAID Controller is a high performance controller, providing two host fibre channel and two device fibre channel interfaces. It is an intelligent, caching controller that supports the controller, and connections for debug and out-ofband service to the host and device PCI busses. The RAID - Acer Altos S700F | User Manual - Page 58
: 128, 256, 512 MB DIMMs • 128 KB NVRAM configuration memory • Real Time Clock • 4 MB Flash PROM • Transparent failover/failback with multiple target ID support The I/O circuit board includes a Battery Backup Unit (BBU) that maintains memory content in case of AC power failure. Power for the BBU is - Acer Altos S700F | User Manual - Page 59
is for information only. Only qualified service personnel should open the RAID Controller circuit board to the disk arrays in the Altos S700 enclosure. The controller circuit board performs the enclosure and a host, as well as general support functions. The I/O circuit board provides the following: - Acer Altos S700F | User Manual - Page 60
4 RAID Configurations The I/O circuit board has two SFF optical transceivers supporting shortwave multimode fibre on the host side and a 90-pin controlled port applicable when attaching to operating systems that are not supported by Acer's management software, or for using a CLI to create scripts. - Acer Altos S700F | User Manual - Page 61
45 RAID Controller Location The RAID controller is installed in the rear of the enclosure in the location shown in Figure 4-2. Figure 4-2 RAID Controller location RAID Controller 1 2 1 2 3 4 5 6 7 RAID Controller 1 2 1 2 3 4 5 6 7 I 0 I 0 The above illustration shows a dual RAID configuration. - Acer Altos S700F | User Manual - Page 62
46 Chapter 4 RAID Configurations RAID Controller Status LEDs The RAID controller has 7 Status LEDs as shown above. describes what these LEDs signify. Controller Status LEDs LED 1 2 3 4 5 6 7 Description Yellow - Not Ready. Normally Off. Goes On during power up sequence. Green - Ready. Normally - Acer Altos S700F | User Manual - Page 63
47 RAID Controller Configurations This section describes how to cable the two standard RAID controller configurations: Single RAID Controller and Dual RAID Controller (dual active). The procedure for daisy chaining these standard configurations to expansions enclosures is also described. This - Acer Altos S700F | User Manual - Page 64
a combination of the Slot number and the enclosure ID. The enclosure ID is set, using the enclosure ID switch, located on the rear of the Altos S700 (see Figure 4-4). Note: The enclosure ID must be set prior to powering on the enclosure. Note: Each enclosure must have a separate ID when daisy - Acer Altos S700F | User Manual - Page 65
49 The graphic below shows the slot number and location. Slot location when viewed from the front of the enclo LSM Slot 0 Slot 1 Slot 2 Slot 3 Slot 4 Slot 5 Slot 6 Slot 7 Slot 8 Slot 9 Slot 10 Slot 11 Slot 12 Slot 13 LSM The fourteen disk drive slots (0 to 13), will be assigned an identifier based - Acer Altos S700F | User Manual - Page 66
50 Chapter 4 RAID Configurations Enclosure ID Drive Slot 0 1 2 3 4 5 6 7 Slot 13 16 31 46 61 76 91 106 121 - Acer Altos S700F | User Manual - Page 67
: For all RAID configurations, there must be two LS modules installed in the enclosure. Note: The following configuration procedures refer to connecting the Altos S700 Series directly to the host system. It is also possible to connect the system using a Hub/Switch. Caution: Before working on the - Acer Altos S700F | User Manual - Page 68
52 Chapter 4 RAID Configurations Figure 4-5 Single RAID Controller to Host Connector 1 1 2 2 1 HBA 1 2 3 HBA 2 4 5 6 7 I 0 I 0 Daisy Chaining a Single Controller Enclosure To daisy chain the RAID enclosure to an expansion enclosure, connect link cables from the RAID controller to the - Acer Altos S700F | User Manual - Page 69
53 Figure 4-6 Daisy Chaining Single Controller Enclosure I/O Module 1 2 RAID Controller 1 2 Link Cable Connect this cable for dual loop operation 1 2 I 0 1 HBA 1 2 3 HBA 2 4 5 6 7 0 I Link Cable 1 2 0 0 I I To next enclosure Total of 8 enclosures may be daisy chained together - Acer Altos S700F | User Manual - Page 70
In this configuration two RAID Controllers are installed in the enclosures I/O slots. Note: The following configuration procedures refer to connecting the Altos S700 Series directly to the host system. It is also possible to connect the system using a Hub/Switch. Caution: Before working - Acer Altos S700F | User Manual - Page 71
Figure 4-7 Dual RAID Controller Configuration 1 2 Host B HBA 1 1 HBA 2 2 3 4 5 6 7 55 1 2 Host A 1 HBA 1 2 3 HBA 2 4 5 6 7 I 0 I 0 Daisy Chaining a Dual Controller Enclosure To daisy chain the RAID enclosure to an expansion enclosure, connect link cables from the RAID enclosure to the - Acer Altos S700F | User Manual - Page 72
56 Chapter 4 RAID Configurations Figure 4-8 Daisy Chaining a Dual Controller Enclosure 1 2 Host B HBA 1 1 HBA 2 2 3 4 5 6 7 0 I Link Cable 1 2 I 0 1 2 Host A 1 HBA 1 2 3 HBA 2 4 5 6 7 Link Cable 1 2 0 0 I I To next enclosure Total of 8 enclosures may be daisy chained together - Acer Altos S700F | User Manual - Page 73
57 Connecting a Power Source The Altos S700 enclosure supports dual AC power supplies. Only one power supply is required for normal operation. However, a second, optional, power supply may be added to provide a redundant power - Acer Altos S700F | User Manual - Page 74
numeric SEL_ID of the disk drive. Once the enclosure is powered up and all 14 drives are spun up as depicted above, the enclosure will support immediate drive spin up with two power supplies present. Modulo 8 The drive spin up sequence above uses modulo 8 to calculate the spin up delay. Modulo - Acer Altos S700F | User Manual - Page 75
Chapter 5 System Monitoring - Acer Altos S700F | User Manual - Page 76
This Chapter describes the devices used to monitor the Altos S700 Series. The location of the monitoring LEDs and how to interpret them is described. - Acer Altos S700F | User Manual - Page 77
61 Overview The front mounted LS module is the main monitoring device of the Altos S700 Series. This module is complemented by status and fault LEDs, mounted on all the major components of the enclosure, such as, disk drives, power - Acer Altos S700F | User Manual - Page 78
and control for the Altos S700 Series. The module reports status and receives control information over the Enclosure Services Interface (ESI) port of memory for the microcontroller • Temperature sensor • Audible alarm with manual and software disable • FC link monitoring and status information • - Acer Altos S700F | User Manual - Page 79
Enclosure LEDs The Altos S700 Series has six LEDs located on each of the front mounted LS Modules. These LEDs the enclosure (1GB or 2Gb operation). Figure 5-1 shows the location of the LEDs Figure 5-1 Location of Altos S700 Enclosure LEDs LED 0 0 LED 1 1 LED 2 2 LED 3 3 LED 4 LED 5 4 5 - Acer Altos S700F | User Manual - Page 80
64 Chapter 5 System Monitoring The table below shows the meaning of each of the LEDs, and how to interpret them. LED 0 Description Power On LED 1 Shelf Fault LED 2 FC Loop A LED 3 FC Loop B LED 4 LS Fault LED 5 2Gb Operation Color Indication Green Normally ON, indicates power is applied. - Acer Altos S700F | User Manual - Page 81
65 Disk Drive LEDs Each disk drive carrier has two LED indicators visible from the front of the Altos S700 enclosure. The green disk drive ready LED is controlled by the disk drive, and the bi-colour LED is controlled by the LS Module. - Acer Altos S700F | User Manual - Page 82
66 Figure 5-2 Disk Drive Carrier LEDs Disk Drive Ready (Green) 18F Chapter 5 System Monitoring BiColor LED (Green/Amber) - Acer Altos S700F | User Manual - Page 83
Series uses two AC power supplies. The AC power supplies provide 853W peak output power and 673W continuous output power. The Altos S700 Series power supply has two LED indicators on it, which are visible from the rear of the enclosure. The green Power OK LED is - Acer Altos S700F | User Manual - Page 84
Series has two variable speed fans per advanced cooling module. Each of the two ACMs on the rear of the Altos S700 Series enclosure has two fault LEDs visible from the rear of the enclosure. The LEDs are labeled "1" and "2" to correspond with the two fans - Acer Altos S700F | User Manual - Page 85
69 RAID Controller LEDs The RAID controller has 7 LEDs located and numbered as shown. Figure 5-5 RAID controller LEDs RS232 FC Host Connectors (SSF optical) HSSDC Connector 1 2 3 4 Status LEDs 5 6 7 The table below describes the LEDs meaning. Controller Status LEDs LED 1 2 3 4 5 6 7 - Acer Altos S700F | User Manual - Page 86
70 Chapter 5 System Monitoring - Acer Altos S700F | User Manual - Page 87
Chapter 6 Installing and Removing Components - Acer Altos S700F | User Manual - Page 88
This Chapter describes the procedures for installing and removing the replaceable components in the Altos S700 Series. Warning: The module handles are to facilitate the easy insertion and removal of the modules, they should not be used to lift and/or carry the enclosure. - Acer Altos S700F | User Manual - Page 89
73 Location of the Components Module Disk Drives ACMs 1 2 LS Module 1 2 I 0 I 0 I/O Module/ RAID Controller Power Supplies I/O Module/ RAID Controller - Acer Altos S700F | User Manual - Page 90
74 Chapter 6 Installing and Removing Components Installing and Removing a Disk Drive Carrier The disk drive carriers are located in the front of the enclosure. Follow these procedures to install and remove the disk drive carrier. Installing a Disk Drive Carrier 1 Select the disk drive slot into - Acer Altos S700F | User Manual - Page 91
18F 75 Figure 6-1 Disk Drive Carrier Push locking tab in this direction to open Cam Lever - Acer Altos S700F | User Manual - Page 92
76 Chapter 6 Installing and Removing Components Installing and Removing an LS Module The LS Modules are located in the front of the enclosure. Follow these procedures to install and remove the LS Modules. Installing an LS Module 1 Select the LS Module slot in to which the LS Module is to be - Acer Altos S700F | User Manual - Page 93
77 Figure 6-2 LS Module Push locking tab in this direction to open 0 1 2 3 4 5 Cam Lever - Acer Altos S700F | User Manual - Page 94
78 Chapter 6 Installing and Removing Components Installing and Removing a Power Supply The power supplies are located in the rear of the enclosure. Follow these procedures to install and remove the power supplies. Installing a Power Supply 1 Select the power supply slot into which the power - Acer Altos S700F | User Manual - Page 95
79 Installing and Removing an Advanced Cooling Module The advanced cooling modules are located in the rear of the enclosure. Follow these procedures to install and remove the advanced cooling modules. Installing an Advanced Cooling Module 1 Select the advanced cooling module slot into which the - Acer Altos S700F | User Manual - Page 96
80 Chapter 6 Installing and Removing Components Installing and Removing an I/O Module/RAID Controller Note: In the following section, "I/O Module" is taken to include the RAID Controller in addition to the I/O Module. The I/O module is located in the rear of the enclosure. Follow these procedures - Acer Altos S700F | User Manual - Page 97
Appendix A Safety Statement Translations - Acer Altos S700F | User Manual - Page 98
82 Caution: Appendix A Safety Statement Translations This equipment is intended only for installation in a restricted access location. Caution: Dieses Gerät sollte nur an einem Ort mit Zugangskontrolle installiert werden. Denna utrustning får endast installeras på ställe med begränsad åtkomst. - Acer Altos S700F | User Manual - Page 99
83 Låt skivdrivenheter och strömtillförsel nå rumstemperatur innan strömförsörjningen slås på. Ennen kuin kytket virran hyllyyn sijoitettuihin levyasemiin ja teholähteisiin, odota, että laitteet saavuttavat huoneiston lämpötilan. Sørg for, at drev og strømforsyninger har opnået rumtemperaturer, før - Acer Altos S700F | User Manual - Page 100
84 Appendix A Safety Statement Translations Hvis der i mere end ét udstyrsrackkabinet er indbyrdes forbundet udstyr, bør disse kabinetter have samme grundspænding. Dersom sammenkoblingsutstyr er montert i mer enn ett kabinett i utstyrsrack, anbefales det at kabinettene blir montert slik at de har - Acer Altos S700F | User Manual - Page 101
85 Før det blir gjort forsøk på installere eller fjerne komponenter, må det tas forholdsregler for å avverge statisk elektrisitet. Minimumskravet er riktig jordet antistatisk håndleddstropp og jordingsledning. When installing or removing a rackmount shelf, remove all power supplies and disk drives. - Acer Altos S700F | User Manual - Page 102
86 Appendix A Safety Statement Translations Når hylle for rackmontering blir installert eller fjernet, må alle strømforsyninger og diskstasjoner fjernes. Det anbefales at du arbeider sammen med minst én annen person når du installerer en diskhylle. Dette er nødvendig for å hindre personskade og - Acer Altos S700F | User Manual - Page 103
87 Nach dem Entfernen des LS Module muss die entstehende Lücke durch eine Blende oder durch die Installation eines anderen LS Module geschlossen werden. Wird dies nicht beachtet, kann es zu Unterbrechung der Luftzufuhr und zu stark verminderter Kühlung kommen. När en LS Module avlägsnas skall - Acer Altos S700F | User Manual - Page 104
88 Warning Appendix A Safety Statement Translations A possible shock hazard may exist in the area of the fan connection. Im Bereich des Lüftungsanschlusses besteht Stromschlaggefahr. Det finns risk för elstötar i området runt fläktanslutningen. Tuuletinliitännän ympäristössä voi olla sähköiskun - Acer Altos S700F | User Manual - Page 105
Appendix B Technical Specifications - Acer Altos S700F | User Manual - Page 106
Specifications Technical Specifications Host Interface • Two Fibre Channel interfaces, 200MB\s each, 400 MB\s total. • External hub and switch support. Disk Drive Interface • Dual independent Fibre Channel interfaces, 200MB\s each, 400MB\s total. System Max drives per enclosure: Max drives - Acer Altos S700F | User Manual - Page 107
91 Rack Enclosure Height: 5.22 inches (13.3cm) Width: 17.5 inches (44.5cm) Depth: 20 inches (50.8cm) Weight: 60 lbs (29.5kg) maximum Warranty Three (3) years (5 years disk drive warranty) Monitoring Temperature, advanced cooling modules, power supplies, disk drives, loop resiliency modules, I/O - Acer Altos S700F | User Manual - Page 108
: Current Rating Input Frequency: Max. Peak Output Power Max. Average Output Power Appendix B Technical Specifications 10K; 15K 3.5" 1.0" Fibre Channel (2Gb FC support) 85 - 264 VAC 10 - 5 Amps 47 - 63 Hz 853 Watts 673 Watts Temperature • Operating Temperature: 5oC to 40oC • Temperature Storage - Acer Altos S700F | User Manual - Page 109
93 • Altitude Storage: -200 to 40,000 feet Operational Shock Half sine shock: 3G half sine shock with a pulse duration of 11 milliseconds or less. No permanent damage will occur at or below this level. Operational Vibration Sinusoidal vibration from 5 to 350 Hz at 0.2G (0 to peak) at a sweep rate of - Acer Altos S700F | User Manual - Page 110
94 Appendix B Technical Specifications Immunity Testing: Light Industry CENELEC EN 50 082-1, 1997 • Electrostatic Discharge CENELEC EN 61000-4-2, 1995 • Radiated Immunity CENELEC EN 61000-4-3 • Electrical Fast Transients (Burst) CENELEC EN 61000-4-4 1995 • Transient (Surge) CENELEC EN 61000-4-5, - Acer Altos S700F | User Manual - Page 111
Appendix C Configuration Loop Diagram - Acer Altos S700F | User Manual - Page 112
96 Appendix C Configuration Loop Diagram Loop Diagram for a Single Enclosure System - Single Loop External 3 4 5 6 7 8 9 Enclosure ID 0 16 15 10 14 13 12 11 Circles denote disk drives with drive ID shown. - Acer Altos S700F | User Manual - Page 113
97 Loop Diagram for a Dual Enclosure System - Single Loop External 3 4 5 6 7 8 9 Enclosure ID 0 16 15 14 13 10 12 11 18 19 20 21 22 23 24 Enclosure ID 1 25 31 30 29 28 27 26 Circles denote disk drives with drive ID shown. - Acer Altos S700F | User Manual - Page 114
98 Appendix C Configuration Loop Diagram Loop Diagram for a Single Enclosure System - Dual Loop External 3 4 5 6 7 8 9 Enclosure ID 0 16 15 14 13 10 12 11 Circles denote disk drives with drive ID shown. - Acer Altos S700F | User Manual - Page 115
99 Loop Diagram for a Dual Enclosure System - Dual Loop External 3 4 5 6 7 8 9 Enclosure ID 0 16 15 14 13 10 12 11 18 19 20 21 22 23 24 Enclosure ID 1 25 31 30 29 28 27 26 Circles denote disk drives with drive ID shown. - Acer Altos S700F | User Manual - Page 116
100 Appendix C Configuration Loop Diagram - Acer Altos S700F | User Manual - Page 117
Appendix D Upgrading an Altos S700 JBOD Array to a RAID Array - Acer Altos S700F | User Manual - Page 118
In this section the procedure for upgrading a Altos S700 Series Storage Array from a JBOD system to a RAID system is described. The equipment and parts necessary for the upgrade are also described. - Acer Altos S700F | User Manual - Page 119
and properly earthed grounding wire. • Phillips head screw driver. • Altos S700 RAID Controller (2 controllers if dual controller operation is required) • FC host cables to connect RAID controller to host/hub/switch Contact Acer Technical Support to ensure that the correct LS Module Firmware is - Acer Altos S700F | User Manual - Page 120
104 Appendix D Upgrading an Altos S700 JBOD Array to a RAID Array 5 If you are upgrading to a dual RAID configuration then repeat steps 2 through 4 to install the second RAID controller. 6 Attach - Acer Altos S700F | User Manual - Page 121
105 Follow this procedure to install the Battery Backup Unit (BBU): 1 Remove the ACM from the enclosure by loosening the two ACM screws and using the handle, slide the ACM out of the enclosure. 2 Lay the ACM on a flat surface as in above. 3 Orient the BBU as shown. Installing the BBU BBU Connector - Acer Altos S700F | User Manual - Page 122
106 Appendix D Upgrading an Altos S700 JBOD Array to a RAID Array - Acer Altos S700F | User Manual - Page 123
107 Index A advanced cooling module, leds, 68 advanced cooling modules, 5, 78, 79 air flow, 16 ambient temperature, 16 audience, vii B battery backup unit (BBU) 104 battery backup unit, location 104 C cabling, dual i/o module, 33 circuit overloading, 18 communication, esi, 62 compliance, agency, 93 - Acer Altos S700F | User Manual - Page 124
108 spin up sequence 58 T technical specifications, 90 temperature, 16, 92 terminal emulation 44 U unpacking, 15 V vibration, operational, 93 VT100 44 W warranty, 91
-
 1
1 -
 2
2 -
 3
3 -
 4
4 -
 5
5 -
 6
6 -
 7
7 -
8
-
9
-
10
-
11
-
12
-
13
-
14
-
15
-
16
-
17
-
18
-
19
-
20
-
21
-
22
-
23
-
24
-
25
-
26
-
27
-
28
-
29
-
30
-
31
-
32
-
33
-
34
-
35
-
36
-
37
-
38
-
39
-
40
-
41
-
42
-
43
-
44
-
45
-
46
-
47
-
48
-
49
-
50
-
51
-
52
-
53
-
54
-
55
-
56
-
57
-
58
-
59
-
60
-
61
-
62
-
63
-
64
-
65
-
66
-
67
-
68
-
69
-
70
-
71
-
72
-
73
-
74
-
75
-
76
-
77
-
78
-
79
-
80
-
81
-
82
-
83
-
84
-
85
-
86
-
87
-
88
-
89
-
90
-
91
-
92
-
93
-
94
-
95
-
96
-
97
-
98
-
99
-
100
-
101
-
102
-
103
-
104
-
105
-
106
-
107
-
108
-
109
-
110
-
111
-
112
-
113
-
114
-
115
-
116
-
117
-
118
-
119
-
120
-
121
-
122
-
123
-
124
 |
 |

Altos S700 Series
User’s Guide