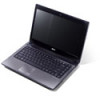
Acer Aspire 4741 Service Guide
Acer Aspire 4741 Manual
 |
View all Acer Aspire 4741 manuals
Add to My Manuals
Save this manual to your list of manuals |
Acer Aspire 4741 manual content summary:
- Acer Aspire 4741 | Service Guide - Page 1
Aspire 4741 Series Service Guide Service guide files and updates are available on the ACER/CSD web; for more information, please refer to http://csd.acer.com.tw PRINTED IN TAIWAN - Acer Aspire 4741 | Service Guide - Page 2
and Replacement Chapter 3 This chapter contains step-by-step procedures on how to disassemble the notebook computer for maintenance and troubleshooting. Disassembly Requirements To disassemble the computer, you need the following tools: • Wrist grounding strap and conductive mat for preventing - Acer Aspire 4741 | Service Guide - Page 3
Instructions Before proceeding with the disassembly procedure, make sure that you do the following: 1. Turn off the power to the system and all peripherals. 2. Unplug the AC adapter and all power and signal cables from the system. 3. Place the system on a flat, stable surface. 4. Remove the battery - Acer Aspire 4741 | Service Guide - Page 4
The flowchart below gives you a graphic representation on the entire disassembly sequence and instructs you on the components that need to be removed during servicing. For example, if you want to remove the main board, you must first remove the keyboard, then disassemble the inside assembly frame in - Acer Aspire 4741 | Service Guide - Page 5
Pack 1. Turn base unit over. 2. Slide the battery lock/unlock latch to the unlock position. 3. Slide the battery release latch to the release position to pop out the battery pack, then remove the battery pack from the main unit. Note: Battery has been highlighted with the yellow circle as above - Acer Aspire 4741 | Service Guide - Page 6
Removing the SD Dummy Card 1. Push the SD dummy card all the way in to eject it. 2. Pull SD dummy card out from the slot. Chapter 3 31 - Acer Aspire 4741 | Service Guide - Page 7
Removing the Back Cover 1. See "Removing the Battery Pack" on page 30. 2. See "Removing the SD Dummy Card" on page 31. 3. Remove the four captive screws securing the back cover. 4. Use a flat screwdriver to pry open the back cover and detach it from the lower case. 32 Chapter 3 - Acer Aspire 4741 | Service Guide - Page 8
Removing the DIMM Modules 1. See "Removing the Battery Pack" on page 30. 2. See "Removing the SD Dummy Card" on page 31. 3. See "Removing the Back Cover" on page 32. 4. Push out the latches on both sides of the DIMM socket to release the DIMM modules. 5. Remove the DIMM modules. Chapter 3 33 - Acer Aspire 4741 | Service Guide - Page 9
Removing the Hard Disk Drive Module 1. See "Removing the Battery Pack" on page 30. 2. See "Removing the SD Dummy Card" on page 31. 3. See "Removing the Back Cover" on page 32. 4. See "Removing the DIMM Modules" on page 33 5. Remove the one screw (B) securing the hard disk drive module. Size ( - Acer Aspire 4741 | Service Guide - Page 10
7. Remove the two screws (C) securing the hard disk to the bracket and remove the hard disk from the bracket. Size (Quantity) M3 x L4 (1) Color Silver Torque 3.0 kgf-cm Part No. 86.9A524.4R0 Chapter 3 35 - Acer Aspire 4741 | Service Guide - Page 11
Wireless WAN Module 1. See "Removing the Battery Pack" on page 30. 2. See "Removing the SD Dummy Card" on page 31. 3. See "Removing the Back Cover" on page 32. 4. See "Removing the DIMM Modules" on page 33. 5. See "Removing the Hard Disk Drive Module" on page 34. 6. Remove the one screw (B) securing - Acer Aspire 4741 | Service Guide - Page 12
the cable are arranged properly. Removing the WLAN Module 1. See "Removing the Battery Pack" on page 30. 2. See "Removing the SD Dummy Card" on page 31. 3. See "Removing the Back Cover" on page 32. 4. See "Removing the DIMM Modules" on page 33. 5. See "Removing the Hard Disk Drive Module" on page 34 - Acer Aspire 4741 | Service Guide - Page 13
8. Remove the one screw (B) securing the WLAN module to the system. Size (Quantity) M2 x L3 (1) Color Black Torque 1.6 kgf-cm Part No. 86.00F80.723 9. Disconnect the black antenna cable from MAIN connector and the white antenna cable from AUX connector on the WLAN module. 38 Chapter 3 - Acer Aspire 4741 | Service Guide - Page 14
are arranged properly. Removing the Optical Drive Module 1. See "Removing the Battery Pack" on page 30. 2. See "Removing the SD Dummy Card" on page 31. 3. See "Removing the Back Cover" on page 32. 4. See "Removing the DIMM Modules" on page 33. 5. See "Removing the Hard Disk Drive Module" on page - Acer Aspire 4741 | Service Guide - Page 15
9. Slowly pull out the ODD module from the ODD drive bay. 10. Remove the one screw (B) securing the ODD bracket to the ODD module. Size (Quantity) M2 x L3 (1) Color Black Torque 1.6 kgf-cm Part No. 86.00F80.723 40 Chapter 3 - Acer Aspire 4741 | Service Guide - Page 16
11. Detach the ODD bracket from the optical disk drive module. Chapter 3 41 - Acer Aspire 4741 | Service Guide - Page 17
Main Unit Disassembly Process Main Unit Disassembly Flowchart Screw List Item B E Screw M2 x L3 M2.5 x L6 Color Black Black Part No. 86.00F80.723 86.00E12.536 42 Chapter 3 - Acer Aspire 4741 | Service Guide - Page 18
Removing the Keyboard 1. See "Removing the Battery Pack" on page 30. 2. See "Removing the SD Dummy Card" on page 31. 3. See "Removing the Back Cover" on page 32. 4. See "Removing the DIMM Modules" on page 33. 5. See "Removing the Hard Disk Drive Module" on page 34. 6. See "Removing the Wireless WAN - Acer Aspire 4741 | Service Guide - Page 19
detach the keyboard. Separating the Upper Case from the Lower Case 1. See "Removing the Battery Pack" on page 30. 2. See "Removing the SD Dummy Card" on page 31. 3. See "Removing the Back Cover" on page 32. 4. See "Removing the DIMM Modules" on page 33. 5. See "Removing the Hard Disk Drive Module - Acer Aspire 4741 | Service Guide - Page 20
11. Detach the power cable from its connector on the main board. 12. Detach the speaker cable from its connector on the main board. 13. Detach the touchpad cable from its connector on the main board. Chapter 3 45 - Acer Aspire 4741 | Service Guide - Page 21
14. Remove the nine screws (E) from the lower case. Size (Quantity) M2.5 x L6 (9) Color Black 15. Remove the five screws (B) from the lower case. Torque 3.0 kgf-cm Part No. 86.00E12.536 Size (Quantity) M2 x L3 (5) Color Black Torque 1. 6 kgf-cm Part No. 86.00F80.723 46 Chapter 3 - Acer Aspire 4741 | Service Guide - Page 22
16. Use a plastic screw driver to pry loose the sides of the upper case. 17. Gently detach the upper case from the lower case. Remove the upper case. Chapter 3 47 - Acer Aspire 4741 | Service Guide - Page 23
DIMM Modules" on page 33. 5. See "Removing the Hard Disk Drive Module" on page 34. 6. See "Removing the Wireless WAN Module" on page 36. 7. See "Removing the WLAN Module" on page 37. 8. See "Removing the Optical Drive Module" on page 39. 9. See "Removing the Keyboard" on page 43. 10. See "Separating - Acer Aspire 4741 | Service Guide - Page 24
13. Remove the four screws (E) from the left and right hinges of the LCD module. Size (Quantity) M2.5 x L6 (4) Color Black Torque 3.0 kgf-cm Part No. 86.00E12.536 14. Release the microphone cable, WWAN and WLAN antennas from the latches and tapes. Chapter 3 49 - Acer Aspire 4741 | Service Guide - Page 25
15. Carefully pull out the wireless antenna cables from the hole(s). 16. Carefully remove the LCD module from the base unit. NOTE: When connecting the cable back to the unit, please note that the cable should be routed well. 50 Chapter 3 - Acer Aspire 4741 | Service Guide - Page 26
DIMM Modules" on page 33. 5. See "Removing the Hard Disk Drive Module" on page 34. 6. See "Removing the Wireless WAN Module" on page 36. 7. See "Removing the WLAN Module" on page 37. 8. See "Removing the Optical Drive Module" on page 39. 9. See "Removing the Keyboard" on page 43. 10. See "Separating - Acer Aspire 4741 | Service Guide - Page 27
DIMM Modules" on page 33. 5. See "Removing the Hard Disk Drive Module" on page 34. 6. See "Removing the Wireless WAN Module" on page 36. 7. See "Removing the WLAN Module" on page 37. 8. See "Removing the Optical Drive Module" on page 39. 9. See "Removing the Keyboard" on page 43. 10. See "Separating - Acer Aspire 4741 | Service Guide - Page 28
DIMM Modules" on page 33. 5. See "Removing the Hard Disk Drive Module" on page 34. 6. See "Removing the Wireless WAN Module" on page 36. 7. See "Removing the WLAN Module" on page 37. 8. See "Removing the Optical Drive Module" on page 39. 9. See "Removing the Keyboard" on page 43. 10. See "Separating - Acer Aspire 4741 | Service Guide - Page 29
DIMM Modules" on page 33. 5. See "Removing the Hard Disk Drive Module" on page 34. 6. See "Removing the Wireless WAN Module" on page 36. 7. See "Removing the WLAN Module" on page 37. 8. See "Removing the Optical Drive Module" on page 39. 9. See "Removing the Keyboard" on page 43. 10. See "Separating - Acer Aspire 4741 | Service Guide - Page 30
from the lower case. Removing the Bluetooth Module 1. See "Removing the Battery Pack" on page 30. 2. See "Removing the SD Dummy Card" on page 31. 3. See "Removing the Back Cover" on page 32. 4. See "Removing the DIMM Modules" on page 33. 5. See "Removing the Hard Disk Drive Module" on page 34 - Acer Aspire 4741 | Service Guide - Page 31
13. Disconnect the bluetooth cable from its connector on the main board. 14. Release the bluetooth cable from the tape and latches. 15. Detach the bluetooth module. 56 Chapter 3 - Acer Aspire 4741 | Service Guide - Page 32
DIMM Modules" on page 33. 5. See "Removing the Hard Disk Drive Module" on page 34. 6. See "Removing the Wireless WAN Module" on page 36. 7. See "Removing the WLAN Module" on page 37. 8. See "Removing the Optical Drive Module" on page 39. 9. See "Removing the Keyboard" on page 43. 10. See "Separating - Acer Aspire 4741 | Service Guide - Page 33
DIMM Modules" on page 33. 5. See "Removing the Hard Disk Drive Module" on page 34. 6. See "Removing the Wireless WAN Module" on page 36. 7. See "Removing the WLAN Module" on page 37. 8. See "Removing the Optical Drive Module" on page 39. 9. See "Removing the Keyboard" on page 43. 10. See "Separating - Acer Aspire 4741 | Service Guide - Page 34
DIMM Modules" on page 33. 5. See "Removing the Hard Disk Drive Module" on page 34. 6. See "Removing the Wireless WAN Module" on page 36. 7. See "Removing the WLAN Module" on page 37. 8. See "Removing the Optical Drive Module" on page 39. 9. See "Removing the Keyboard" on page 43. 10. See "Separating - Acer Aspire 4741 | Service Guide - Page 35
Module" on page 58. 16. Disconnect the heatsink fan cable from its connector from the main board. 17. Remove the six screws securing the heatsink module in the order shown. NOTE: The Discrete system may be shipped with NVIDIA N11PGE1 VRAM HYNIX Graphic DDRIII 800 1GB or NVIDIA N11MGE1 VRAM Samsung - Acer Aspire 4741 | Service Guide - Page 36
lift up the heatsink module. Removing the CPU 1. See "Removing the Battery Pack" on page 30. 2. See "Removing the SD Dummy Card" on page 31. 3. See "Removing the Back Cover" on page 32. 4. See "Removing the DIMM Modules" on page 33. 5. See "Removing the Hard Disk Drive Module" on page 34. 6. See - Acer Aspire 4741 | Service Guide - Page 37
17. Using a flat screwdriver, turn the CPU socket latch counter-clockwise to release the CPU. 18. Lift up carefully to remove the CPU. 62 Chapter 3 - Acer Aspire 4741 | Service Guide - Page 38
NOTE: When installing the CPU, make sure to install the CPU with PIN 1 at the corner as shown. Chapter 3 63 - Acer Aspire 4741 | Service Guide - Page 39
LCD Module Disassembly Process LCD Module Disassembly Flowchart Screw List Item A B D Screw M2.5 x L5 M2 x L3 M2.5 x L4 Color Black Black Silver Part No. 86.00F87.735 86.00F80.723 86.00H36.534 64 Chapter 3 - Acer Aspire 4741 | Service Guide - Page 40
DIMM Modules" on page 33. 5. See "Removing the Hard Disk Drive Module" on page 34. 6. See "Removing the Wireless WAN Module" on page 36. 7. See "Removing the WLAN Module" on page 37. 8. See "Removing the Optical Drive Module" on page 39. 9. See "Removing the Keyboard" on page 43. 10. See "Separating - Acer Aspire 4741 | Service Guide - Page 41
14. Carefully pry open the LCD bezel and remove it from the LCD panel. 66 Chapter 3 - Acer Aspire 4741 | Service Guide - Page 42
DIMM Modules" on page 33. 5. See "Removing the Hard Disk Drive Module" on page 34. 6. See "Removing the Wireless WAN Module" on page 36. 7. See "Removing the WLAN Module" on page 37. 8. See "Removing the Optical Drive Module" on page 39. 9. See "Removing the Keyboard" on page 43. 10. See "Separating - Acer Aspire 4741 | Service Guide - Page 43
the LCD Panel with the Brackets 1. See "Removing the Battery Pack" on page 30. 2. See "Removing the SD Dummy Card" on page 31. 3. See "Removing the Back Cover" on page 32. 4. See "Removing the DIMM Modules" on page 33. 5. See "Removing the Hard Disk Drive Module" on page 34. 6. See "Removing the - Acer Aspire 4741 | Service Guide - Page 44
DIMM Modules" on page 33. 5. See "Removing the Hard Disk Drive Module" on page 34. 6. See "Removing the Wireless WAN Module" on page 36. 7. See "Removing the WLAN Module" on page 37. 8. See "Removing the Optical Drive Module" on page 39. 9. See "Removing the Keyboard" on page 43. 10. See "Separating - Acer Aspire 4741 | Service Guide - Page 45
15. Remove the four screws (B) securing the left and right LCD brackets to remove the brackets. Size (Quantity) M2 x L3 (4) Color Black Torque 1.6 kgf-cm Part No. 86.00F80.723 70 Chapter 3 - Acer Aspire 4741 | Service Guide - Page 46
DIMM Modules" on page 33. 5. See "Removing the Hard Disk Drive Module" on page 34. 6. See "Removing the Wireless WAN Module" on page 36. 7. See "Removing the WLAN Module" on page 37. 8. See "Removing the Optical Drive Module" on page 39. 9. See "Removing the Keyboard" on page 43. 10. See "Separating - Acer Aspire 4741 | Service Guide - Page 47
17. Disconnect the FPC cable from the LCD panel. 72 Chapter 3 - Acer Aspire 4741 | Service Guide - Page 48
DIMM Modules" on page 33. 5. See "Removing the Hard Disk Drive Module" on page 34. 6. See "Removing the Wireless WAN Module" on page 36. 7. See "Removing the WLAN Module" on page 37. 8. See "Removing the Optical Drive Module" on page 39. 9. See "Removing the Keyboard" on page 43. 10. See "Separating - Acer Aspire 4741 | Service Guide - Page 49
DIMM Modules" on page 33. 5. See "Removing the Hard Disk Drive Module" on page 34. 6. See "Removing the Wireless WAN Module" on page 36. 7. See "Removing the WLAN Module" on page 37. 8. See "Removing the Optical Drive Module" on page 39. 9. See "Removing the Keyboard" on page 43. 10. See "Separating