Acer C112TCi User Manual
Acer C112TCi - TravelMate - Pentium M 1.1 GHz Manual
 |
UPC - 099802228675
View all Acer C112TCi manuals
Add to My Manuals
Save this manual to your list of manuals |
Acer C112TCi manual content summary:
- Acer C112TCi | User Manual - Page 1
Acer Projector C112/LB100/LK-WV20 Series User's Guide - Acer C112TCi | User Manual - Page 2
Acer Projector C112/LB100/LK-WV20 Series User's Guide Original Issue: 12/2010 Changes may be made periodically to the information in this publication without obligation to notify any person of such revisions or changes. Such changes will be incorporated in new editions of this manual No part of this - Acer C112TCi | User Manual - Page 3
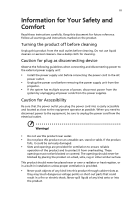
this document for future reference. Follow all warnings and instructions marked on the product. Turning the product off before cabinet slots as they may touch dangerous voltage points or short-out parts that could result in a fire or electric shock. Never spill liquid of any kind onto or - Acer C112TCi | User Manual - Page 4
iv • To avoid damage of internal components and to prevent battery leakage, do not place the product on a vibrating surface. • Never use it under sporting, exercising, or any vibrating environment which will probably cause unexpected short current or damage rotor devices, lamp. Using electrical - Acer C112TCi | User Manual - Page 5
performance, indicating a need for service • the product does not operate normally after following the operating instructions Note: Adjust only those controls for purchase options. Your device and its enhancements may contain small parts. Keep them out of the reach of small children. Additional - Acer C112TCi | User Manual - Page 6
projector. There are dangerous high voltages inside which may hurt you. The only user serviceable part is the lamp which has its own removable cover. Refer servicing only to suitable qualified professional service personnel. • Do not stand the projector on end vertically. It may cause the projector - Acer C112TCi | User Manual - Page 7
Decrease the volume if you can't hear people speaking near you. Disposal instructions Do not throw this electronic device into the trash when discarding. To and Electronics Equipment (WEEE) regulations, visit http://www.acer-group.com/public/ Sustainability/sustainability01.htm Mercury advisory For - Acer C112TCi | User Manual - Page 8
Precautions Follow all warnings, precautions and maintenance as recommended in this user's guide to maximize the life of your unit. Warning: • Do not look please allow the projector to cool down, and follow all changing instructions. • When switching the projector off, please ensure the projector - Acer C112TCi | User Manual - Page 9
14 User Controls 15 Onscreen Display (OSD) Menus 15 Display Mode 16 Projection 16 Aspect Ratio 17 Language 17 Management 18 Audio 18 Appendices 19 Troubleshooting 19 - Acer C112TCi | User Manual - Page 10
LED & Alarm Definition Listing 20 Specifications 21 Compatibility Modes 22 Regulations and safety notices 23 - Acer C112TCi | User Manual - Page 11
Display (OSD) menus • Environmental light source and longer life by LED solution • Display over USB (mini type) • Apple iPhone AV jack supported • Enjoy media playback via USB • Acer notebook power adapter compatible (except for the CULV models) • Microsoft® Windows® 2000, XP, 7, Vista® OS compliant - Acer C112TCi | User Manual - Page 12
to make sure you have them all. Contact your dealer immediately if any thing is missing. Projector Acer Projector Power adapter 3.5 mm jack A/V cable Quick start guide User's guide (CD-ROM) USB cable XXXXXX 3V Remote control Remote control battery Carrying case Projector battery (Optional - Acer C112TCi | User Manual - Page 13
English 3 Projector Overview Projector Outlook Front / upper side 34 2 5 1 # Description 1 Projection lens 2 Focus ring 3 Control panel 4 Power key and Power indicator LED: To turn on the projector, press and hold the power key for 3 seconds. 5 Battery release button Rear side 1 2 3 - Acer C112TCi | User Manual - Page 14
4 Control Panel English 3 4 1 2 # Function 1 Power key and Power indicator LED 2 SOURCE 3 MENU 4 Four directional select keys Description Refer to the "Turning the Projector On/ Off" section. Chooses composite video, USB A or USB B source. Launches the Onscreen Display (OSD) menu, - Acer C112TCi | User Manual - Page 15
English 5 Remote Control Layout 1 2 3 4 6 5 7 8 9 11 10 12 17 13 14 15 16 # icon Function 1 Infrared transmitter 2 FREEZE Description Sends signals to the projector. To pause the screen image. 3 POWER Refer to the "Turning the Projector On/Off" section. 4 HIDE Press " - Acer C112TCi | User Manual - Page 16
6 English # icon Function Description 11 MENU • Launches the Onscreen Display (OSD) menu, returns to the previous step for the OSD menu operation or exits the OSD menu. • Confirms your selection of items. 12 Next/Fast forward Not applicable. 13 USB A To change source to USB A. 14 USB - Acer C112TCi | User Manual - Page 17
English 7 Using the projector battery Attaching the projector battery: 1 Remove the cap underneath the projector. 2 Align the connectors between the projector and the battery and attach the battery to the projector securely. 1 2 Removing the projector battery: Press the button on the side of the - Acer C112TCi | User Manual - Page 18
English 8 Getting Started Connecting the Projector USB Notebook/PC Speakers 1 3 2 USB RWY USB A USB B AUDIO OUT AUDIO IN /AV IN iPod/iPhone DC IN 4 5 a USB disk/stick (to the USB A connector) For details, please refer to the Multi-media user's guide CD supplied with your projector. - Acer C112TCi | User Manual - Page 19
automatically sends an application to your computer by adding a removable disk. 3 Double-click the executable file and follow the on-screen instruction to install the required file to your computer. 4 Restart your computer after the installation completes. 5 Run the program "EZ Display" from - Acer C112TCi | User Manual - Page 20
English 10 6 You can select the display area of your computer. • Full Screen: Displays the full screen of your computer from the projector. • Compatible mode: Sets the computer screen to 640 x 480. That is only partial screen of the computer will be displayed. • To stop projecting the computer - Acer C112TCi | User Manual - Page 21
English 11 Turning the Projector On/Off Turning On the Projector 1 Ensure that the power adapter and signal cable are securely connected or that the projector battery is charged and properly attached. The Power indicator LED will light red. DC IN 2 Press and hold (POWER) on the control panel for 3 - Acer C112TCi | User Manual - Page 22
used for an extended period, unplug the power cord from the power outlet. Note: Whenever the projector automatically shuts down, contact your local reseller or service center. - Acer C112TCi | User Manual - Page 23
English 13 Adjusting the Projected Image Adjusting the Height of the Projected Image The projector is equipped with a fixed foot for adjusting the image height. You can also use a tripod (optional) to lift the projector. To raise the image: • Release the fixed foot from the bottom of the projector. - Acer C112TCi | User Manual - Page 24
base to W (cm) x H (cm) top of image (cm) < C > 0.6 15 33 x 19 23 0.8 20 44 x 25 30 1 25 55 x 31 38 1.5 37 83 x 47 56 2 50 110 x 62 76 2.5 62 138 x 78 94 3 75 166 x 93 114 3.5 87 193 x 109 133 4 100 221 x 124 152 Zoom Ratio: 1.0 x - Acer C112TCi | User Manual - Page 25
15 User Controls English Onscreen Display (OSD) Menus The projector has multilingual Onscreen Display (OSD) menus that allow you to make image adjustments and change a variety of settings. Using the OSD menus • To open the OSD menu, press "MENU" on the control panel or remote control. • When the - Acer C112TCi | User Manual - Page 26
16 Display Mode English Display Mode There are three factory presets. • Bright: For brightness optimization. • Standard: For common environment. • Video: For playing video in a bright environment. • ECO: Lowers the power consumption, reduces noise, and extends the lamp life. Projection - Acer C112TCi | User Manual - Page 27
English 17 Aspect Ratio Aspect Ratio Use this function to choose your desired aspect ratio. • Full: Resizes image to fit full screen by width (858 pixels) and height (480 pixels). • Auto: Keeps the image with original width-height ratio and maximize the image to fit native horizontal or vertical - Acer C112TCi | User Manual - Page 28
English 18 Management Auto Shutdown The projector will automatically shut down while there is no signal input detected after the setting time. Audio Volume Press to select if you want to mute, decrease, or increase the projector speaker volume. - Acer C112TCi | User Manual - Page 29
19 Appendices English Troubleshooting If you experience a problem with your Acer projector, refer to the following troubleshooting guide. If the problem persists, please contact your local reseller or service center. # Problem Solution 1 No image appears • Make sure all the cables are - Acer C112TCi | User Manual - Page 30
20 LED & Alarm Definition Listing LED Messages English Message Standby (Power cord plugged in) Power on process Power on Fan error Thermal error Battery run out Power LED Red Blue V -- --Repeatedly flash twice in a row. Repeatedly flash thrice in a row. Repeatedly flash four times in a row. - Acer C112TCi | User Manual - Page 31
guide CD for details. Aspect ratio Full (native), Auto Displayable colors 24 bits Projection lens F = 1.7, f = 12 mm, Manual 1 (for the remote control) • User's guide (CD-ROM) x 1 • Quick start guide x 1 • Carrying case x 1 • Acer Multi-media user's guide (CD-ROM) x 1 Accessory (optional) - Acer C112TCi | User Manual - Page 32
22 *Design and specifications are subject to change without notice. English Compatibility Modes 1 PC Signal Mode VGA_60 SVGA_60 XGA_60 WXGA_60 WXGA_60 WXGA_60 2 Video Signal Resolution 640 x 480 800 x 600 1024 x 768 1280 x 720 1280 x 768 1280 x 800 Remark Video - Acer C112TCi | User Manual - Page 33
to comply with the limits for a Class B digital device pursuant to Part 15 of the FCC rules. These limits are designed to provide reasonable energy and, if not installed and used in accordance with the instructions, may cause harmful interference to radio communications. However, there is - Acer C112TCi | User Manual - Page 34
la norme NMB-003 du Canada. Declaration of Conformity for EU countries Acer hereby, declares that this projector series is in compliance with the essential GHz band To prevent radio interference to the licensed service, this device is intended to be operated indoors and installation outdoors is - Acer C112TCi | User Manual - Page 35
English English 25 List of applicable countries This device must be used in strict accordance with the regulations and constraints in the country of use. For further information, please contact a local office in the country of use. Please see http://ec.europa.eu/enterprise/rtte/implem.htm for the - Acer C112TCi | User Manual - Page 36
Italy s.r.l Via Lepetit, 40, 20020 Lainate (MI) Italy Tel: +39-02-939-921, Fax: +39-02 9399-2913, www.acer.it Hereby declare that: Product: Projector Trade Name: Acer Model Number: KWV0015/LB100/LK-WV20 series Machine Type: C112 series Is compliant with the essential requirements and other - Acer C112TCi | User Manual - Page 37
English English 27 Acer Incorporated 8F, 88, Sec. 1, Hsin Tai Wu Rd., Hsichih Taipei Hsien 221, Taiwan The standards listed below 328 -. EN301 893 (Applicable to 5GHz high performance RLAN). Year to begin affixing CE marking 2010. Easy Lai /Manager Regulation Center, Acer Inc. Dec. 1, 2010 Date - Acer C112TCi | User Manual - Page 38
333 West San Carlos St., San Jose CA 95110, U. S. A. Tel: 254-298-4000 Fax: 254-298-4147 www.acer.com Federal Communications Commission Declaration of Conformity This device complies with Part 15 of the FCC Rules. Operation is subject to the following two conditions: (1) this device may not cause
-
 1
1 -
 2
2 -
 3
3 -
 4
4 -
 5
5 -
 6
6 -
 7
7 -
8
-
9
-
10
-
11
-
12
-
13
-
14
-
15
-
16
-
17
-
18
-
19
-
20
-
21
-
22
-
23
-
24
-
25
-
26
-
27
-
28
-
29
-
30
-
31
-
32
-
33
-
34
-
35
-
36
-
37
-
38
 |
 |

Acer Projector
C112/LB100/LK-WV20 Series
User's Guide