Acer TravelMate 4732G Pre-Install Intel® AHCI Driver for Windows XP&a
Acer TravelMate 4732G Manual
 |
View all Acer TravelMate 4732G manuals
Add to My Manuals
Save this manual to your list of manuals |
Acer TravelMate 4732G manual content summary:
- Acer TravelMate 4732G | Pre-Install Intel® AHCI Driver for Windows XP&a - Page 1
Before you start to install Microsoft® Windows XP® operating system, you will need an optical drive, a USB floppy disk drive, a blank 1.44MB floppy diskette, and Microsoft® Windows XP® Professional/Home Edition Setup Disc (bootable). 1. Extract AHCI F6 driver files to a blank 1.44MB floppy diskette - Acer TravelMate 4732G | Pre-Install Intel® AHCI Driver for Windows XP&a - Page 2
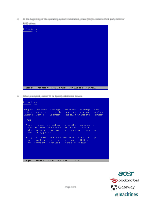
3. At the beginning of the operating system installation, press [F6] to install a third party SCSI or RAID driver. 4. When prompted, select 'S' to Specify Additional Device. Page 2 of 4 - Acer TravelMate 4732G | Pre-Install Intel® AHCI Driver for Windows XP&a - Page 3
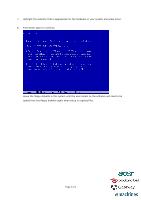
5. Insert the floppy diskette you created in step 1. 6. At this point you should be presented with a selection for one of the following controllers listed depending on your hardware version and configuration for AHCI Controllers: - Please use arrow key to scroll and select [Intel(R) ICH9M-E/M SATA - Acer TravelMate 4732G | Pre-Install Intel® AHCI Driver for Windows XP&a - Page 4
in your system and press Enter. 8. Press Enter again to continue. Leave the floppy diskette in the system until the next reboot as the software will need to be copied from the floppy diskette again when setup is copying files. Page 4 of 4
-
 1
1 -
 2
2 -
 3
3 -
 4
4
 |
 |
Page 1 of 4
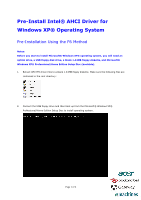
Pre-Install Intel® AHCI Driver for
Windows XP® Operating System
Pre-Installation Using the F6 Method
Notes:
Before you start to install Microsoft® Windows XP® operating system, you will need an
optical drive, a USB floppy disk drive, a blank 1.44MB floppy diskette, and Microsoft®
Windows XP® Professional/Home Edition Setup Disc (bootable).
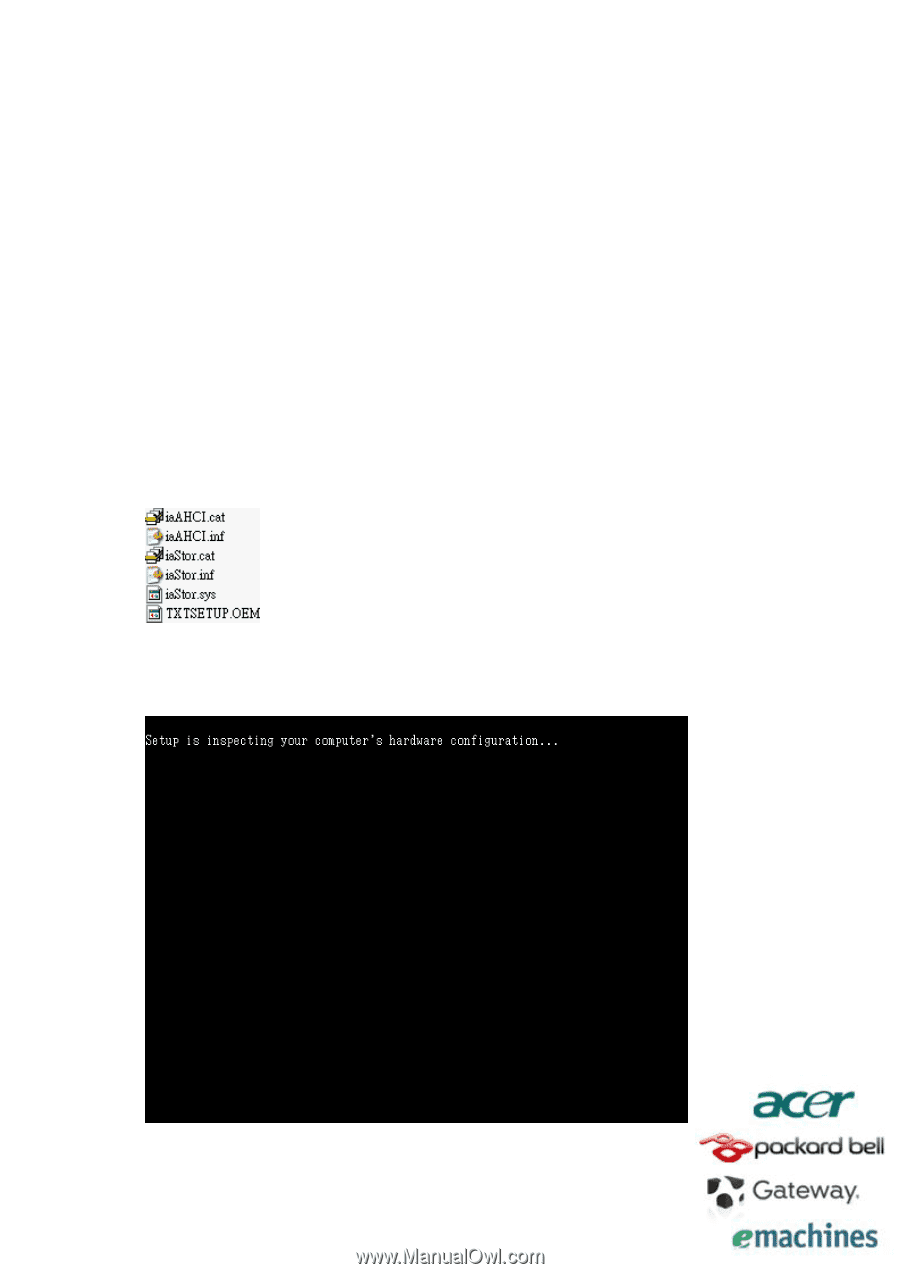
1.
Extract AHCI F6 driver files to a blank 1.44MB floppy diskette. Make sure the following files are
contained in the root directory:
2.
Connect the USB floppy drive and then boot up from the Microsoft®
Windows XP®
Professional/Home Edition Setup Disc to install operating system.