Acer TravelMate 7730G User Manual
Acer TravelMate 7730G Manual
 |
View all Acer TravelMate 7730G manuals
Add to My Manuals
Save this manual to your list of manuals |
Acer TravelMate 7730G manual content summary:
- Acer TravelMate 7730G | User Manual - Page 1
TravelMate Series Generic User Guide - Acer TravelMate 7730G | User Manual - Page 2
Copyright © 2008. Acer Incorporated. All Rights Reserved. TravelMate Series Generic User Guide Original Issue: 08/2008 This company makes no representations or warranties, either express or implied, with respect to the contents hereof and specifically disclaims the implied warranties of - Acer TravelMate 7730G | User Manual - Page 3
the equipment, be sure to unplug the power cord from the electrical outlet. CAUTION for bundled dummy cards (only for certain models) Your computer shipped with plastic dummies installed in the card slots. Dummies protect unused slots from dust, metal objects or other particles. Save the dummies for - Acer TravelMate 7730G | User Manual - Page 4
fire or electric shock. Never spill liquid of any kind onto or into the product. • To avoid damage of internal components and to prevent battery leakage, do not place the product on a vibrating surface. • Never use it under sporting, exercising, or any vibrating environment which will probably cause - Acer TravelMate 7730G | User Manual - Page 5
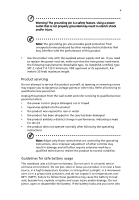
power supply cord set. If you need to replace the power cord set, make sure that the new for service • the product does not operate normally after following the operating instructions Note normal condition. Guidelines for safe battery usage This notebook uses a Lithium-ion battery. Do not use it in - Acer TravelMate 7730G | User Manual - Page 6
battery. Use only Acer approved batteries, and recharge your battery only with Acer approved chargers designated for this device. Use the battery only from the battery, which could affect performance. Replacing the battery pack The notebook uses lithium batteries. Replace the battery with the same - Acer TravelMate 7730G | User Manual - Page 7
your laptop under the following conditions. These devices may include, but are not limited to: wireless lan (WLAN), Bluetooth and network. In some cases, transmission of data files or messages may be delayed until such a connection is available. Ensure that the above separation distance instructions - Acer TravelMate 7730G | User Manual - Page 8
of the aircraft, disrupt the wireless telephone network, and may be illegal. Potentially explosive atmosphere and obey all signs and instructions. Potentially explosive atmospheres include areas at refueling points such as near gas pumps at service stations. Observe restrictions on the use of radio - Acer TravelMate 7730G | User Manual - Page 9
the Electronic Industries Alliance at www.eiae.org. For lamp-specific disposal information, check www.lamprecycle.org. Rechargeable Recycling Program in US and Canada Acer supports the efforts of the Rechargeable Battery Recycling Corporation's Call2Recycle (RBRC) program. The RBRC is deigned to - Acer TravelMate 7730G | User Manual - Page 10
conventional equipment. More information refers to http://www.energystar.gov and http://www.energystar.gov/ powermanagement. Note: The statement above is applicable only to Acer notebooks with an ENERGY STAR sticker located in the bottom right-hand corner of the palm rest. As an ENERGY STAR partner - Acer TravelMate 7730G | User Manual - Page 11
tensing your muscles or shrugging your shoulders • install the external display, keyboard and mouse properly and within comfortable reach • if you view your monitor contact lenses, glare, excessive room lighting, poorly focused screens, very small typefaces and low-contrast displays could stress - Acer TravelMate 7730G | User Manual - Page 12
breaks regularly, and do some stretching exercises. Note: For more information, please refer to "Regulations and safety notices" on page 57 in the AcerSystem User Guide. - Acer TravelMate 7730G | User Manual - Page 13
installed on your computer, clicking on AcerSystem User Guide will run the Adobe Reader setup program first. Follow the instructions on the screen to complete the installation. For instructions on how to use Adobe Reader, access the Help and Support menu. Basic care and tips for using your computer - Acer TravelMate 7730G | User Manual - Page 14
xiv To turn the power off, do any of the following: • Use the Windows shutdown command Click on Start then click on Shut Down. • Use the power button You can also put the computer in sleep mode by pressing the sleep hotkey + . Note: If you cannot power off the computer normally, press - Acer TravelMate 7730G | User Manual - Page 15
of the same kind as replacements. Turn the power off before removing or replacing batteries. • Do not tamper with batteries. Keep them away from children. • Dispose of used batteries according to local regulations. Recycle if possible. Cleaning and servicing When cleaning the computer, follow - Acer TravelMate 7730G | User Manual - Page 16
xvi - Acer TravelMate 7730G | User Manual - Page 17
calls viii Disposal instructions ix Mercury guides xiii Basic care and tips for using your computer xiii Turning your computer on and off xiii Taking care of your computer xiv Taking care of your AC adapter xiv Taking care of your battery pack xv Cleaning and servicing xv Acer - Acer TravelMate 7730G | User Manual - Page 18
Acer Bio-Protection (only for certain models) 19 Acer GridVista (dual-display compatible) 20 Frequently asked questions 22 Requesting service 25 International Travelers Warranty (ITW) 25 Before you call 25 Battery pack 26 Battery pack characteristics 26 Maximizing the battery's life - Acer TravelMate 7730G | User Manual - Page 19
PC Card slot 39 ExpressCard 40 Installing memory 41 BIOS utility Acer eRecovery Management 46 Burn backup discs 47 Create a user backup 48 Manage user backups 50 Restore 51 Restore Windows Vista from backup discs 52 Troubleshooting 55 Troubleshooting specifications 64 Index 65 - Acer TravelMate 7730G | User Manual - Page 20
- Acer TravelMate 7730G | User Manual - Page 21
: Note: The following content is for general reference only. Actual product specifications may vary. • Acer ePower Management optimizes battery usage via customizable power plans (only for certain models). • Acer eRecovery Management backs up and recovers data flexibly, reliably and completely (only - Acer TravelMate 7730G | User Manual - Page 22
The quick menu allows you to perform certain tasks simply and quickly. 3 You may also run the application by selecting it from the Acer Empowering Technology program group in the Start menu. Empowering Technology password You must set the Empowering Technology password to use the password protection - Acer TravelMate 7730G | User Manual - Page 23
should have a minimum of 4 and a maximum of 12 characters. 6 Enter a password hint that will help you remember your password. 7 Make sure the box Use for Acer eRecovery Management is checked. 8 Click OK to set the password. - Acer TravelMate 7730G | User Manual - Page 24
, edit, delete and restore power plans, as described below. View and adjust settings for On Battery and Plugged In modes by clicking the appropriate tabs. For more power options, click in the Acer ePower Management utility, or right-click the Windows power icon in the system tray and select - Acer TravelMate 7730G | User Manual - Page 25
the remaining battery life based on current usage. 2 You can also launch the Acer ePower Management application and refer to the Battery status panel located just below the power plans. 3 Click the Battery tab to view remaining battery life, battery status, and remaining battery life in standby - Acer TravelMate 7730G | User Manual - Page 26
, burn the factory default image to optical disc, and restore from previously created backups or reinstall applications and drivers. By default, user-created backups are stored to the D:\ drive. Acer eRecovery Management provides you with: • Backup: • Back up factory default to CD/DVD • Back up - Acer TravelMate 7730G | User Manual - Page 27
Empowering Technology 7 For more information, please refer to"Acer eRecovery Management" on page 46 in the Acer System User Guide. Note: If your computer did not come with a Recovery CD or System CD, please use Acer eRecovery Management's Backup factory default to CD/DVD feature to burn a backup - Acer TravelMate 7730G | User Manual - Page 28
networking on/off, external display settings, display orientation and synchronization status. Windows Mobility Center also includes Acer-specific settings like Bluetooth Add Device (if applicable), sharing folders overview/sharing service on or off, and a shortcut to the Acer user guide, drivers - Acer TravelMate 7730G | User Manual - Page 29
up when Caps Lock is activated. Indicates the computer's power status. Battery Indicates the computer's battery status. Bluetooth (Manufacturing option) Indicates the status of Bluetooth communication. Wireless LAN (Manufacturing option) Indicates the status of wireless LAN communication - Acer TravelMate 7730G | User Manual - Page 30
10 English Easy-launch buttons Located beside the keyboard are application buttons. These buttons are called easy-launch buttons. They are: WLAN, Internet, email, Bluetooth and Acer Empowering Technology. The mail and Web browser buttons are pre-set to email and Internet programs, but can be reset - Acer TravelMate 7730G | User Manual - Page 31
and easier way to work. • Lock key - runs the Windows® lock function to lock the notebook when you step out. If the laptop is equipped with Acer Bio-Protection, you only need to swipe your finger to log into Windows® again. • Presentation key - minimizes open application windows and prepares the - Acer TravelMate 7730G | User Manual - Page 32
to the left and right 12 3 4 buttons on a mouse. Tapping on the touchpad is the same as clicking the left button. • Use Acer Bio-Protection fingerprint reader (3) supporting Acer FingerNav 4-way control function (only for certain models) to scroll up or down and move left or right a page. This - Acer TravelMate 7730G | User Manual - Page 33
English 13 Touchpad basics (with two-click buttons) The following items show you how to use the touchpad with two-click buttons. • Move your finger across the touchpad (1) to move the cursor. • Press the left (2) and right (3) buttons located beneath the touchpad to perform selection and - Acer TravelMate 7730G | User Manual - Page 34
surface. This means the cursor 1 responds as you use your finger to move the FineTrack. Its central 2 location on the keyboard provides optimum comfort and support. 3 FineTrack basics The following items show you how to use the FineTrack and FineTrack buttons: • Using your finger, apply - Acer TravelMate 7730G | User Manual - Page 35
keyboard The keyboard has full-sized keys and an embedded numeric keypad, separate cursor, lock, Windows, function and special keys.. Lock keys and embedded numeric keypad The keyboard F11> only for certain models. When Scroll Lock is on, the screen moves one line up or down when you press the up or - Acer TravelMate 7730G | User Manual - Page 36
English 16 Windows keys The keyboard has two keys that perform Windows-specific functions. Key Description Windows key 3-D < > + : Bring all gadgets to the front and select Windows Sidebar + < network) > + : Search for computers (if you are on a + < > + : - Acer TravelMate 7730G | User Manual - Page 37
of the computer's controls like screen brightness, volume output and the BIOS utility. To activate hotkeys, press > Acer ePower Management Sleep Display toggle Screen blank Touchpad toggle Speaker toggle Volume up Launches Acer ePower Management in Acer Empowering Technology. See "Acer Empowering - Acer TravelMate 7730G | User Manual - Page 38
-right of the keyboard, or hold and then press the key at the upper-center of the keyboard. Note: Some fonts and software do not support the Euro symbol. . Acer PureZone (only for certain models) The system provides you whole new enthusiastic audio experience including Acer PureZone - Acer TravelMate 7730G | User Manual - Page 39
can launch up to three applications/ websites from a single finger swipe. Acer Bio-Protection Fingerprint Solution also allows you to navigate through web browsers and documents using Acer FingerNav. With Acer Bio-Protection Fingerprint Solution, you can now enjoy an extra layer of protection for - Acer TravelMate 7730G | User Manual - Page 40
handy utility that offers four pre-defined display settings so you can view multiple windows on the same screen. To access this function, please go to Start, All Programs and click on Acer GridVista. You may choose any one of the four display settings indicated below: 12 2 13 1 3 2 13 24 Double - Acer TravelMate 7730G | User Manual - Page 41
English 21 3 Enjoy the convenience of a well-organized desktop. Note: Please ensure that the resolution setting of your second monitor is set to the manufacturer's recommended value. - Acer TravelMate 7730G | User Manual - Page 42
the battery, it may be low and unable to power the computer. Connect the AC adapter to recharge the battery pack. replace it with a system disk and press + + to restart the system. Nothing appears on the screen. The computer's power management system automatically blanks the screen - Acer TravelMate 7730G | User Manual - Page 43
keyboard does not respond. Try attaching an external keyboard to a USB port on the computer. If it works, contact your dealer or an authorized service center as the internal keyboard 3 Begin setting up your location. Refer to the Windows manual. Note: Please note, on first booting your notebook, that - Acer TravelMate 7730G | User Manual - Page 44
reboot. Note: To activate the BIOS utility, press during POST. To start the recovery process: 1 Restart the system. 2 While the Acer logo is showing, press + at the same time to enter the recovery process. 3 Refer to the onscreen instructions to perform system recovery. Important - Acer TravelMate 7730G | User Manual - Page 45
International Travelers Warranty (ITW) that gives you security and peace of mind when traveling. Our worldwide network of service Acer for online service, and please be at your computer when you call. With your support, we can reduce the amount of time a call takes and help solve your problems - Acer TravelMate 7730G | User Manual - Page 46
in handy when you travel or during a power failure. It is advisable to have an extra fully charged battery pack available as backup. Contact your dealer for details on ordering a spare battery pack. Maximizing the battery's life Like all other batteries, your computer's battery will degrade over - Acer TravelMate 7730G | User Manual - Page 47
above. • Frequent use; the more you use the battery, the faster it will reach the end of its effective life. A standard computer battery has a life span of about 300 charges. Installing and removing the battery pack Important! Before removing the battery from the unit, connect the AC adapter if you - Acer TravelMate 7730G | User Manual - Page 48
before traveling enables you to start the next day with a fully charged battery. Checking the battery level The Windows power meter indicates the current battery level. Rest the cursor over the battery/power icon on the taskbar to see the battery's present charge level. Optimising battery life - Acer TravelMate 7730G | User Manual - Page 49
applications. 3. Shut down the operating system to turn off the computer. 4. Replace the battery pack. 5. Turn on the computer and resume work. The AC adapter or a power outlet is unavailable. You have no spare battery pack. 1. Save all necessary files. 2. Close all applications. 3. Shut down the - Acer TravelMate 7730G | User Manual - Page 50
hints to consider when moving around or traveling with your computer. Disconnecting from the cord from the AC adapter. 6 Disconnect the keyboard, pointing device, printer, external monitor and to disconnect your computer from Acer ezDock II/II+: 1 Make sure that the battery pack is charged enough for - Acer TravelMate 7730G | User Manual - Page 51
your meeting will be longer, or if your battery is not fully charged, you may want to have an electrical outlet, reduce the drain on the battery by putting the computer in Sleep mode. Press - Acer TravelMate 7730G | User Manual - Page 52
and inspect the screen for condensation before weight to and from home. If you use your computer at home for significant periods of time, you might also want to add an external keyboard, monitor or mouse. Traveling battery pack(s) • Additional printer driver files if you plan to use another printer - Acer TravelMate 7730G | User Manual - Page 53
appropriate for the country to which you are traveling • Spare, fully-charged battery packs • Additional printer driver files if you plan to use another printer traveling internationally: • When traveling in another country, check that the local AC voltage and the AC adapter power cord specifications - Acer TravelMate 7730G | User Manual - Page 54
data: • Supervisor Password prevents unauthorized entry into the BIOS utility. Once set, you must enter this password to gain access to the BIOS utility. • User Password secures your computer against unauthorized your password, please get in touch with your dealer or an authorized service center. - Acer TravelMate 7730G | User Manual - Page 55
password prompt appears in the center of the display screen. • When the Supervisor Password is set, a prompt appears when you press to enter the BIOS utility at boot-up. • Type the Supervisor Password and press to access the BIOS utility. If you enter the password incorrectly, a warning - Acer TravelMate 7730G | User Manual - Page 56
mobile computing experience. Connectivity options Ports allow you to connect peripheral devices to your computer as you would with a desktop PC. For instructions on how to connect different external devices to the computer, read the following section. Fax/data modem Your computer has a built-in - Acer TravelMate 7730G | User Manual - Page 57
feature, connect an Ethernet cable from the Ethernet (RJ-45) port on the chassis of the computer to a network jack or hub on your network. Fast Infrared (FIR) (only for certain models) The computer's Fast Infrared (FIR) port allows you to do wireless data transfer with other IR-aware computers - Acer TravelMate 7730G | User Manual - Page 58
English 38 Universal Serial Bus (USB) The USB 2.0 port is a high-speed serial bus which allows you to connect USB peripherals without taking up precious system resources. IEEE 1394 port (only for certain models) The computer's IEEE 1394 port allows you to connect to an IEEE 1394compatible device - Acer TravelMate 7730G | User Manual - Page 59
High-Definition Multimedia Interface) is an industry-supported, uncompressed, all-digital audio/video interface. Cards include flash, fax/data modem, wireless LAN and SCSI cards. CardBus improves on the 16-bit PC card technology by expanding the bandwidth to 32 bits. Note: Refer to your card's manual - Acer TravelMate 7730G | User Manual - Page 60
slot and make the proper connections (e.g., network cable), if necessary. See your card manual for details. Ejecting a PC Card Before ejecting a PC Card: 1 Exit the application using the card. 2 Left-click on the PC Card icon on the taskbar and stop the card operation. 3 Press the slot eject button - Acer TravelMate 7730G | User Manual - Page 61
gently into the slot and release to pop out the card. Then pull the card free from the slot. Installing memory Follow these steps to install memory: 1 Turn off the computer, unplug the AC adapter (if connected) and remove the battery pack. Then turn the computer over to access its base. 2 Remove - Acer TravelMate 7730G | User Manual - Page 62
into place. 4 Replace the memory cover and secure it with the screw. 5 Reinstall the battery pack, and reconnect the AC adapter. 6 Turn on the computer. The computer automatically detects and reconfigures the total memory size. Please consult a qualified technician or contact your local Acer dealer. - Acer TravelMate 7730G | User Manual - Page 63
run this utility. However, if you encounter configuration problems, you may need to run it. To activate the BIOS utility, press during the POST; boot sequence in the BIOS utility, activate the BIOS utility, then select Boot from the categories listed at the top of the screen. Enable disk-to- - Acer TravelMate 7730G | User Manual - Page 64
USA, Canada Europe, Middle East, South Africa, Japan Southeast Asia, Taiwan, South Korea Latin America, Australia, New Zealand Former USSR, parts of Africa, India People's Republic of China Note: To change the region code, insert a DVD movie of a different region into the DVD drive. Please refer to - Acer TravelMate 7730G | User Manual - Page 65
monitors system activity. System activity refers to any activity involving one or more of the following devices: keyboard, mouse, hard disk, peripherals connected to the computer, and video memory. If no activity is detected for a period of time (called an inactivity timeout), the computer stops - Acer TravelMate 7730G | User Manual - Page 66
and drivers. Note: All of the following content is for general reference only. Actual product specifications may vary. Acer eRecovery factory default • Reinstall applications/drivers • Restore system from user backup • Password settings This chapter will guide you through each process. Note - Acer TravelMate 7730G | User Manual - Page 67
from the Empowering Technology toolbar to start Acer eRecovery Management. 2 Acer eRecovery Management opens to the Backup page. 3 Select the type of backup (factory default or drivers and applications) you would like to burn to disc. 4 Follow the instructions on screen to complete the process. - Acer TravelMate 7730G | User Manual - Page 68
and applications, create a drivers and application backup instead - this disc will not be bootable. Create a user backup You can easily create full and fast (incremental) backup of the whole C:\ drive to a hard disk or optical discs from the Backup page of Acer eRecovery Management. Note: Fast - Acer TravelMate 7730G | User Manual - Page 69
English 49 3 Choose the destination of the backup you are going to create. By default, user-created backups are stored to the D:\ drive. 4 Select whether you want to create a Full or Fast backup. 5 Follow the instructions on screen to complete the process. - Acer TravelMate 7730G | User Manual - Page 70
Technology toolbar to start Acer eRecovery Management. 2 On the Backup page of Acer eRecovery Management, click Manage user backups. 3 Select the user backup file you want to Delete, Rename or Burn disc. 4 Select the action you want to perform. 5 Follow the instructions on screen to complete the - Acer TravelMate 7730G | User Manual - Page 71
and drivers for your Acer system. 1 Select Acer eRecovery Management from the Empowering Technology toolbar to start Acer drivers. If you choose to restore from a user-created backup, you will need to select the backup point you would like to restore from. 4 Follow the instructions on screen - Acer TravelMate 7730G | User Manual - Page 72
your computer and insert the first system recovery disc into the optical disc drive. Restart your computer. 2 During startup when the Acer logo shows, press the F2 key to enter BIOS Setup, where you can set system parameters. 3 Use the left and right arrow keys to select the Main submenu. 4 Use the - Acer TravelMate 7730G | User Manual - Page 73
English 53 7 After rebooting, when the Acer logo shows, press the F12 key to open the Boot Menu. Here you can select which device to boot from. 8 Use the arrow keys to - Acer TravelMate 7730G | User Manual - Page 74
your computer and insert the first system recovery disc into the optical disc drive. Restart your computer. 2 During startup when the Acer logo shows, press the F2 key to enter BIOS Setup, where you can set system parameters. 3 Use the left and right arrow keys to select the Boot submenu. 4 Use the - Acer TravelMate 7730G | User Manual - Page 75
dealer or an authorized service center. Keyboard error or no Contact your dealer or an authorized service center. keyboard connected Keyboard interface error Contact your dealer or an authorized service center. Memory size mismatch Press (during POST) to enter the BIOS utility, then press - Acer TravelMate 7730G | User Manual - Page 76
56 If you still encounter problems after going through the corrective measures, please contact your dealer or an authorized service center for assistance. Some problems may be solved using the BIOS utility. English - Acer TravelMate 7730G | User Manual - Page 77
installation. This device generates, uses, and can radiate radio frequency energy and, if not installed and used in accordance with the instructions, may cause harmful interference to radio communications. However, there is no guarantee that interference will not occur in a particular installation - Acer TravelMate 7730G | User Manual - Page 78
request, you must provide this information to your telephone company. If your telephone equipment causes harm to the telephone network, the telephone company may discontinue your service temporarily. If possible, they will notify you in advance. But, if advance notice is not practical, you will be - Acer TravelMate 7730G | User Manual - Page 79
advance to give you an opportunity to maintain uninterrupted telephone service. If this equipment should fail to operate properly, disconnect the equipment from the phone line to determine if it is causing the problem. If the problem is with the equipment, discontinue use and contact your dealer or - Acer TravelMate 7730G | User Manual - Page 80
is compatible with all of Telecom's network services. 2 This equipment is not Specifications: a There shall be no more than 10 call attempts to the same number within any 30 minute period for any single manual that Telecom lines will always continue to support pulse dialing. 7 Use of pulse dialing - Acer TravelMate 7730G | User Manual - Page 81
English 61 Laser compliance statement The CD or DVD drive used with this computer is a laser product. The CD or DVD drive's classification label (shown below) is located on the drive. CLASS 1 LASER PRODUCT CAUTION: INVISIBLE LASER RADIATION WHEN OPEN. AVOID EXPOSURE TO BEAM. APPAREIL A LASER DE - Acer TravelMate 7730G | User Manual - Page 82
Bluetooth modules). Below information is for products with such devices. Declaration of Conformity for EU countries Hereby, Acer power of the wireless LAN Mini PCI Card and Bluetooth card is far below the FCC radio instructions on wireless option devices that are included in the user's manual - Acer TravelMate 7730G | User Manual - Page 83
LAN Mini PCI Card built in to the screen section and all persons. Note: The Acer wireless Mini PCI adapter implements a transmission diversity function. The function does not emit radio frequencies simultaneously from both antennas. One of the antennas is selected automatically or manually (by users - Acer TravelMate 7730G | User Manual - Page 84
specifications English Design viewing distance Design inclination angle Design azimuth angle Viewing direction range class Screen tilt angle Design screen level: [250 + (250cosα)] lx where α = 85° • Color: Source D65 • Ordinary LCD: Class I • Protective or Acer CrystalBrite™ LCD: Class III Both - Acer TravelMate 7730G | User Manual - Page 85
38 low conditions 40 maximizing life 37 optimizing 39 removing 39 using the first time 37 BIOS utility 53 brightness hotkeys 28 C caps lock 25 on indicator 21 care AC adapter xvi battery pack xvii computer xvi CD-ROM ejecting manually 34 troubleshooting 34 charging checking level 39 cleaning - Acer TravelMate 7730G | User Manual - Page 86
Card 49 ejecting 50 inserting 50 ports 47 printer troubleshooting 34 problems 33 CD-ROM 34 display 33 keyboard 34 printer 34 startup 33 troubleshooting 27 troubleshooting 33 support information 36 T touchpad 23 hotkey 27 using 23- 24 travel international flights 44 local trips 43 troubleshooting 59
-
 1
1 -
 2
2 -
 3
3 -
 4
4 -
 5
5 -
 6
6 -
 7
7 -
8
-
9
-
10
-
11
-
12
-
13
-
14
-
15
-
16
-
17
-
18
-
19
-
20
-
21
-
22
-
23
-
24
-
25
-
26
-
27
-
28
-
29
-
30
-
31
-
32
-
33
-
34
-
35
-
36
-
37
-
38
-
39
-
40
-
41
-
42
-
43
-
44
-
45
-
46
-
47
-
48
-
49
-
50
-
51
-
52
-
53
-
54
-
55
-
56
-
57
-
58
-
59
-
60
-
61
-
62
-
63
-
64
-
65
-
66
-
67
-
68
-
69
-
70
-
71
-
72
-
73
-
74
-
75
-
76
-
77
-
78
-
79
-
80
-
81
-
82
-
83
-
84
-
85
-
86
 |
 |

TravelMate Series
Generic User Guide