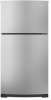
Amana A1RXNGFYS Use and Care
Amana A1RXNGFYS Manual
 |
View all Amana A1RXNGFYS manuals
Add to My Manuals
Save this manual to your list of manuals |
Amana A1RXNGFYS manual content summary:
- Amana A1RXNGFYS | Use and Care - Page 1
REFRIGERATOR USER INSTRUCTIONS THANK YOU for purchasing this high-quality product. If you should experience a problem not covered in TROUBLESHOOTING, please visit our website at www.amana.com for additional information. If you still need assistance, call us at 1-800-843-0304. In Canada, visit our - Amana A1RXNGFYS | Use and Care - Page 2
not problems of the past. Junked or abandoned refrigerators are still dangerous - even if they will sit for "just a few days." If you are getting rid of your old refrigerator, please follow these instructions to help prevent accidents. Before You Throw Away Your Old Refrigerator or Freezer: ■ Take - Amana A1RXNGFYS | Use and Care - Page 3
follow these instructions can result in death, fire, or electrical shock. Before you move your refrigerator into its final Refrigerator or Freezer Control depending on the model) to OFF and then disconnect the refrigerator from the electrical source. When you are finished, reconnect the refrigerator - Amana A1RXNGFYS | Use and Care - Page 4
clear line of water. 3. Locate a ½" to 1¹⁄₄" (1.25 cm to 3.18 cm) vertical cold water pipe near the refrigerator. IMPORTANT: ■ Make sure it is a cold water pipe. ■ Horizontal pipe will work, but drill on the top side of the pipe, not the bottom. This will help keep water away from the drill and - Amana A1RXNGFYS | Use and Care - Page 5
place while you are working. 4. Remove the parts for the top hinge as shown in Top Hinge graphic. Lift the freezer door free from the cabinet. 5. Remove the parts for the center hinge as shown in the Center Hinge graphic. Lift the refrigerator door free from the cabinet. 6. Remove the parts for the - Amana A1RXNGFYS | Use and Care - Page 6
Screw Hole Plug Plastic Handles - Extend from the Door (on some models) Cabinet 1. Remove the Torx®† type hinge screws from handle side and hole plug from top of freezer door. Move to opposite side as shown in Graphic 3. 2. Remove door stop from both the freezer and refrigerator doors and move - Amana A1RXNGFYS | Use and Care - Page 7
A A. Flat-Head Handle Screws B. Freezer Handle 4 A 7 A. Door Handle Sealing Screws Front View Side View 5 A. Door Stop Screw A B B. Door Stop 6-1 A A. Door Handle Screw Cover Door Handle Seal Screw Front 6-2 A 6-3 B C A. Flat-Head Handle Screw B. Refrigerator Handle C. Handle Screw 7 - Amana A1RXNGFYS | Use and Care - Page 8
Top Hinge D. Hinge Pin 1-2 A A. Cabinet Hinge Hole Plugs 4 A 1-1 A. Door Hinge Hole Plug A A Torx® Type Screws C A. Freezer Handle B. ¹⁄₄" Setscrew 9 C. Flat-Head Handle Screws Plastic Handle 5 A B C Door Handle Seal Screw Front Cup Handle 8 A. Flat-Head Handle Screws B. Refrigerator - Amana A1RXNGFYS | Use and Care - Page 9
before adjusting the controls. Adjusting Controls If you need to adjust the temperature in either the refrigerator or freezer compartment, use the settings listed in the chart below as a guide. ■ Move the dial to the desired number of snowflakes from (1 least cold to 5 coldest). NOTE: Except - Amana A1RXNGFYS | Use and Care - Page 10
supporting bottom of drawer with other hand. Slide drawer out the rest of the way. 3. Replace the drawer by sliding it back in fully past the drawer stop. Meat Drawer Cover (on some models) Refrigerator Shelves (Glass shelves on some models wall of the cabinet. 5. Guide the front of the shelf into - Amana A1RXNGFYS | Use and Care - Page 11
and vegetables with skins. ■ Fruit: Wash, let dry and store in refrigerator in plastic bag or crisper. Do not wash or hull berries until they sure both ends of the shelf are inserted into the shelf supports. Glass Freezer Shelf (on some models) To remove and replace a glass shelf: 1. Lift the - Amana A1RXNGFYS | Use and Care - Page 12
the freezer. Gently push the shelf into the freezer until models) To remove and replace the racks/bins: 1. Remove the rack/bin by lifting it and pulling it straight out. 2. Replace the rack/bin by sliding it in above the desired support and pushing it down until it stops. Frozen Food Storage Guide - Amana A1RXNGFYS | Use and Care - Page 13
top of or in the ice maker or ice storage bin. Both the refrigerator and freezer models, stainless steel is corrosionresistant and not corrosion-proof. To help avoid corrosion of your stainless steel, keep your surfaces clean by using the following cleaning instructions. To Clean Your Refrigerator - Amana A1RXNGFYS | Use and Care - Page 14
or reconnect power. 5. Plug in refrigerator or reconnect power. TROUBLESHOOTING First try the solutions suggested here or visit our website and reference FAQs (Frequently Asked Questions) to possibly avoid the cost of a service call. In the U.S.A., www.amana.com In Canada, www.amanacanada.ca - Amana A1RXNGFYS | Use and Care - Page 15
top of the refrigerator the supports. The refrigerator to water supply and turn water shutoff valve fully open. ■ Kink in the water source line? A kink in the line can reduce water flow. Straighten the water source line. ■ Ice maker turned on? Make sure wire shutoff arm or switch (depending on model - Amana A1RXNGFYS | Use and Care - Page 16
you would like to schedule service, you may contact Amana at the number below. Have your complete model number ready. You can find your model number and serial number on the label, located on the inside wall of the refrigerator compartment. For assistance or service in the U.S.A., call 1-800-843 - Amana A1RXNGFYS | Use and Care - Page 17
cubierto en SOLUCIÓN DE PROBLEMAS, visite nuestro sitio de internet en www.amana.com para obtener información adicional. Si considera que aún necesita ayuda, ll importante. Hemos incluido muchos mensajes importantes de seguridad en este manual y en su electrodoméstico. Lea y obedezca siempre todos - Amana A1RXNGFYS | Use and Care - Page 18
Cómo deshacerse adecuadamente de su refrigerador viejo ADVERTENCIA Peligro de Asfixia Remueva las puertas de su refrigerador viejo. No seguir esta instrucción puede ocasionar la muerte o daño al cerebro. IMPORTANTE: El atrapamiento y asfixia de niños no es un problema del pasado. Los refrigeradores - Amana A1RXNGFYS | Use and Care - Page 19
NOTA: No se recomienda instalar el refrigerador cerca de un horno, radiador u otra fuente de calor. No instale el refrigerador en un lugar donde la temperatura puede ser menor de 55°F (13°C). 1/2" (1,25 cm) 2" (5,08 cm) Requisitos eléctricos ADVERTENCIA Peligro de Choque Eléctrico Conecte a un - Amana A1RXNGFYS | Use and Care - Page 20
Conexión del suministro de agua Lea todas las instrucciones antes de comenzar. IMPORTANTE: Si enciende el refrigerador antes de instalar la conexión del agua, APAGUE la fábrica de hielo. Conexión a la línea de agua 1. Desenchufe el refrigerador o desconecte el suministro de energía. 2. CIERRE el - Amana A1RXNGFYS | Use and Care - Page 21
Puertas del refrigerador HERRAMIENTAS NECESARIAS: Llave de cubo de cabeza hexagonal de destornillador Torx®† T20, destornillador Phillips N° 2, destornillador de hoja plana, llave de boca de cuchillo plano para masilla de 2". IMPORTANTE: ■ Antes de comenzar, fije el control del refrigerador en - Amana A1RXNGFYS | Use and Care - Page 22
6. Coloque el tornillo de tope de la manija en el lado opuesto de la puerta del refrigerador y enrósquelo como se muestra en la Ilustración 6-2. 7. Quite el retén de la puerta. Colóquelo en el lado opuesto de la puerta del refrigerador, como se indica en la ilustración 5. 8. Coloque la manija del - Amana A1RXNGFYS | Use and Care - Page 23
Estilo 1 - Puerta estándar Cómo quitar y volver a poner la puerta en su lugar Rejilla de la base A A A. Tapón del orificio de la bisagra inferior Bisagra superior A B C A. Tapa de la bisagra superior B. Tornillos de cabeza hexagonal de la bisagra de 5/16" C. Bisagra superior Bisagra central A B A. - Amana A1RXNGFYS | Use and Care - Page 24
Estilo 2 - Puerta contorneada Cómo quitar y volver a poner la puerta en su lugar Rejilla de la base Bisagra superior A B C D A. Cubierta de la bisagra superior B. Tornillos de cabeza hexagonal para bisagra de C. Bisagra superior D. Pasador de la bisagra Bisagra central A B A. Bisagra central B. - Amana A1RXNGFYS | Use and Care - Page 25
Ajuste las puertas Cierre de la puerta Su refrigerador tiene dos rodillos frontales regulables - uno a la derecha y otro a la izquierda. Si su refrigerador parece inestable o usted quiere que las puertas se cierren con mayor facilidad, ajuste la inclinación del refrigerador usando las instrucciones - Amana A1RXNGFYS | Use and Care - Page 26
Encendido/Apagado del enfriamiento Mueva el control del cuadrante hacia la palabra OFF (Apagado). Para volver a encender el enfriamiento, mueva el control del cuadrante hacia el ajuste de temperatura deseado. NOTA: No se enfriará ningún compartimiento cuando el control se fije en OFF. CARACTERÍ - Amana A1RXNGFYS | Use and Care - Page 27
Guía para la conservación de carnes Por lo general guarde todas las carnes en su envoltura original siempre y cuando sea hermética y a prueba de humedad. Vuelva a envolverlas si fuera necesario. Consulte el cuadro siguiente respecto a períodos de conservación. Para guardar la carne por un tiempo más - Amana A1RXNGFYS | Use and Care - Page 28
NOTA: El estante deberá bajarse ligeramente y encajar en su lugar. Si el estante no parece estable, asegúrese de que ambos extremos del mismo hayan encajado en sus soportes. Estante de vidrio del congelador (en algunos modelos) Para quitar y volver a colocar un estante de vidrio: 1. Levante el - Amana A1RXNGFYS | Use and Care - Page 29
Compartimiento de uso general y portalatas Cómo quitar y volver a colocar el compartimiento de uso general: 1. Saque el compartimiento de uso general levantando y sosteniendo la cubierta, a la vez que levanta el compartimiento de uso general y lo jala directamente hacia afuera. 2. Vuelva a colocar - Amana A1RXNGFYS | Use and Care - Page 30
CUIDADO DE SU REFRIGERADOR Limpieza ADVERTENCIA Peligro de Explosión Use un limpiador no inflamable. 4. No es necesaria una limpieza rutinaria del condensador en ambientes de funcionamiento normal en el hogar. Si el ambiente es particularmente grasoso o polvoriento, o si hay bastante tránsito de - Amana A1RXNGFYS | Use and Care - Page 31
"Preguntas que se hacen con frecuencia", para evitar posiblemente el costo de una visita de servicio técnico. En EE.UU., www.amana.com En Canadá, www.amanacanada.ca Funcionamiento del refrigerador El refrigerador no funciona ADVERTENCIA Parece que el motor funciona excesivamente Es posible que - Amana A1RXNGFYS | Use and Care - Page 32
Es difícil abrir la puerta ADVERTENCIA Peligro de Explosión Use un limpiador no inflamable. No seguir esta instrucción puede ocasionar la muerte, explosión o incendio. ■ ¿Están las juntas sucias o pegajosas? Limpie las juntas y las superficies de contacto con jabón suave y agua tibia. Enjuague y - Amana A1RXNGFYS | Use and Care - Page 33
sea debido a defectos en los materiales o la mano de obra y se le informe a Amana en un lapso de 30 días a partir de la fecha de compra. 6. Cualquier diferentes a los colores de marcadores recomendados para borrar en seco en el Manual de uso y cuidado. 13. Cualquier daño o decoloración causado por - Amana A1RXNGFYS | Use and Care - Page 34
usted no tiene acceso a internet y necesita ayuda para usar su producto, o si quisiera hacer una cita para obtener servicio, puede ponerse en contacto con Amana, en el número que se indica a continuación. Tenga listo su número de modelo completo. Puede encontrar el número de modelo y de serie en la - Amana A1RXNGFYS | Use and Care - Page 35
INSTRUCTIONS D'UTILISATION DU RÉFRIGÉRATEUR Nous vous REMERCIONS d'avoir acheté ce produit de haute qualité. Si vous rencontrez un problème non mentionné dans la section DÉPANNAGE, veuillez visiter notre site Web www.amana.com pour des informations supplémentaires. Si vous avez toujours besoin d' - Amana A1RXNGFYS | Use and Care - Page 36
". Risque d'explosion Garder les matériaux et les vapeurs inflammables, telle que l'essence, loin du réfrigérateur. Le non-respect de cette instruction peut causer un décès, une explosion ou un incendie. Pour obtenir une aération appropriée pour votre réfrigérateur, laisser un espace de ½" (1,25 - Amana A1RXNGFYS | Use and Care - Page 37
pas enlever la broche de liaison à la terre. Ne pas utiliser un adaptateur. Ne pas utiliser un câble de rallonge. Le non-respect de ces instructions peut causer un décès, un incendie ou un choc électrique. Avant de placer le réfrigérateur à son emplacement final, il est important de vous assurer - Amana A1RXNGFYS | Use and Care - Page 38
pas enlever la broche de liaison à la terre. Ne pas utiliser un adaptateur. Ne pas utiliser un câble de rallonge. Le non-respect de ces instructions peut causer un décès, un incendie ou un choc électrique. 1. Brancher sur une prise à 3 alvéoles reliée à la terre. REMARQUE : Attendre 24 heures pour - Amana A1RXNGFYS | Use and Care - Page 39
section. ■ Si vous ne faites qu'enlever ou remplacer les portes, les instructions sont les mêmes quel que soit le style de porte. Voir "Enlever les les séparer de la caisse de l'appareil. REMARQUE : Prévoir un support additionnel des portes pendant le déplacement des charnières. La force d' - Amana A1RXNGFYS | Use and Care - Page 40
les pièces de la charnière inférieure tel qu'illustré. Resserrer les vis. Replacer la porte du réfrigérateur. REMARQUE : Prévoir un support additionnel des portes pendant le déplacement des charnières. La force d'attraction des aimants des portes ne suffit pas à les maintenir en place. 2. Assembler - Amana A1RXNGFYS | Use and Care - Page 41
Style 1-Porte standard Démontage et réinstallation de la porte Grille de la base A A A. Bouchon obturateur de charnière inférieure Charnière supérieure A B C A. Plaque de charnière supérieure B. Vis de charnière à tête hexagonale de C. Charnière supérieure Charnière centrale A B A. Charnière - Amana A1RXNGFYS | Use and Care - Page 42
Style 2 - Porte contour Dépose et réinstallation de la porte Grille de la base Charnière supérieure A B C D A. Couvercle de charnière supérieure B. Vis de charnière à tête hexagonale de C. Charnière supérieure D. Axe de charnière Charnière centrale A B A. Charnière centrale B. Vis de type Torx® de - Amana A1RXNGFYS | Use and Care - Page 43
les portes semble inégal, on peut faire le réglage en suivant les instructions ci-dessous : 1. Soulever et enlever le couvercle sur la charnière sup congélation, utiliser les réglages indiqués dans le tableau ci-dessous comme guide. ■ Déplacer la commande vers la quantité de flocons de neige souhait - Amana A1RXNGFYS | Use and Care - Page 44
de la tablette et en la retirant au-delà de la butée. Retirer complètement la tablette en la faisant glisser entièrement hors des supports. 4. Réinstaller la tablette en la réinsérant de nouveau dans la rainure de la paroi de la caisse. 5. Guider l'avant de la tablette dans la - Amana A1RXNGFYS | Use and Care - Page 45
Guide d'entreposage des viandes Garder la plus grande partie des viandes dans leur lors de leur dépose afin d'éviter de les faire tomber. 2. Soulever l'avant du bac pour retirer le support du couvercle. Soulever le couvercle et le glisser vers l'extérieur. 3. Réinstaller le couvercle en plaçant - Amana A1RXNGFYS | Use and Care - Page 46
de chaque côté de la paroi de la porte. Enclencher fermement le support et l'ensemble sur les pattes situées au-dessus de la tablette tel qu'indiqué. Style 1 - Rainures de porte Style 2 - Porte-bouteilles/canettes Guide de stockage des aliments surgelés Les périodes de conservation varient selon - Amana A1RXNGFYS | Use and Care - Page 47
compartiment utilitaire et en le tirant tout droit pour le dégager. 2. Réinstaller le compartiment utilitaire en le faisant glisser audessus du support désiré et en l'enfonçant jusqu'à la butée. Retrait et réinstallation du compartiment à canettes : 1. Enlever le compartiment à canettes d'une main - Amana A1RXNGFYS | Use and Care - Page 48
résistant à la corrosion, et non pas anticorrosion. Pour éviter la corrosion de l'acier inoxydable, garder les surfaces propres à l'aide des instructions de nettoyage suivantes. Nettoyage de votre réfrigérateur : REMARQUE : Ne pas utiliser des nettoyants abrasifs tels que les nettoyants à vitre en - Amana A1RXNGFYS | Use and Care - Page 49
questions) pour éviter le coût d'un appel de service. Aux É.-U., www.amana.com Au Canada, www.amanacanada.ca Fonctionnement du ré adaptateur. Ne pas utiliser un câble de rallonge. Le non-respect de ces instructions peut causer un décès, un incendie ou un choc électrique. ■ Le cordon les supports. 49 - Amana A1RXNGFYS | Use and Care - Page 50
La porte est difficile à ouvrir AVERTISSEMENT Risque d'explosion Utiliser un produit de nettoyage ininflammable. Le non-respect de cette instruction peut causer un décès, une explosion ou un incendie. ■ Les joints d'étanchéité sont-ils sales ou collants? Nettoyer les joints et les surfaces de - Amana A1RXNGFYS | Use and Care - Page 51
services d'entretien ou de réparation Amana autorisé n'est pas disponible. 10. La dépose et la réinstallation de votre gros appareil ménager si celui-ci est installé dans un endroit inaccessible ou n'est pas installé conformément aux instructions d'installation fournies par Amana le Guide d' - Amana A1RXNGFYS | Use and Care - Page 52
du produit ou que vous souhaitez prendre un rendez-vous, vous pouvez contacter Amana au numéro ci-dessous. Ayez votre numéro de modèle à la paroi interne du compartiment de réfrigération. Pour assistance ou service aux É.-U., composez le 1-800-843-0304. Au Canada, composez le 1-800-
-
 1
1 -
 2
2 -
 3
3 -
 4
4 -
 5
5 -
 6
6 -
 7
7 -
8
-
9
-
10
-
11
-
12
-
13
-
14
-
15
-
16
-
17
-
18
-
19
-
20
-
21
-
22
-
23
-
24
-
25
-
26
-
27
-
28
-
29
-
30
-
31
-
32
-
33
-
34
-
35
-
36
-
37
-
38
-
39
-
40
-
41
-
42
-
43
-
44
-
45
-
46
-
47
-
48
-
49
-
50
-
51
-
52
 |
 |

THANK YOU for purchasing this high-quality product. If you should experience a problem not covered in TROUBLESHOOTING,
please visit our website at
www.amana.com
for additional information. If you still need assistance, call us at 1-800-843-0304.
In Canada, visit our website at
www.amanacanada.ca
or call us at 1-800-807-6777.
You will need your model and serial number, located on the inside wall of the refrigerator compartment.
REFRIGERATOR SAFETY
Table of Contents
/
Índice / Table des matières
REFRIGERATOR SAFETY
...............................
1
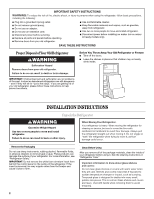
INSTALLATION INSTRUCTIONS
....................
2
REFRIGERATOR USE
......................................
9
REFRIGERATOR FEATURES
........................
10
FREEZER FEATURES
....................................
11
DOOR FEATURES
..........................................
12
REFRIGERATOR CARE
.................................
13
TROUBLESHOOTING
....................................
14
ACCESSORIES
...............................................
15
WARRANTY
....................................................
16
SEGURIDAD DEL REFRIGERADOR
.............
17
INSTRUCCIONES DE INSTALACIÓN
...........
18
USO DE SU REFRIGERADOR
.......................
25
CARACTERÍSTICAS
DEL REFRIGERADOR
....................................
26
CARACTERÍSTICAS DEL CONGELADOR...27
CARACTERÍSTICAS DE LA PUERTA
...........
28
CUIDADO DE SU REFRIGERADOR
.............
30
SOLUCIÓN DE PROBLEMAS
.......................
31
ACCESORIOS
.................................................
32
GARANTÍA
......................................................
33
SÉCURITÉ DU RÉFRIGÉRATEUR
................
35
INSTRUCTIONS D'INSTALLATION
..............
36
UTILISATION DU RÉFRIGÉRATEUR
............
43
CARACTÉRISTIQUES
DU RÉFRIGÉRATEUR
....................................
44
CARACTÉRISTIQUES
DU CONGÉLATEUR
.......................................
45
CARACTÉRISTIQUES DE LA PORTE
..........
46
ENTRETIEN DU RÉFRIGÉRATEUR
..............
48
DÉPANNAGE
..................................................
49
ACCESSOIRES
...............................................
50
GARANTIE
......................................................
51
REFRIGERATOR USER INSTRUCTIONS
W10359301A
You can be killed or seriously injured if you don't immediately
You
can be killed or seriously injured if you don't follow
All safety messages will tell you what the potential hazard is, tell you how to reduce the chance of injury, and tell you what can
happen if the instructions are not followed.
Your safety and the safety of others are very important.
We have provided many important safety messages in this manual and on your appliance. Always read and obey all safety
messages.
This is the safety alert symbol.
This symbol alerts you to potential hazards that can kill or hurt you and others.
All safety messages will follow the safety alert symbol and either the word “DANGER” or “WARNING.”
These words mean:
follow instructions.
instructions.
DANGER
WARNING