Amana A8RXNGFBS Use and Care
Amana A8RXNGFBS Manual
 |
View all Amana A8RXNGFBS manuals
Add to My Manuals
Save this manual to your list of manuals |
Amana A8RXNGFBS manual content summary:
- Amana A8RXNGFBS | Use and Care - Page 1
REFRIGERATOR USER INSTRUCTIONS THANK YOU for purchasing this high-quality product. If you should experience a problem not covered in TROUBLESHOOTING, please visit our website at www.amana.com for additional information. If you still need assistance, call us at 1-800-843-0304. In Canada, visit our - Amana A8RXNGFBS | Use and Care - Page 2
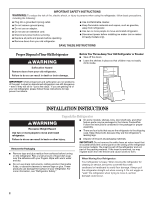
Excessive Weight Hazard Use two or more people to move and install refrigerator. ■ On some models, shelves, bins, door shelf rails, and other feature parts may be packaged in the Interior FeaturePak. Follow the instructions contained in the package for proper assembly. ■ There are four bolts that - Amana A8RXNGFBS | Use and Care - Page 3
wrenches, ¹⁄₄" nut driver and drill bit, cordless drill. Gather the required tools and parts before starting installation. Read and follow the instructions provided with any tools listed. NOTE: Your refrigerator dealer has a kit available with a ¹⁄₄" (6.35 mm) saddle-type shutoff valve, a union, and - Amana A8RXNGFBS | Use and Care - Page 4
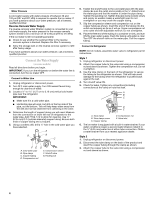
Connect to Refrigerator NOTE: On kit models, assemble water valve to refrigerator per kit instructions. Style 1 1. Unplug refrigerator or disconnect power . Obtain a water strainer from your nearest appliance dealer. Style 2 1. Unplug refrigerator or disconnect power. 2. Disconnect the tube clamp - Amana A8RXNGFBS | Use and Care - Page 5
appliance dealer. Complete the Installation WARNING Electrical Shock Hazard Plug into a grounded 3 prong outlet. Do not remove ground prong. Do not use an adapter. Do not use an extension cord. Failure to follow these instructions can result in death, fire, or electrical shock. Refrigerator - Amana A8RXNGFBS | Use and Care - Page 6
1. Replace the parts for the bottom hinge as shown. Tighten screws. Replace the refrigerator door. NOTE: Provide additional support for the doors use an adapter. Do not use an extension cord. Failure to follow these instructions can result in death, fire, or electrical shock. 2. Plug into a grounded - Amana A8RXNGFBS | Use and Care - Page 7
Screws B. Freezer Handle 4 A A. Door Handle Sealing Screws Front View Side View 5 A. Door Stop Screw A B B. Door Stop A. Door Handle Seal Screw Front 6 A B C D A. Flat-Head Handle Screw B. Refrigerator Handle C. Handle Screw D. Screw Cover 7 - Amana A8RXNGFBS | Use and Care - Page 8
Style 2 - Contoured Door Removal & Replacement Top Hinge A B C D A. Top Hinge Cover B. 5/16" Hex-Head Hinge Screws C. Top Hinge D. Spacer Center Hinge A B C D E F A. Door Stop B. Door Stop Screw C. Spacer D. Center Hinge E. 5/16" Hex-Head Hinge Screws F. Spacer Bottom Hinge A B C D E A. Door Stop B. - Amana A8RXNGFBS | Use and Care - Page 9
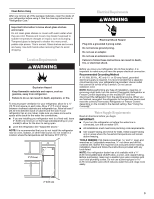
refrigerator's tilt using the instructions below. Depending on your model, your refrigerator may have leveling legs (Style 1) or leveling screws (Style 2). They are part guide. Wait at least 24 hours between adjustments and then recheck the temperatures. CONDITION/REASON: ADJUSTMENT: REFRIGERATOR - Amana A8RXNGFBS | Use and Care - Page 10
ON, simply lower the wire shutoff arm. To manually turn the ice maker OFF, lift the wire supply. Water softener chemicals (such as salt) can damage parts of the ice maker and lead to poor quality ice. If clean by using the following cleaning instructions. To Clean Your Refrigerator: NOTE: Do not use - Amana A8RXNGFBS | Use and Care - Page 11
mistake on plastic parts or on the side of the refrigerator, it is recommended to clean immediately with liquid dish detergent and water. For assistance in case of prolonged exposure to the marker's ink, please visit our website at www.amana.com or call the Amana Appliance Customer Service toll free - Amana A8RXNGFBS | Use and Care - Page 12
TROUBLESHOOTING First try the solutions suggested here or visit our website and reference FAQs (Frequently Asked Questions) to possibly avoid the cost of a service call. In the U.S.A., www.amana.com In Canada, www.amanacanada.ca Refrigerator Operation The refrigerator on the supports. The door - Amana A8RXNGFBS | Use and Care - Page 13
moisture buildup NOTE: Some moisture buildup is normal. ■ Humid room? Contributes to moisture buildup. ■ Door opened often or left open? Allows humid air to enter refrigerator. Minimize door openings and keep door fully closed. Ice and Water The ice maker is not producing ice or not enough ice - Amana A8RXNGFBS | Use and Care - Page 14
remote area where service by an authorized Amana servicer is not available. 10. The removal and reinstallation of your major appliance if it is installed in an inaccessible location or is not installed in accordance with Amana's published installation instructions. 11. Replacement parts or repair - Amana A8RXNGFBS | Use and Care - Page 15
cubierto en SOLUCIÓN DE PROBLEMAS, visite nuestro sitio de internet en www.amana.com para obtener información adicional. Si considera que aún necesita ayuda, ll importante. Hemos incluido muchos mensajes importantes de seguridad en este manual y en su electrodoméstico. Lea y obedezca siempre todos - Amana A8RXNGFBS | Use and Care - Page 16
espuma blanca de retorno de aire que está ubicado detrás del panel de control, en el techo del refrigerador (en algunos modelos). Esta pieza es parte del refrigerador y no es material de empaque. Si se quita dicha pieza, el hielo del congelador puede bajar y formar carámbanos. Cómo limpiar su - Amana A8RXNGFBS | Use and Care - Page 17
un espacio de ¹⁄₂" (12,70 mm) a cada lado. Deje un espacio de 3" (7,5 cm) entre los armarios de arriba y la parte superior del refrigerador. Deje por lo menos 1" (25,40 mm) entre la parte trasera de la carcasa y la pared. Si su refrigerador tiene una fábrica de hielo, asegúrese de que haya - Amana A8RXNGFBS | Use and Care - Page 18
sedimento normal en la válvula. 4. Para determinar la longitud de la tubería de cobre que va a necesitar, mida desde la conexión baja de la parte trasera izquierda del refrigerador hasta la tubería de agua. Agregue 7 pies (2,1 m) para la limpieza. Use tubería de cobre de ¹⁄₄" (6,35 mm) de diámetro - Amana A8RXNGFBS | Use and Care - Page 19
ajuste demasiado. Vuelva a unir la abrazadera para tubería y el tubo a la parte posterior de la carcasa. A B C ■ Quite los alimentos y los recipientes ajustables Quite los tapones de los orificios de las bisagras de la parte superior de la carcasa y colóquelos en los orificios de la bisagra - Amana A8RXNGFBS | Use and Care - Page 20
y colóquelos en los orificios de la bisagra del lado opuesto. Vea la ilustración 1-2. Puertas 1. Quite el tapón del orificio de la bisagra de la parte superior de la puerta del congelador. Colóquelo del lado opuesto como se indica. Vea la ilustración 2. 2. Quite el retén de la puerta del congelador - Amana A8RXNGFBS | Use and Care - Page 21
Estilo 1 - Estándar Cómo quitar y volver a poner la puerta en su lugar Bisagra superior A B C A. Tornillos de bisagra de cabeza hexagonal de 5/16" B. Bisagra superior C. Espaciador Bisagra central A B C D E F A. Retén de la puerta B. Tornillo del retén de la puerta C. Espaciador D. Bisagra central - Amana A8RXNGFBS | Use and Care - Page 22
Estilo 2 - Contorneada Cómo quitar y volver a poner la puerta en su lugar Bisagra superior A B C D A. Tapa de la bisagra superior B. Tornillos de cabeza hexagonal de la bisagra de 5/16" C. Bisagra superior D. Espaciador Bisagra central A B C D E F A. Retén de la puerta B. Tornillo del retén de la - Amana A8RXNGFBS | Use and Care - Page 23
de lado a lado. Regule si fuera necesario. USO DE SU REFRIGERADOR Uso del control El control de temperatura está ubicado en la parte superior del compartimiento del refrigerador. Éste controla la temperatura tanto en los compartimientos del refrigerador como del congelador. Para su comodidad, el - Amana A8RXNGFBS | Use and Care - Page 24
muriático, ceras para limpieza, detergentes concentrados, blanqueadores o productos de limpieza que contengan productos de petróleo en las partes exteriores (puertas y carcasa), partes de plástico, en el interior ni en los revestimientos o juntas de la puerta. No use toallas de papel, estropajos - Amana A8RXNGFBS | Use and Care - Page 25
de los electrodomésticos Amana al 1-800-843-0304. En Canadá, visite nuestro sitio de internet en www.amanacanada.ca o llámenos al 1-800-807-6777. 1. Quite el juego de marcadores, que se incluye dentro de su refrigerador. Coloque el juego de marcadores horizontalmente en alguna parte en su cocina - Amana A8RXNGFBS | Use and Care - Page 26
posiblemente el costo de una visita de servicio técnico. En EE.UU., www.amana.com En Canadá, www.amanacanada.ca Funcionamiento del refrigerador El refrigerador no funciona ADVERTENCIA bien la tapa del compartimiento para verduras, de manera que la parte posterior descanse sobre los soportes. 26 - Amana A8RXNGFBS | Use and Care - Page 27
Es difícil abrir la puerta ADVERTENCIA Peligro de Explosión Use un limpiador no inflamable. No seguir esta instrucción puede ocasionar la muerte, explosión o incendio. ■ ¿Están las juntas sucias o pegajosas? Limpie las empaquetaduras y las superficies de contacto con jabón suave y agua tibia. - Amana A8RXNGFBS | Use and Care - Page 28
a los colores de marcadores recomendados para borrar en seco en el Manual de uso y cuidado. 13. Cualquier daño o decoloración causado por Canadá: Amana Brand Home Appliances Customer eXperience Center 553 Benson Road Benton Harbor, MI 49022-2692 Amana Brand Home Appliances Customer eXperience - Amana A8RXNGFBS | Use and Care - Page 29
INSTRUCTIONS D'UTILISATION DU RÉFRIGÉRATEUR Nous vous REMERCIONS d'avoir acheté ce produit de haute qualité. Si vous rencontrez un problème non mentionné dans la section DÉPANNAGE, veuillez visiter notre site Web www.amana.com pour des informations supplémentaires. Si vous avez toujours besoin d' - Amana A8RXNGFBS | Use and Care - Page 30
frigérateur AVERTISSEMENT Risque du poids excessif Utiliser deux ou plus de personnes pour déplacer et installer le réfrigérateur. Le non-respect de cette instruction peut causer une blessure au dos ou d'autre blessure. Enlèvement des matériaux d'emballage ■ Enlever le ruban adhésif et la colle des - Amana A8RXNGFBS | Use and Care - Page 31
pas enlever la broche de liaison à la terre. Ne pas utiliser un adaptateur. Ne pas utiliser un câble de rallonge. Le non-respect de ces instructions peut causer un décès, un incendie ou un choc électrique. Avant de placer le réfrigérateur à son emplacement final, il est important de vous assurer - Amana A8RXNGFBS | Use and Care - Page 32
de la pression de votre eau, appeler un plombier qualifié agréé. Raccordement de la canalisation d'eau (sur certains modèles) Lire toutes les instructions avant de commencer. IMPORTANT : Si on met en marche le réfrigérateur avant son raccordement à la canalisation d'eau, placer la commande de la - Amana A8RXNGFBS | Use and Care - Page 33
adaptateur. Ne pas utiliser un câble de rallonge. Le non-respect de ces instructions peut causer un décès, un incendie ou un choc électrique. 1. Brancher sur les séparer de la caisse de l'appareil. REMARQUE : Prévoir un support additionnel des portes pendant le démontage des charnières. La force d' - Amana A8RXNGFBS | Use and Care - Page 34
à part jusqu'à ce que la charnière inférieure soit installée sur le réfrigérateur. Style 2 - Contour Les illustrations suivent ces instructions. Ré la porte du compartiment de réfrigération. REMARQUE : Prévoir un support additionnel des portes pendant la réinstallation des charnières. La force d' - Amana A8RXNGFBS | Use and Care - Page 35
Style 1 - Standard Démontage et réinstallation de la porte Charnière supérieure A B C A. Vis de charnière à tête hexagonale de 5/16" B. Charnière supérieure C. Cale d'espacement Charnière centrale A B C D E F A. Butée de la porte B. Vis de butée de la porte C. Cale d'espacement D. Charnière centrale - Amana A8RXNGFBS | Use and Care - Page 36
Style 2 - Contour Démontage et réinstallation de la porte Charnière supérieure A B C D A. Couvercle de la charnière supérieure B. Vis de charnière à tête hexagonale de 5/16" C. Charnière supérieure D. Cale d'espacement Charnière centrale A B C D E F A. Butée de la porte B. Vis de butée de la porte - Amana A8RXNGFBS | Use and Care - Page 37
, faire le réglage de l'inclinaison du réfrigérateur en suivant les instructions ci-dessous. Selon votre modèle, le réfrigérateur peut disposer de bloqués. S'il est nécessaire d'ajuster les températures, utiliser comme guide les réglages indiqués dans le tableau ci-dessous. Attendre au moins - Amana A8RXNGFBS | Use and Care - Page 38
la corrosion et non anti-corrosion. Afin d'éviter l'oxydation de l'acier inoxydable, veiller à ce que les surfaces restent propres en suivant les instructions de nettoyage suivantes. Pour nettoyer le réfrigérateur : REMARQUE : Ne pas utiliser de nettoyants abrasifs tels que les nettoyants à vitre en - Amana A8RXNGFBS | Use and Care - Page 39
ininflammable. Le non-respect de cette instruction peut causer un décès, une explosion ou un incendie. Le réfrigérateur Amana® JOT™ a une surface dotée visiter notre site Web www.amana.com ou communiquer sans frais avec le Service à la clientèle pour appareils éléctroménagers Amana au 1-800-843-0304. - Amana A8RXNGFBS | Use and Care - Page 40
questions) pour éviter le coût d'un appel de service. Aux É.-U., www.amana.com Au Canada, www.amanacanada.ca Fonctionnement du réfrigé les supports. La porte est difficile à ouvrir AVERTISSEMENT Risque d'explosion Utiliser un produit de nettoyage ininflammable. Le non-respect de cette instruction - Amana A8RXNGFBS | Use and Care - Page 41
Température et humidité La température est trop élevée ■ S'agit-il d'une nouvelle installation? Accorder 24 heures après l'installation pour que le réfrigérateur se refroidisse complètement. ■ La porte est-elle ouverte fréquemment ou a-t-elle été laissée ouverte? Ceci permet à l'air chaud de péné - Amana A8RXNGFBS | Use and Care - Page 42
services d'entretien ou de réparation Amana autorisé n'est pas disponible. 10. La dépose et la réinstallation de votre gros appareil ménager si celui-ci est installé dans un endroit inaccessible ou n'est pas installé conformément aux instructions d'installation fournies par Amana le Guide d'
-
 1
1 -
 2
2 -
 3
3 -
 4
4 -
 5
5 -
 6
6 -
 7
7 -
8
-
9
-
10
-
11
-
12
-
13
-
14
-
15
-
16
-
17
-
18
-
19
-
20
-
21
-
22
-
23
-
24
-
25
-
26
-
27
-
28
-
29
-
30
-
31
-
32
-
33
-
34
-
35
-
36
-
37
-
38
-
39
-
40
-
41
-
42
 |
 |
THANK YOU for purchasing this high-quality product. If you should experience a problem not covered in TROUBLESHOOTING,
please visit our website at
www.amana.com
for additional information. If you still need assistance, call us at 1-800-843-0304. In
Canada, visit our website at
www.amanacanada.ca
or call us at 1-800-807-6777.
You will need your model and serial number, located on the inside wall of the refrigerator compartment.
REFRIGERATOR
SAFETY
Table of Contents
/
Índice / Table des matières
REFRIGERATOR SAFETY
...............................
1
INSTALLATION INSTRUCTIONS
....................
2
REFRIGERATOR USE
......................................
9
REFRIGERATOR CARE
.................................
10
TROUBLESHOOTING
....................................
12
WARRANTY
....................................................
14
SEGURIDAD DEL REFRIGERADOR
.............
15
INSTRUCCIONES DE INSTALACIÓN
...........
16
USO DE SU REFRIGERADOR
.......................
23
CUIDADO DE SU REFRIGERADOR
.............
24
SOLUCIÓN DE PROBLEMAS
.......................
26
GARANTÍA
......................................................
28
SÉCURITÉ DU RÉFRIGÉRATEUR
................
29
INSTRUCTIONS D’INSTALLATION
..............
30
UTILISATION DU RÉFRIGÉRATEUR
............
37
ENTRETIEN DU RÉFRIGÉRATEUR
..............
38
DÉPANNAGE
..................................................
40
GARANTIE
......................................................
42
REFRIGERATOR USER INSTRUCTIONS
W10214254A
You can be killed or seriously injured if you don't immediately
You
can be killed or seriously injured if you don't follow
All safety messages will tell you what the potential hazard is, tell you how to reduce the chance of injury, and tell you what can
happen if the instructions are not followed.
Your safety and the safety of others are very important.
We have provided many important safety messages in this manual and on your appliance. Always read and obey all safety
messages.
This is the safety alert symbol.
This symbol alerts you to potential hazards that can kill or hurt you and others.
All safety messages will follow the safety alert symbol and either the word “DANGER” or “WARNING.”
These words mean:
follow instructions.
instructions.
DANGER
WARNING