Asus A68HM-PLUS User Guide
Asus A68HM-PLUS Manual
 |
View all Asus A68HM-PLUS manuals
Add to My Manuals
Save this manual to your list of manuals |
Asus A68HM-PLUS manual content summary:
- Asus A68HM-PLUS | User Guide - Page 1
Motherboard A68HM Series E9808_A68HM Series_Manual.indb 1 2014/10/16 10:08:57 - Asus A68HM-PLUS | User Guide - Page 2
applicable license entitles you to the source code of such software and/or other additional data, you may obtain it for a period of three years after our last shipment of the product, either (1) for free by downloading it from http://support.asus.com/download or (2) for the cost of reproduction and - Asus A68HM-PLUS | User Guide - Page 3
you proceed 1-1 1.2 Motherboard overview 1-1 1.3 Accelerated Processing Unit (APU 1-3 1.4 System memory 1-6 1.5 Expansion slots 1-9 1.6 Headers...1-10 1.7 Connectors 1-11 1.8 Software support 1-19 BIOS information 2.1 Managing and updating your BIOS 2-1 2.2 BIOS setup program 2-6 2.3 My - Asus A68HM-PLUS | User Guide - Page 4
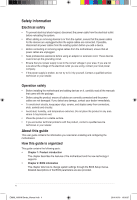
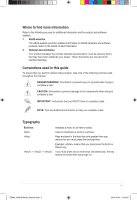
. • If you encounter technical problems with the product, contact a qualified service technician or your retailer. About this guide This user guide contains the information you need when installing and configuring the motherboard. How this guide is organized This guide contains the following parts - Asus A68HM-PLUS | User Guide - Page 5
updates. 1. ASUS websites The ASUS website provides updated information on ASUS hardware and software products. Refer to the ASUS contact Conventions used in this guide To ensure that you perform certain tasks properly, take note of the following symbols used throughout this manual. DANGER/WARNING: - Asus A68HM-PLUS | User Guide - Page 6
retailer. A68HM Series specifications summary CPU Chipset Memory Graphics Storage / RAID AMD® FM2+ Socket for AMD® A-Series/Athlon™ Series processors AMD® Turbo Core Technology 3.0 support Supports APU up to 4 cores • Refer to www.asus.com for the AMD® CPU support list. AMD® A68H FCH 2 x DIMMs - Asus A68HM-PLUS | User Guide - Page 7
the front panel to support a 7.1-channel audio output. AMD® A68H FCH: - 2 x USB 3.0 ports (2 ports at back panel, blue) - 6 x USB2.0 ports (2 ports at back panel; 4 ports at mid-board) ASUS 5X Protection* - ASUS DIGI+ VRM - 3+2 Phase digital power design - ASUS Enhanced DRAM Overcurrent Protection - Asus A68HM-PLUS | User Guide - Page 8
Definition Front panel audio connector 1 x 24-pin EATX power connector 1 x 4-pin ATX 12V power connector 64Mb Flash ROM, NEW UEFI BIOS, PnP, DMI v2.0, WfM2.0, SM BIOS V2.7, ACPI V2.0a Drivers ASUS Update ASUS utilities Anti-Virus software (OEM version) Windows® 8.1, 32bit/64-bit Windows® 8, 32bit/64 - Asus A68HM-PLUS | User Guide - Page 9
you install motherboard components or change any motherboard settings. • Unplug the power cord from the wall socket before touching circles to secure the motherboard to the chassis. Do not overtighten the screws! Doing so can damage the motherboard. ASUS A68HM Series E9808_A68HM Series_Manual.indb - Asus A68HM-PLUS | User Guide - Page 10
) DDR3 DIMM_B1 (64bit, 240-pin module) SOCKET FM2+ VGA 22.6cm(8.9in) 1-2 USB1112 EATXPWR LAN_USB12 1 BATTERY AUDIO A68HM-E 8111 GR PCIEX16 5 SATA6G_4 Super I/O PCIEX1_1 AMD® A68H SPEAKER 6 ALC 887 PCI1 F_PANEL SPDIF_OUT CLRTC 64Mb BIOS 7 TPM USB56 USB34 SATA6G_1 SATA6G_2 - Asus A68HM-PLUS | User Guide - Page 11
1-13 1-15 1-18 1-17 1.3 Accelerated Processing Unit (APU) This motherboard comes with an FM2+ socket designed for AMD® A-series / Athlon™ Series graphics. A68HM-E A68HM-E CPU socket FM2+ Ensure that you use an APU designed for the FM2+ socket. The APU fits in only one correct orientation. DO NOT - Asus A68HM-PLUS | User Guide - Page 12
1.3.1 Installing the APU 1 2 3 4 1.3.2 APU heatsink and fan assembly installation Apply the Thermal Interface Material to the APU heatsink and APU before you install the heatsink and fan if necessary. 1-4 E9808_A68HM Series_Manual.indb 4 Chapter 1: Product introduction 2014/10/16 10:09:00 - Asus A68HM-PLUS | User Guide - Page 13
To install the APU heatsink and fan assembly 1 2 3 4 5 To uninstall the APU heatsink and fan assembly 1 2 3 ASUS A68HM Series E9808_A68HM Series_Manual.indb 5 1-5 2014/10/16 10:09:01 - Asus A68HM-PLUS | User Guide - Page 14
are developed for better performance with less power consumption. The figure illustrates the location of the DDR3 DIMM sockets: DIMM_A1 DIMM_B1 A68HM-E A68HM-E 240-pin DDR3 DIMM sockets Channel Channel A Channel B Sockets DIMM_A1 DIMM_B1 1-6 E9808_A68HM Series_Manual.indb 6 Chapter 1: Product - Asus A68HM-PLUS | User Guide - Page 15
menu for manual memory frequency adjustment. • For system stability, use a more efficient memory cooling system to support a full memory load (2 DIMMs) or overclocking condition. • Refer to www.asus.com for the latest Memory QVL (Qualified Vendors List). ASUS A68HM Series E9808_A68HM Series_Manual - Asus A68HM-PLUS | User Guide - Page 16
1.4.3 1 Installing a DIMM 2 3 To remove a DIMM B A 1-8 E9808_A68HM Series_Manual.indb 8 Chapter 1: Product introduction 2014/10/16 10:09:02 - Asus A68HM-PLUS | User Guide - Page 17
arise between the two PCI groups, making the system unstable and the card inoperable. 1.5.3 PCI slot The PCI slot supports cards such as a LAN card, SCSI card, USB card, and other cards that comply with PCI specifications. ASUS A68HM Series E9808_A68HM Series_Manual.indb 9 1-9 2014/10/16 10:09:02 - Asus A68HM-PLUS | User Guide - Page 18
1.5.4 PCI Express x1 slot This motherboard supports PCI Express 2.0 x1 network cards, SCSI cards, and other cards that comply with the PCI Express specifications. 1.5.5 PCI Express x16 slot This motherboard supports one PCI Express 3.0/2.0 x16 graphics cards that comply with the PCI Express - Asus A68HM-PLUS | User Guide - Page 19
RAM data. After clearing the CMOS, reinstall the battery. • You do not need to clear the RTC when the system hangs due to overclocking. For system failure due to overclocking, use the CPU GREEN 1Gbps connection LAN port ASUS A68HM Series 1-11 E9808_A68HM Series_Manual.indb 11 2014/10/16 10:09:03 - Asus A68HM-PLUS | User Guide - Page 20
module in the front panel to support a 7.1-channel audio output. 6. OS environment and after USB 3.0 driver installation. • The plugged USB Video Graphics Adapter (VGA) port. This 15-pin port is for a VGA monitor or other VGA-compatible devices. 9. DVI-D port. This port is for any DVI-D compatible - Asus A68HM-PLUS | User Guide - Page 21
inside the system may damage the motherboard components. These are not jumpers! DO NOT place jumper caps on the fan connectors. • The CPU_FAN connector supports a CPU fan of maximum 2A (24 W) fan power. • The CPU_FAN and CHA_FAN connectors support the ASUS Fan Xpert feature. 2. TPM connector (20 - Asus A68HM-PLUS | User Guide - Page 22
become unstable or may not boot up if the power is inadequate. • If you are uncertain about the minimum power supply requirement for your system, refer to the Recommended Power Supply Wattage Calculator at http://support.asus. com/PowerSupplyCalculator/PSCalculator.aspx?SLanguage=en-us for details - Asus A68HM-PLUS | User Guide - Page 23
in the BIOS to [AHCI]. 5. Digital audio connector (4-1 pin SPDIF_OUT) This connector is for an additional Sony/Philips Digital Interface (S/PDIF) port. +5V SPDIFOUT GND A68HM-E SPDIF_OUT A68HM-E Digital audio connector The S/PDIF module is purchased separately. ASUS A68HM Series E9808_A68HM - Asus A68HM-PLUS | User Guide - Page 24
panel connector (10-1 pin PANEL) This connector supports several chassis-mounted functions. F_PANEL +PWR LED- PWR BTN PWR_LED+ PWR_LEDPWR GND HDD_LED+ HDD_LED- Ground HWRST# (NC) A68HM-E PIN 1 +HDD_LED- RESET A68HM-E System panel connector • System power LED (2-pin PWR_LED) This 2-pin connector - Asus A68HM-PLUS | User Guide - Page 25
supports either motherboard high-definition audio capability. • If you want to connect a high definition front panel audio module to this connector, set the Front Panel Type item in the BIOS beeps and warnings. SPEAKER A68HM-E PIN 1 A68HM-E Speaker Out connector +5V GND GND Speaker Out ASUS A68HM - Asus A68HM-PLUS | User Guide - Page 26
supports up to 480Mbps connection speed. USB56 USB34 USB+5V USB_P5USB_P5+ GND NC USB+5V USB_P3USB_P3+ GND NC A68HM-E PIN 1 PIN 1 USB+5V USB_P6USB_P6+ GND USB+5V USB_P4USB_P4+ GND A68HM-E USB2.0 connectors Never connect a 1394 cable to the USB connectors. Doing so will damage the motherboard - Asus A68HM-PLUS | User Guide - Page 27
at www.asus.com for updates. To run the Support DVD Place the Support DVD into the optical drive. If Autorun is enabled in your computer, the DVD automatically displays the Specials screen which contains the unique features of ASUS motherboard. Click Drivers, Utilities, Make Disk, Manual, Contact - Asus A68HM-PLUS | User Guide - Page 28
1-20 E9808_A68HM Series_Manual.indb 20 Chapter 1: Product introduction 2014/10/16 10:09:05 - Asus A68HM-PLUS | User Guide - Page 29
automatically update your motherboard's driver, software and firmware Model Name: A68HM-E Version:0203 Release Date: 09/08/2014 File: A68HM-E-ASUS-0205.CAP Model Name: A68HM-E Version:0205 Release Date: 09/28/2014 C:\Users\test\Downloads\A68HM-E-ASUS-02... Click to find and select the BIOS from - Asus A68HM-PLUS | User Guide - Page 30
motherboard support DVD or a USB flash drive that contains the updated BIOS file. • Before using this utility, rename the BIOS file in the removable device into A68HME.CAP (for A68HM-E model) or A68HMK (for A68HM-K model). • The BIOS file in the support DVD may not be the latest version. Download - Asus A68HM-PLUS | User Guide - Page 31
reference only and may not be exactly the same as actually shown on your computer screen. Before updating BIOS • Prepare the motherboard support DVD and a USB flash drive. • Download the latest BIOS file and BIOS Updater from http://support.asus.com and save them in your USB flash drive. NTFS is not - Asus A68HM-PLUS | User Guide - Page 32
Please select boot device: E1: ASUS DVD-E818A6T (4069MB) USB DISK 2.0 (3824MB) UEFI: (FAT) USB DISK D:/> Updating the BIOS file To update the BIOS file: 1. On the FreeDOS prompt, type bupdater /pc /g and press . D:/> bupdater /pc /g 2. On the BIOS Updater screen, press to switch from - Asus A68HM-PLUS | User Guide - Page 33
down or reset the system while updating the BIOS to prevent system boot failure. Ensure to load the BIOS default settings to ensure system compatibility and stability. Select the Load Optimized Defaults item under the Exit BIOS menu. ASUS A68HM Series E9808_A68HM Series_Manual.indb 5 2-5 2014/10 - Asus A68HM-PLUS | User Guide - Page 34
what you see on your screen. • Visit the ASUS website at www.asus.com to download the latest BIOS file for this motherboard. • Ensure that a USB mouse is connected to your motherboard if you want to use the mouse to control the BIOS setup program. • If the system becomes unstable after changing - Asus A68HM-PLUS | User Guide - Page 35
and CPU/ motherboard temperature Sets the system date and time Selects the display language of the BIOS setup program Sets the system performance mode Selects the boot device priority Selects the boot device priority Displays the A.M.P. status Click to set Fan Tuning manually Displays the CPU - Asus A68HM-PLUS | User Guide - Page 36
ASUS EZ Mode or press F7. Quick settings bar Configuration fields Hardware information Menu bar Back button General help Submenu item Menu items Drop-down list the overclocking settings Advanced For changing the advanced system settings Monitor For displaying the system temperature, power - Asus A68HM-PLUS | User Guide - Page 37
personal space where you can easily save and access your favorite BIOS items. Adding items to My Favorites To add frequently-used BIOS items to My Favorites: 1. Use the arrow keys to SPD Information, system time and date ASUS A68HM Series E9808_A68HM Series_Manual.indb 9 2-9 2014/10/16 10:09:08 - Asus A68HM-PLUS | User Guide - Page 38
date, time, language, and security settings. • If you have forgotten your BIOS password, erase the CMOS Real Time Clock (RTC) RAM to clear the BIOS password. See section 1.6 Headers for information on how to erase the RTC RAM. • The Administrator or User Password items on top of the screen show - Asus A68HM-PLUS | User Guide - Page 39
. Incorrect field values can cause the system to malfunction. The configuration options for this section vary depending on the CPU and DIMM model you installed on the motherboard. Scroll down to display the other items. ASUS A68HM Series E9808_A68HM Series_Manual.indb 11 2-11 2014/10/16 10:09:09 - Asus A68HM-PLUS | User Guide - Page 40
you to change the settings for the CPU and other system devices. Be cautious when changing the settings of the Advanced menu items. Incorrect field values can cause the system to malfunction. 2.7 Monitor menu The Monitor menu displays the system temperature/power status, and allows you to change the - Asus A68HM-PLUS | User Guide - Page 41
2.8 Boot menu The Boot menu items allow you to change the system boot options. Scroll down to display the other items. ASUS A68HM Series E9808_A68HM Series_Manual.indb 13 2-13 2014/10/16 10:09:10 - Asus A68HM-PLUS | User Guide - Page 42
> to display the submenu. 2.10 Exit menu The Exit menu items allow you to load the optimal default values for the BIOS items, and save or discard your changes to the BIOS items. You can access the EZ Mode from the Exit menu. 2-14 E9808_A68HM Series_Manual.indb 14 Chapter 2: Getting started 2014 - Asus A68HM-PLUS | User Guide - Page 43
with manufacturer's instructions, may cause harmful graphics card is required to assure compliance with FCC regulations. Changes or modifications to this unit not expressly approved by the party responsible for compliance could void the user's authority to operate this equipment. ASUS A68HM - Asus A68HM-PLUS | User Guide - Page 44
. If this is used near a radio or television receiver in a domestic environment, it may cause radio interference. Install and use the equipment according to the instruction manual. KC: Korea Warning Statement A-2 E9808_A68HM Series_Manual.indb 2 Appendices 2014/10/16 10:09:11 - Asus A68HM-PLUS | User Guide - Page 45
ASUS REACH website at http://csr.asus.com/english/REACH.htm. DO NOT throw the motherboard placed in municipal waste. ASUS Recycling/Takeback Services ASUS recycling and takeback programs ://csr.asus.com/english/Takeback.htm for detailed recycling information in different regions. ASUS A68HM Series - Asus A68HM-PLUS | User Guide - Page 46
Way, Fremont, CA 94539, USA +1-510-739-3777 +1-510-608-4555 http://www.asus.com/us/ Technical Support General support Support fax Online support +1-812-282-2787 +1-812-284-0883 http://www.service.asus.com/ ASUS COMPUTER GmbH (Germany and Austria) Address Harkort Str. 21-23, D-40880 - Asus A68HM-PLUS | User Guide - Page 47
: ASUSTeK COMPUTER INC. 4F, No. 150, LI-TE Rd., PEITOU, TAIPEI 112, TAIWAN ASUS COMPUTER GmbH HARKORT STR. 21-23, 40880 RATINGEN GERMANY Product name : Motherboard Model name : A68HM-K, A68HM-E conform with the essential requirements of the following directives: 2004/108/EC-EMC Directive EN
-
 1
1 -
 2
2 -
 3
3 -
 4
4 -
 5
5 -
 6
6 -
 7
7 -
8
-
9
-
10
-
11
-
12
-
13
-
14
-
15
-
16
-
17
-
18
-
19
-
20
-
21
-
22
-
23
-
24
-
25
-
26
-
27
-
28
-
29
-
30
-
31
-
32
-
33
-
34
-
35
-
36
-
37
-
38
-
39
-
40
-
41
-
42
-
43
-
44
-
45
-
46
-
47
 |
 |

Motherboard
A68HM Series
E9808_A68HM Series_Manual.indb
1
2014/10/16
10:08:57