Asus EX-A320M-GAMING Users Manual English
Asus EX-A320M-GAMING Manual
 |
View all Asus EX-A320M-GAMING manuals
Add to My Manuals
Save this manual to your list of manuals |
Asus EX-A320M-GAMING manual content summary:
- Asus EX-A320M-GAMING | Users Manual English - Page 1
Motherboard EX-A320M-GAMING - Asus EX-A320M-GAMING | Users Manual English - Page 2
service will not be extended if: (1) the product is repaired, modified or altered, unless such repair, modification of alteration is authorized in writing by ASUS; or (2) the serial number of the product is defaced or missing. ASUS PROVIDES THIS MANUAL from http://support.asus.com/download problems - Asus EX-A320M-GAMING | Users Manual English - Page 3
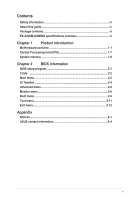
Safety information iv About this guide iv Package contents vi EX-A320M-GAMING specifications summary vi Chapter 1 Product introduction Motherboard overview 1-1 Central Processing Unit (CPU 1-7 System memory 1-9 Chapter 2 BIOS information BIOS setup program 2-1 I-Cafe ...2-2 Main menu - Asus EX-A320M-GAMING | Users Manual English - Page 4
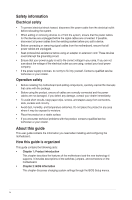
is organized This guide contains the following parts: • Chapter 1: Product introduction This chapter describes the features of the motherboard and the new technology it supports. It includes descriptions of the switches, jumpers, and connectors on the motherboard. • Chapter 2: BIOS information This - Asus EX-A320M-GAMING | Users Manual English - Page 5
to the following sources for additional information and for product and software updates. 1. ASUS websites The ASUS website provides updated information on ASUS hardware and software products. Refer to the ASUS contact information. 2. Optional documentation Your product package may include optional - Asus EX-A320M-GAMING | Users Manual English - Page 6
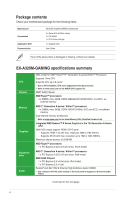
Application DVD Documentation ASUS EX-A320M-GAMING motherboard 2 x Serial ATA 6.0Gb/s cables 1 x I/O Shield 1 x M.2 screw package 1 x Support DVD User Guide If any of the above items is damaged or missing, contact your retailer. EX-A320M-GAMING specifications summary CPU Chipset Memory Graphics - Asus EX-A320M-GAMING | Users Manual English - Page 7
EX-A320M-GAMING specifications summary LAN Storage USB ASUS unique features Realtek® RTL8111H Gigabit LAN AMD Ryzen™ processors: - 1 x M.2 socket 3 with M Key, Type 2242/2260/2280/22110 (PCIE 3.0 x4 and SATA modes) storage devices support AMD 7th Generation A-series / Athlon™ processors: - 1 x M.2 - Asus EX-A320M-GAMING | Users Manual English - Page 8
EX-A320M-GAMING specifications summary Rear panel I/O ports Internal connectors BIOS features Manageability Support DVD OS support Form factor 1 x PS/2 keyboard (purple) 1 x PS/2 mouse port (green) 1 x HDMI port 1 x DVI-D port 1 x LAN (RJ-45) port 4 x USB 3.0/ 2.0 ports 2 x USB 2.0/ 1.1 ports 3 x - Asus EX-A320M-GAMING | Users Manual English - Page 9
severe damage to the motherboard, peripherals, or components. • Unplug the power cord before installing or removing the motherboard. Failure to do 6in) SATA6G_4 LAN_USB12 128Mb BIOS AIO_PUMP 15 AUDIO Realtek® 8111H 17 EX-A320M-GAMING PCIEX16 M.2(SOCKET3) 16 Super ASUS EX-A320M-GAMING 1-1 - Asus EX-A320M-GAMING | Users Manual English - Page 10
. Do not forget to connect the fan cables to the fan connectors. Insufficient air flow inside the system may damage the motherboard components. These are not jumpers! Do not place jumper caps on the fan connectors! The CPU_FAN connector supports a CPU fan of maximum 1A (12 W) fan power. ATX power - Asus EX-A320M-GAMING | Users Manual English - Page 11
TPM) Connect a Trusted Platform Module (TPM) system to this connector to enhance network security, protect digital identities, and ensure platform integrity. TPM +3VSB S_PCIRST#_TBD GND C_PCICLK_TPM +3V +3V F_CLKRUN F_SERIRQ F_FRAME# F_LAD3 F_LAD2 F_LAD1 F_LAD0 PIN 1 ASUS EX-A320M-GAMING 1-3 - Asus EX-A320M-GAMING | Users Manual English - Page 12
the Front Panel Type item in the BIOS setup to [HD Audio]. If you want to connect an AC'97 front panel audio module to this connector, set the item to [AC97]. By default, this connector is set to [HD Audio]. PCI Express 2.0 x4 slot This motherboard has one PCI Express 2.0 x4 slot that supports PCI - Asus EX-A320M-GAMING | Users Manual English - Page 13
panel connectors legacy USB devices must update their firmware for better Front Speaker Out. 6. Microphone port (pink). This port connects to a microphone. Refer to the audio configuration table for the function of the audio ports in 2.1, 4.1, 5.1, or 7.1-channel configuration. ASUS EX-A320M-GAMING - Asus EX-A320M-GAMING | Users Manual English - Page 14
with HD audio module in the front panel to support a 7.1-channel audio output. 7. USB 2.0 port. This 9-pin Universal Serial Bus 2.0 (USB 2.0) port is for a USB 2.0 device. 8. HDMI port. This port is for a High-Definition Multimedia Interface (HDMI) connector, and is HDCP compliant allowing playback - Asus EX-A320M-GAMING | Users Manual English - Page 15
in only one correct orientation. DO NOT force the CPU into the socket to prevent bending the pins and damaging the CPU! Installing the CPU 1 2 3 4 Apply the Thermal Interface Material to the CPU heatsink and CPU before you install the heatsink and fan if necessary. ASUS EX-A320M-GAMING 1-7 - Asus EX-A320M-GAMING | Users Manual English - Page 16
Installing the CPU heatsink and fan assembly Type 1 1 2 3 4 Type 2 1 2 Remove the screws and the retention module only. Do not remove the plate on the bottom. 1-8 Chapter 1: Product introduction - Asus EX-A320M-GAMING | Users Manual English - Page 17
System memory Overview This motherboard comes with four Double Data Rate 4 (DDR4) Dual Inline memory cooling system to support a full memory load (4 DIMMs). • Refer to www.asus.com for the latest Memory QVL (Qualified Vendors List) Recommended memory configurations ASUS EX-A320M-GAMING 1-9 - Asus EX-A320M-GAMING | Users Manual English - Page 18
Installing a DIMM 1 2 A To remove a DIMM A B A B 1-10 Chapter 1: Product introduction - Asus EX-A320M-GAMING | Users Manual English - Page 19
fails to boot after changing any BIOS setting, try to clear the CMOS and reset the motherboard to the default value. See section Motherboard overview for information on how to erase the RTC RAM. BIOS menu screen The BIOS setup program can be used under the Advanced Mode. 2-1 ASUS EX-A320M-GAMING - Asus EX-A320M-GAMING | Users Manual English - Page 20
you to select the desired additional POST waiting time to easily enter the BIOS setup. You can only execute the POST delay time during Normal Boot. The ASUS EZ Flash 3 Utility Allows you to run ASUS EZ Flash 3. Press [Enter] to launch the ASUS EZ Flash 3 screen. Chapter 2: BIOS information 2-2 - Asus EX-A320M-GAMING | Users Manual English - Page 21
Clock (RTC) RAM to clear the BIOS password. See section 1Motherboard overview for information on how to erase the RTC RAM. • The Administrator or User Password items on top of the screen show the default Not Installed. After you set a password, these items show Installed. 2-3 ASUS EX-A320M-GAMING - Asus EX-A320M-GAMING | Users Manual English - Page 22
values can cause the system to malfunction Ai Overclock Tuner Allows you to select the CPU overclocking options to achieve the desired CPU internal frequency. Configuration options: Memory Frequency This item to enable or disable the EPU power saving function. Chapter 2: BIOS information 2-4 - Asus EX-A320M-GAMING | Users Manual English - Page 23
voltage fed to the CPU cores. Increase the voltage when setting a high Core Frequency value. VDDCR SOC Voltage Allows you to set the VDDCR SOC Voltage. Configuration options: [Auto] [Manual] [Offset]. DRAM Voltage voltage. Use the and keys to adjust the value. 2-5 ASUS EX-A320M-GAMING - Asus EX-A320M-GAMING | Users Manual English - Page 24
the TPM device. You can select the Firmware TPM to enable the AMD CPU fTPM or select Discrete TPM to disable the AMD CPU fTPM. CPU Configuration The items in this menu show the CPU-related information that the BIOS automatically detects. NB Configuration The items in this menu allow you to adjust - Asus EX-A320M-GAMING | Users Manual English - Page 25
This menu displays the SMART information of the connected devices. USB Configuration The items in this menu allow you to change the USB-related features. 2-7 ASUS EX-A320M-GAMING - Asus EX-A320M-GAMING | Users Manual English - Page 26
and allows you to change the fan settings. CPU/ MB Temperature The onboard hardware monitor automatically detects and displays the CPU and motherboard temperatures. Select [Ignore] if you do not The subitems in this menu allows you to configure the Q-Fan features. Chapter 2: BIOS information 2-8 - Asus EX-A320M-GAMING | Users Manual English - Page 27
sequence. Interrupt 19 Capture This item allows you to trap Interrupt 19 by the option ROMs. Setup Mode Allows you to select the setup mode. 2-9 ASUS EX-A320M-GAMING - Asus EX-A320M-GAMING | Users Manual English - Page 28
installed in the system. • To access Windows® OS in Safe Mode, press after POST (Windows® 8 not supported). • To select the boot device during system startup, press when ASUS Logo appears. Boot Override These items displays the available devices. The number of device items that appears on - Asus EX-A320M-GAMING | Users Manual English - Page 29
items show Not assigned if no profile is created. ASUS SPD Information DIMM Slot number [DIMM_A1] Displays the Serial Presence Detect (SPD) information of the DIMM module installed on the selected slot. Configuration options: [DIMM_A1] [DIMM_A2] [DIMM_B1] [DIMM_B2] 2-11 ASUS EX-A320M-GAMING - Asus EX-A320M-GAMING | Users Manual English - Page 30
Exit menu The Exit menu items allow you to load the optimal default values for the BIOS items, and save or discard your changes to the BIOS items. Load Optimized Defaults This option allows you to load the default values for each of the parameters on the Setup menus. When you select - Asus EX-A320M-GAMING | Users Manual English - Page 31
radiate radio frequency energy and, if not installed and used in accordance with manufacturer's instructions, may cause harmful interference to radio communications. However, there is no guarantee that compliance could void the user's authority to operate this equipment. ASUS EX-A320M-GAMING A-1 - Asus EX-A320M-GAMING | Users Manual English - Page 32
Compliance Statement of Innovation, Science and Economic Development Canada (ISED) This Class B digital apparatus complies with Canadian ICES-003, RSS-210, and CAN ICES3(B)/NMB-3(B). This device complies with Industry Canada license exempt RSS standard(s). Operation is subject to the following two - Asus EX-A320M-GAMING | Users Manual English - Page 33
in our products at ASUS REACH website at http://csr.asus.com/english/REACH.htm. DO NOT throw the motherboard in municipal waste. should not be placed in municipal waste. ASUS Recycling/Takeback Services ASUS recycling and takeback programs come from our commitment License. ASUS EX-A320M-GAMING A-3 - Asus EX-A320M-GAMING | Users Manual English - Page 34
con le direttive correlate. Il testo completo della dichiarazione di conformità UE è disponibile all'indirizzo: www.asus.com/support ASUS www.asus.com/support ASUSTeK Computer Inc www.asus.com/support Hrvatski ASUSTeK Computer Inc. ovim izjavljuje da je ovaj uređaj sukladan s bitnim zahtjevima - Asus EX-A320M-GAMING | Users Manual English - Page 35
Harkort Str. 21-23, 40880 Ratingen, Germany Fax +49-2102-959931 Web site http://www.asus.com/de Online contact http://eu-rma.asus.com/sales Technical Support Telephone +49-2102-5789555 Support Fax +49-2102-959911 Online support http://qr.asus.com/techserv ASUS EX-A320M-GAMING A-5 - Asus EX-A320M-GAMING | Users Manual English - Page 36
2 Section 2. 1077(a) Responsible Party Name: Asus Computer International Address: 800 Corporate Way, Fremont, CA 94539. Phone/Fax No: (510)739-3777/(510)608-4555 hereby declares that the product Product Name : Motherboard Model Number : EX-A320M-GAMING Conforms to the following specifications: FCC
-
 1
1 -
 2
2 -
 3
3 -
 4
4 -
 5
5 -
 6
6 -
 7
7 -
8
-
9
-
10
-
11
-
12
-
13
-
14
-
15
-
16
-
17
-
18
-
19
-
20
-
21
-
22
-
23
-
24
-
25
-
26
-
27
-
28
-
29
-
30
-
31
-
32
-
33
-
34
-
35
-
36
 |
 |

Motherboard
EX-A320M-GAMING