Asus Eee PC 1101HA User Manual
Asus Eee PC 1101HA Manual
 |
View all Asus Eee PC 1101HA manuals
Add to My Manuals
Save this manual to your list of manuals |
Asus Eee PC 1101HA manual content summary:
- Asus Eee PC 1101HA | User Manual - Page 1
E4982 Eee PC User Manual Windows® XP Edition Eee PC 1101 Series 15G06Q164001 - Asus Eee PC 1101HA | User Manual - Page 2
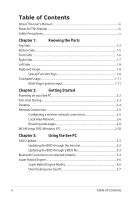
Browsing web pages 2-9 WLAN Setup FAQ (Windows XP 2-10 Chapter 3: Using the Eee PC ASUS Update...3-2 Updating the BIOS through the Internet 3-2 Updating the BIOS through a BIOS file 3-3 Bluetooth Connection (on selected models 3-4 Super Hybrid Engine...3-6 Super Hybrid Engine Modes - Asus Eee PC 1101HA | User Manual - Page 3
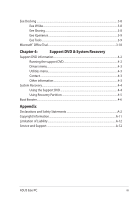
menu...4-3 Contact...4-3 Other information 4-3 System Recovery...4-4 Using the Support DVD 4-4 Using Recovery Partition 4-5 Boot Booster...4-6 Appendix Declarations and Safety Statements A-2 Copyright Information...A-11 Limitation of Liability...A-12 Service and Support...A-12 ASUS Eee - Asus Eee PC 1101HA | User Manual - Page 4
major sections of this User's Manual: 1. Knowing the Parts Provides information on the Eee PC's components. 2. Getting Started Provides information on getting started with the Eee PC. 3. Using the Eee PC Provides information on using the Eee PC's utilities. 4. Support DVD and System Recovery Gives - Asus Eee PC 1101HA | User Manual - Page 5
Safety Precautions The following safety precautions will increase the life of the Eee PC. Follow all precautions and instructions. Except as described in this manual, refer all servicing to qualified personnel. Do not use damaged power cords, accessories, or other peripherals. Do not use strong - Asus Eee PC 1101HA | User Manual - Page 6
is powered ON with any materials that will reduce air circulation such as a carrying bag. Incorrect installation of battery may cause explosion and damage the Eee PC. DO NOT throw the Eee PC in municipal waste. This product has been designed to enable proper reuse of parts and recycling.The symbol - Asus Eee PC 1101HA | User Manual - Page 7
. Be aware that it takes much longer to charge the battery pack when the Eee PC is in use. Remember to fully charge the battery (8 hours or more) before first use and whenever it is depleted to prolong battery life.The battery reaches its maximmum capacity after a few full charging and discharging - Asus Eee PC 1101HA | User Manual - Page 8
viii Table of Contents - Asus Eee PC 1101HA | User Manual - Page 9
Top Side Bottom Side Front Side Right Side Left Side Keyboard Usage Touchpad Usage 1 Knowing the Parts - Asus Eee PC 1101HA | User Manual - Page 10
Top Side Refer to the illustration below to identify the components on this side of the Eee PC. The top side may vary in appearance depending on models. 1 2 3 4 5 6 7 8 The keyboard differs for each territory. 1-2 Chapter 1: Knowing the Parts - Asus Eee PC 1101HA | User Manual - Page 11
device that provides the same functions as a desktop mouse. 8 Status Indicators Power Indicator The power indicator lights when the Eee PC is turned ON and blinks slowly when the Eee PC is in the Save-to-RAM (Suspend) mode. This indicator is OFF when the Eee PC is turned OFF. ASUS Eee PC 1-3 - Asus Eee PC 1101HA | User Manual - Page 12
%) Green ON Medium battery power (11%-94%) Orange ON Low battery power (0%-10%) Orange Blinking Without Adapter Off Off Off Hard Disk Drive (HDD) Indicator The hard disk drive indicator blinks when data is written to or read from the disk drive. Wireless/Bluetooth Indicator This is only - Asus Eee PC 1101HA | User Manual - Page 13
OF THE BODY TO AVOID INJURY FROM THE HEAT. 1 Battery Lock - Spring The spring battery lock keeps the battery pack secure. When the battery pack is inserted, it will automatically lock. When removing the battery pack, this spring lock must be retained in the unlocked position. ASUS Eee PC 1-5 - Asus Eee PC 1101HA | User Manual - Page 14
time varies by usage and by the specifications for this Eee PC.The battery pack cannot be disassembled and must be purchased as a single unit. 3 Battery Lock - Manual The manual battery lock is used to keep the battery pack secured. Move the manual lock to the unlocked position to insert - Asus Eee PC 1101HA | User Manual - Page 15
1.1) and 480Mbits/sec (USB 2.0). Also, the USB supports hot-swapping function. 5 LAN Port The eight-pin RJ-45 LAN port (10/100M bit) supports a standard Ethernet cable for connection to a local network. The built-in connector allows convenient use without additional adapters. ASUS Eee PC 1-7 - Asus Eee PC 1101HA | User Manual - Page 16
damage to the Eee PC and battery pack, always use the supplied power adapter. THE ADAPTER MAY BECOME WARM TO HOT WHEN IN USE. BE SURE NOT TO COVER THE ADAPTER AND KEEP IT AWAY FROM YOUR BODY. 2 Display (Monitor) Output The 15-pin D-sub monitor port supports a standard VGAcompatible device - Asus Eee PC 1101HA | User Manual - Page 17
. Follow the icons whenever your hot key locations do not match the manual. Zz Icon (F1): Places the Eee PC in suspend mode (Save-to-RAM). Radio Tower (F2) (Wireless Models Only):Toggles the internal wireless LAN or Bluetooth (on selected models) ON or OFF with an on-screen-display. When - Asus Eee PC 1101HA | User Manual - Page 18
the pointer to the beginning of the line. End (→): Press to move the pointer to the end of the line. Windows icon: Displays the start menu. Menu with pointer icon : Activates the properties menu and is equivalent to right-clicking the touchpad/mouse on an object. 1-10 Chapter 1: Knowing the Parts - Asus Eee PC 1101HA | User Manual - Page 19
apart or together on the touchpad to zoom in or zoom out. This is convenient when viewing photos or reading documents. Zoom in Zoom out ASUS Eee PC 1-11 - Asus Eee PC 1101HA | User Manual - Page 20
1-12 Chapter 1: Knowing the Parts - Asus Eee PC 1101HA | User Manual - Page 21
Powering on your Eee PC First-time Startup Desktop Network Connection 2 Getting Started - Asus Eee PC 1101HA | User Manual - Page 22
panel, do not force it down to the table or else the hinges may break! Never lift the Eee PC by the display panel! • Only use battery packs and power adapters supplied with this Eee PC or specifically approved by the manufacturer or retailer for use with this model or else damage may occur to the - Asus Eee PC 1101HA | User Manual - Page 23
time you start your Eee PC, the Windows wizard will launch automatically and lead you through setting up your preferences and some basic information. Follow the wizard instructions to finish the initialization user license agreement and click Yes, I accept. Click Next to continue. ASUS Eee PC 2-3 - Asus Eee PC 1101HA | User Manual - Page 24
5. Click Help protect my PC by turning on Automatic Updates now to get the latest important updates and click Next to continue. 6. Type your computer's name in the Computer name box and click Next to continue. 7. Follow the onscreen instructions to register with Microsoft and finish the - Asus Eee PC 1101HA | User Manual - Page 25
can see the wireless network icon in the Notification area. The wireless connection icon disappears when you Press + ( + ) to disable the WLAN function. ASUS Eee PC 2-5 - Asus Eee PC 1101HA | User Manual - Page 26
Local Area Network To establish a wired network, follow the instructions below: Using a dynamic IP: 1. Right-click the network icon with a yellow warning triangle on the Windows® taskbar and select Open Network Connections. 2. Right-click Local - Asus Eee PC 1101HA | User Manual - Page 27
5. Click Create a new connection to start the New Connection Wizard. 6. Click Next. 7. Select Connect to the Internet and click Next. 8. Select Set up my connection manually. 9. Select your connection type and click Next. 10. Enter your ISP Name and click Next. ASUS Eee PC 2-7 - Asus Eee PC 1101HA | User Manual - Page 28
11. Enter your User name and Password. Click Next. 12 Click Finish to finish the configuration. 13. Enter your user name and password. Click Connect to connect to the Internet. 2-8 Chapter 2: Getting Started - Asus Eee PC 1101HA | User Manual - Page 29
Subnet mask and Gateway from your service provider. 4. If Service Provider (ISP) if you have problems connecting to the network. Browsing web pages After you finish the network setup, click Internet Explorer on the desktop and start enjoying net surfing. Visit our Eee PC homepage (http://eeepc.asus - Asus Eee PC 1101HA | User Manual - Page 30
instructions in the manual and fail to build a wireless network connection successfully, refer to the frequently asked questions below for quick solutions to your problems my USB 3G wireless data card/wireless router compatible with Eee PC Windows XP OS? Contact the wireless card/router manufacturer - Asus Eee PC 1101HA | User Manual - Page 31
ASUS Update Bluetooth Connection Super Hybrid Engine Eee Docking Microsoft® Office Trial 3 Using the Eee PC - Asus Eee PC 1101HA | User Manual - Page 32
the BIOS version information. This utility is pre-loaded in your Eee PC and is also available in the support DVD that comes with the Eee PC package. ASUS Update requires an Internet connection either through a network or an Internet Service Provider (ISP). Updating the BIOS through the Internet To - Asus Eee PC 1101HA | User Manual - Page 33
> ASUS > ASUSUpdate for EeePC> ASUSUpdate. The ASUS Update main window appears. 2. Select Update BIOS from file from the drop‑down menu, then click Next. 3. Locate the BIOS file from the Open window, then click Open. 4. Follow the screen instructions to complete the update process. ASUS Eee PC 3-3 - Asus Eee PC 1101HA | User Manual - Page 34
the desktop and follow the onscreen instructions to finish initialization. Click Next to continue. 3. Name your Eee PC and select the device type. Click Next to continue. 4. To decide the Bluetooth services this device offers, click Next to continue. 5. Select the service you would like to offer - Asus Eee PC 1101HA | User Manual - Page 35
interested in from the list and have been created on the My click Next to continue. Bluetooth Places screen of Windows Explorer. Click Ok to continue. 11. Click Skip to set up connection 11. Click Finish to complete later and continue. the initial bluetooth configuration. ASUS Eee PC 3-5 - Asus Eee PC 1101HA | User Manual - Page 36
. The power saving modes control many aspects of your Eee PC to maximize performance versus battery time.The selected mode is shown on the display. To change the power mode • Click Start > All Programs > ASUS > - Asus Eee PC 1101HA | User Manual - Page 37
the BIOS setup by doing the instruction above, restart the system and try Eee PC. The most stable overclock value of your Eee PC varies with hardware differences. If system instability occurs due to high overclocking settings, adjust the SHE Overclock Value item to a lower setting. ASUS Eee PC - Asus Eee PC 1101HA | User Manual - Page 38
multimedia enjoyment online. Refer to the Help file in each function for more detiled instructions. Eee Sharing Data Sync Data Sync allows you to easily synchronize the data on your Eee PC with another PC (station PC) at home or in the office under the same network segment. EzMessenger EzMessenger - Asus Eee PC 1101HA | User Manual - Page 39
PC screen. Easy Mode (on selected models) Easy Mode categorizes multiple commonly used functions into Favorite, Internet, Work, Learn, Play, and Setting, helping you find the functions easier and quicker. Settings Allows you to configure detail settings of the Eee Docking Touch tool bar. ASUS Eee - Asus Eee PC 1101HA | User Manual - Page 40
can enjoy Microsoft Office Suite free trial for 60 days. Do the following instructions to start the free trial. 1. Ensure that your Eee PC is connected to the Internet and doubleclick Microsoft Office 60 Day Trial - Online on the desktop. 2. Click TRY NOW. 3. Enter your E-mail address and click - Asus Eee PC 1101HA | User Manual - Page 41
Support DVD information System Recovery Boot Booster 4 Support DVD & System Recovery - Asus Eee PC 1101HA | User Manual - Page 42
can install to avail all the features. Running the support DVD Insert the support DVD in the external optical drive.The DVD automatically displays the Drivers menu if Autorun is enabled in your computer. Click an icon to display support DVD/ Eee PC information Click an item to install If Autorun is - Asus Eee PC 1101HA | User Manual - Page 43
detects installed devices. Install the necessary drivers to activate the devices. Utilities menu The Utilities menu shows the applications that the Eee PC supports. Contact Click the Contact tab to display the ASUS contact information. Other information The icons on the top right corner of the - Asus Eee PC 1101HA | User Manual - Page 44
to a network drive and make note of any customized configuration settings (such as network settings). 1. Connect an external optical drive to your Eee PC and insert the Support DVD into the optical drive (System needs to be powered ON). 2. Press on bootup and the Please select boot device - Asus Eee PC 1101HA | User Manual - Page 45
the system recovery is completed, eject the the Support DVD from the optical drive and click OK to restart the Eee PC. Using Recovery Partition About the Recovery Partition The system recovery automatically and follow the onscreen instructions to complete the recovery process. ASUS Eee PC 4-5 - Asus Eee PC 1101HA | User Manual - Page 46
Eee PC components or perform system recovery (from USB flash disk, external optical drive or hidden partition). Follow the instructions or enter the BIOS setup by doing the instruction above, restart the system and try pressing < restart Eee PC. Remember to enable Boot Booster after you - Asus Eee PC 1101HA | User Manual - Page 47
Declarations and Safety Statements Copyright Information Limitation of Liability Service and Support A Appendix - Asus Eee PC 1101HA | User Manual - Page 48
installation.This equipment generates, uses, and can radiate radio frequency energy and, if not installed and used in accordance with the instructions, may cause harmful interference to radio communications. However, there is no guarantee that interference will not occur in a particular installation - Asus Eee PC 1101HA | User Manual - Page 49
manufacture declares that this device is limited to Channels 1 through 11 in the 2.4GHz frequency by specified firmware controlled in the . The measured SAR levels evaluated are incompliance with the FCC RF exposure guidelines. Eee PC 1101 Series Max. SAR Measurement (1g) AR5B95 (AW-NE785H) 802.11b: - Asus Eee PC 1101HA | User Manual - Page 50
transmitting antenna during transmitting. End users must follow the specific operating instructions for satisfying RF exposure compliance. Operation is subject to of the device. To prevent radio interference to the licensed service (i.e. co-channel Mobile Satellite systems) this device is intended - Asus Eee PC 1101HA | User Manual - Page 51
Eee PC 1101 Series Max. SAR Measurement (1g) AR5B95 (AW-NE785H) 802.11b: 0.091W/Kg 802.11g: 0.084W/kg 802.11n 20MHz: 0.090W/kg 802.11n This Class [B] digital apparatus complies with Canadian ICES-003. Cet appareil numérique de la classe [B] est conforme à la norme NMB-003 du Canada ASUS Eee PC A-5 - Asus Eee PC 1101HA | User Manual - Page 52
the 2400-2483.5 MHz band is permitted with an EIRP of less than 100mW indoors and less than 10mW outdoors: 01 Ain 05 Hautes Alpes 11 Aude 24 Dordogne 32 Gers 41 Loir et Cher 55 Meuse 60 Oise 64 Pyrénées Atlantique 02 Aisne 03 Allier 08 Ardennes 09 Ari - Asus Eee PC 1101HA | User Manual - Page 53
, for example, near a bath tub, wash bowl, kitchen sink or laundry tub, in a wet basement or near a swimming pool. • DO NOT use the Eee PC during an electrical storm. There may be a remote risk of electric shock from lightning. • DO NOT use the Eee PC in the vicinity of a gas leak. ASUS Eee PC A-7 - Asus Eee PC 1101HA | User Manual - Page 54
reaction. • Do not dispose the Eee PC battery pack in a fire, as they may explode. Check with local codes for possible special disposal instructions to reduce the risk of injury the chemical substances in our products at ASUS REACH website at http:// green.asus.com/english/REACH.htm. A-8 Appendix - Asus Eee PC 1101HA | User Manual - Page 55
. Kassera använt batteri enligt fabrikantens instruktion. (Swedish) VAROITUS! Paristo voi räjähtää, jos se on virheellisesti asennettu. Vaihda paristo ainoastaan laitevalmistajan sousittelemaan tyyppiin. Hävitä käytetty paristo valmistagan ohjeiden mukaisesti. (Finnish) ASUS Eee PC A-9 - Asus Eee PC 1101HA | User Manual - Page 56
type ou d'un type équivalent recommandé par le constructeur. Mettre au rebut les batteries usagées conformément aux instructions du fabricant. (French) ADVARSEL! Eksplosjonsfare ved feilaktig skifte av batteri. Benytt samme batteritype eller en tilsvarende type anbefalt av apparatfabrikanten. Brukte - Asus Eee PC 1101HA | User Manual - Page 57
SPECIFICATIONS AND INFORMATION CONTAINED IN THIS MANUAL ASUS. ASUS ASSUMES NO RESPONSIBILITY OR LIABILITY FOR ANY ERRORS OR INACCURACIES THAT MAY APPEAR IN THIS MANUAL, INCLUDING THE PRODUCTS AND SOFTWARE DESCRIBED IN IT. Copyright © 2009 ASUSTeK COMPUTER INC. All Rights Reserved. ASUS Eee PC A-11 - Asus Eee PC 1101HA | User Manual - Page 58
CONSEQUENTIAL DAMAGES (INCLUDING LOST PROFITS OR SAVINGS), EVEN IF ASUS, ITS SUPPLIERS OR YOUR RESELLER IS INFORMED OF THEIR POSSIBILITY. Service and Support Visit our multi-language web site at http://support.asus.com Manufacturer Address, City Country Authorized Representative in Europe Address
-
 1
1 -
 2
2 -
 3
3 -
 4
4 -
 5
5 -
 6
6 -
 7
7 -
8
-
9
-
10
-
11
-
12
-
13
-
14
-
15
-
16
-
17
-
18
-
19
-
20
-
21
-
22
-
23
-
24
-
25
-
26
-
27
-
28
-
29
-
30
-
31
-
32
-
33
-
34
-
35
-
36
-
37
-
38
-
39
-
40
-
41
-
42
-
43
-
44
-
45
-
46
-
47
-
48
-
49
-
50
-
51
-
52
-
53
-
54
-
55
-
56
-
57
-
58
 |
 |
Eee PC
User Manual
Windows
®
XP Edition
Eee PC 1101 Series
E4982
15G06Q164001