Asus F1 Series User Guide
Asus F1 Manual
 |
View all Asus F1 manuals
Add to My Manuals
Save this manual to your list of manuals |
Asus F1 manual content summary:
- Asus F1 | Series User Guide - Page 1
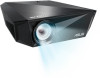
LED projector E-Manual F1 Series THRO W EN S 0.8:1 S HO R - Asus F1 | Series User Guide - Page 2
, OR INDIRECT DAMAGES OR FOR ANY ECONOMIC CONSEQUENTIAL DAMAGES (INCLUDING LOST PROFITS OR SAVINGS), EVEN IF ASUS, ITS SUPPLIERS OR YOUR RESELLER IS INFORMED OF THEIR POSSIBILITY. SERVICE AND SUPPORT Visit our multi-language web site at https://www.asus.com/support 2 LED projector E-Manual - Asus F1 | Series User Guide - Page 3
Contents About this manual 5 Conventions used in this manual 6 Typography...6 Multi-language versions 6 Safety precautions 7 Using your LED projector 7 Servicing and replacement of parts 7 Caring for your LED projector 8 Proper disposal 8 Chapter 1: Knowing your LED projector Features...10 - Asus F1 | Series User Guide - Page 4
47 Appendices Federal Communications Commission Statement 50 Regional notice for California 51 Global Environmental Regulation Compliance and Declaration ..52 ASUS Recycling/Takeback Services 52 Specifications for F1 series LED projector 53 Supported PC Timings 56 4 LED projector E-Manual - Asus F1 | Series User Guide - Page 5
About this manual This manual provides information about the hardware and software features of your LED projector through the following chapters: Chapter 1: Knowing your LED Projector This chapter details the parts of your LED projector and its accompanying remote control. Chapter 2: Setting up This - Asus F1 | Series User Guide - Page 6
. Typography Bold = This indicates a menu or an item that must be selected. Italic = This indicates sections that you can refer to in this manual. Multi-language versions Download other language versions of this E-Manual via this website: https://www.asus.com/support 6 LED projector E-Manual - Asus F1 | Series User Guide - Page 7
parts • Do not disassemble or attempt to service this LED projector by yourself. Contact your local ASUS service center for assistance. • When replacing parts of your LED projector, purchase items as specified by ASUS and contact your local service center for assistance. LED projector E-Manual 7 - Asus F1 | Series User Guide - Page 8
(2) hours after an extreme or sudden change in temperature occurs. Proper disposal Do not throw your LED projector in municipal waste. This product has been designed to enable proper reuse of parts and recycling. The that the battery should not be placed in municipal waste. 8 LED projector E-Manual - Asus F1 | Series User Guide - Page 9
Chapter 1: Knowing your LED projector Chapter 1: Knowing your LED projector LED projector E-Manual 9 - Asus F1 | Series User Guide - Page 10
Features Top view 10 LED projector E-Manual - Asus F1 | Series User Guide - Page 11
projector settings as indicated below. Open main menu / OK Adjust focus Adjust volume (push center) (move up or down) (move left or right) NOTE: For more information on using your LED projector's settings, refer to the Using the onscreen display menu section in this manual. LED projector E-Manual - Asus F1 | Series User Guide - Page 12
RO W ENS Lens cover The lens cover protects the lens from scratches and possible dirt build-up. IMPORTANT! Remove the lens cover before using your LED projector. Lens The lens projects video or image files onscreen from your input device. WARNING! Do not touch the lens using your hands or any sharp - Asus F1 | Series User Guide - Page 13
ports are for the HDMI (High-Definition Multimedia Interface) connectors. These port are HDCP compliant for HD DVD, Blu-ray, and other protected content playback. LED projector E-Manual 13 - Asus F1 | Series User Guide - Page 14
to amplified speakers or headphones. Left side Air vents The air vents allow cool air to enter and warm air to exit your LED projector. WARNING! Ensure that paper, books, clothing, cables, or other objects do not block any of the air vents or else overheating may occur. 14 LED projector E-Manual - Asus F1 | Series User Guide - Page 15
® compatible LED projector security products. Air vents The air vents allow cool air to enter and warm air to exit your LED projector. WARNING! Ensure that paper, books, clothing, cables, or other objects do not block any of the air vents or else overheating may occur. LED projector E-Manual 15 - Asus F1 | Series User Guide - Page 16
with a built-in stand that allows you to adjust the height of the projector by either 5.7 degrees or 8.2 degrees. Ceiling mount holes Use these holes to connect the LED projector to a ceiling mount. Tripod socket Connect the LED projector to a tripod using this socket. 16 LED projector E-Manual - Asus F1 | Series User Guide - Page 17
several lighting schemes for you to customize your LED projector. NOTE: For more details on customizing the AURA RGB LED, refer to the Using the onscreen display menu section in this manual. Mounting your LED projector Aside from using the LED projector as a tabletop device, you can also mount it - Asus F1 | Series User Guide - Page 18
Ceiling or Rear Ceiling to change the settings of your LED projector. Ceiling mount hole details IMPORTANT! Ensure that the washers included in the ceiling mount kit are placed between the ceiling mount and screw to protect your LED projector and stabilize its position. 18 LED projector E-Manual - Asus F1 | Series User Guide - Page 19
on model. Battery compartment The battery compartment allows you to use CR2032 lithium coin batteries to power your LED projector's remote control. NOTE: For more details on using the battery compartment, refer to the Replacing the battery section in this manual. LED projector E-Manual 19 - Asus F1 | Series User Guide - Page 20
Press this button to go back to the / previous screen or select a Splendid mode for your LED projector. Keystone - Press this button to adjust the keystone of your projection onscreen. Input - Press this refer to the Using the onscreen display menu section in this manual. 20 LED projector E-Manual - Asus F1 | Series User Guide - Page 21
Replacing the battery A. Slide the battery cover down and remove it completely. B. Remove the old batteries. LED projector E-Manual 21 - Asus F1 | Series User Guide - Page 22
C. Insert the new CR2032 lithium coin batteries with the positive sides (+) facing up. D. Slide the battery cover up all the way in until you hear a soft click, indicating that the battery cover is locked back in place. 22 LED projector E-Manual - Asus F1 | Series User Guide - Page 23
should not exceed 8 meters (about 26 feet). NOTE: Ensure sure that there are no obstacles between the remote control and the remote sensor on your LED projector. ±30 degrees LED projector E-Manual 23 - Asus F1 | Series User Guide - Page 24
24 LED projector E-Manual - Asus F1 | Series User Guide - Page 25
Chapter 2: Setting up Chapter 2: Setting up LED projector E-Manual 25 - Asus F1 | Series User Guide - Page 26
unit, refer to the following steps when operating your LED projector. Connect the LED projector to the power adapter A. Connect the AC/DC power cord to a power source. C. Connect the DC power connector to your LED projector. Power adapter information: - Input voltage: 100-240Vac - Input frequency: - Asus F1 | Series User Guide - Page 27
your current location. IMPORTANT! Contact your sales dealer if the AC power cord bundled with your LED projector does not match your local power source. NOTE: We highly recommend that you use a video China For U.S.A., Canada, and Taiwan For Continental Europe For U.K. LED projector E-Manual 27 - Asus F1 | Series User Guide - Page 28
Connect the LED projector to your device A. Audio output jack 28 LED projector E-Manual - Asus F1 | Series User Guide - Page 29
B. HDMI LED projector E-Manual 29 - Asus F1 | Series User Guide - Page 30
C. Power output (5V/2A) 30 LED projector E-Manual - Asus F1 | Series User Guide - Page 31
D. VGA LED projector E-Manual 31 - Asus F1 | Series User Guide - Page 32
inside the projector bag. NOTES: • Place the LED projector on a stable flat surface. • Keep a space of 30 cm or more between the sides of the LED projector. • Consult your dealer for special installation procedures like suspending the LED projector from the ceiling. 32 LED projector E-Manual - Asus F1 | Series User Guide - Page 33
Screen size and projection distance table Adjust the LED projector's distance from the screen using the table below. LED projector Screen size Projection distance Screen Diagonal inch cm Screen Size Width Height 2.83 210" 533.4 178.08 452.32 111.30 282.7 12.14 3.70 LED projector E-Manual 33 - Asus F1 | Series User Guide - Page 34
Press the power button 34 LED projector E-Manual - Asus F1 | Series User Guide - Page 35
Adjust the image focus Push the focus button on the LED projector up or down, or press the focus button on the remote control to adjust the image focus. NOTE: Use a still image when adjusting the onscreen display. OR LED projector E-Manual 35 - Asus F1 | Series User Guide - Page 36
36 LED projector E-Manual - Asus F1 | Series User Guide - Page 37
Chapter 3: Using the onscreen display menu Chapter 3: Using the onscreen display menu LED projector E-Manual 37 - Asus F1 | Series User Guide - Page 38
center of the joystick to set this language for use on your LED projector. 4. You may now start using your LED projector to display files from your input device. The NO SIGNAL screen may appear if no input device is connected or cannot be detected by the LED projector. 38 LED projector E-Manual - Asus F1 | Series User Guide - Page 39
Adjusting your LED projector's settings To adjust your LED projector settings: 1. Press the center of the joystick on your LED projector (or press the Menu/OK button on your remote control) to launch the and go back to the home screen. Remote control buttons Joystick LED projector E-Manual 39 - Asus F1 | Series User Guide - Page 40
. • Tint - Select this menu option to adjust the tint of your projection onscreen. • Splendid - This option allows you to select a Splendid mode for your LED projector. • Color Temperature - This option allows you to adjust the color temperature of your LED projector. 40 LED projector E-Manual - Asus F1 | Series User Guide - Page 41
you to change the way your projections are oriented onscreen based from the current location of your LED projector. • Auto Ceiling Rotation - This option allows you to turn Auto Ceiling detection on or off menu option to adjust the screen ratio of your projection onscreen. LED projector E-Manual 41 - Asus F1 | Series User Guide - Page 42
Auto Source on or off. Turn this option on to scan the connected devices to your LED projector automatically. • VGA/PC - Select this menu option to project images from the VGA this menu option to wirelessly project images from a supported Android or Windows® 10 device. 42 LED projector E-Manual - Asus F1 | Series User Guide - Page 43
minutes before your LED projector automatically shuts down when not in use. • AURA RGB - Select this menu option to adjust the AURA RGB LED of your projector. • Language - This option allows you to select the language to use on your LED projector's onscreen display menu. LED projector E-Manual 43 - Asus F1 | Series User Guide - Page 44
overview of information about your LED projector. • Reset all - This option allows you to reset all the settings you have currently set up for your LED projector. NOTE: Please wait for at least eight (8) seconds for the reset process to complete, then reselect a language. 44 LED projector E-Manual - Asus F1 | Series User Guide - Page 45
Turning off your LED projector 1. Press the power button. 2. When the following screen appears, press the power button again to completely turn off your LED projector. LED projector E-Manual 45 - Asus F1 | Series User Guide - Page 46
Using 3D glasses Your LED projector supports 3D technology for an enhanced viewing experience. IMPORTANT! Purchase DLP Link 3D glasses. Your 3D files must be compatible with the 3D format. NOTE: For more details on viewing 3D files, refer to the user guide that comes with your 3D glasses. To view 3D - Asus F1 | Series User Guide - Page 47
Multi-language versions Download other language versions of this E-Manual via this website: https://www.asus.com/support LED projector E-Manual 47 - Asus F1 | Series User Guide - Page 48
48 LED projector E-Manual - Asus F1 | Series User Guide - Page 49
AAppppeennddiicceess Appendices LED projector E-Manual 49 - Asus F1 | Series User Guide - Page 50
radiate radio frequency energy and, if not installed and used in accordance with the instructions, may cause harmful interference to radio communications. However, there is no guarantee that 2. This device must accept any interference that may cause undesired operation. 50 LED projector E-Manual - Asus F1 | Series User Guide - Page 51
si le brouillage est susceptible d'en compromettre le fonctionnement. CAN ICES-3(B)/NMB-3(B) Regional notice for California WARNING Cancer and Reproductive Harm www.P65Warnings.ca.gov LED projector E-Manual 51 - Asus F1 | Series User Guide - Page 52
regulation requirements ASUS is complied with: Japan JIS-C-0950 Material Declarations EU REACH SVHC Korea RoHS ASUS Recycling/Takeback Services ASUS recycling . Please go to http://csr.asus.com/english/Takeback.htm for detailed recycling information in different regions. 52 LED projector E-Manual - Asus F1 | Series User Guide - Page 53
Specifications for F1 series LED projector Display Projection Lens Video Features Audio Features F1 Display Technology 0.47" DLP® Light Source R/G/B LED Light Source Life 30 + 8W (Woofer) 2.1 Channel speaker with Harman Kardon®certified (continued on the next page) LED projector E-Manual 53 - Asus F1 | Series User Guide - Page 54
F1 Signal Analog Signal Frequency Supporting Stand Yes (Two steps) Ceiling Mount Yes Lens Cover Yes Security Kensington lock Yes Dimension Physical Dimension 250(W) x 75(H) x 210(D) mm Box Dimension 496(W) x 115(H) x 302(D) mm (continued on the next page) 54 LED projector E-Manual - Asus F1 | Series User Guide - Page 55
, power cord, HDMI cable, Quick Start Guide, remote control, warranty card * Specifications are subject to change without prior notice. ** Product availability may vary by region. *** All brand and product names mentioned are trademarks of their respective companies. LED projector E-Manual 55 - Asus F1 | Series User Guide - Page 56
Supported PC Timings VGA Resolution 720 x 400 640 x 480 800 x 600 1024 x 768 1152 x 864 1280 x 720 1280 x 800 1280 x 1024 Hz 1920 x 1080p @59.94/60Hz 1920 x 1080p @50Hz Frame Packing Side-by-side(Half) v v v v v v v v v v v v v Top-and-Bottom v v v v v v 56 LED projector E-Manual - Asus F1 | Series User Guide - Page 57
.94 31.47 50 15.63 50 31.25 50 37.5 60 45 50 28.13 60 33.75 50 56.25 60 67.5 24 LED projector E-Manual 57 - Asus F1 | Series User Guide - Page 58
declaration of conformity is available at https://www.asus.com/support/ The WiFi operating in the band 5150-5350MHz F1 output power table: Function WiFi Frequency 2412 - 2472 MHz 5150 - 5350 MHz 5470 - 5725 MHz Maximum Output Power (EIRP) 18.78 dBm 18.47 dBm 18.02 dBm 58 LED projector E-Manual
-
 1
1 -
 2
2 -
 3
3 -
 4
4 -
 5
5 -
 6
6 -
 7
7 -
8
-
9
-
10
-
11
-
12
-
13
-
14
-
15
-
16
-
17
-
18
-
19
-
20
-
21
-
22
-
23
-
24
-
25
-
26
-
27
-
28
-
29
-
30
-
31
-
32
-
33
-
34
-
35
-
36
-
37
-
38
-
39
-
40
-
41
-
42
-
43
-
44
-
45
-
46
-
47
-
48
-
49
-
50
-
51
-
52
-
53
-
54
-
55
-
56
-
57
-
58
 |
 |

T
H
R
R
O
O
H
S
1
:
8
W
E
N
.
S
0
LED projector
E-Manual
F1 Series