Asus KFSN4-DRE SAS User Guide
Asus KFSN4-DRE SAS Manual
 |
View all Asus KFSN4-DRE SAS manuals
Add to My Manuals
Save this manual to your list of manuals |
Asus KFSN4-DRE SAS manual content summary:
- Asus KFSN4-DRE SAS | User Guide - Page 1
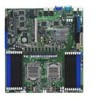
Motherboard KFSN4-DRE Series KFSN4-DRE/SAS KFSN4-DRE/2S KFSN4-DRE - Asus KFSN4-DRE SAS | User Guide - Page 2
No part of this manual, including the products and software described in it, INC. ("ASUS"). Product warranty or service will not ASUS HAS BEEN ADVISED OF THE POSSIBILITY OF SUCH DAMAGES ARISING FROM ANY DEFECT OR ERROR IN THIS MANUAL OR PRODUCT. SPECIFICATIONS AND INFORMATION CONTAINED IN THIS MANUAL - Asus KFSN4-DRE SAS | User Guide - Page 3
viii About this guide ix Typography x KFSN4-DRE Series specifications summary xi Chapter 1: Product introduction 1.1 Welcome 1-1 1.2 Package contents 1-1 1.3 Serial number label 1-1 1.4 Special features 1-2 1.4.1 Product highlights 1-2 1.4.2 Innovative ASUS features 1-3 Chapter 2: Hardware - Asus KFSN4-DRE SAS | User Guide - Page 4
dual function power switch 3-2 Chapter 4: BIOS setup 4.1 Managing and updating your BIOS 4-1 4.1.1 Creating a bootable floppy disk 4-1 4.1.2 AFUDOS utility 4-2 4.1.3 ASUS CrashFree BIOS 2 utility 4-4 4.2 BIOS setup program 4-5 4.2.1 BIOS menu screen 4-6 4.2.2 Menu bar 4-6 4.2.3 Navigation - Asus KFSN4-DRE SAS | User Guide - Page 5
MPT Setup Utility (KFSN4-DRE/SAS model only 5-9 5.3.1 Integrated Mirroring 5-9 5.3.2 Integrated Mirroring Enhanced 5-13 5.3.3 Integrated Striping (IS) volume 5-15 5.3.4 Managing Arrays 5-18 5.3.5 Viewing SAS topology 5-23 5.5.6 Global Properties 5-25 Chapter 6: Driver installation 6.1 RAID - Asus KFSN4-DRE SAS | User Guide - Page 6
Contents 6.4.4 Utilities menu 6-14 6.4.5 Contact information 6-14 Appendix: Reference information A.1 KFSN4-DRE/SAS model block diagram A-1 A.2 KFSN4-DRE/2S model block diagram A-2 A.3 KFSN4-DRE model block diagram A-3 vi - Asus KFSN4-DRE SAS | User Guide - Page 7
. This equipment generates, uses and can radiate radio frequency energy and, if not installed and used in accordance with manufacturer' s instructions, may cause harmful interference to radio communications. However, there is no guarantee that interference will not occur in a particular installation - Asus KFSN4-DRE SAS | User Guide - Page 8
supply is broken, do not try to fix it by yourself. Contact a qualified service technician or your retailer. Operation safety • Before installing the motherboard and adding devices on it, carefully read all the manuals that came with the package. • Before using the product, make sure all cables - Asus KFSN4-DRE SAS | User Guide - Page 9
utilities. • Chapter 6: Driver installation This chapter provides instructions for installing the necessary drivers for different system components. • Appendix: Reference information This appendix includes additional information that you may refer to when configuring the motherboard. Where to find - Asus KFSN4-DRE SAS | User Guide - Page 10
the following symbols used throughout this manual. DANGER/WARNING: Information to prevent injury to yourself when trying to complete a task. CAUTION: Information to prevent damage to the components when trying to complete a task. IMPORTANT: Instructions that you MUST follow to complete - Asus KFSN4-DRE SAS | User Guide - Page 11
KFSN4-DRE Series specifications summary Model Name KFSN4-DRE KFSN4-DRE/2S KFSN4-DRE/SAS Processor / System Bus 2 * socket 1207 AMD Opteron™ 2000 series processor (Barcelona Support) Quad Core / Dual Core HyperTransport™ Technology 1.0, 1GHz 512KB L2 cache/Per core, 2MB L3 Core Logic - Asus KFSN4-DRE SAS | User Guide - Page 12
KFSN4-DRE Series specifications 45 PS/2 KB/Mouse Software Out of Band Remote ATX 12V power connector 1* SO-DIMM socket for optional ASMB3-SOL 1 (support 2 USB ports) 10 * 4pin 2 2 2 1 1 1 -40℃ ~ 70℃ Non operation humidity: 20% ~ 90% ( Non condensing) *Specifications are subject to - Asus KFSN4-DRE SAS | User Guide - Page 13
This chapter describes the motherboard introPdruoc1dtuiocnt features and the new technologies it supports. - Asus KFSN4-DRE SAS | User Guide - Page 14
Chapter summary 1 1.1 Welcome 1-1 1.2 Package contents 1-1 1.3 Serial number label 1-1 1.4 Special features 1-2 ASUS KFSN4-DRE Series - Asus KFSN4-DRE SAS | User Guide - Page 15
motherboard's serial number containing 12 characters xxM0Axxxxxxx shown as the figure below. With the correct serial number of the product, ASUS Technical Support team members can then offer a quicker and satisfying solution to your problems. KFSN4-DRE xxM0Axxxxxxx Made in China 合格 ASUS KFSN4-DRE - Asus KFSN4-DRE SAS | User Guide - Page 16
is software compatible with existing PCI specifications. DDR2 memory support The motherboard supports DDR2 memory which memory to boost system performance, eliminating bottlenecks with peak bandwidth of up to 10.7 GB/s. Serial Attached SCSI (SAS) technology support (KFSN4-DRE/SAS model only) SAS - Asus KFSN4-DRE SAS | User Guide - Page 17
when the BIOS codes and data are corrupted. This protection eliminates the need to buy a replacement ROM chip. ASUS Smart Fan technology The ASUS Smart Fan technology smartly adjusts the fan speeds according to the system loading to ensure quiet, cool, and efficient operation. ASUS KFSN4-DRE Series - Asus KFSN4-DRE SAS | User Guide - Page 18
1-4 Chapter 1: Product introduction - Asus KFSN4-DRE SAS | User Guide - Page 19
This chapter lists the hardware setup procedures that you have to perform when installing system components. It includes description of the jumpers and connectors on the motherboard. 2 Hardware information - Asus KFSN4-DRE SAS | User Guide - Page 20
Chapter summary 2 2.1 Before you proceed 2-1 2.2 Motherboard overview 2-3 2.3 Central Processing Unit (CPU 2-9 2.4 System memory 2-13 2.5 Expansion slots 2-16 2.6 Jumpers 2-19 2.7 Connectors 2-23 ASUS KFSN4-DRE Series - Asus KFSN4-DRE SAS | User Guide - Page 21
that you should shut down the system and unplug the power cable before removing or plugging in any motherboard component. The illustration below shows the location of the onboard LED ® SB_PWR1 ON Standby Power KFSN4-DRE Series Standby power LED OFF Powered Off ASUS KFSN4-DRE Series 2-1 - Asus KFSN4-DRE SAS | User Guide - Page 22
is working normally. ® KFSN4-DRE Series SAS LED LED1 Blinks Normal (green) OFF Abnormal 3. CPU warning LED (CPU_WARN1) The CPU warning LED lights up to indicate that a processor is not installed or the processor is not installed properly in CPU 1 socket. 4. Memory warning LED (MEM_WARN1) The - Asus KFSN4-DRE SAS | User Guide - Page 23
in the image below. 2.2.2 Screw holes Place ten (10) screws into the holes indicated by circles to secure the motherboard to the chassis. DO NOT overtighten the screws! Doing so can damage the motherboard. Place this side towards the rear of the chassis ® KFSN4-DRE ASUS KFSN4-DRE Series 2-3 - Asus KFSN4-DRE SAS | User Guide - Page 24
2.2.4 Motherboard layouts KFSN4-DRE/SAS model 33cm (13in) PS/2 T: Mouse B: Keyboard USB1 USB2 REAR_FAN4 PSUSMB1 PRI_IDE1 SEC_IDE1 ATXPWR1 ATX12V1 SATA2 SATA1 SATA4 SATA3 COM1 REAR_FAN3 REAR_FAN2 REAR_FAN1 FAN_SEL1 LAN1_EN1 LAN2_EN1 nForce Professional 2200 USB34 DDR2 DIMM_B4 (64/72 bit - Asus KFSN4-DRE SAS | User Guide - Page 25
DIMM_C2 (64/72 bit, 240-pin module) DDR2 DIMM_D2 (64/72 bit, 240-pin module) DDR2 DIMM_C3 (64/72 bit, 240-pin module) DDR2 DIMM_D3 (64/72 bit, 240-pin module) DDR2 DIMM_C4 (64/72 bit, 240-pin module) DDR2 DIMM_D4 (64/72 bit, 240-pin module) FRNT_FAN2 30.5cm (12in) FRNT_FAN1 ASUS KFSN4-DRE Series - Asus KFSN4-DRE SAS | User Guide - Page 26
(64/72 bit, 240-pin module) DDR2 DIMM_A3 (64/72 bit, 240-pin module) DDR2 DIMM_B2 (64/72 bit, 240-pin module) DDR2 DIMM_A2 (64/72 bit, 240-pin module) DDR2 DIMM_B1 (64/72 bit, 240-pin module) DDR2 DIMM_A1 (64/72 bit, 240-pin module) FRNT_FAN5 FRNT_FAN6 VGA1 LAN1 BCM 5721 CPU1 ® KFSN4-DRE - Asus KFSN4-DRE SAS | User Guide - Page 27
CPU sockets 2. DDR2 sockets 3. PCI Express x 16 slots 4. BMC��s�o�c�k�e�t Page 2-9 2-13 2-18 2-18 Jumpers 5. Onboard storage setting (3-pin SAS_EN1) (KFSN4-DRE/SAS model only) 6 F�o�rc�e��B�IO��S�r�e�c�o�v�e�ry��se rt�s Page 2-23 2-23 2-23 2-23 2-23 2-23 ASUS KFSN4-DRE Series 2-7 - Asus KFSN4-DRE SAS | User Guide - Page 28
(24-pin ATXPWR1, 8-pin ATX12V1) 9. Power supply SMBus connector (5-pin PSUSMB1) 10. SAS connectors (KFSN4-DRE/SAS model only) 11. SAS LSI1064E ports LED connector (18-1 pin SASLED1) (KFSN4-DRE/SAS model only) 12. Serial General Purpose Input/Output connector (6-pin SGPIO1) 13. Auxiliary - Asus KFSN4-DRE SAS | User Guide - Page 29
the cap after installing the motherboard. ASUS will process Return Merchandise Authorization (RMA) requests only if the motherboard comes with the cap To install a CPU: 1. Locate the CPU socket on the motherboard. CPU1 CPU1 CPU2 KFSN4-DRE Series CPU Socket 1207 Before installing the CPU, make sure - Asus KFSN4-DRE SAS | User Guide - Page 30
2. Press the load lever with your thumb (A), then move it to the left (B) until it is released from the retention tab. Retention tab A Load lever PnP cap This side of the socket B box should face you. To prevent damage to the socket pins, do not remove the PnP cap unless you are installing a - Asus KFSN4-DRE SAS | User Guide - Page 31
The CPU fits in only one correct orientation. DO NOT force the CPU into the socket to prevent bending the connectors on the socket and damaging the CPU! 6. Close the load plate (A), then push A the load lever (B) until it snaps into the retention tab. B ASUS KFSN4-DRE Series 2-11 - Asus KFSN4-DRE SAS | User Guide - Page 32
2.3.2 Installing the heatsink The AMD Opteron™ 2000 series processors require a specially designed heatsink to ensure optimum thermal condition and performance. Make sure that you use only qualified heatsink assembly. Follow these steps to install the CPU heatsink. 1. Place the heatsink on top of - Asus KFSN4-DRE SAS | User Guide - Page 33
2.4 System memory 2.4.1 Overview The motherboard comes with sixteen (16) Double Data Rate 2 (DDR2) Dual Inline Memory Modules (DIMM) sockets. A DDR2 module The figure illustrates the location of the DDR2 DIMM sockets: ® KFSN4-DRE Series 240-pin DIMM sockets 128 Pins 112 Pins DIMM_B4 DIMM_A4 - Asus KFSN4-DRE SAS | User Guide - Page 34
= DIMM_C1=DIMM_C2 =DIMM_D1=DIMM_D2 • Always install DIMMs with the same CAS latency. For optimum compatibility, it is recommended that you obtain memory modules from the same vendor. Memory population table CPU1 SingleChannel Dual Channel CPU2 Single Channel Dual Channel A1 B1 A2 B2 A3 B3 A4 B4 - Asus KFSN4-DRE SAS | User Guide - Page 35
can cause severe damage to both the motherboard and the components. To install a Support the DIMM lightly with your fingers when pressing the 1 retaining clips. The DIMM might get damaged when it flips out with 1 DDR2 DIMM notch extra force. 2. Remove the DIMM from the socket. ASUS KFSN4-DRE - Asus KFSN4-DRE SAS | User Guide - Page 36
your motherboard is already installed in a chassis). 3. Remove the bracket opposite the slot BIOS setup. 2. Assign an IRQ to the card. Refer to the tables on the next page. 3. Install the software drivers for the expansion card. When using PCI cards on shared slots, ensure that the drivers support - Asus KFSN4-DRE SAS | User Guide - Page 37
PCI steering* PS/2 Compatible Mouse Port* Numeric Data Processor Primary IDE Channel Secondary IDE Channel * These IRQs are usually available for ISA or PCI devices. ASUS KFSN4-DRE Series 2-17 - Asus KFSN4-DRE SAS | User Guide - Page 38
motherboard supports PCI Express x16 cards that comply with the PCI Express specifications. The diagram shows the location of the PCI Express x16 slot. KFSN4-DRE Series PCI Express slot The number of PCIE slot differs by model. The KFSN4-DRE/SAS comes with one PCIE x 16 slot (x 8link); the KFSN4-DRE - Asus KFSN4-DRE SAS | User Guide - Page 39
clear the CMOS memory of date, time BIOS setup to re-enter data. Except when clearing the RTC RAM, NEVER remove the cap on CLRTC jumper default position. Removing the cap will cause system boot failure! ® CLRTC1 2 1 Normal (Default) 3 2 Clear CMOS KFSN4-DRE Series Clear RTC RAM ASUS KFSN4-DRE - Asus KFSN4-DRE SAS | User Guide - Page 40
you to enable or disable the onboard Broadcom® BCM5721 Gigabit LAN1/2 controller. Set to pins 1-2 to activate the Gigabit LAN feature. KFSN4-DRE Series LAN setting LAN1_EN1 12 23 Enable (Default) Disable LAN2_EN1 12 23 Enable (Default) Disable 3. VGA Graphics controller setting (3-pin - Asus KFSN4-DRE SAS | User Guide - Page 41
(3-pin SAS_EN1) (KFSN4-DRE/SAS model only) This jumper allows you to enable or disable the onboard LSI1064E SAS controller. Set the jumper to pins 1-2 to enable the SAS function (default). ® KFSN4-DRE Series SAS setting SAS_EN1 12 23 Enable (Default) Disable ASUS KFSN4-DRE Series 2-21 - Asus KFSN4-DRE SAS | User Guide - Page 42
correct BIOS for your motherboard model. 2. Set the jumper to pins 2-3. 3. Insert the floppy disk then turn on the system to update the BIOS. 4. Shut down the system. 5. Set the jumper back to pins 1-2. 6. Turn on the system. ® RECOVERY1 12 23 Disable (Default) KFSN4-DRE Series BIOS recovery - Asus KFSN4-DRE SAS | User Guide - Page 43
BLINKING Data activity Speed LED Status Description OFF 10 Mbps connection ORANGE 100 Mbps connection GREEN 1 Gbps connection ACT/LINK SPEED LED LED LAN port ASUS KFSN4-DRE Series 2-23 - Asus KFSN4-DRE SAS | User Guide - Page 44
connector at the back of the floppy disk drive. ® FLOPPY1 PIN 1 NOTE: Orient the red markings on the floppy ribbon cable to PIN 1. KFSN4-DRE Series Floppy disk drive connector 2. IDE connectors (40-1 pin PRI_IDE1, SEC_IDE1) The onboard IDE connectors are for Ultra DMA 133/100/66 signal cables - Asus KFSN4-DRE SAS | User Guide - Page 45
on the IDE ribbon cable to PIN 1. KFSN4-DRE Series IDE connector 3. Serial ATA connectors (7-pin SATA1, SATA2, SATA3, SATA4) Supported by the NVIDIA® nForce4™ chipset, these GND GND RSATA_RXP3 RSATA_RXN3 GND RSATA_TXN3 RSATA_TXP3 GND KFSN4-DRE Series SATA connectors The actual data transfer rate - Asus KFSN4-DRE SAS | User Guide - Page 46
install the module to a slot opening at the back of the system chassis. This USB connector complies with USB 2.0 specification that supports up to 480 Mbps connection speed. USB34 Power USB PortB(-) USB PortB(+) GND NC Power USB PortA(-) USB PortA(+) GND PIN1 KFSN4-DRE Series USB connector 2-26 - Asus KFSN4-DRE SAS | User Guide - Page 47
motherboard components. These are not jumpers! DO NOT place jumper caps on the fan connectors! • All fans feature the ASUS Smart Fan technology. REAR_FAN4 REAR_FAN3 REAR_FAN2 REAR_FAN1 FRNT_FAN6 FRNT_FAN5 FRNT_FAN4 FRNT_FAN3 FRNT_FAN2 FRNT_FAN1 REAR_FAN4 REAR_FAN3 REAR_FAN2 REAR_FAN1 KFSN4-DRE - Asus KFSN4-DRE SAS | User Guide - Page 48
GND GND GND GND +3 Volts -12 Volts Ground PSON# Ground Ground Ground -5 Volts +5 Volts +5 Volts +5 Volts Ground 12V1 12V1 12V2 12V2 KFSN4-DRE Series ATX power connectors 9. Power Supply SMBus connector (5-pin PSUSMB1) This connector allows you to connect SMBus (System Management Bus) to the power - Asus KFSN4-DRE SAS | User Guide - Page 49
10. SAS connectors (KFSN4-DRE/SAS model only) This motherboard comes with four Serial Attached SCSI (SAS) connectors, the next-generation storage technology that supports both Series SCSI and Serial ATA (SATA). Each connector supports one device. ® GND RSATA_RXP1 RSATA_RXN1 GND RSATA_TXN1 - Asus KFSN4-DRE SAS | User Guide - Page 50
ACT_LED1 ACT_LED2 ACT_LED3 ACT_LED4 ACT_LED5 ACT_LED6 ACT_LED7 FLT_LED0 FLT_LED1 FLT_LED2 FLT_LED3 GND FLT_LED4 FLT_LED5 FLT_LED6 FLT_LED7 11. SAS LSI1064E ports LED connector (18-1 pin SASLED1) (KFSN4-DRE/SAS model only) This connector is for the front panel LED port indicator that shows the - Asus KFSN4-DRE SAS | User Guide - Page 51
supports several server system functions. 1 22 NC I2C_4_CLK# GND I2C_4_DATA# +5VSB LAN1_LINK LAN1_ACT LAN2_ACT LAN2_LINK ® AUX_PANEL1 PIN1 +5VSB CASEOPEN GND LOCATORLED1+ LOCATORLED1- LOCATORBTN# GND LOCATORLED2LOCATORLED2+ KFSN4-DRE LED 2 cable to this connector. ASUS KFSN4-DRE Series 2-31 - Asus KFSN4-DRE SAS | User Guide - Page 52
supports several chassis-mounted functions. POWERLED+ NC POWERLEDMLED+ MLEDNC +5V GND GND SPKROUT ® IDELED+ IDELEDNMIBTN# GND POWERBTN# GND NC RESETBTN# GND PANEL1 KFSN4-DRE the system in SLEEP or SOFT-OFF mode depending on the BIOS settings. Pressing the power switch for more than four seconds - Asus KFSN4-DRE SAS | User Guide - Page 53
This chapter describes the power up Powerin3g up sequence, and ways of shutting down the system. - Asus KFSN4-DRE SAS | User Guide - Page 54
Chapter summary 3 3.1 Starting up for the first time 3-1 3.2 Powering off the computer 3-2 ASUS KFSN4-DRE Series - Asus KFSN4-DRE SAS | User Guide - Page 55
system then runs the power-on self-test or POST. While the tests are running, the BIOS beeps or additional messages appear on the screen. If you do not see anything within 30 on, hold down the key to enter the BIOS Setup. Follow the instructions in Chapter 4. ASUS KFSN4-DRE Series 3-1 - Asus KFSN4-DRE SAS | User Guide - Page 56
is ON, pressing the power switch for less than four seconds puts the system to sleep mode or to soft-off mode, depending on the BIOS setting. Pressing the power switch for more than four seconds lets the system enter the soft-off mode regardless of the - Asus KFSN4-DRE SAS | User Guide - Page 57
This chapter tells how to change the system settings through the BIOS Setup BIOS se4tup menus. Detailed descriptions of the BIOS parameters are also provided. - Asus KFSN4-DRE SAS | User Guide - Page 58
Chapter summary 4 4.1 Managing and updating your BIOS 4-1 4.2 BIOS setup program 4-5 4.3 Main menu 4-8 4.4 Advanced menu 4-13 4.5 Server menu 4-27 4.6 Security menu 4-29 4.7 Boot menu 4-31 4.8 Exit menu 4-33 ASUS KFSN4-DRE Series - Asus KFSN4-DRE SAS | User Guide - Page 59
Click Start, then select Run. d. From the Open field, type D:\bootdisk\makeboot a: assuming that D: is your optical drive. e. Press , then follow screen instructions to continue. 2. Copy the original or the latest motherboard BIOS file to the bootable floppy disk. ASUS KFSN4-DRE Series 4-1 - Asus KFSN4-DRE SAS | User Guide - Page 60
has at least 1024KB free space to save the file. • The succeeding BIOS screens are for reference only. The actual BIOS screen displays may not be same as shown. 1. Copy the AFUDOS utility (afudos.exe) from the motherboard support CD to the bootable floppy disk you created earlier. 2. Boot the system - Asus KFSN4-DRE SAS | User Guide - Page 61
Megatrends, Inc. All rights reserved. WARNING!! Do not turn off power during flash BIOS Reading file ....... done Reading flash ...... done Advance Check ...... Erasing flash ...... done Writing flash ...... done Verifying flash .... done Please restart your computer A:\> ASUS KFSN4-DRE Series 4-3 - Asus KFSN4-DRE SAS | User Guide - Page 62
KFSN4DRE.ROM. Recovering the BIOS from a floppy disk To recover the BIOS from a floppy disk: 1. Turn on the system. 2. Insert the floppy disk with the original or updated BIOS file to the floppy disk drive. Download the original or the latest BIOS file for this motherboard from ASUS website (support - Asus KFSN4-DRE SAS | User Guide - Page 63
the Exit Menu. See section 4.8 Exit Menu. • The BIOS setup screens shown in this section are for reference purposes only, and may not exactly match what you see on your screen. • Visit the ASUS website (www.asus.com) to download the latest BIOS file for this motherboard. ASUS KFSN4-DRE Series 4-5 - Asus KFSN4-DRE SAS | User Guide - Page 64
screen Menu items Menu bar Configuration fields General help Main Advanced System Date System Time Floppy A Server BIOS SETUP UTILITY Security Boot Exit [Wed, 07/25/2007] [11:07:30] [1.44 MB 3½"] . Some of the navigation keys differ from one screen to another. 4-6 Chapter 4: BIOS setup - Asus KFSN4-DRE SAS | User Guide - Page 65
4.2.4 Menu items The highlighted item on the menu bar displays the specific items for that menu. For example, selecting Main shows the Main menu items. The other items (Advanced, bar At the top right corner of the menu screen is a brief description of the selected item. ASUS KFSN4-DRE Series 4-7 - Asus KFSN4-DRE SAS | User Guide - Page 66
Primary IDE Slave Secondary IDE Master Secondary IDE Slave Tertiary IDE Master Fourth IDE Master Fifth IDE Master Sixth IDE Master System Information BIOS SETUP UTILITY Security Boot Exit [Wed, 07/25/2007] [11:07:30] [1.44 MB 3½"] [Not Detected] [Not Detected] [Not Detected] [Not Detected] [Not - Asus KFSN4-DRE SAS | User Guide - Page 67
Select an item then press if you wish to configure the item. Main BIOS SETUP UTILITY IDE Configuration OnBoard IDE Controller IDE DMA Transfer nVidia RAID Setup [Both] [ SATA 1/2 Primary/Secondary channel as RAID. Configuration options: [Disabled] [Enabled] ASUS KFSN4-DRE Series 4-9 - Asus KFSN4-DRE SAS | User Guide - Page 68
information. Main BIOS SETUP UTILITY Primary IDE Master Device :Hard Disk Vendor :xxxxxxxxx Size :xx.xGB LBA Mode :Supported Block Mode: of the appropriate IDE device type. Select [CDROM] if you are specifically configuring a CD-ROM drive. Select [ARMD] (ATAPI Removable Media Device - Asus KFSN4-DRE SAS | User Guide - Page 69
07/10/2007 AGESA Version: 03.00.09 Processor Information System Memory Information BIOS SETUP UTILITY →← Select Screen ↑↓ Select Item +- Change Field Tab Select Field F1 General Help F10 Save and Exit ESC Exit V02.61 (C)Copyright 1985-2006, American Megatrends, Inc. ASUS KFSN4-DRE Series 4-11 - Asus KFSN4-DRE SAS | User Guide - Page 70
1985-2006, American Megatrends, Inc. System Memory Displays the installed system memory information. Main System Memory Information BIOS SETUP UTILITY Total Memory 2048MB Node1 Memory Configuration Node2 Memory Configuration Node1/2 Memory Configuration Main Speed DDR2 400 DIMM_A1 - None - Asus KFSN4-DRE SAS | User Guide - Page 71
items. Incorrect field values can cause the system to malfunction. Main Advanced Server BIOS SETUP UTILITY Security Boot Exit WARNING: Setting wrong values in the below sections Sets the Multi-Processor System (MPS) table version. Configuration options: [1.1] [1.4] ASUS KFSN4-DRE Series 4-13 - Asus KFSN4-DRE SAS | User Guide - Page 72
The NorthBridge Configuration menu allows you to change the Northbridge settings. Advanced BIOS SETUP UTILITY NorthBridge Configuration Memory Configuration DRAM Timing Configuration ECC Configuration IOMMU Option Menu Memory CLK :200 MHz CAS Latency(Tcl) :3.0 RAS/CAS Delay(Trcd) :3 CLK - Asus KFSN4-DRE SAS | User Guide - Page 73
options: [Disabled] [Enabled] Memory Hole Remapping [Enabled] Enables memory remapping around memory hole. Configuration options: [Disabled] [Enabled] Unganged Mode support [Enabled] Enables or disables the force unganged mode. Configuration options: [Disabled] [Enabled] ASUS KFSN4-DRE Series 4-15 - Asus KFSN4-DRE SAS | User Guide - Page 74
DRAM Timing Configuration Main Advanced BIOS SETUP UTILITY DRAM Timing Configuration Memory Clock Mode DRAM Timing Mode [Auto] [Auto] Options Auto Limit Manual Memory Clock Mode [Auto] Configuration options: [Auto] [Limit] [Manual] The following item appears when Memory Clock Mode is set to [ - Asus KFSN4-DRE SAS | User Guide - Page 75
] [Auto] tRFC2 [Auto] Configuration options: [75ns] [105ns] [127.5ns] [195ns] [327.5ns] [Auto] tRFC3 [Auto] Configuration options: [75ns] [105ns] [127.5ns] [195ns] [327.5ns] [Auto] ASUS KFSN4-DRE Series 4-17 - Asus KFSN4-DRE SAS | User Guide - Page 76
ECC Configuration Main Advanced ECC Configuration BIOS SETUP UTILITY [Enabled] Set GART size in systems configuration. Configuration options: [Enabled] [Disabled] IOMMU Option Menu Main Advanced IOMMU Mode BIOS SETUP UTILITY [Disabled] Set GART size in systems without AGP, or disable altogether. - Asus KFSN4-DRE SAS | User Guide - Page 77
/CK804 Configuration menu allows you to change the Southbridge settings. Advanced BIOS SETUP UTILITY SouthBridge/CK804 Configuration CPU Spread Spectrum [Disabled] →← Select clock spread spectrum. Configuration options: [Disabled] [Center Spread] [Down Spread] ASUS KFSN4-DRE Series 4-19 - Asus KFSN4-DRE SAS | User Guide - Page 78
resources for either PCI/PnP or legacy ISA devices, and setting the memory size block for legacy ISA devices. Take caution when changing the settings options: [No] [Yes] Plug And Play O/S [No] When set to [No], BIOS configures all the devices in the system. When set to [Yes] and if you install - Asus KFSN4-DRE SAS | User Guide - Page 79
HiSpeed] Allows you to set the USB 2.0 controller mode to HiSpeed (480 Mbps) or FullSpeed (12 Mbps). Configuration options: [FullSpeed ] [HiSpeed] BIOS EHCI Hand-Off [Enabled] Enables or disables the BIOS EHCI hand-off support. Configuration options: [Disabled] [Enabled] ASUS KFSN4-DRE Series 4-21 - Asus KFSN4-DRE SAS | User Guide - Page 80
Serial Port2 Address Parallel Port Address Parallel Port Mode Parallel Port IRQ [Enabled] [3F8/IRQ4] [2F8/IRQ3] [Normal] [378] [Normal] [IRQ7] Allows BIOS to Enable or Disable Floppy Controller. →← Select Screen ↑↓ Select Item +- Change Field Tab Select Field F1 General Help F10 Save and Exit ESC - Asus KFSN4-DRE SAS | User Guide - Page 81
options: [Disabled] [Enabled] ACPI EMS Support [Disabled] Enables or disables the ACPI EMS support. Configuration options: [Disabled] [Enabled] ACPI MCFG Support [Enabled] Enables or disables the ACPI MCFG support. Configuration options: [Disabled] [Enabled] ASUS KFSN4-DRE Series 4-23 - Asus KFSN4-DRE SAS | User Guide - Page 82
-menu allows you to change Advanced Power Management (APM) features. Select an item then press to display the configuration options. Advanced BIOS SETUP UTILITY APM Configuration Options Restore On AC Power Loss Resume by Ring Resume by PCIE Wake# Resume by RTC [Last State] [Disabled - Asus KFSN4-DRE SAS | User Guide - Page 83
Advanced BIOS SETUP motherboard, the field shows N/A. Smart Fan Control [Smart Fan II] Allows you to enable or disable the ASUS Smart Fan feature that smartly adjusts the fan speeds for more efficient system operation. Configuration options: [Disabled] [Smart Fan] [Smart Fan II] ASUS KFSN4-DRE - Asus KFSN4-DRE SAS | User Guide - Page 84
Allows you to set the CPU target temperature. Configuration options: [40] [45] [50] [55] [60] [65] [70] [75] [80] [85] System1 Target Temperature [50] Allows you to set the system target temperature. Configuration options: [40 if no processor is installed in CPU2 socket. 4-26 Chapter 4: BIOS setup - Asus KFSN4-DRE SAS | User Guide - Page 85
features. Select an item then press to display the configuration options. Server BIOS SETUP UTILITY Configure Remote Access type and parameters Remote Access [Disabled] Select Remote Access following items appear only when Remote Access is set to [Enabled]. ASUS KFSN4-DRE Series 4-27 - Asus KFSN4-DRE SAS | User Guide - Page 86
options: [None] [Hardware] [Software] Redirection After BIOS POST [Always] Sets the redirection mode after the BIOS Power-On Self-Test (POST). [VT100] [VT-UTF8] VT-UTF8 Combo Key Support [Disabled] Enables or disables the VT-UTF8 combo key support for ANSI or VT100 terminals. Configuration options: [ - Asus KFSN4-DRE SAS | User Guide - Page 87
forget your BIOS password, you can clear it by erasing the CMOS Real Time Clock (RTC) RAM. See section 2.6 Jumper for information on how to erase the RTC RAM. After you have set a supervisor password, the other items appear to allow you to change other security settings. ASUS KFSN4-DRE Series 4-29 - Asus KFSN4-DRE SAS | User Guide - Page 88
the same steps as in setting a user password. Password Check [Setup] When set to [Setup], BIOS checks for user password when accessing the Setup utility. When set to [Always], BIOS checks for user password both when accessing Setup and booting the system. Configuration options: [Setup] [Always - Asus KFSN4-DRE SAS | User Guide - Page 89
ESC Exit V02.61 (C)Copyright 1985-2006, American Megatrends, Inc. 4.7.1 Boot Device Priority BIOS SETUP UTILITY Boot Boot Device Priority 1st Boot Device 2nd Boot Device 3rd Boot Device 4th Boot in the system. Configuration options: [xxxxx Drive] [Disabled] ASUS KFSN4-DRE Series 4-31 - Asus KFSN4-DRE SAS | User Guide - Page 90
Mouse Support POST Error Setup Prompt Interrupt 19 Capture [Enabled] [Enabled] [On] [Auto] [Enabled] [Enabled] [Disabled] Allows BIOS to options: [Disabled] [Enabled] Set this item to [Enabled] to use the ASUS MyLogo2™ feature. Bootup Num-Lock [On] Allows you to select the power-on - Asus KFSN4-DRE SAS | User Guide - Page 91
program. If you made changes to fields other than System Date, System Time, and Password, the BIOS asks for a confirmation before exiting. Discard Changes This option allows you to discard the selections you other changes before saving the values to the non-volatile RAM. ASUS KFSN4-DRE Series 4-33 - Asus KFSN4-DRE SAS | User Guide - Page 92
4-34 Chapter 4: BIOS setup - Asus KFSN4-DRE SAS | User Guide - Page 93
This chapter provides instructions for setting up, creating, and configuring RAID sets using the available utilities. 5RAID configuration - Asus KFSN4-DRE SAS | User Guide - Page 94
Chapter summary 5 5.1 Setting up RAID 5-1 5.2 NVIDIA® RAID configurations 5-3 5.3 LSI Logic MPT Setup Utility (KFSN4-DRE/SAS model only)..... 5-9 ASUS KFSN4-DRE Series - Asus KFSN4-DRE SAS | User Guide - Page 95
disk drives for this configuration. If you want to boot the system from a hard disk drive included in a created RAID set, copy first the RAID driver from the support CD to a floppy disk before you install an operating system to the selected hard disk drive. ASUS KFSN4-DRE Series 5-1 - Asus KFSN4-DRE SAS | User Guide - Page 96
for details on how to enter the RAID configuration utility. For KFSN4-DRE/SAS model, you may use the LSI1064E SAS Configuration Utility if you installed SAS hard disk drives to the SAS connector(s) supported by the LSI1064E PCI-E SAS controller. Refer to the succeeding sections for details on how to - Asus KFSN4-DRE SAS | User Guide - Page 97
NVIDIA® RAID configurations The motherboard includes a high performance SATA RAID controller integrated in the NVIDIA® nForce Professional 2200 chip. The RAID controller supports RAID 0 and RAID [ENTER] Popup The navigation keys vary depending on the menu level or option. ASUS KFSN4-DRE Series 5-3 - Asus KFSN4-DRE SAS | User Guide - Page 98
by default. • Not all RAID modes are supported on all platforms. (This server only has two HDDs that only supports RAID 0 and RAID 1 mode.) 2. Press For low disk usage, select 4 KB/16 KB. For typical disk usage, select 64 KB. Select 128KB for performance disk usage. 4K ↑ 8K 16K 32K 64K 128K - Asus KFSN4-DRE SAS | User Guide - Page 99
2006 - Array List - Boot Yes Id Status 2 Healthy Vendor NVIDIA Array Model Name MIRROR XXX.XXG [Ctrl-X]Exit [↑↓]Select [B]Set Boot [N]New Array [ENTER]Detail ASUS KFSN4-DRE Series 5-5 - Asus KFSN4-DRE SAS | User Guide - Page 100
5.2.3 Rebuilding a RAID set To rebuild a RAID set: 1. From the Array List, use the up or down arrow keys to select the RAID set you want to rebuild, then press . The RAID set details appear. NVIDIA RAID Utility Mar 23 2006 - Array List - Boot Yes Yes Id Status 2 Healthy 2 Healthy Vendor - Asus KFSN4-DRE SAS | User Guide - Page 101
all data on the drives if you delete a disk array! 4. The Define a New Array menu appears when you press . Create a new RAID set following the instructions in the previous sections. ASUS KFSN4-DRE Series 5-7 - Asus KFSN4-DRE SAS | User Guide - Page 102
5.2.5 Clearing the disk data You will lose all data when you clear a disk! To clear the disk data: 1. From the Array List, use the up or down arrow keys to select a RAID set, then press . The RAID set details appear. NVIDIA RAID Utility Mar 23 2006 - Array List - Boot No No Id Status 4 - Asus KFSN4-DRE SAS | User Guide - Page 103
all SAS hard disk drives. 2. During POST, press to enter the SAS configuration utility. LSI Logic Corp. MPT SAS BIOS MPTBIOS-6.16.00.00 (2007.05.07) Copyright 2000-2007 LSI Logic Corp. Adapter(s) disabled by user Press Ctrl-C to start LSI Logic Configuration Utility... ASUS KFSN4-DRE - Asus KFSN4-DRE SAS | User Guide - Page 104
to select RAID Properties, then press . LSI Logic Config Utility Adapter Properties -- SAS1064E Adapter PCI Slot PCI Address(Bus/Dev/Func) MPT Firmware Revision SAS Address NVDATA Version Status Boot Order Boot Support v6.16.00.00 (2007.05.07) SAS1064E 00 04:00:00 1.22.01.00-IR 500E0101 - Asus KFSN4-DRE SAS | User Guide - Page 105
or . LSI Logic Config Utility Create New Array -- SAS1064E Array Type: Array Size(MB): Slot Device Identifier Num 0 SEAGATE ST373454SS 1 SEAGATE ST373454SS 2 SEAGATE ST373454SS 3 SEAGATE ST373454SS v6.16.00.00 array. • The disk is already part of another array. ASUS KFSN4-DRE Series 5-11 - Asus KFSN4-DRE SAS | User Guide - Page 106
7. A confirmation screen appears. Press to keep existing data on the first disk. If you choose this option, data on the first disk will be mirrored on the second disk that you will add to the volume later. Make sure the data you want to mirror is on the first disk. Press to overwrite any - Asus KFSN4-DRE SAS | User Guide - Page 107
SAS1064E v6.16.00.00 (2007.05.07) Adapter PCI Slot PCI Address(Bus/Dev/Func) MPT Firmware Revision SAS Address NVDATA Version Status Boot Order Boot Support SAS1064E 00 04:00:00 1.22.01.00-IR 500E0101: = Exit Menu F1/Shift+1 = Help Enter = Choose array type to create ASUS KFSN4-DRE Series 5-13 - Asus KFSN4-DRE SAS | User Guide - Page 108
to make up the IME volume. Integrated Mirroring Enhanced (IME) supports three to ten disks, or seven mirrored disks plus two hot Config Utility Create New Array -- SAS1064E Array Type: Array Size(MB): Slot Device Identifier Num 0 SEAGATE ST373454SS 1 SEAGATE ST373454SS 2 SEAGATE ST373454SS 3 - Asus KFSN4-DRE SAS | User Guide - Page 109
Boot Order Boot Support RAID Properties SAS Topology Advanced Adapter Properties v6.16.00.00 (2007.05.07) SAS1064E 00 04.00:00 1.22.01.00-IR 500E0101:23456712 2B.00 Enabled 0 (Enabled BIOS & OS) Esc = Exit Menu F1/Shift+1 = Help Enter = Select Item -/+ = Change Item ASUS KFSN4-DRE Series 5-15 - Asus KFSN4-DRE SAS | User Guide - Page 110
include this disk in the array, press , , or . LSI Logic Config Utility Create New Array -- SAS1064E Array Type: Array Size(MB): Slot Device Identifier Num 0 SEAGATE ST373454SS 1 SEAGATE ST373454SS 2 SEAGATE ST373454SS 3 SEAGATE ST373454SS v6.16.00.00 (2007.05.07) IS 102996 RAID Hot - Asus KFSN4-DRE SAS | User Guide - Page 111
Reboot 9. The utility creates the array. LSI Logic Config Utility v6.16.00.00 (2007.05.07) Processing...may take up 1 minute Creating RAID array ASUS KFSN4-DRE Series 5-17 - Asus KFSN4-DRE SAS | User Guide - Page 112
PCI Slot PCI Address(Bus/Dev/Func) MPT Firmware Revision SAS Address NVDATA Version Status Boot Order Boot Support SAS1064E 00 04:00:00 1.22.01.00-IR 500E0101:23456712 2B.00 Enabled 0 (Enabled BIOS & OS) RAID Properties SAS - Asus KFSN4-DRE SAS | User Guide - Page 113
Array v6.16.00.00 (2007.05.07) 1 of 1 LSILOGICLogical Volume 3000 IME 0 51498 Optimal Slot Device Identifier Num 0 SEAGATE ST373454SS 2 SEAGATE ST373454SS 3 SEAGATE ST373454SS RAID Hot Disk Spr 0003 Yes NO +N=Next Array C = Create an array Size (MB) 34331 34331 34331 ASUS KFSN4-DRE Series 5-19 - Asus KFSN4-DRE SAS | User Guide - Page 114
Array Identifier Type Scan Order Size(MB) Status Manage Array v6.16.00.00 (2007.05.07) 1 of 1 LSILOGICLogical Volume 3000 IME 0 51498 Optimal Slot Device Identifier Num 0 SEAGATE ST373454SS 2 SEAGATE ST373454SS 3 SEAGATE ST373454SS RAID Hot Disk Spr 0003 Yes NO 0003 Yes NO 0003 Yes NO Drive Pred - Asus KFSN4-DRE SAS | User Guide - Page 115
Config Utility Manage Hot Spare -- SAS1064E Identifier Type Scan Order Size(MB) Status Slot Device Identifier Num 0 SEAGATE ST373454SS 1 SEAGATE ST373454SS 2 SEAGATE ST373454SS 3 SEAGATE ST373454SS +1 = Help 3. Press to begin the synchronization, or to cancel. ASUS KFSN4-DRE Series 5-21 - Asus KFSN4-DRE SAS | User Guide - Page 116
Activating an array If an array is removed from one controller/computer or moved to another, the array is considered inactive. When you add the array back to the system, you may reactivate the array. To activate the array: 1. From the Manage Array screen, select Activate Array, then press . - Asus KFSN4-DRE SAS | User Guide - Page 117
LSI Logic Config Utility SAS Topology -- SAS1064E v6.16.00.00 (2007.05.07) Device Identifier SAS1064E(04:00:00) ﹂ Controller Direct Attach Devices ﹂ IM VOL LSILOGICLogical Volume 3000 Device Info Controller Esc=Exit F1=Help Alt+D=Device Properties Alt+N=More Keys ASUS KFSN4-DRE Series 5-23 - Asus KFSN4-DRE SAS | User Guide - Page 118
SAS Topology screen. This disk is then moved to scan ID 0 on the next boot, and remains at this position. This makes it easier to set BIOS SAS Topology option. The current topology is displayed. If the selection of a boot device is supported PCI PCI FW Revision BUS Dev Fnc Slot 04 03 00 00 1.22.01.00 - Asus KFSN4-DRE SAS | User Guide - Page 119
Properties Adapter SAS1064E PCI PCI PCI PCI BUS Dev Fnc Slot 04 03 00 00 v6.16.00.00 (2007.05 Support Interrupt Restore Defaults [No] [Display adapters & installed devices] [Hook interrupt, the Default] Esc = Exit Menu F1/Shift+1 = Help Alt+N = Adapter List -/+ = Change Item ASUS KFSN4-DRE - Asus KFSN4-DRE SAS | User Guide - Page 120
Utility Adapter List Global Properties v6.16.00.00 (2007.05.07) Pause When Boot Alert Displayed Boot Information Display Mode Support Interrupt Restore Defaults [No] [Display adapters & installed devices] [Hook interrupt, the Default] Esc = Exit Menu F1/Shift+1 = Help Alt+N = Adapter List - Asus KFSN4-DRE SAS | User Guide - Page 121
.16.00.00 (2007.05.07) Pause When Boot Alert Displayed Boot Information Display Mode Support Interrupt Restore Defaults [No] [Display adapters & installed devices] [Hook interrupt, the Default] Esc = Exit Menu F1/Shift+1 = Help Alt+N = Adapter List -/+ = Change Item ASUS KFSN4-DRE Series 5-27 - Asus KFSN4-DRE SAS | User Guide - Page 122
5-28 Chapter 5: RAID configuration - Asus KFSN4-DRE SAS | User Guide - Page 123
This chapter provides instructions for installing the necessary drivers for different system components. 6Driver installation - Asus KFSN4-DRE SAS | User Guide - Page 124
Chapter summary 6 6.1 RAID driver installation 6-1 6.2 LAN driver installation 6-7 6.4 nVIDIA® driver installation 6-10 6.5 Management application and utilities installation 6-13 ASUS KFSN4-DRE Series - Asus KFSN4-DRE SAS | User Guide - Page 125
menu appears. Create Driver Diskette Menu nVIDIA nForce SATA RAID Driver LSI 1064E SAS Driver Broadcom ASF Firmware Update FreeDOS command prompt 6. Use the arrow keys to select the type of RAID driver disk you want to ceate and press to enter the sub-menu. ASUS KFSN4-DRE Series 6-1 - Asus KFSN4-DRE SAS | User Guide - Page 126
64 bit RHEL AS4 UP4 32 bit RHEL AS4 UP4 64 bit RHEL 5 32 bit RHEL 5 64 bit SLES 9.0 SP3 32 bit SLES 9.0 SP3 64 bit SLES 10 32 bit SLES 10 64 bit Back Exit 7. Locate the RAID driver and place a blank, high-density floppy disk to the floppy disk drive. 8. Press . 9. Follow screen instructions - Asus KFSN4-DRE SAS | User Guide - Page 127
hard disk drive. During installation, the computer prompts you to press the if you are installing a third-party SCSI or RAID driver. 2. Press , then insert the RAID driver disk to the floppy disk drive. 3. Follow screen instructions to install the RAID drivers. ASUS KFSN4-DRE Series 6-3 - Asus KFSN4-DRE SAS | User Guide - Page 128
Windows® 2000/2003 Server OS To install the RAID controller driver when installing Windows® 2000/2003 Server OS: 1. Boot the "Press F6 if you need to install a third party SCSI or RAID driver..." appears at the bottom of the screen. 3. When prompted, press to specify an additional device. - Asus KFSN4-DRE SAS | User Guide - Page 129
4. Insert the RAID driver disk you created earlier to the floppy disk drive, then press . 5. Select the NVIDIA RAID CLASS DRIVER (required), then press . 6. Press again at the Specigy Devices screen, then press . ASUS KFSN4-DRE Series 6-5 - Asus KFSN4-DRE SAS | User Guide - Page 130
7. Select NVIDIA RAID CLASS DRIVER (required), then press . The following windows appears listing both drrvers. 8. Press to continuen with Windows® remove the floppy disk until the blue screen portion of Windows® 2000/2003 installation is completed. 6-6 Chapter 6: Driver installation - Asus KFSN4-DRE SAS | User Guide - Page 131
. Click Cancel to close this window. • If Autorun is NOT enabled in your computer, browse the contents of the support CD to locate the file ASSETUP.EXE from the BIN folder. Doubleclick the ASSETUP.EXE to run the CD. 3. Click the Broadcom 5721 Driver to begin installation. ASUS KFSN4-DRE Series 6-7 - Asus KFSN4-DRE SAS | User Guide - Page 132
4. Click Next when the InstallShield Wizard window appears. 5. Toggle I accept the terms in the license agreement and click Next to continue. 6-8 Chapter 6: Driver installation - Asus KFSN4-DRE SAS | User Guide - Page 133
6. Click Install to start the installation. 7. Click Finish to exit the wizard when the installation is completed. ASUS KFSN4-DRE Series 6-9 - Asus KFSN4-DRE SAS | User Guide - Page 134
® 2000/ Server 2003 OS: 1. Restart the computer, and then log on with Administrator privileges. 2. Insert the motherboard/system support CD to the optical drive. The CD automatically displays the Drivers menu if Autorun is enabled in your computer. If Autorun is NOT enabled in your computer, browse - Asus KFSN4-DRE SAS | User Guide - Page 135
4. Click Next when the InstallShield Wizard window appears. 5. Check the box before the driver you want to install and click Next to continue. ASUS KFSN4-DRE Series 6-11 - Asus KFSN4-DRE SAS | User Guide - Page 136
6. Click Next to start the installation. 7. Click Finish to exit the wizard when the installation is completed. 6-12 Chapter 6: Driver installation - Asus KFSN4-DRE SAS | User Guide - Page 137
EXE to run the CD. 6.4.2 Drivers menu The Drivers menu shows the available device drivers if the system detects installed devices. Install the necessary drivers to activate the devices. The screen display and driver options vary under different operating system versions. ASUS KFSN4-DRE Series 6-13 - Asus KFSN4-DRE SAS | User Guide - Page 138
displays the software applications and utilities that the motherboard supports. Click an item to install. 6.4.5 Contact information Click the Contact tab to display the ASUS contact information. You can also find this information on the inside front cover of this user guide. 6-14 Chapter 6: Driver - Asus KFSN4-DRE SAS | User Guide - Page 139
This appendix includes additional Reference informaAtion information that you may refer to when configuring the motherboard. - Asus KFSN4-DRE SAS | User Guide - Page 140
Appendix summary A A.1 KFSN4-DRE/SAS model block diagram A-1 A.2 KFSN4-DRE/2S model block diagram A-2 A.3 KFSN4-DRE model block diagram A-3 ASUS KFSN4-DRE Series - Asus KFSN4-DRE SAS | User Guide - Page 141
A.1 KFSN4-DRE/SAS model block diagram 2 channel DDR2 SDRAM 8 x DIMMs 2 channel DDR2 SDRAM 8 x DIMMs AMD Opteron™/ Barcelona(L1SP) CPU2 533/667MHz 64/128 bit x16 Dual-Link x16 2.0GT/s 2.0GT/s 533/667MHz AMD Opteron™/ Barcelona(L1SP) 64/128 bit CPU1 PCIE1 X8 x16 2.0GT/s 2 IDE Ports (Ultra - Asus KFSN4-DRE SAS | User Guide - Page 142
A.2 KFSN4-DRE/2S model block diagram 2 channel DDR2 SDRAM 8 x DIMMs 2 channel DDR2 SDRAM 8 x DIMMs AMD Opteron™/ Barcelona(L1SP) CPU2 533/667MHz 64/128 bit x16 Dual-Link x16 2.0GT/s 2.0GT/s 533/667MHz AMD Opteron™/ Barcelona(L1SP) 64/128 bit CPU1 x16 2.0GT/s PCIE1 X8 x8 PCIE2 X8 x8 - Asus KFSN4-DRE SAS | User Guide - Page 143
33MHz nVIDIA nForce Professional 2200 4 Serial ATA Ports Raid 0,1,10,5 USB2.0 Port x4 USB USB USB USB LPC BUS XGI Z9Ss Winbond W83627THG-A Super I/O 8Mbit BIOS LPC PS/2 KB&Mouse 1xFloppy 2xSerial, ASUS KFSN4-DRE Series A-3 - Asus KFSN4-DRE SAS | User Guide - Page 144
A-4 Appendix A: Reference information
-
 1
1 -
 2
2 -
 3
3 -
 4
4 -
 5
5 -
 6
6 -
 7
7 -
8
-
9
-
10
-
11
-
12
-
13
-
14
-
15
-
16
-
17
-
18
-
19
-
20
-
21
-
22
-
23
-
24
-
25
-
26
-
27
-
28
-
29
-
30
-
31
-
32
-
33
-
34
-
35
-
36
-
37
-
38
-
39
-
40
-
41
-
42
-
43
-
44
-
45
-
46
-
47
-
48
-
49
-
50
-
51
-
52
-
53
-
54
-
55
-
56
-
57
-
58
-
59
-
60
-
61
-
62
-
63
-
64
-
65
-
66
-
67
-
68
-
69
-
70
-
71
-
72
-
73
-
74
-
75
-
76
-
77
-
78
-
79
-
80
-
81
-
82
-
83
-
84
-
85
-
86
-
87
-
88
-
89
-
90
-
91
-
92
-
93
-
94
-
95
-
96
-
97
-
98
-
99
-
100
-
101
-
102
-
103
-
104
-
105
-
106
-
107
-
108
-
109
-
110
-
111
-
112
-
113
-
114
-
115
-
116
-
117
-
118
-
119
-
120
-
121
-
122
-
123
-
124
-
125
-
126
-
127
-
128
-
129
-
130
-
131
-
132
-
133
-
134
-
135
-
136
-
137
-
138
-
139
-
140
-
141
-
142
-
143
-
144
 |
 |

Motherboard
KFSN4-DRE
Series
KFSN4-DRE/SAS
KFSN4-DRE/2S
KFSN4-DRE