Asus P8H61-M LX2 R2.0 P8H61-M LX R2 User's Manual
Asus P8H61-M LX2 R2.0 Manual
 |
View all Asus P8H61-M LX2 R2.0 manuals
Add to My Manuals
Save this manual to your list of manuals |
Asus P8H61-M LX2 R2.0 manual content summary:
- Asus P8H61-M LX2 R2.0 | P8H61-M LX R2 User's Manual - Page 1
Motherboard P8H61-M LX2 R2.0 - Asus P8H61-M LX2 R2.0 | P8H61-M LX R2 User's Manual - Page 2
additional data, you may obtain it for a period of three years after our last shipment of the product, either (1) for free by downloading it from http://support.asus.com/download or (2) for the cost of reproduction and shipment, which is dependent on the preferred carrier and the location where you - Asus P8H61-M LX2 R2.0 | P8H61-M LX R2 User's Manual - Page 3
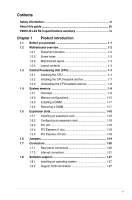
About this guide vii P8H61-M LX2 R2.0 specifications summary ix Chapter 1 Product introduction 1.1 Before you proceed 1-1 1.2 Motherboard overview 1-2 1.2.1 Placement direction 1-2 1.2.2 Screw holes 1-2 1.2.3 Motherboard layout 1-3 1.2.4 Layout contents 1-3 1.3 Central Processing Unit (CPU - Asus P8H61-M LX2 R2.0 | P8H61-M LX R2 User's Manual - Page 4
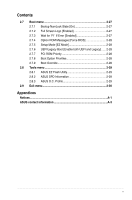
Contents Chapter 2 BIOS information 2.1 Managing and updating your BIOS 2-1 2.1.1 ASUS Update utility 2-1 2.1.2 ASUS EZ Flash 2 2-2 2.1.3 ASUS CrashFree BIOS 3 utility 2-3 2.1.4 ASUS BIOS Updater 2-4 2.2 BIOS setup program 2-7 2.3 Main menu 2-11 2.3.1 System Language [English 2-11 2.3.2 - Asus P8H61-M LX2 R2.0 | P8H61-M LX R2 User's Manual - Page 5
2.7.3 Wait for 'F1' If Error [Enabled 2-27 2.7.4 Option ROM Messages [Force BIOS 2-28 2.7.5 Setup Mode [EZ Mode 2-28 2.7.6 UEFI/Legacy Boot [Enable both UEFI 2-28 2.8 Tools menu 2-29 2.8.1 ASUS EZ Flash Utility 2-29 2.8.2 ASUS SPD Information 2-29 2.8.3 ASUS O.C. Profile 2-29 2.9 Exit menu 2- - Asus P8H61-M LX2 R2.0 | P8H61-M LX R2 User's Manual - Page 6
Contact a qualified service technician or your retailer. Operation safety • Before installing the motherboard and adding hardware components, carefully read all the manuals that came . • If you encounter technical problems with the product, contact a qualified service technician or your retailer. vi - Asus P8H61-M LX2 R2.0 | P8H61-M LX R2 User's Manual - Page 7
parts: • Chapter 1: Product introduction This chapter describes the supported features of the motherboard. • Chapter 2: BIOS information This chapter provides a detailed guide to navigating and setting up the BIOS. Conventions used in this guide To ensure that you perform certain tasks properly - Asus P8H61-M LX2 R2.0 | P8H61-M LX R2 User's Manual - Page 8
for product and software updates. 1. ASUS websites The ASUS website provides updated information on ASUS hardware and software products. Refer to the ASUS contact information. 2. or more keys simultaneously, the key names are linked with a plus sign (+). Example: + + viii - Asus P8H61-M LX2 R2.0 | P8H61-M LX R2 User's Manual - Page 9
P8H61-M LX2 R2.0 specifications summary CPU Chipset Memory Graphics Expansion slots Storage LAN Audio USB ASUS unique features LGA1155 socket for Intel® 3rd/2nd generation Core™ i7/ i5 / i3 / Pentium® / Celeron® Processors Supports Intel® 22 nm CPU Supports Intel® 32 nm CPU * Refer to www. asus. - Asus P8H61-M LX2 R2.0 | P8H61-M LX R2 User's Manual - Page 10
PDIF-out header 1 x COM header 64 Mb Flash ROM, EFI BIOS, PnP, DMI v2.0, WfM 2.0, SMBIOS v2.5, ACPI v2.0a, Multi-language BIOS WOL, PXE, PME Wake Up, WOR by Ring 2 x Serial ATA 3.0Gb/s cables 1 x I/O shield 1 x User Manual 1 x Support DVD Drivers ASUS PC Probe II ASUS Update Anti-virus software (OEM - Asus P8H61-M LX2 R2.0 | P8H61-M LX R2 User's Manual - Page 11
Chapter 1 Product introduction Thank you for buying an ASUS® P8H61-M LX2 R2.0 Series motherboard! Before you start installing the motherboard, and hardware devices on it, check the items in your motherboard package. Refer to page x for the list of accessories. • If any of the items is damaged or - Asus P8H61-M LX2 R2.0 | P8H61-M LX R2 User's Manual - Page 12
in the image below. 1.2.2 Screw holes Place six screws into the holes indicated by circles to secure the motherboard to the chassis. Do not overtighten the screws! Doing so can damage the motherboard. Place this side towards the rear of the chassis P8H61-M LX2 R2.0 1-2 ASUS P8H61-M LX2 R2.0 - Asus P8H61-M LX2 R2.0 | P8H61-M LX R2 User's Manual - Page 13
-pin module) EATXPWR 24.4cm(9.6in) VGA LGA1155 2 USB34 LAN_USB12 AUDIO CHA_FAN Lithium Cell CMOS Power PCIEX16_1 SATA3G_1 6 RTL 8111F Super I/O PCIEX1_1 P8H61-M LX2 R2.0 PCIEX1_2 asmedia ASM1083 SB_PWR Intel® H61 SATA3G_2 8Mb BIOS SATA3G_3 6 VIA VT1708S AAFP SPDIF_OUT COM1 PCI1 - Asus P8H61-M LX2 R2.0 | P8H61-M LX R2 User's Manual - Page 14
Central Processing Unit (CPU) The motherboard comes with a surface mount LGA1155 socket designed for the Intel® Second Generation processors. • Refer to www.asus.com for Intel® CPU support list. • Unplug all power cables before installing the CPU. • Upon purchase of the motherboard, ensure that the - Asus P8H61-M LX2 R2.0 | P8H61-M LX R2 User's Manual - Page 15
the direction of the arrow until the load plate is completely lifted. Load plate 4. Remove the PnP cap from the CPU socket by lifting the tab only. PnP cap 5. Position the CPU over the socket, ensuring that the gold triangle is on the bottom‑left corner of the socket, and then fit - Asus P8H61-M LX2 R2.0 | P8H61-M LX R2 User's Manual - Page 16
6. Apply some Thermal Interface Material to the exposed area of the CPU that the heatsink will be in contact with, ensuring that it is spread in an even thin of the load plate slides under the retention knob (C). B A C 8. Insert the load lever under the retention tab. 1-6 ASUS P8H61-M LX2 R2.0 - Asus P8H61-M LX2 R2.0 | P8H61-M LX R2 User's Manual - Page 17
condition and performance. • When you buy a boxed Intel® processor, the package includes the CPU fan and heatsink assembly. If you buy a CPU separately, ensure that you use only Intel®‑certified multi‑directional heatsink and fan. • Your Intel® LGA1155 heatsink and fan assembly comes in a push-pin - Asus P8H61-M LX2 R2.0 | P8H61-M LX R2 User's Manual - Page 18
and fan: 1. Disconnect the CPU fan cable from the connector on the motherboard. 2. Rotate each fastener counterclockwise. 3. Pull up two fasteners at a time in a diagonal sequence to disengage the heatsink and fan assembly from the motherboard. A B A B B A B A 1-8 ASUS P8H61-M LX2 R2.0 - Asus P8H61-M LX2 R2.0 | P8H61-M LX R2 User's Manual - Page 19
to ensure correct orientation when reinstalling. 1.4 System memory 1.4.1 Overview The motherboard comes with two Double Data Rate 3 (DDR3) Dual Inline Memory DIMM sockets: DIMM_A1 DIMM_B1 P8H61-M LX2 R2.0 Channel Channel A Channel B Sockets DIMM_A1 DIMM_B1 P8H61-M LX2 R2.0 240-pin DDR3 DIMM - Asus P8H61-M LX2 R2.0 | P8H61-M LX R2 User's Manual - Page 20
that you do any of the following: - Use a maximum of 3GB system memory if you are using a 32-bit Windows® OS. - Install a 64-bit Windows® OS when you want to install 4GB or more on the motherboard. • Memory modules with memory frequency higher than 2133 MHz and its corresponding timing or the loaded - Asus P8H61-M LX2 R2.0 | P8H61-M LX R2 User's Manual - Page 21
) 4GB(2 x 2GB) 1GB 2GB 2GB 4GB 1GB 2GB 2GB 2GB 2GB 4GB 4GB SS/ Chip DS Brand Chip NO. Timing Voltage DIMM socket support 1DIMM 2DIMMs SS A-Data AD30908C8D-151C E0906 - - SS A-DATA 3CCD-1509HNA1126L - - SS ADATA 3CCD-1509A EL1127T - - SS - - - - SS - - 8-8-8-24 1.65-1.85V SS - Asus P8H61-M LX2 R2.0 | P8H61-M LX R2 User's Manual - Page 22
Voltage 1.5V - 1.5V 1.5V 1.5V 1.5V 1.5V 1.5V 1.5V 1.65V DIMM socket support 1DIMM 2DIMMs DS - - 9 XMP 1.25V DS ELPIDA J2108BCSE-DJ-F 9 1.5V DS ELPIDA - - - - DS - - 9-9-9-24 1.5V DS ELPIDA J1108BDBG-DJ-F - - DS ELPIDA J2108BCSE-DJ-F - - 1-12 ASUS P8H61-M LX2 R2.0 - Asus P8H61-M LX2 R2.0 | P8H61-M LX R2 User's Manual - Page 23
UMAX E41302GP0-73BDB 2GB WINTEC 3WVS31333-2G-CNR 2GB SS/ DS Chip Brand DS RiDATA DS RiDATA Chip NO. N/A N/A Timing 9 9 Voltage - DIMM socket support 1DIMM 2DIMMs SS NANYA NT5CB128M8AN-CG 9 - SS Elixir SS S-POWER DS Elixir DS S-POWER SS - DS - DS - DS - DS UMAX DS AMPO - Asus P8H61-M LX2 R2.0 | P8H61-M LX R2 User's Manual - Page 24
/ Chip DS Brand SS - Chip NO. - Timing - Voltage 1.5V DIMM socket support (Optional) 1DIMM 2DIMMs DS - - 9-9-9-27 1.65V DS - - 9-9-9-27 1.65V - 7-7-7-20 1.7V DS HYNIX H5TQ2G83BFR PBC - - SS S-POWER 20YT5NG-1201 - - DS S-POWER 20YT5NG-1201 - - 1-14 ASUS P8H61-M LX2 R2.0 - Asus P8H61-M LX2 R2.0 | P8H61-M LX R2 User's Manual - Page 25
- - - - Timing 8-8-8-24 9-9-9-24 9-9-9-24 9-10-9-27 9-10-9-28 10-11-10-30 9-10-9-28 9-9-9-24 - Voltage 1.55V-1.75V 1.65V DIMM socket support (optional) 1DIMM 2DIMMs 1.65V 1.50V 1.5V 1.5V 1.5V 1.6V 1.65V 1.65V 1.65V 1.5V DDR3-2000 MHz capability Vendor Part No. Size SS/ DS Apacer - Asus P8H61-M LX2 R2.0 | P8H61-M LX R2 User's Manual - Page 26
-11-11-31 - 9-11-9-28 - 9-11-9-27 - 10-11-10-30 - - - 9 - 9 - 9-11-9-27 Voltage 1.65V 1.65V 1.65V 1.65V 1.8V 1.65V 1.65V 1.65V 1.65V DIMM socket support (optional) 1DIMM 2DIMMs 1-16 ASUS P8H61-M LX2 R2.0 - Asus P8H61-M LX2 R2.0 | P8H61-M LX R2 User's Manual - Page 27
components. Failure to do so can cause severe damage to both the motherboard and the components. 1. Press the retaining clips outward to unlock a DIMM Simultaneously press the retaining clips outward to unlock the DIMM. 2 Support the DIMM lightly with your fingers when pressing the retaining 1 - Asus P8H61-M LX2 R2.0 | P8H61-M LX R2 User's Manual - Page 28
x1 network cards, SCSI cards, and other cards that comply with the PCI Express specifications. 1.5.5 PCI Express x16 slot This motherboard has a PCI Express 2.0 x16 slot that supports PCI Express x16 2.0 graphic cards complying with the PCI Express specifications. 1-18 ASUS P8H61-M LX2 R2.0 - Asus P8H61-M LX2 R2.0 | P8H61-M LX R2 User's Manual - Page 29
as system passwords. P8H61-M LX2 R2.0 CLRTC 12 23 Normal (Default) Clear RTC P8H61-M LX2 R2.0 Clear RTC RAM To erase the RTC RAM: 1. Turn OFF overclocking, use the CPU Parameter Recall (C.P.R.) feature. Shut down and reboot the system, then the BIOS automatically resets parameter settings - Asus P8H61-M LX2 R2.0 | P8H61-M LX R2 User's Manual - Page 30
RJ-45) port. This port allows Gigabit connection to a Local Area Network (LAN) through a network hub. Refer to the table below for the LAN port LED indications 8-channel audio output: Use a chassis with HD audio module in the front panel to support 8-channel audio output. 1-20 ASUS P8H61-M LX2 R2.0 - Asus P8H61-M LX2 R2.0 | P8H61-M LX R2 User's Manual - Page 31
Bus (USB) ports are for USB 2.0/1.1 devices. 8. Video Graphics Adapter (VGA) port. This 15-pin port is for a P8H61-M LX2 R2.0 Front panel audio connector • We recommend that you connect a high-definition front panel audio module to this connector to avail of the motherboard's high-definition audio - Asus P8H61-M LX2 R2.0 | P8H61-M LX R2 User's Manual - Page 32
PIN 1 GND +5 Volts GND +5 Volts GND +3 Volts +3 Volts PIN 1 P8H61-M LX2 R2.0 ATX power connectors GND +5 Volts +5 Volts +5 Volts -5 Volts GND GND GND to the Recommended Power Supply Wattage Calculator at http://support.asus. com/PowerSupplyCalculator/PSCalculator.aspx?SLanguage=en-us for - Asus P8H61-M LX2 R2.0 | P8H61-M LX R2 User's Manual - Page 33
Rotation P8H61-M LX2 R2.0 CPU connectors Do not forget to connect the fan cables to the fan connectors. Insufficient air flow inside the system may damage the motherboard components. These are not jumpers! Do not place jumper caps on the fan connectors! The CPU_FAN connector supports a CPU fan - Asus P8H61-M LX2 R2.0 | P8H61-M LX R2 User's Manual - Page 34
RSATA_RXN2 RSATA_RXP2 GND SATA3G_3 SATA3G_4 P8H61-M LX2 R2.0 SATA connectors • You must install Windows® XP Service Pack 3 or a later on Windows® Vista / Windows® 7, set the SATA Mode item in the BIOS to [AHCI Mode]. See section 2.5.4 SATA Configuration for details. 7. Digital audio connector - Asus P8H61-M LX2 R2.0 | P8H61-M LX R2 User's Manual - Page 35
GND HD_LED+ HD_LED- Ground Reset 8. System panel connector (10-1 pin PANEL) This connector supports several chassis-mounted functions. PWR LED PWR BTN F_PANEL PIN 1 P8H61-M LX2 R2.0 HD_LED RESET P8H61-M LX2 R2.0 System panel connector • System power LED (2-pin PLED) This 2-pin connector is for - Asus P8H61-M LX2 R2.0 | P8H61-M LX R2 User's Manual - Page 36
20-1 pin TPM) This connector supports a Trusted Platform Module (TPM) system, which can securely store keys, digital certificates, passwords, and data. A TPM system also helps enhance network security, protects digital identities, and ensures platform integrity. P8H61-M LX2 R2.0 TPM PIN 1 PCICLK - Asus P8H61-M LX2 R2.0 | P8H61-M LX R2 User's Manual - Page 37
you install Windows® XP Service Pack 3 or later versions / Windows® Vista Service Pack 1 or later versions before installing the drivers for better compatibility and system stability. 1.8.2 Support DVD information The Support DVD that comes with the motherboard package contains the drivers, software - Asus P8H61-M LX2 R2.0 | P8H61-M LX R2 User's Manual - Page 38
1-28 ASUS P8H61-M LX2 R2.0 - Asus P8H61-M LX2 R2.0 | P8H61-M LX R2 User's Manual - Page 39
and update the motherboard BIOS in Windows® environment. • ASUS Update requires an Internet connection either through a network or an Internet Service Provider (ISP). • This utility is available in the support DVD that comes with the motherboard package. Installing ASUS Update To install ASUS Update - Asus P8H61-M LX2 R2.0 | P8H61-M LX R2 User's Manual - Page 40
from the Open window, then click Open. 3. Follow the onscreen instructions to complete the updating process. 2.1.2 ASUS EZ Flash 2 The ASUS EZ Flash 2 feature allows you to update the BIOS without using an OS‑based utility. Before you start using this utility, download the latest BIOS file from the - Asus P8H61-M LX2 R2.0 | P8H61-M LX R2 User's Manual - Page 41
BIOS file using the motherboard support DVD or a USB flash drive that contains the updated BIOS file. • Before using this utility, rename the BIOS file in the removable device to P8H61-M-LX2-R2-ASUS-0402.CAP. • The BIOS file in the support DVD may not be the latest version. Download the latest BIOS - Asus P8H61-M LX2 R2.0 | P8H61-M LX R2 User's Manual - Page 42
displays may not be the same as shown. Before updating BIOS 1. Prepare the motherboard support DVD and a USB flash drive formatted using FAT32/16 on a single partition. 2. Download the latest BIOS file and BIOS Updater from the ASUS website at http://support.asus D:\> 2-4 ASUS P8H61-M LX2 R2.0 - Asus P8H61-M LX2 R2.0 | P8H61-M LX R2 User's Manual - Page 43
for the extension. 2. The BIOS Updater backup screen appears indicating the BIOS backup process. When BIOS backup is done, press any key to return to the DOS prompt. ASUSTek BIOS Updater for DOS V1.18 Current ROM BOARD: P8H61-M LX2 R2 VER: 0402 DATE: 01/13/2012 Update ROM BOARD: Unknown VER - Asus P8H61-M LX2 R2.0 | P8H61-M LX R2 User's Manual - Page 44
press . D:\>bupdater /pc /g 2. The BIOS Updater screen appears as below. ASUSTek BIOS Updater for DOS V1.18 Current ROM BOARD: P8H61-M LX2 R2 VER: 0402 DATE: 01/13/2012 Update ROM BOARD: Unknown VER: Unknown DATE: Unknown PATH: A:\ A: P8H61-M-LX2-R2-ASUS-0402.CAP 4068078 2012-01-11 - Asus P8H61-M LX2 R2.0 | P8H61-M LX R2 User's Manual - Page 45
only, and may not exactly match what you see on your screen. • Visit the ASUS website at www.asus.com to download the latest BIOS file for this motherboard. • Connect a USB mouse if you want to use the mouse to control the BIOS setup program. • If the system becomes unstable after changing any - Asus P8H61-M LX2 R2.0 | P8H61-M LX R2 User's Manual - Page 46
Boot menu for details. Displays the CPU/ motherboard temperature, CPU voltage output, and CPU/chassis fan speed Selects the display language of the BIOS setup program Exits the BIOS setup program without saving is available only when there is an available boot device. 2-8 ASUS P8H61-M LX2 R2.0 - Asus P8H61-M LX2 R2.0 | P8H61-M LX R2 User's Manual - Page 47
the following sections for the detailed configurations. To access the EZ Mode, click Exit, then select ASUS EZ Mode. Back button Menu items Menu bar Configuration fields General help Submenu item Pop-up window Navigation keys Menu bar The menu bar on top of the screen has the following main - Asus P8H61-M LX2 R2.0 | P8H61-M LX R2 User's Manual - Page 48
the item has a submenu. To display the submenu, select the item and press . Pop-up window Select a menu item and press to display a pop-up window with the configuration options for that of a field, select it and press to display a list of options. 2-10 ASUS P8H61-M LX2 R2.0 - Asus P8H61-M LX2 R2.0 | P8H61-M LX R2 User's Manual - Page 49
information, and allows you to set the system date, time, language, and security settings. 2.3.1 System Language [English] Allows you to choose the BIOS language version from the options. Configuration options: [English] [Español 2.3.2 System Date [Day xx/xx/xxxx] Allows you to set the system - Asus P8H61-M LX2 R2.0 | P8H61-M LX R2 User's Manual - Page 50
• If you have forgotten your BIOS password, erase the CMOS Real Time Clock (RTC) RAM to clear the BIOS password. See section 1.6 Jumpers for information on how to erase the RTC RAM. • The Administrator or User Password item on top of the screen shows Not Installed. 2-12 ASUS P8H61-M LX2 R2.0 - Asus P8H61-M LX2 R2.0 | P8H61-M LX R2 User's Manual - Page 51
> when prompted to create/confirm the password. After you clear the password, the User Password item on top of the screen shows Not Installed. Chapter 2: BIOS information 2-13 - Asus P8H61-M LX2 R2.0 | P8H61-M LX R2 User's Manual - Page 52
motherboard. Target CPU Turbo-Mode Speed : xxxxMHz Displays the current CPU Turbo-Mode speed. Target DRAM Speed : xxxxMHz Displays the current DRAM speed. 2.4.1 ASUS MultiCore Enhancement [Enabled] Allows you to set the memory frequency mode under XMP/Manual CPU. 2-14 ASUS P8H61-M LX2 R2.0 - Asus P8H61-M LX2 R2.0 | P8H61-M LX R2 User's Manual - Page 53
ranges vary according to your CPU model. Enhanced Intel SpeedStep Technology [Enabled] Allows you to enable or disable the Enhanced Intel® SpeedStep Technology (EIST). [Disabled] Disables this function. [Enabled] The operating system dynamically adjusts the processor voltage and core frequency - Asus P8H61-M LX2 R2.0 | P8H61-M LX R2 User's Manual - Page 54
Plane Current Limit [Auto] Use / to adjust the value. 2.5 Advanced menu The Advanced menu items allow you to change the settings for the CPU and other system devices. Be cautious when changing the settings of the Advanced menu items. Incorrect field values can cause the system to malfunction - Asus P8H61-M LX2 R2.0 | P8H61-M LX R2 User's Manual - Page 55
different due to the CPU you installed. Scroll down to display the following items: Intel Adaptive Thermal Monitor [Enabled] [Enabled] Enables the overheated CPU to throttle its clock speed to cool down. [Disabled] Disables the CPU thermal monitor function. Active Processor Cores [All] Allows - Asus P8H61-M LX2 R2.0 | P8H61-M LX R2 User's Manual - Page 56
] and allows you to enable or disable the Intel® Turbo Mode Technology. [Enabled] Allows processor cores to run faster than marked frequency in specific condition. [Disabled] Disables this function. CPU C1E [Auto] [Enabled] Enables the C1E support function. This item should be enabled in order - Asus P8H61-M LX2 R2.0 | P8H61-M LX R2 User's Manual - Page 57
to disable or enable the CPU C6 report to OS. 2.5.2 PCH Configuration High Precision Timer [Enabled] Allows you to enable or disable the High Precision Event Timer. Configuration options: [Enabled] [Disabled] Intel(R) Rapid Start Technology Intel(R) Rapid Start Technology [Disabled] Allows you to - Asus P8H61-M LX2 R2.0 | P8H61-M LX R2 User's Manual - Page 58
to support the Intel(R) Rapid Start Technology. Intel(R) Smart Connect Technology ISCT Configuration [Disabled] Allows you to enable or disable the ISCT configuration. Configuration options: [Enabled] [Disabled] 2.5.3 SATA Configuration While entering Setup, the BIOS driver to Technology) - Asus P8H61-M LX2 R2.0 | P8H61-M LX R2 User's Manual - Page 59
SATA type. Under Windows® XP, there is no need to change the SATA type. 2.5.4 System Agent Configuration Memory Remap Feature [Enabled] [Enabled] Allow you to enable remapping the memory above 4GB. [Disabled] Disables this function. Graphics Configuration Primary Display [Auto] Allows you - Asus P8H61-M LX2 R2.0 | P8H61-M LX R2 User's Manual - Page 60
audio depending on the audio standard that the front panel audio module supports. [HD] Sets the front panel audio connector (AAFP) mode to high definition audio. [AC97] Sets the front panel audio connector IRQ=4] [IO=2F8h; IRQ=3] [IO=3E8h; IRQ=4] [IO=2E8h; IRQ=3] 2-22 ASUS P8H61-M LX2 R2.0 - Asus P8H61-M LX2 R2.0 | P8H61-M LX R2 User's Manual - Page 61
Enables the Power On by a PS/2 mouse. This feature requires an ATX power supply that provides at least 1A on the +5VSB lead. 2.5.8 Network Stack Network Stack [Disable Link] Enables or disables the UEFI network stack. Configuration options: [Disable Link] [Enable] Chapter 2: BIOS information 2-23 - Asus P8H61-M LX2 R2.0 | P8H61-M LX R2 User's Manual - Page 62
] / [N/A] The onboard hardware monitor automatically detects and displays the CPU and chassis fan speeds in rotations per minute (RPM). If the fan is not connected to the motherboard, the field shows N/A. Select Ignore if you do not wish to display the detected speed. 2-24 ASUS P8H61-M LX2 R2.0 - Asus P8H61-M LX2 R2.0 | P8H61-M LX R2 User's Manual - Page 63
fan operation. [Turbo] Sets to [Turbo] to achieve maximum CPU fan speed. [Manual] Sets to [Manual] to assign detailed fan speed control parameters. The following four items appear only when you set CPU Fan Profile to [Manual]. CPU Upper Temperature [70] Use the and keys to adjust the - Asus P8H61-M LX2 R2.0 | P8H61-M LX R2 User's Manual - Page 64
chassis fan speed. [Manual] Sets to [Manual] to assign detailed fan [40] Displays the lower limit of the chassis temperature. CPU Fan Min. Support [Enabled] This item allows you to enable or disable the Anti Surge function. Configuration options: [Disabled] [Enabled] 2-26 ASUS P8H61-M LX2 R2 - Asus P8H61-M LX2 R2.0 | P8H61-M LX R2 User's Manual - Page 65
Screen Logo [Enabled] Enables the full screen logo display feature. Disables the full screen logo display feature. Set this item to [Enabled] to use the ASUS MyLogo 2™ feature. Post Report [5 sec] This when error occurs. Configuration options: [Disabled] [Enabled] Chapter 2: BIOS information 2-27 - Asus P8H61-M LX2 R2.0 | P8H61-M LX R2 User's Manual - Page 66
Windows OS in Safe Mode, press after POST. 2.7.9 Boot Override These items displays the available devices. The number of device items that appears on the screen depends on the number of devices installed in the system. Click an item to start booting from the selected device. 2-28 ASUS P8H61 - Asus P8H61-M LX2 R2.0 | P8H61-M LX R2 User's Manual - Page 67
CMOS settings, press , and then select Yes. • DO NOT shut down or reset the system while updating the BIOS to prevent the system boot failure! • We recommend that you update the BIOS file only coming from the same memory/CPU configuration and BIOS version. Chapter 2: BIOS information 2-29 - Asus P8H61-M LX2 R2.0 | P8H61-M LX R2 User's Manual - Page 68
changes and exit. ASUS EZ Mode This option allows you to enter the EZ Mode screen. Launch EFI Shell from filesystem device This option allows you to attempt to launch the EFI Shell application (shellx64.efi) from one of the available devices that have a filesystem. 2-30 ASUS P8H61-M LX2 R2.0 - Asus P8H61-M LX2 R2.0 | P8H61-M LX R2 User's Manual - Page 69
, if not installed and used in accordance with manufacturer's instructions, may cause harmful interference to radio communications. However, there use of shielded cables for connection of the monitor to the graphics card is required to assure compliance with FCC regulations. Changes or modifications - Asus P8H61-M LX2 R2.0 | P8H61-M LX R2 User's Manual - Page 70
crossed out wheeled bin indicates that the battery should not be placed in municipal waste. ASUS Recycling/Takeback Services ASUS recycling and takeback Please go to �http://csr.asus.com/english/Takeback.htm for the detailed recycling information in different regions. A-2 ASUS P8H61-M LX2 R2.0 - Asus P8H61-M LX2 R2.0 | P8H61-M LX R2 User's Manual - Page 71
15 Li-Te Road, Peitou, Taipei, Taiwan 11259 +886-2-2894-3447 +886-2-2890-7798 [email protected] www.asus.com.tw Technical Support Telephone Online support +86-21-38429911 support.asus.com ASUS COMPUTER INTERNATIONAL (America) Address 800 Corporate Way, Fremont, CA 94539, USA Telephone - Asus P8H61-M LX2 R2.0 | P8H61-M LX R2 User's Manual - Page 72
R.O.C. Country: TAIWAN Authorized representative in Europe: ASUS COMPUTER GmbH Address, City: HARKORT STR. 21-23, 40880 RATINGEN Country: GERMANY declare the following apparatus: Product name : Motherboard Model name : P8H61-M LX2 R2.0 conform with the essential requirements of the
-
 1
1 -
 2
2 -
 3
3 -
 4
4 -
 5
5 -
 6
6 -
 7
7 -
8
-
9
-
10
-
11
-
12
-
13
-
14
-
15
-
16
-
17
-
18
-
19
-
20
-
21
-
22
-
23
-
24
-
25
-
26
-
27
-
28
-
29
-
30
-
31
-
32
-
33
-
34
-
35
-
36
-
37
-
38
-
39
-
40
-
41
-
42
-
43
-
44
-
45
-
46
-
47
-
48
-
49
-
50
-
51
-
52
-
53
-
54
-
55
-
56
-
57
-
58
-
59
-
60
-
61
-
62
-
63
-
64
-
65
-
66
-
67
-
68
-
69
-
70
-
71
-
72
 |
 |

Motherboard
P8H61-M LX2 R2.0