Asus RS700-E8-RS4 V2 RS700-E8 V2 Series Rail Kit Installation Manual 20170418
Asus RS700-E8-RS4 V2 Manual
 |
View all Asus RS700-E8-RS4 V2 manuals
Add to My Manuals
Save this manual to your list of manuals |
Asus RS700-E8-RS4 V2 manual content summary:
- Asus RS700-E8-RS4 V2 | RS700-E8 V2 Series Rail Kit Installation Manual 20170418 - Page 1
Rail Kit Installation Manual E12612 / First Edition / March 2017 - Asus RS700-E8-RS4 V2 | RS700-E8 V2 Series Rail Kit Installation Manual 20170418 - Page 2
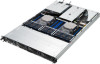
the server rack without the need for additional tools. The kit also comes with a metal stopping bracket that can be installed to provide additional support and stability to the server. The tool-less rail kit package includes: Set of screws Fixing latches Rail components (screws included) Latch - Asus RS700-E8-RS4 V2 | RS700-E8 V2 Series Rail Kit Installation Manual 20170418 - Page 3
of the server using the set of latch screws. The locations of the screw holes vary with different server models. Refer to your server user manual for details. For 1U devices For 2U devices Rail Kit Installation - Asus RS700-E8-RS4 V2 | RS700-E8 V2 Series Rail Kit Installation Manual 20170418 - Page 4
3 to 5 for the other rack rail. Ensure that the installed rack rails (left and right) are aligned, secured, and stable in place. 4 Rail Kit Installation Manual - Asus RS700-E8-RS4 V2 | RS700-E8 V2 Series Rail Kit Installation Manual 20170418 - Page 5
8. Lift the server chassis and insert into the rack rail. Ensure that the rack rail cabinet and the rack posts are stable and standing firmly on a level surface. Rail Kit Installation Manual 5 - Asus RS700-E8-RS4 V2 | RS700-E8 V2 Series Rail Kit Installation Manual 20170418 - Page 6
2. Rail kit dimensions 43.6mm 43.6mm 900mm 589mm 6 Rail Kit Installation Manual
-
 1
1 -
 2
2 -
 3
3 -
 4
4 -
 5
5 -
 6
6
 |
 |

Rail Kit
Installation Manual
E12612 / First Edition / March 2017