Asus VW193T User Guide
Asus VW193T - 19" LCD Monitor Manual
 |
UPC - 610839228591
View all Asus VW193T manuals
Add to My Manuals
Save this manual to your list of manuals |
Asus VW193T manual content summary:
- Asus VW193T | User Guide - Page 1
Q3031 V3 September 2007 VW 198/VW193/VW171 Series LCD Monitor User Guide - Asus VW193T | User Guide - Page 2
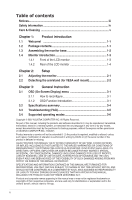
the.monitor 2-1 2.2. Detaching.the.arm/stand.(for.VESA.wall.mount 2-2 Chapter.3:. General.Instruction.. 3.1. OSD.(On-Screen.Display).menu 3-1 3.1.1 How to reconfigure 3-1 3.1.2 OSD Function Introduction 3-1 3.2. Specifications summary 3-4 3.3. Troubleshooting.(FAQ 3-5 3.4. Supported.operating - Asus VW193T | User Guide - Page 3
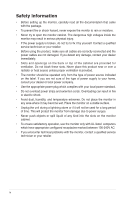
can radiate radio frequency energy and, if not installed and used in accordance with manufacturer' s instructions, may cause harmful help. As an Energy Star® Partner, our company has determined that this product meets the Energy Star® guidelines for energy efficiency. Canadian.Department. - Asus VW193T | User Guide - Page 4
slots on the monitor cabinet. • To ensure satisfactory operation, use the monitor only with UL listed computers which have appropriate configured receptacles marked between 100-240V AC. • If you encounter technical problems with the monitor, contact a qualified service technician or your retailer - Asus VW193T | User Guide - Page 5
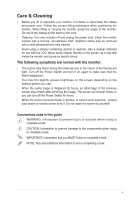
LCD. Never spray cleaner directly on the screen, as it may drip inside the monitor and cause an electric shock. The.following.symptoms.are.normal.with.the.monitor your dealer or service center to fix it. Do not repair the screen by yourself! Conventions.used.in.this.guide WARNING: Information to - Asus VW193T | User Guide - Page 6
product and software updates. 1.. ASUS.websites The ASUS websites worldwide provide updated information on ASUS hardware and software products. Refer to http://www.asus.com 2.. Optional.documentation Your product package may include optional documentation, such as warranty card, that may have been - Asus VW193T | User Guide - Page 7
items: LCD monitor Monitor base User manual CD Quick Start Guide 1 x Power cord 1 x VGA cable 1 x DVI cable (Only for some models) 1 x Audio cable (Only for some models) If any of the above items is damaged or missing, contact your retailer immediately. ASUS LCD Monitor VW198/VW193 /VW171Series - Asus VW193T | User Guide - Page 8
base To assemble the monitor base: 1. Connect the base with the monitor. A click indicates that the base has been connected successfully. 2. Adjust the monitor to the angle that is most comfortable for you. We recommend that you cover the table surface with soft cloth to prevent damage to the - Asus VW193T | User Guide - Page 9
Standard Mode, Theater Mode) with SPLENDID™ Video Enhancement Technology. • Exit the OSD menu or go back to the previous menu as the OSD menu is active. 2. Button: • Press this button to fuction. • This is also a hotkey for Brightness adjustment. ASUS LCD Monitor VW198/VW193/VW171 Series 1-3 - Asus VW193T | User Guide - Page 10
Description ON Standby mode OFF 1.4.2. Rear.of.the.LCD.monitor. Screw.holes.for. VESA.Wall.Mount Rear.connectors 1 234 Rear.connectors.( bundled audio cable.(Only for some models) 3. DVI.port. This 24-pin port is for PC (Personal Computer) DVI-D digital signal connection. (Only for some models - Asus VW193T | User Guide - Page 11
look at the full face of the monitor, then adjust the monitor to the angle that is most comfortable for you. • Hold the stand to prevent the monitor from falling when you change its angle. • You can adjust the monitor's angle from -5º to 20º. ..-5º~20º ASUS LCD Monitor VW198/VW193/VW171 Series 2-1 - Asus VW193T | User Guide - Page 12
stand of the VW198/V193/VW171 Series LCD monitor is specially designed for VESA wall mount. To detach the arm/stand: 1. Remove the arm cover. 2. Have the front of the monitor face down on a table. 3. Use a screwdriver to remove the three screws on the stand of the monitor as the below drawing shows - Asus VW193T | User Guide - Page 13
Enhancement. • In the Standard Mode, the Satuation and Sharpness functions are not user-configurable. • In the other modes, the sRGB function is not user-configurable. ASUS LCD Monitor VW198/VW193/VW171 Series 3-1 - Asus VW193T | User Guide - Page 14
including Reddish, Natural, and Yellowish. In the User mode, colors of R (Red), G (Green), and B (Bluee) are userconfigurable; the adjusting range is from 0-100. 3-2 Chapter 3: General Instruction - Asus VW193T | User Guide - Page 15
4. Input Select In this function, you can select either VGA or DVI input source. (Only for some models) 5. System Setup Allow you to "Full" or "4:3". • Information: shows the monitor information. • Reset: "Yes" allows you to revert to the preset mode. ASUS LCD Monitor VW198/VW193/VW171 Series 3-3 - Asus VW193T | User Guide - Page 16
(VW198T only) 5ms (Tr+Tf) Yes DVI(VW193T only) 8ms (Tr+Tf) Yes -- Speaker(Built-in) 1W x 2 (VW198T and VW198S only) 1W x 2 (VW193T and VW193S only) 1W x 2 (VW171S only) Tilt +20° ~ -5° +20° ~ -5° +20° ~ -5° VESA wall mount Physical Dimension (WxHxD) 100 x 100mm 444x364x210mm 100 x 100mm - Asus VW193T | User Guide - Page 17
sound or sound is low • Ensure that the audio cable is properly connected to the monitor and the computer • Adjust the volume settings of both your monitor and computer. • Ensure that the computer sound card driver is properly installed and activated. ASUS LCD Monitor VW198/VW193/VW171 Series 3-5 - Asus VW193T | User Guide - Page 18
3.4 VW198 Supported operating modes Mode VGA SVGA XGA Mac WXGA SXGA WXGA+ WSXGA Resolution Frequency 640 x 480 640 x 480 640 x 480 800 x 600 800 x 600 800 x 600 800 x 600 1024 x 768 1024 x Píxel 30,24MHz 57,2832MHz Notes:those modes are for VW198 series only. 3-6 Chapter 3: General Instruction - Asus VW193T | User Guide - Page 19
VW193/VW171 Supported operating modes Mode VGA SVGA XGA Mac SXGA WXGA+ IBM modes Mode DOS Resolution 1280 x 1024 1440 x 900 1440 x 900 Resolution Frequency 640 x 350 720 x 400 Horizontal Mode VGA SVGA Resolution Frequency 640 x supported. For optimal resolution, we recommend that you
-
 1
1 -
 2
2 -
 3
3 -
 4
4 -
 5
5 -
 6
6 -
 7
7 -
8
-
9
-
10
-
11
-
12
-
13
-
14
-
15
-
16
-
17
-
18
-
19
 |
 |

VW
198/VW
193
/VW171
Series
LCD Monitor
User Guide
Q
3031 V
3
September
2007