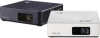
Asus ZenBeam S2 S2 Series User Guide
Asus ZenBeam S2 Manual
 |
View all Asus ZenBeam S2 manuals
Add to My Manuals
Save this manual to your list of manuals |
Asus ZenBeam S2 manual content summary:
- Asus ZenBeam S2 | S2 Series User Guide - Page 1
LED projector E-Manual S2 Series - Asus ZenBeam S2 | S2 Series User Guide - Page 2
Warranty Statement, up to the listed contract price of each product. ASUS will only be responsible for or indemnify ASUS, ITS SUPPLIERS OR YOUR RESELLER IS INFORMED OF THEIR POSSIBILITY. SERVICE AND SUPPORT Visit our multi-language web site at https://www.asus.com/support 2 LED projector E-Manual - Asus ZenBeam S2 | S2 Series User Guide - Page 3
Contents About this manual 5 Conventions used in this manual 6 Typography...6 Multi-language versions 6 Safety precautions 7 Using your LED projector 7 Servicing and replacement of parts 7 Caring for your LED projector 8 Proper disposal 8 Chapter 1: Knowing your LED projector Features...10 - Asus ZenBeam S2 | S2 Series User Guide - Page 4
47 Appendices Federal Communications Commission Statement 50 Regional notice for California 51 Global Environmental Regulation Compliance and Declaration ..52 ASUS Recycling/Takeback Services 52 Specifications for S2 series LED projector 53 Support PC Timings 55 4 LED projector E-Manual - Asus ZenBeam S2 | S2 Series User Guide - Page 5
About this manual This manual provides information about the hardware and software features of your LED projector through the following chapters: Chapter 1: Knowing your LED Projector This chapter details the parts of your LED projector and its accompanying remote control. Chapter 2: Setting up This - Asus ZenBeam S2 | S2 Series User Guide - Page 6
. Typography Bold = This indicates a menu or an item that must be selected. Italic = This indicates sections that you can refer to in this manual. Multi-language versions Download other language versions of this E-Manual via this website: https://www.asus.com/support 6 LED projector E-Manual - Asus ZenBeam S2 | S2 Series User Guide - Page 7
parts • Do not disassemble or attempt to service this LED projector by yourself. Contact your local ASUS service center for assistance. • When replacing parts of your LED projector, purchase items as specified by ASUS and contact your local service center for assistance. LED projector E-Manual 7 - Asus ZenBeam S2 | S2 Series User Guide - Page 8
(2) hours after an extreme or sudden change in temperature occurs. Proper disposal Do not throw your LED projector in municipal waste. This product has been designed to enable proper reuse of parts and recycling. The that the battery should not be placed in municipal waste. 8 LED projector E-Manual - Asus ZenBeam S2 | S2 Series User Guide - Page 9
Chapter 1: Knowing your LED projector Chapter 1: Knowing your LED projector LED projector E-Manual 9 - Asus ZenBeam S2 | S2 Series User Guide - Page 10
Features Top view 10 LED projector E-Manual - Asus ZenBeam S2 | S2 Series User Guide - Page 11
power is not more than 25%. Battery charge indicator This LED indicator lights up when the LED projector is plugged to a power source using its power adapter. IMPORTANT! Use only the bundled power adapter to charge the battery pack and supply power to your LED projector. LED projector E-Manual 11 - Asus ZenBeam S2 | S2 Series User Guide - Page 12
LED projector settings as indicated below. Open main menu/OK Adjust focus Adjust volume (push center) (move up or down) (move left or right) NOTE: For more information on using your LED projector's settings, refer to the Using the onscreen display menu section in this manual. 12 LED projector - Asus ZenBeam S2 | S2 Series User Guide - Page 13
Front view Auto focus camera This camera helps the LED projector with the auto focus feature. Lens The lens projects video or image files onscreen from your input device. WARNING! Do not touch the lens using your hands or any sharp object. LED projector E-Manual 13 - Asus ZenBeam S2 | S2 Series User Guide - Page 14
Rear view Audio output jack port The audio output jack port allows you to connect your LED projector to amplified speakers or headphones. HDMI port This port is for the HDMI (High- mobile device to this port to keep it charged while using it with your LED projector. 14 LED projector E-Manual - Asus ZenBeam S2 | S2 Series User Guide - Page 15
device to this port to keep it charged while using it with your LED projector. NOTE: Ensure to use USB cables certified by the USB-IF to be compliant with USB 3.1 Gen 1 or above. Manual reset hole If your LED projector is unresponsive, insert a straightened paper clip into this hole to turn off your - Asus ZenBeam S2 | S2 Series User Guide - Page 16
power to your LED projector. IMPORTANT! Use only the bundled power adapter to charge the battery pack and supply power to your LED projector. WARNING! The air vents allow cool air to enter and warm air to exit your LED projector. WARNING! Ensure that paper, books, clothing, cables, or other objects - Asus ZenBeam S2 | S2 Series User Guide - Page 17
Right side Air vents The air vents allow cool air to enter and warm air to exit your LED projector. WARNING! Ensure that paper, books, clothing, cables, or other objects do not block any of the air vents or else overheating may occur. LED projector E-Manual 17 - Asus ZenBeam S2 | S2 Series User Guide - Page 18
Bottom view Tripod socket Connect the LED projector to a tripod using this socket. Built-in stand This LED projector comes with a built-in stand that allows you to adjust the height of the projector by either 4.5 degrees or 9.7 degrees. 18 LED projector E-Manual - Asus ZenBeam S2 | S2 Series User Guide - Page 19
your LED projector to launch the NO SIGNAL display. 3. Press repeatedly until the LED projector flashes a steady white light. IMPORTANT! Ensure that your LED projector is charged and can run on battery mode before enabling this feature. Battery time varies depending on usage. LED projector E-Manual - Asus ZenBeam S2 | S2 Series User Guide - Page 20
before enabling this feature. Battery time varies depending on usage. NOTE: To turn off or switch between the flashlight and emergency light feature of your LED projector, just press the Back/Splendid button until your preferred lighting feature is disabled or enabled. 20 LED projector E-Manual - Asus ZenBeam S2 | S2 Series User Guide - Page 21
on model. Battery compartment The battery compartment allows you to use CR2025 lithium coin batteries to power your LED projector's remote control. NOTE: For more details on using the battery compartment, refer to the Replacing the battery section in this manual. LED projector E-Manual 21 - Asus ZenBeam S2 | S2 Series User Guide - Page 22
control buttons These additional buttons allow you to use the LED projector from a distance of up to 8 meters. Power - Press this button to turn your LED projector on or off. Auto focus - Press this button to the Using the onscreen display menu section in this manual. 22 LED projector E-Manual - Asus ZenBeam S2 | S2 Series User Guide - Page 23
the battery compartment. C. Remove the old battery, then insert the new CR2025 lithium coin battery into the battery holder with the positive side (+) facing up. LED projector E-Manual 23 - Asus ZenBeam S2 | S2 Series User Guide - Page 24
D. Slide the battery holder back into the battery compartment. Push it all the way in until you hear a soft click, indicating that the battery compartment is locked back in place. 24 LED projector E-Manual - Asus ZenBeam S2 | S2 Series User Guide - Page 25
Chapter 2: Setting up Chapter 2: Setting up LED projector E-Manual 25 - Asus ZenBeam S2 | S2 Series User Guide - Page 26
LED projector This portable LED projector allows you to plug and play your devices so you can easily open multimedia files and hear audio straight from its built-in SonicMaster speakers. For your safety and to maintain the quality of this unit, refer to the following steps when operating your LED - Asus ZenBeam S2 | S2 Series User Guide - Page 27
LED projector. • Ensure that your LED projector LED projector. • To disconnect your LED projector from its main power supply, unplug your LED projector from the power socket. WARNING! Read the following precautions for your LED projector to short-circuit your LED projector's battery. • Never attempt - Asus ZenBeam S2 | S2 Series User Guide - Page 28
location. IMPORTANT! Contact your sales dealer if the AC power cord bundled with your LED projector does not match your local power source. NOTE: We highly recommend that you use Australia and Mainland China For U.S.A., Canada, and Taiwan For Continental Europe For U.K. 28 LED projector E-Manual - Asus ZenBeam S2 | S2 Series User Guide - Page 29
Connect the LED projector to your device A. Audio output jack LED projector E-Manual 29 - Asus ZenBeam S2 | S2 Series User Guide - Page 30
B. HDMI input 30 LED projector E-Manual - Asus ZenBeam S2 | S2 Series User Guide - Page 31
C. Power output (5V/1A) NOTE: The power output port is available when using the LED projector in battery mode or charging mode. LED projector E-Manual 31 - Asus ZenBeam S2 | S2 Series User Guide - Page 32
D. USB 3.1 Gen 2 Type-C™ DisplayPort input 32 LED projector E-Manual - Asus ZenBeam S2 | S2 Series User Guide - Page 33
E. USB 3.1 Gen 2 Type-C™ Power Delivery output (5V/1.5A) NOTE: The Power Delivery output port is only available when using the LED projector in charging mode. LED projector E-Manual 33 - Asus ZenBeam S2 | S2 Series User Guide - Page 34
the projector bag. NOTE: • Place the LED projector on a stable flat surface. • Keep a space of 30 cm or more between the sides of the LED projector. • Consult your dealer for special installation procedures like suspending the LED projector from the ceiling. 4.5o 9.7o 34 LED projector E-Manual - Asus ZenBeam S2 | S2 Series User Guide - Page 35
Screen size and projection distance table Adjust the LED projector's distance from the screen using the table below. LED projector Screen size Projection distance Screen Diagonal inch mm Screen Size Horizontal inch 27 2750 120 3048 104.61 2657 58.82 1494 118.11 3000 LED projector E-Manual 35 - Asus ZenBeam S2 | S2 Series User Guide - Page 36
Press the power button 3s 36 LED projector E-Manual - Asus ZenBeam S2 | S2 Series User Guide - Page 37
Adjust the image focus Push the focus button on the LED projector up or down, or press the focus button on the remote control to adjust the image focus. NOTE: Use a still image when adjusting the onscreen display. LED projector E-Manual OR 37 - Asus ZenBeam S2 | S2 Series User Guide - Page 38
38 LED projector E-Manual - Asus ZenBeam S2 | S2 Series User Guide - Page 39
Chapter 3: Using the onscreen display menu Chapter 3: Using the onscreen display menu LED projector E-Manual 39 - Asus ZenBeam S2 | S2 Series User Guide - Page 40
LED projector model. Using your LED projector for the first time Refer to the following steps when using your LED projector for the first time. NOTE: Ensure that your LED projector language for use on your LED projector. 4. You may now start using your LED projector to display files from your input - Asus ZenBeam S2 | S2 Series User Guide - Page 41
Adjusting your LED projector's settings To adjust your LED projector settings: 1. Press the center of the joystick on your LED projector (or press the Menu/OK button on your remote control) to launch settings and go back to the home screen. Remote control buttons LED projector E-Manual Joystick 41 - Asus ZenBeam S2 | S2 Series User Guide - Page 42
image projection onscreen. • Splendid - This option allows you to select a Splendid mode for your LED projector. • Brightness - Select this menu option to adjust the brightness of your projection onscreen. • menu option to adjust the gamma of your projection onscreen. 42 LED projector E-Manual - Asus ZenBeam S2 | S2 Series User Guide - Page 43
you to change the way your projections are oriented onscreen based from the current location of your LED projector. • Auto Ceiling Detection - This option allows you to turn Auto Ceiling detection on or off you to zoom in, zoom out, and pan your projection onscreen. LED projector E-Manual 43 - Asus ZenBeam S2 | S2 Series User Guide - Page 44
Auto Source on or off. Turn this option on to scan the connected devices to your LED projector automatically. • HDMI - Select this menu option to project images from the HDMI port. menu option to wirelessly project images from a supported Android or Windows® 10 device. 44 LED projector E-Manual - Asus ZenBeam S2 | S2 Series User Guide - Page 45
you to reset all the settings you have currently set up for your LED projector. • System Update - This option allows you to update the LED projector's firmware. NOTE: For the latest firmware and more information, visit https://www.asus.com/Projectors/ASUS-ZenBeam-S2/ LED projector E-Manual 45 - Asus ZenBeam S2 | S2 Series User Guide - Page 46
Turning off your LED projector 1. Press the power button. 2. When the following screen appears, press the power button again to completely turn off your LED projector. 46 LED projector E-Manual - Asus ZenBeam S2 | S2 Series User Guide - Page 47
Multi-language versions Download other language versions of this E-Manual via this website: https://www.asus.com/support LED projector E-Manual 47 - Asus ZenBeam S2 | S2 Series User Guide - Page 48
48 LED projector E-Manual - Asus ZenBeam S2 | S2 Series User Guide - Page 49
AAppppeennddiicceess Appendices LED projector E-Manual 49 - Asus ZenBeam S2 | S2 Series User Guide - Page 50
Communications Commission Statement This equipment has been tested and found to comply with the limits and, if not installed and used in accordance with the instructions, may cause harmful interference to radio communications. However, there may cause undesired operation. 50 LED projector E-Manual - Asus ZenBeam S2 | S2 Series User Guide - Page 51
CAN ICES-3(B)/NMB-3(B) Déclaration de conformité de Innovation, Sciences et Développement économique Canada (ISED) Le présent appareil est conforme aux CNR d'Innovation, Sciences et Dé notice for California WARNING Cancer and Reproductive Harm www.P65Warnings.ca.gov LED projector E-Manual 51 - Asus ZenBeam S2 | S2 Series User Guide - Page 52
regulation requirements ASUS is complied with: Japan JIS-C-0950 Material Declarations EU REACH SVHC Korea RoHS ASUS Recycling/Takeback Services ASUS recycling . Please go to http://csr.asus.com/english/Takeback.htm for detailed recycling information in different regions. 52 LED projector E-Manual - Asus ZenBeam S2 | S2 Series User Guide - Page 53
Additional Modes Keystone adjustment Auto Keystone Aspect Ratio Projector Placement Built-in speakers S2 0.3" DLP® R/G/B LED 30,000 hours (Max) HD 720p ( Table, Rear ceiling, Front ceiling Yes, 2W speaker (ASUS SonicMaster Audio technology) (continued on the next page) LED projector E-Manual 53 - Asus ZenBeam S2 | S2 Series User Guide - Page 54
S2 Signal Digital Signal Frequency Frequency 37.8 ~ 79.9 KHz(H) / 50 ~ 60 Hz(V) Power Power On Mode ≤65 W Standby Mode - Asus ZenBeam S2 | S2 Series User Guide - Page 55
Support PC Timings HDMI (PC) Resolution 800 x 600 1024 x 768 1280 x 768 1280 x 800 1280 x 1024 1280 x 960 1440 x 900 1400X1050 1024x768@75Hz 1366x768 (Hz) H-frequency (kHz) 50 37.5 60 45 50 56.25 60 67.5 24 Dot Clock frequency (MHz) 74.25 74.25 148.5 148.5 LED projector E-Manual 55 - Asus ZenBeam S2 | S2 Series User Guide - Page 56
56 LED projector E-Manual
-
 1
1 -
 2
2 -
 3
3 -
 4
4 -
 5
5 -
 6
6 -
 7
7 -
8
-
9
-
10
-
11
-
12
-
13
-
14
-
15
-
16
-
17
-
18
-
19
-
20
-
21
-
22
-
23
-
24
-
25
-
26
-
27
-
28
-
29
-
30
-
31
-
32
-
33
-
34
-
35
-
36
-
37
-
38
-
39
-
40
-
41
-
42
-
43
-
44
-
45
-
46
-
47
-
48
-
49
-
50
-
51
-
52
-
53
-
54
-
55
-
56
 |
 |

LED projector
E-Manual
S2 Series