Audiovox AVD400A Owners Manual
Audiovox AVD400A - AVD 400A - DVD Player Manual
 |
UPC - 044476029776
View all Audiovox AVD400A manuals
Add to My Manuals
Save this manual to your list of manuals |
Audiovox AVD400A manual content summary:
- Audiovox AVD400A | Owners Manual - Page 1
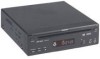
AVD400A SLOT-IN DVD PLAYER AVD400A DVDPLAYER DOLBY Owner's Manual - Audiovox AVD400A | Owners Manual - Page 2
AVD400A DVD Player. The AVD400A is designed to optimize the enjoyment of your favorite DVDs in the mobile environment. This DVD Player is constructed to provide years of reliable, trouble-free service. Please read this manual thoroughly prior to operating the player (servicing) instructions in - Audiovox AVD400A | Owners Manual - Page 3
and/or exposure to Laser Radiation. Contact qualified service personnel if your system is in need of repair. 3. CLEANING UNIT When cleaning, make sure the system is unplugged from the power source. Do not use any solvents or cleaning materials. Clean the DVD player using a lightly dampened lint - Audiovox AVD400A | Owners Manual - Page 4
Refer to the instructions supplied with the discs. 5. Powering the DVD Player This system MUST be powered from switched (Accessory) power as inside the AVD400A and cause the DVD player to malfunction. If the AVD400A does not operate properly under these conditions leave the AVD400A turned on - Audiovox AVD400A | Owners Manual - Page 5
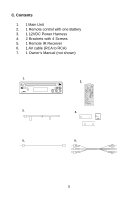
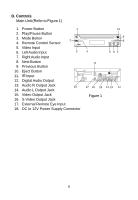
C. Contents 1. 1 Main Unit 2. 1 Remote control with one Battery 3. 1 12VDC Power Harness 4. 2 Brackets with 4 Screws 5. 1 Remote IR Receiver 6. 1 AV cable (RCA to RCA) 7. 1 Owner's Manual (not shown) 1. AVD400A DVDPLAYER DOLBY 3. 5. 2. AUDIOVOX 4. X 4 6. 5 - Audiovox AVD400A | Owners Manual - Page 6
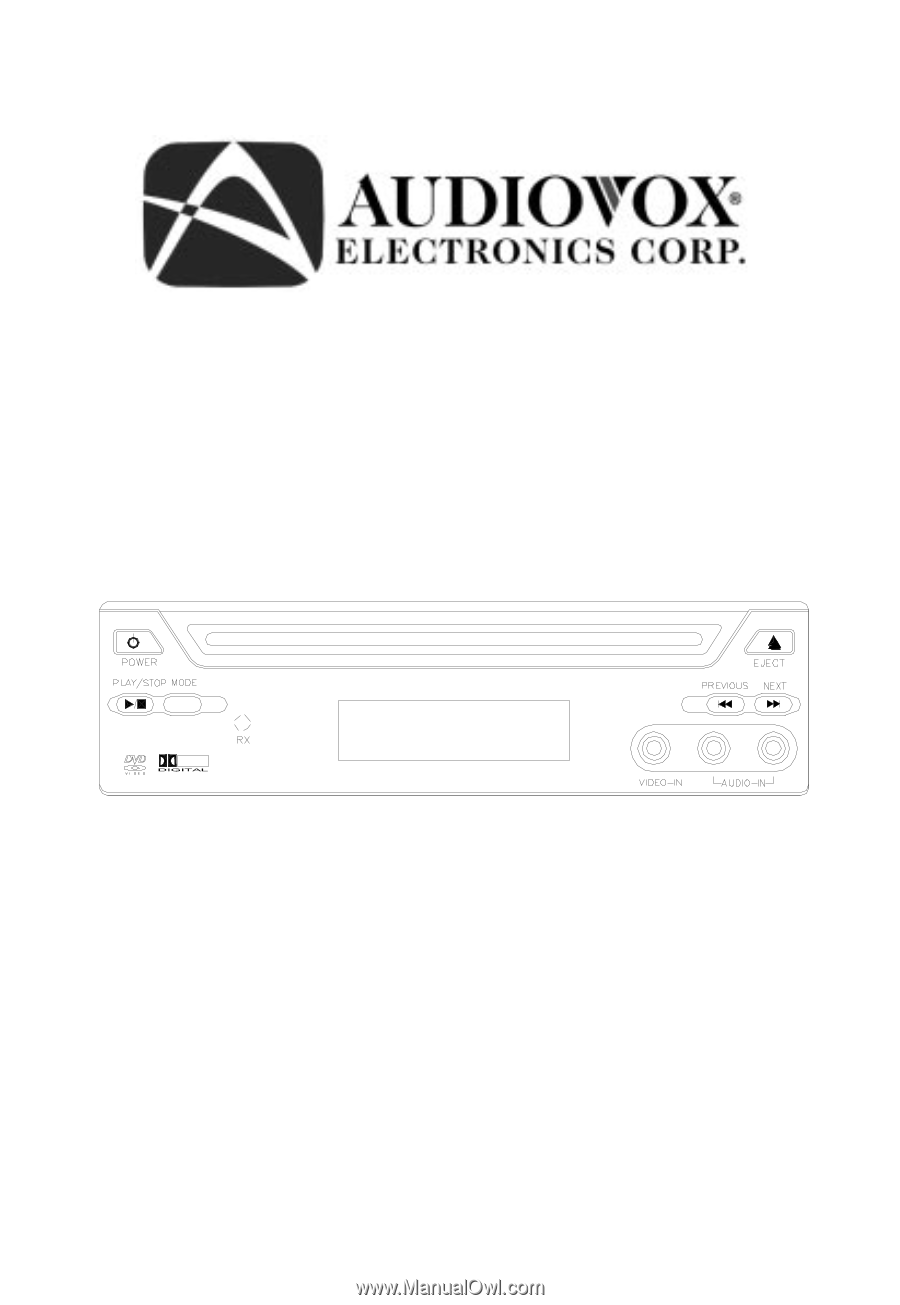
Power Button 1 2. Play/Pause Button 3. Mode Button 4. Remote Control Sensor 5. Video Input 2 AVD400A DVDPLAYER DOLBY 6. Left Audio Input 3 4 7. Right Audio Input Output Jack Figure 1 17. External Remote Eye Input 18. DC In 12V Power Supply Connector 10 9 8 5 67 FC DOLBY C 14 13 12 6 - Audiovox AVD400A | Owners Manual - Page 7
E. Remote Control View (Refer to Figure 2) 1) MODE Button 2) POWER Button 3) MENU Button 4) UP/DOWN/ LEFT/RIGHT Button 5) ENTER/PLAY Button 6) VOLUME +/- Buttons 7) NUMERIC KEYPAD 8) 10+ Button 9) TITLE - Audiovox AVD400A | Owners Manual - Page 8
F. Connections AVD400A DVDPLAYER DOLBY Front Rear Yellow Video Input (to DVD Player) Red Audio In White Audio In Figure 3 1. Powering your DVD Player ( Refer to Figure 3) Connect the black wire (-) to the vehicle ground. Connect the red wire (+) to a switched (Accessory) 12VDC source. Plug the - Audiovox AVD400A | Owners Manual - Page 9
disc into the slot on the front track, time, etc.). Change the angles of a scene Select the subtitle language Select the audio language Enlarge an image to 2, 3, or 4 times the original When the unit is in play mode this button will bring up a display for Brightness + Sharpness adjustment. For DVD - Audiovox AVD400A | Owners Manual - Page 10
disc will appear on the screen of your TV or Monitor. Contents of the menu will vary depending on the disc content. Press MENU during playback to display the main menu. Some DVDs only allow you to select disc playback options using the DVD root menu. 3. DISPLAY 1) Display mode During playback press - Audiovox AVD400A | Owners Manual - Page 11
disc playback press AUDIO* to select the desired audio language. (You can see item 10 in Picture 1 change) *NOTE: Some DVD's only allow access to these functions through the DVD menu. 7. ZOOM 2 'Zoom' in Display Mode 2 'Zoom' Display During playback press 'ZOOM' to enlarge the picture by 2x or 3x - Audiovox AVD400A | Owners Manual - Page 12
When playing an audio CD the AVD400A will automatically display the disc playback information. The options below show you what information is displayed. Press the 'DISPLAY' button to remove the display. 1. The current track. 2. The number of total tracks. 3. Playing time of the disc. 4. Remaining - Audiovox AVD400A | Owners Manual - Page 13
significant loss of audio quality. CD-R / RW discs that have been encoded in MP3 format are compatible with this device. Insert an MP3 Disc, the DVD player will initialize the disc and the directory (folder) will be shown on the monitor. CD-R MENU ROOT ------ --------28 ----------- Name1 Name2 - Audiovox AVD400A | Owners Manual - Page 14
you turn it off. NOTICE • " " sign in front of a file name indicates that this is a folder, not a MP3 file. • " " sign in front of a file name indicates that this is a MP3 file. During MP3 playback, you cannot access "PLAY MODE", folders or songs. 11. Playing a JPEG file 1) Insert the JPEG Disc into - Audiovox AVD400A | Owners Manual - Page 15
12. SETUP Press STOP and then Press 'SETUP' to display the Main screen of the SETUP Menu on the screen. Press 'SETUP' again to exit the SETUP Menu and the unit will resume it's last playback mode. Main 'SETUP' Menu Screen 1) Select language using the LEFT/RIGHT buttons. 'Language' Display Menu a. - Audiovox AVD400A | Owners Manual - Page 16
to enter the submenu. Select the audio language you desire using the UP/DOWN buttons, then press ENTER to confirm the setting. 'Audio' Display d. Select 'DVD Menu' using the UP/DOWN buttons, then press ENTER to enter the submenu. Select the 'DISC Menu' language you desire using the UP/DOWN buttons - Audiovox AVD400A | Owners Manual - Page 17
UP/DOWN buttons, then press ENTER to confirm the setting. 'TV Shape' Display * 4:3/PS: When the player is connected to a normal TV, and a wide picture is shown on the full screen. * 4:3/LB: When the player is connected to a normal TV, and a wide picture is shown on the screen with a black strip at - Audiovox AVD400A | Owners Manual - Page 18
b. Select 'TV System' using the UP/DOWN buttons, then press ENTER to enter the submenu. Select the TV System you desire using the UP/ DOWN buttons, then press ENTER to confirm the setting. 'TV System' Display 3) Select 'AUDIO' using the LEFT/RIGHT buttons. 'AUDIO' Display Menu a. Select 'DIGITAL OUT - Audiovox AVD400A | Owners Manual - Page 19
b. Select 'LPCM 48k DS' using the UP/DOWN buttons, then press ENTER to enter the submenu. Select the LPCM output you desire using the UP/DOWN buttons, then press ENTER to confirm the setting. 'DTS' Display 4) Select 'Rating' by using the LEFT/RIGHT buttons, press ENTER to enter the Rating set up - Audiovox AVD400A | Owners Manual - Page 20
default password to set the parental level and change the password, you can record this default password in another area and delete it from this manual. Some discs can be limited depending on the age of users while some discs can not. Restore Default: To restore all of the options to - Audiovox AVD400A | Owners Manual - Page 21
Supported media Signal format system DVD Video format Video output Audio output Signal-to-noise ratio Harmonic distortion Dynamic range Wow and flutter Power source Power consumption Operating temperature Storage temperature Operating humidity Dimensions (W x H x D) Weight DVD/CD/MP3/JPEG/CD - Audiovox AVD400A | Owners Manual - Page 22
generated static or noise, to correction of antenna problems, to costs incurred for installation, removal or reinstallation of the product, or to damage to digital memory cards, discs, speakers, accessories, or vehicle electrical systems. This Warranty does not apply to any product or part - Audiovox AVD400A | Owners Manual - Page 23
© 2005 Audiovox Electronics Corp., 150 Marcus Blvd., Hauppauge, N.Y. 11788 128-7393A
-
 1
1 -
 2
2 -
 3
3 -
 4
4 -
 5
5 -
 6
6 -
 7
7 -
8
-
9
-
10
-
11
-
12
-
13
-
14
-
15
-
16
-
17
-
18
-
19
-
20
-
21
-
22
-
23
 |
 |
AVD400A
SLOT-IN DVD PLAYER
Owner’s Manual
AVD400A
DVDPLAYER
DOLBY