Audiovox D1809 Owners Manual
Audiovox D1809 - DVD Player - 8 Manual
 |
UPC - 044476066054
View all Audiovox D1809 manuals
Add to My Manuals
Save this manual to your list of manuals |
Audiovox D1809 manual content summary:
- Audiovox D1809 | Owners Manual - Page 1
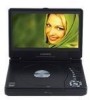
D1809 8" LCD MONITOR WITH DVD PLAYER PDF created with pdfFactory Pro trial version www.pdffactory.com - Audiovox D1809 | Owners Manual - Page 2
block any ventilation openings. Install in accordance with the manufacturer's instructions. l Do not install near any heat sources such as radiators unused for long periods of time. l Refer all servicing to qualified service personnel. Servicing is required when the apparatus has been damaged in any - Audiovox D1809 | Owners Manual - Page 3
not contain customer serviceable components. l Do not use the unit immediately after transportation from a cold place to a warm place; condensation problems may result. Wait for about one hour till the moisture evaporates before operating the unit. l When using your portable DVD player, do not sit - Audiovox D1809 | Owners Manual - Page 4
installation. This equipment generates, uses and can radiate radio frequency energy and, if not installed and used in accordance with the instructions, may cause harmful interference to radio communications. However, there is no guarantee that interference will not occur in a particular installation - Audiovox D1809 | Owners Manual - Page 5
product. Manufacturer/Responsible Party Audiovox Electronics Corp., 150 Marcus Blvd Service Information This product should be serviced only by those specially trained in appropriate servicing techniques. For instructions on how to obtain service, refer to the warranty included in this user manual - Audiovox D1809 | Owners Manual - Page 6
, and Connectors 9 F. Loading and Playing a Disc 10 G. Basic Operation 11 H. Menu 12 I. Display 12 J. Playing Audio CDs 18 K. Playing JPEG Files 19 L. Connecting to Other Equipment 20 M. Setup 21 N. Specifications 29 O. Rechargeable Built-in Battery use 29 P. Troubleshooting 31 6 PDF - Audiovox D1809 | Owners Manual - Page 7
A. Introduction Thank you for choosing the D1809 portable DVD player. The main features include a 8" wide Screen (16:9 Aspect Ratio) Liquid Crystal Display (LCD) monitor and a DVD player. The unit applies the latest state of the art electronics and is designed for use in hotels, offices or your home - Audiovox D1809 | Owners Manual - Page 8
C. Contents 1. 1 x 8'' LCD Monitor and DVD Player 2. 1 x Remote Control with Battery (CR2025) 3. 1 x Audio/Video Cable 4. 1 x AC to DC Adapter 5. 1 x DC Power Adapter 6. 1 x Instruction Manual 7. 1 x Product Registration Card 8. 1 x eMusic Card D. Powering and Installation 1. Powering the System - Audiovox D1809 | Owners Manual - Page 9
E. Controls, Indicators, and Connectors 1. Unit View (Refer to Figure 2) Figure 2 1) LCD Panel Shut Off Switch 2) Wide Screen Button 3) Stop Button 4) Previous Button 5) Next Button 6) Play/Pause Button 7) Menu Button 8) Up Button 9) Right Button 10) OK Button 11) Down Button 12) Left Button 13) - Audiovox D1809 | Owners Manual - Page 10
Button 15) STOP Button 16) MENU Button 17) AUDIO Button 18) ANGLE Button 19) PLAY/PAUSE Button Figure 3 F. Loading and Playing a Disc a. After connecting power to the unit, apply power to the DVD player by sliding the POWER ON/OFF switch to ON. The power indicator will be green. b. Open the disc - Audiovox D1809 | Owners Manual - Page 11
A-B DISPLAY ANGLE SUBTITLE AUDIO ZOOM SETUP Turn the unit on/off Remove/load the disc Start Play/Execute item or setting Still Picture (1 time) Stop audio language Enlarge an image to 2, 3, or 4 times the original size during DVD playback. Display the setup menu to select and set items, and exit the - Audiovox D1809 | Owners Manual - Page 12
. The contents of the menu vary from disc to disc. Press MENU during playback to display the menu. Some DVDs only allow you to select disc playback options using the DVD root menu. I. Display (Display contents vary from disc to disc.) 1. Playing Time and Remaining Time a. During playback press the - Audiovox D1809 | Owners Manual - Page 13
c. Press DISPLAY button a third time to display the Elapsed Time for the chapter. The heading will disappear automatically in 3 seconds. Tt 01/01 Ch 02/17 0:00:00 Chapter Elapsed Time Screen Display d. Press DISPLAY button a fourth time to display the Remaining Time for the chapter. The heading will - Audiovox D1809 | Owners Manual - Page 14
' is displayed. The Subtitle display will disappear automatically if the SUB button is not pressed again within 3 seconds. Subtitle 01/02 Subtitle Screen Display * Some DVDs only allow access to this function through the DVD menu. 14 PDF created with pdfFactory Pro trial version www.pdffactory.com - Audiovox D1809 | Owners Manual - Page 15
audio display will disappear automatically if the AUDIO button is not pressed within 3 seconds. Audio Language Screen Display * Some DVDs only allow access to this function through the DVD menu. 5. Zoom During playback press ZOOM button to enlarge the picture by 2x, 3x or 4X with the current zoom - Audiovox D1809 | Owners Manual - Page 16
to set the Starting Point A. A-B Repeat Starting Point Screen Display b. Press A-B button a second time to set the Ending Point B and the player will repeatedly play the part between Point A and Point B. A-B Repeat Ending Point Screen Display c. Press A-B button a third time to cancel A-B repeat - Audiovox D1809 | Owners Manual - Page 17
7. Repeat a. During playback press 1/ALL button once to repeatedly play the current chapter. Chapter Repeat ON Screen Display b.During playback press 1/ALL button again to repeatedly play the current title. Title Repeat ON Screen Display c. During playback press 1/ALL button a third time to repeat - Audiovox D1809 | Owners Manual - Page 18
d. Press 1/ALL button a fourth time, to resume normal playback. Repeat Off Screen Display 8. Forward/Reverse Scan a. During playback press uu to scan forward at 2x, 4x, 8x,16x, 32x and normal speed. b. During playback press tt to scan backward at 2x, 4x, 8x,16x, 32x and normal speed. J. Playing - Audiovox D1809 | Owners Manual - Page 19
A. b. Press A-B a second time to set the Ending Point B and the player will repeatedly play the part between Point A and Point B. c. Press A-B a folders or picture files contained on the disc will be displayed automatically after loading. 3) Press UP, DOWN and ENTER button to select a folder or - Audiovox D1809 | Owners Manual - Page 20
4 2. Connecting Headphones (Not included) Simply plug the headphones into either Headphone jack 1 or Headphone jack 2 on the left side of the DVD Player. (Refer to Figure 5) Figure 5 Plugging into Headphone jack 1 will disable the internal speakers. 20 PDF created with pdfFactory Pro trial version - Audiovox D1809 | Owners Manual - Page 21
a normal TV, and a wide picture is shown on the screen with a black strip at both the top and bottom of the screen. * WIDE: When the player is connected to a wide screen TV, a wide picture is shown on the full screen. TV Display Screen Display 21 PDF created with pdfFactory Pro trial - Audiovox D1809 | Owners Manual - Page 22
b) Select 'ANGLE MARK' using the DOWN buttton, and then press the RIGHT button to enter the submenu. Choose Angle Mark on or off using the UP/DOWN button and then press ENTER button to confirm the setting. Press the LEFT button to return. Angle Mark Screen Display * ON: The screen will show the - Audiovox D1809 | Owners Manual - Page 23
confirm the setting. Press the LEFT button to return. Screen Saver Screen Display *ON: Enables screen saver. *OFF: Disables screen saver. NOTE: The DVD player will enter the Screen Saver mode after approximately five minutes if the same image remains on the screen. e) Select 'LAST MEMORY' by using - Audiovox D1809 | Owners Manual - Page 24
2) Select 'VIDEO' by using the LEFT/RIGHT buttons, press ENTER button to enter the VIDEO SETUP PAGE. Video Quality Setup Screen Display a) Select 'BRIGHTNESS' by using the UP or DOWN button, then press ENTER button. Adjust the Brightness by pressing the LEFT or RIGHT button. To exit Brightness - Audiovox D1809 | Owners Manual - Page 25
default password to set the parental level and change the password, you can record this default password in another area and delete it from this manual. Some discs can be limited depending on the age of users while some discs cannot. 25 PDF created with pdfFactory Pro trial version www.pdffactory - Audiovox D1809 | Owners Manual - Page 26
4) With no disc inside the player select 'PREFEREN' using the LEFT or RIGHT button, then press ENTER button to enter the 'PREFERENCE PAGE'. Preference Page Screen Display a) Select 'AUDIO' using the - Audiovox D1809 | Owners Manual - Page 27
and subtitle selection is only available for discs that are recorded in the above listed languages. If the selected language is not available, the player will play and display on the screen the original recorded language contained in the disc. 27 PDF created with pdfFactory Pro trial version www - Audiovox D1809 | Owners Manual - Page 28
the DOWN button, then press ENTER button to enter the submenu. Press ENTER button to make the setting return to the factory-set mode. Load Factory Setting Screen Display NOTE: The parental setting is not affected by the default reset function. 28 PDF created with pdfFactory Pro trial version www - Audiovox D1809 | Owners Manual - Page 29
x 150 x 40 mm) Battery spec Type: Li-polymer Model no.: 6532100(30) Rating: 1600mAh 7.4V Manufacturer: Great Power Battery (Zhuhai) Co., Ltd O. Rechargeable Built-in Battery Use The DVD player utilizes a long-life Li-Polymer battery for portability. Li-Polymer batteries feature high storage capacity - Audiovox D1809 | Owners Manual - Page 30
fully discharged, immediately recharge (regardless of whether you plan to use battery or not) in order to maximize battery life. 3. To charge the battery, please connect the power jack directly into the DVD Player and leave connected until the red power indicator turns green. Using and Maintaining - Audiovox D1809 | Owners Manual - Page 31
P. Troubleshooting PROBLEM No sound or distorted sound SOLUTION • Make sure the DVD player is connected properly. Make sure all time because: 1. The disc's software restricts it. 2. The disc's software doesn't support the feature (e.g., angles) 3. The feature is not available at the moment. 4. You - Audiovox D1809 | Owners Manual - Page 32
Troubleshooting (Cont) PROBLEM IR sensor inoperative SOLUTION • Verify that the batteries in the remote are fresh. • Verify that the remote sensor eye is not obstructed. Disc won't play Play starts, but then stops immediately • Check the type of disc you put into disc tray. This DVD player only - Audiovox D1809 | Owners Manual - Page 33
static or noise, to correction of antenna problems, to costs incurred for installation, removal or THE COMPANY'S LIABILITY EXCEED THE PURCHASE PRICE PAID BY PURCHASER FOR THE PRODUCT. other rights which vary from state to state. Audiovox Electronics Corporation, 150 Marcus Blvd., Hauppauge, New - Audiovox D1809 | Owners Manual - Page 34
Audiovox Electronics Corporation 150 Marcus Boulevard Hauppauge, NY 11788 www.audiovox.com 128-8573 (V1.0) Printed in China PDF created with pdfFactory Pro trial version www.pdffactory.com
-
 1
1 -
 2
2 -
 3
3 -
 4
4 -
 5
5 -
 6
6 -
 7
7 -
8
-
9
-
10
-
11
-
12
-
13
-
14
-
15
-
16
-
17
-
18
-
19
-
20
-
21
-
22
-
23
-
24
-
25
-
26
-
27
-
28
-
29
-
30
-
31
-
32
-
33
-
34
 |
 |

D1809
8" LCD MONITOR WITH DVD PLAYER
PDF created with pdfFactory Pro trial version
www.pdffactory.com