Avanti HRS10321B Instruction Guide
Avanti HRS10321B Manual
 |
View all Avanti HRS10321B manuals
Add to My Manuals
Save this manual to your list of manuals |
Avanti HRS10321B manual content summary:
- Avanti HRS10321B | Instruction Guide - Page 1
Safe Unit 1 - Felt Liner 2 - Emergency Access Keys Installation Screw Kit 1 - Installation / Usage Guide 4 - Rubber Feet INSTALLING YOUR SECURITY SAFE When installing your safe, be sure the location is sturdy enough to support the unit and is both secure and easy to access. Safe can be - Avanti HRS10321B | Instruction Guide - Page 2
, the Green Light flashes and one long acoustic signals ("beep~"), indicates new master code changed successfully. Avanti Products Miami, FL 33172 In the event of service issues, please call the Customer Hotline at 1-800 - 220 - 5570 - Avanti HRS10321B | Instruction Guide - Page 3
Additional Instructions: Manual Operation (Open using the key). • User will need to remove the key hole cover by peeling away the key access to the safe and the battery compartment. Avanti Products Miami, FL 33172 In the event of service issues, please call the Customer Hotline at 1-800 - 220 - 5570 - Avanti HRS10321B | Instruction Guide - Page 4
product has been installed and operated in accordance with the written instructions in this manual. In rental or commercial use, the warranty period is 90 for service calls to · Repairs performed by unauthorized servicers. remote areas. · Service calls that are related to external problems, such
-
 1
1 -
 2
2 -
 3
3 -
 4
4
 |
 |

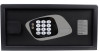
MODEL
HRS10321B
SECURITY SAFE
INSTALLATION AND USAGE INSTRUCTIONS
Your Avanti Room Security Safe is supplied with the following:
1 – Security Safe Unit
2 – Emergency Access Keys
1 – Installation / Usage Guide
1 – Felt Liner
Installation Screw Kit
4 – Rubber Feet
INSTALLING YOUR SECURITY SAFE
When installing your safe, be sure the location is sturdy enough to support the unit and is both
secure and easy to access.
Safe can be installed onto either a concrete or wooden surface.
When installing use a 25/64” (10mm) drill bit and screws.
To prevent removal of your security safe, it is recommended to use Allen type screws (not included)
to affix the unit to the installation location.