Axis Communications P5534 P5532/P5534 - Installation Guide
Axis Communications P5534 Manual
 |
View all Axis Communications P5534 manuals
Add to My Manuals
Save this manual to your list of manuals |
Axis Communications P5534 manual content summary:
- Axis Communications P5534 | P5532/P5534 - Installation Guide - Page 1
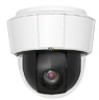
INSTALLATION GUIDE AXIS P5532 PTZ Dome Network Camera AXIS P5534 PTZ Dome Network Camera ENGLISH FRANÇAIS DEUTSCH ITALIANO ESPAÑOL - Axis Communications P5534 | P5532/P5534 - Installation Guide - Page 2
, you can: • download user documentation and firmware updates • find answers to resolved problems in the FAQ database. Search by product, category, or phrases • report problems to Axis support by logging in to your private support area. AXIS P5532/P5534 uses a 3.0V CR2032 Lithium battery, for - Axis Communications P5534 | P5532/P5534 - Installation Guide - Page 3
AXIS P5532/P5534 Installation Guide Page 3 ENGLISH AXIS P5532 & AXIS P5534 Installation Guide This installation guide provides instructions for installing an AXIS P5532/AXIS P5534 PTZ Dome Network Camera on your network. For all other aspects of using the product, please see the User's Manual, - Axis Communications P5534 | P5532/P5534 - Installation Guide - Page 4
Page 4 Hardware Overview Camera unit Control button SDHC card slot Status indicator LED Restart button AXIS P5532/P5534 Installation Guide Dome cover Dome ring screws (6) Dome ring Dome cover Top cover Sealing ring - Axis Communications P5534 | P5532/P5534 - Installation Guide - Page 5
AXIS P5532/P5534 Installation Guide Hard ceiling mount Drop ceiling mount Page 5 Mounting plate Mounting plate screws (3) Bracket arm (3) Bracket arm screw (3) and washer (3) Trim ring Safety wire Unit holders (3) - Axis Communications P5534 | P5532/P5534 - Installation Guide - Page 6
Page 6 AXIS P5532/P5534 Installation Guide Install the hardware ! IMPORTANT! - To use AXIS P5532/P5534 outdoors, it must be installed in an approved outdoor housing. Please see www.axis.com for more information on outdoor housing. Prepare for installation Read all the instructions before - Axis Communications P5534 | P5532/P5534 - Installation Guide - Page 7
ENGLISH AXIS P5532/P5534 Installation Guide Page 6 screws. 4. If installing an SD card, refer to the instructions Install an SD card (optional), below. 5. Put the top cover User's Manual available from the AXIS Network Video Product CD supplied with this product or from the website at www.axis.com - Axis Communications P5534 | P5532/P5534 - Installation Guide - Page 8
Page 8 AXIS P5532/P5534 Installation Guide 4. Route and connect the network cable and the multi- camera and ceiling mount is approximately 2.3 kg (5.1 lb.). Check that the ceiling material is strong enough to support this weight. • The ceiling tile should be 5 mm-60 mm (0.2 in.-2.4 in.) thick. 3. - Axis Communications P5534 | P5532/P5534 - Installation Guide - Page 9
ENGLISH AXIS P5532/P5534 Installation Guide Page 9 7. Route and connect the network cable and the multi plate and rotate the camera unit. 11. Install the High PoE Midspan 1-Port, see Install the AXIS T8123 High PoE Midspan 1-port, on page 11. 12. Check that the indicator LEDs on the midspan - Axis Communications P5534 | P5532/P5534 - Installation Guide - Page 10
Page 10 AXIS P5532/P5534 Installation Guide 14. Place the trim ring over the ceiling bracket and snap it into place. Trim ring Bracket mount (optional accessory) 1. Install the selected bracket according to the instructions supplied with the bracket. If drilling is required, make sure to use - Axis Communications P5534 | P5532/P5534 - Installation Guide - Page 11
AXIS P5532/P5534 Installation Guide Page 11 Install the AXIS T8123 High PoE Midspan 1-port AXIS T8123 High PoE Midspan 1-port enables Axis network video products with high power consumption to receive data and power over the same Ethernet cable. Follow these instructions to connect AXIS T8123. 1. - Axis Communications P5534 | P5532/P5534 - Installation Guide - Page 12
Page 12 AXIS P5532/P5534 Installation Guide Assign an IP Address Most networks today have a you would like to assign a static IP address, the recommended method in Windows is either AXIS IP Utility or AXIS Camera Management. Depending on the number of cameras you wish to install, use the method - Axis Communications P5534 | P5532/P5534 - Installation Guide - Page 13
AXIS P5532/P5534 Installation Guide Page 13 AXIS IP Utility - single camera/small installation AXIS IP Utility automatically discovers and displays Axis devices on your network. The application can also be used to manually assign a static IP address. ENGLISH Note that the computer running AXIS - Axis Communications P5534 | P5532/P5534 - Installation Guide - Page 14
Page 14 AXIS P5532/P5534 Installation Guide AXIS Camera Management - multiple cameras/large installations AXIS Camera Management can automatically discover multiple Axis devices, show connection status, manage firmware upgrades and set IP addresses. Automatic discovery 1. Check that the camera is - Axis Communications P5534 | P5532/P5534 - Installation Guide - Page 15
ENGLISH AXIS P5532/P5534 Installation Guide Page 15 Set the Password To gain access to the product, the password for the default administrator user root must be set. This is done - Axis Communications P5534 | P5532/P5534 - Installation Guide - Page 16
Page 16 AXIS P5532/P5534 Installation Guide Access the video stream The Live View page of the network camera is displayed, with links to the Setup tools, which allow you to customize the camera. If required, click Yes to install AMC (AXIS Media Control), which allows viewing of the video stream in - Axis Communications P5534 | P5532/P5534 - Installation Guide - Page 17
, refer to the service provider´s Installation Guide. For information and help to find a local AVHS Service Provider go to www.axis.com When enabled on your computer, the camera is automatically detected and added to "My Network Places." Applicable to browsers with support for Bonjour. Navigate - Axis Communications P5534 | P5532/P5534 - Installation Guide - Page 18
Page 18 AXIS P5532/P5534 Installation Guide Set the IP address with ARP/Ping 1. Acquire an IP address on the same network segment your computer is connected to. 2. Locate the serial number (S/N) - Axis Communications P5534 | P5532/P5534 - Installation Guide - Page 19
AXIS P5532/P5534 Installation Guide Page 19 ENGLISH Unit Connectors Network connector - RJ-45 Ethernet connector. Supports High PoE (Power over Ethernet, IEEE 802.3at). Use AXIS T8123 High PoE Midspan 1-port (included). Shielded cables should be used to comply with EMC. Multi-connector - Terminal - Axis Communications P5534 | P5532/P5534 - Installation Guide - Page 20
on page 5 and instructions on page 7 and page 8. The cable provides the following connectors: Power connector - 3-pin terminal block used for power input. DC power input, 24-34 V DC AXIS P5532: max 15 W AXIS P5534: max 17 W AC power input, 20-24 V AC AXIS P5532: max 20 VA AXIS P5534: max 23.6 VA - Axis Communications P5534 | P5532/P5534 - Installation Guide - Page 21
AXIS P5532/P5534 Installation Guide Page 21 ENGLISH • Digital firmware upgrade. No network connection Firmware upgrade failure Steady for 10 sec. after successful restart Note: For more information on the AXIS P5532/P5534 status indicators, please see the User's Manual available from the AXIS - Axis Communications P5534 | P5532/P5534 - Installation Guide - Page 22
Page 22 AXIS P5532/P5534 Installation Guide Resetting to the Factory Default instructions. For more information on this and other topics, visit the Axis Support Web at www.axis.com/techsup Further Information The User's Manual is available from the Axis Web site at www.axis.com or from the AXIS - Axis Communications P5534 | P5532/P5534 - Installation Guide - Page 23
AXIS P5532/P5534 Guide d'installation Page 23 FRANÇAIS AXIS P5532 & AXIS P5534 Guide d'installation Ce guide d'installation explique comment installer la Caméra réseau à dôme AXIS P5532/AXIS P5534 PTZ sur votre réseau. Pour toute autre question concernant l'utilisation du produit, reportezvous - Axis Communications P5534 | P5532/P5534 - Installation Guide - Page 24
Page 24 Présentation du matériel Caméra AXIS P5532/P5534 Guide d'installation Bouton de commande Logement de carte SDHC Voyant d'état Bouton Redémarrer Bulle du dôme Anneau du dôme vis (6) Anneau du dôme Bulle du dôme Couvercle supérieur Anneau d'étanchéité - Axis Communications P5534 | P5532/P5534 - Installation Guide - Page 25
AXIS P5532/P5534 Guide d'installation Fixation au plafond Fixation au faux-plafond Page 25 Plaque de fixation Vis de la plaque de fixation (3) Bras du support (3) Vis du bras du support (3) et rondelle (3) Bague décorative Fil de sécurité Supports de rack (3) Couvercle de base de la caméra Vis du - Axis Communications P5534 | P5532/P5534 - Installation Guide - Page 26
pour plus d'informations sur le boîtier d'extérieur. Préparation de l'installation Lisez toutes les instructions avant de préparer l'installation la caméra AXIS P5532/P5534. En effet, de nombreuses étapes de cette préparation requièrent le retrait du couvercle supérieur et il serait plus judicieux - Axis Communications P5534 | P5532/P5534 - Installation Guide - Page 27
FRANÇAIS AXIS P5532/P5534 Guide d'installation Page 27 Remplacement de la bulle du dôme fumée/ rieur, puis serrez les six vis. 4. En cas d'installation de la carte SD, reportez-vous aux instructions décrites dans la section Installation d'une carte SD (facultatif) ci-après. 5. Remettez en place le - Axis Communications P5534 | P5532/P5534 - Installation Guide - Page 28
Page 28 AXIS P5532/P5534 Guide d'installation 3. Desserrez les quatre vis du couvercle de base de la puis serrez les vis. 6. Fixez la caméra à l'aide du fil de sécurité fourni. 7. Glissez les supports de rack de la caméra réseau dans les logements de la plaque de fixation, puis tournez la caméra - Axis Communications P5534 | P5532/P5534 - Installation Guide - Page 29
AXIS P5532/P5534 Guide d'installation Page 29 7. Acheminez le câble réseau et le câble multi- l'aide du fil de sécurité fourni. Plaque de plafond Fil de sécurité Support sur la plaque FRANÇAIS 10. Glissez les supports de rack de la caméra réseau dans les logements de la plaque de fixation, - Axis Communications P5534 | P5532/P5534 - Installation Guide - Page 30
Page 30 AXIS P5532/P5534 Guide d'installation 14. Placez la brague décorative sur le support, puis mettez-le en position. Brague décorative Fixation du support (accessoire en option) 1. Installez le support choisi conformément aux instructions fournies avec le support. S'il s'avère nécessaire - Axis Communications P5534 | P5532/P5534 - Installation Guide - Page 31
AXIS P5532/P5534 Guide d'installation Page 31 Installation de l'injecteur High PoE AXIS T8123 à 1 port L'injecteur High PoE AXIS T8123 à 1 port permet aux produits de vidéo sur IP Axis consommant une quantité importante d'énergie de recevoir des données et de l'alimentation via le même câble - Axis Communications P5534 | P5532/P5534 - Installation Guide - Page 32
Page 32 AXIS P5532/P5534 Guide d'installation Attribution d'une adresse IP Aujourd'hui, la plupart une adresse IP statique, sous Windows nous recommandons l'utilisation de l'application AXIS IP Utility ou de l'application AXIS Camera Management. Selon le nombre de caméras à installer, utilisez la - Axis Communications P5534 | P5532/P5534 - Installation Guide - Page 33
AXIS P5532/P5534 Guide d'installation Page 33 AXIS IP Utility : une seule caméra et une petite installation AXIS IP Utility détecte automatiquement les périphériques Axis IP. 4. Cliquez sur le bouton Assign (Attribuer) et suivez les instructions qui s'affichent à l'écran. La caméra doit être redé - Axis Communications P5534 | P5532/P5534 - Installation Guide - Page 34
Page 34 AXIS P5532/P5534 Guide d'installation AXIS Camera Management : plusieurs caméras et de grandes installations AXIS Camera Management peut détecter automatiquement plusieurs dispositifs Axis, afficher les états de connexion, gérer les mises à niveau du microprogramme et définir les adresses - Axis Communications P5534 | P5532/P5534 - Installation Guide - Page 35
AXIS P5532/P5534 Guide d'installation Page 35 FRANÇAIS Attribution d'adresses IP à plusieurs périphériques AXIS Camera Management accélère le processus d'attribution d'adresses IP à plusieurs périphériques en suggérant des adresses IP parmi une plage spécifiée. 1. Sélectionnez les pé - Axis Communications P5534 | P5532/P5534 - Installation Guide - Page 36
Page 36 AXIS P5532/P5534 Guide d'installation 3. Saisissez un mot de passe, puis saisissez-le de nouveau pour confirmation. Cliquez sur OK. Le mot de passe est maintenant configuré. Pour cré - Axis Communications P5534 | P5532/P5534 - Installation Guide - Page 37
AXIS P5532/P5534 Guide d'installation Page 37 Accès au flux de données vidéo La page Live View (Vidéo en direct) de la caméra réseau s'affiche, avec des - Axis Communications P5534 | P5532/P5534 - Installation Guide - Page 38
38 AXIS P5532/P5534 Guide d'installation Autres méthodes de configuration de l'adresse IP Le tableau ci-dessous indique les autres méthodes permettant de configurer ou de déterminer l'adresse IP. Toutes les méthodes sont activées par défaut et peuvent être désactivées. AVHS Service Connection - Axis Communications P5534 | P5532/P5534 - Installation Guide - Page 39
AXIS P5532/P5534 Guide d'installation Page 39 Définition de l'adresse IP à l'aide d'ARP/Ping 1. Trouvez une adresse IP sur le même segment de réseau que celui de votre ordinateur. 2. - Axis Communications P5534 | P5532/P5534 - Installation Guide - Page 40
Page 40 AXIS P5532/P5534 Guide d'installation Connecteurs de l'appareil Connecteur réseau : connecteur Ethernet RJ-45. Prend en charge High PoE (alimentation par Ethernet, IEEE 802.3at). Utilisez l'injecteur High PoE AXIS T8123 à 1 port (fourni). Des câbles blindés doivent être utilisés par souci - Axis Communications P5534 | P5532/P5534 - Installation Guide - Page 41
à la page 25 et les instructions à la page 27 et à la page 28. Les connecteurs que comprend le câble sont les suivants : Connecteur d'alimentation : bloc terminal à trois broches utilisé pour la puissance d'entrée. FRANÇAIS Alimentation en CC, 24-34 V CC AXIS P5532 : max 15 W AXIS P5534 : max 17 - Axis Communications P5534 | P5532/P5534 - Installation Guide - Page 42
Page 42 AXIS P5532/P5534 Guide d'installation • Entrée numérique : entrée d'alarme utilisée pour connecter des dispositifs transitoires. Charge maximale = 100 mA Tension maximale = +40 V CC AXIS P5532/P5534 Voyants d'état Couleur Indication Éteint Orange Orange/rouge Rouge Vert Connexion - Axis Communications P5534 | P5532/P5534 - Installation Guide - Page 43
AXIS P5532/P5534 Guide d'installation Page 43 Voyants d'état AXIS T8123 Témoin Indicateur Entrée CA Couleur Éteint Clignotement Vert Vert continu Indication Aucune caméra connectée ligne ou le manuel de l'utilisateur, disponible sur le CD du produit de vidéo sur IP AXIS fourni avec le produit. - Axis Communications P5534 | P5532/P5534 - Installation Guide - Page 44
Page 44 AXIS P5532/P5534 Guide d'installation Accès à la caméra via Internet Une fois installée, votre caméra réseau est accessible sur votre réseau local (LAN). Pour accéder à la - Axis Communications P5534 | P5532/P5534 - Installation Guide - Page 45
Komponente Netzwerk-Kamera Kuppelabdeckungen Montagesatz High PoE Midspan CD-ROM Gedruckte Dokumente Modell/Varianten/Anmerkungen AXIS P5532 AXIS P5534 Transparente Klarglasabdeckung (vormontiert) Getönte transparente Abdeckung Montagesatz für die Befestigung an Decken und in Hängedecken - Axis Communications P5534 | P5532/P5534 - Installation Guide - Page 46
Seite 46 Hardwareübersicht Kameraeinheit Steuertaste SDHC-Speicherkarteneinschub Statusanzeige (LED) Neustarttaste AXIS P5532/P5534 Installationsanleitung Kuppelabdeckung Kuppelring schrauben (6) Kuppelring Kuppelabdeckung Obere Abdeckung Dichtungsring - Axis Communications P5534 | P5532/P5534 - Installation Guide - Page 47
AXIS P5532/P5534 Installationsanleitung Deckenmontage Seite 47 DEUTSCH Hängedeckenmontage Montageplatte Schrauben für Montageplatte (3) Halterungsarm (3) Schrauben (3) und Unterlegscheiben (3) für Halterungsarm Montagering Sicherheitsdraht Kamerabefestigungen (3) Kameragrundplatte Schrauben für - Axis Communications P5534 | P5532/P5534 - Installation Guide - Page 48
über Außengehäuse. Vorbereitung der Installation Lesen Sie zunächst alle Anweisungen, bevor Sie mit der Installationsvorbereitung der AXIS P5532/ P5534 beginnen. Bei einigen Vorbereitungsschritten muss die obere Abdeckung abgenommen werden, sodass es sinnvoll ist, diese Schritte zusammen durchzuf - Axis Communications P5534 | P5532/P5534 - Installation Guide - Page 49
AXIS P5532/P5534 Installationsanleitung Seite 49 Austauschen der klaren/getönten Kuppelabdeckung (optional) 1. Lösen (Deaktivieren). Weitere Informationen hierzu finden Sie im Benutzerhandbuch, das sich auf der mitgelieferten CD für Axis-Netzwerkvideoprodukte befindet und auf der Website unter „www - Axis Communications P5534 | P5532/P5534 - Installation Guide - Page 50
Seite 50 AXIS P5532/P5534 Installationsanleitung Deckenmontage 1. Bereiten Sie die Befestigung der Montageplatte an Sie die Kameraeinheit. 8. Installieren Sie den High PoE Midspan (1 Anschluss), siehe Installation des AXIS T8123 High PoE Midspan (1 Anschluss), auf Seite 54. 9. Überprüfen Sie, ob - Axis Communications P5534 | P5532/P5534 - Installation Guide - Page 51
AXIS P5532/P5534 Installationsanleitung Seite 51 Hängedeckenmontage 1. Nehmen Sie die Deckenplatte ab, in der die Halterung für Hängedecken angebracht werden soll. 2. Markieren Sie mithilfe der mitgelieferten Schablone die Position - Axis Communications P5534 | P5532/P5534 - Installation Guide - Page 52
Seite 52 AXIS P5532/P5534 Installationsanleitung 9. Sichern Sie die Kamera mit dem mitgelieferten Sicherheitsdraht Sie die Kameraeinheit. 11. Installieren Sie den High PoE Midspan (1 Anschluss), siehe Installation des AXIS T8123 High PoE Midspan (1 Anschluss), auf Seite 54. 12. Überprüfen Sie, ob - Axis Communications P5534 | P5532/P5534 - Installation Guide - Page 53
AXIS P5532/P5534 Installationsanleitung Seite 53 Montagehalterung (Sonderzubehör) 1. Montieren Sie die gewünschte Bedarf das Mehrfachanschlusskabel mit der Netzwerk-Kamera. 6. Installieren Sie den AXIS T8123, siehe Installation des AXIS T8123 High PoE Midspan (1 Anschluss), auf Seite 54. 7. - Axis Communications P5534 | P5532/P5534 - Installation Guide - Page 54
Seite 54 AXIS P5532/P5534 Installationsanleitung Installation des AXIS T8123 High PoE Midspan (1 Anschluss) Mit dem AXIS T8123 High PoE Midspan (1 Anschluss) können Netzwerk-Videoprodukte von Axis mit einem großen Stromverbrauch über dasselbe Ethernet-Kabel sowohl mit Daten als auch mit Strom - Axis Communications P5534 | P5532/P5534 - Installation Guide - Page 55
AXIS P5532/P5534 Installationsanleitung Seite 55 Zuweisen einer IP-Adresse In den meisten Netzwerken 168.0.90 verwendet. Zum Zuweisen einer statischen IP-Adresse stehen unter Windows die Programme AXIS IP Utility und AXIS Camera Management zur Verfügung. Verwenden Sie die Methode, die für die gewü - Axis Communications P5534 | P5532/P5534 - Installation Guide - Page 56
Seite 56 AXIS P5532/P5534 Installationsanleitung AXIS IP Utility - einzelne Kamera/kleine Installation AXIS IP Utility erkennt automatisch die im Netzwerk vorhandenen Axis-Geräte und zeigt diese an. Die Anwendung kann außerdem zur manuellen Zuweisung einer statischen IP-Adresse verwendet werden. - Axis Communications P5534 | P5532/P5534 - Installation Guide - Page 57
AXIS P5532/P5534 Installationsanleitung Seite 57 AXIS Camera Management - mehrere Kameras/große Installationen Mit AXIS Camera Management können automatisch mehrere Axis-Geräte erkannt, der Verbindungsstatus angezeigt, die Firmware-Aktualisierungen verwaltet und IP-Adressen festgelegt werden. - Axis Communications P5534 | P5532/P5534 - Installation Guide - Page 58
Seite 58 AXIS P5532/P5534 Installationsanleitung Zuweisen von IP-Adressen für mehrere Geräte AXIS Camera Management beschleunigt die Zuweisung von IPAdressen an mehrere Geräte, indem IP-Adressen aus einem angegebenen Bereich vorgeschlagen werden. 1. Wählen Sie die zu konfigurierenden - Axis Communications P5534 | P5532/P5534 - Installation Guide - Page 59
AXIS P5532/P5534 Installationsanleitung Seite 59 3. Geben Sie ein Kennwort ein, und wiederholen Sie die Eingabe, um die korrekte Schreibweise zu bestätigen. Klicken Sie auf OK. Damit - Axis Communications P5534 | P5532/P5534 - Installation Guide - Page 60
60 AXIS P5532/P5534 Installationsanleitung Zugriff auf den Videostrom Die Seite „Live View" (Live-Ansicht) der Netzwerk-Kamera wird geöffnet. Sie enthält Links zu SetupTools, mit denen Sie die Kamera Ihren Bedürfnissen entsprechend anpassen können. Klicken Sie bei Bedarf auf Yes (Ja), um AMC (AXIS - Axis Communications P5534 | P5532/P5534 - Installation Guide - Page 61
AXIS P5532/P5534 Installationsanleitung Seite 61 Andere Methoden zum Festlegen der IP-Adresse Diese Tabelle auf den Link, um auf die Webseiten der Kamera zu gelangen. Ein kostenloser Service von Axis, mit dem Sie Ihre Kamera schnell und einfach installieren können. Eine Internetverbindung ohne - Axis Communications P5534 | P5532/P5534 - Installation Guide - Page 62
Seite 62 AXIS P5532/P5534 Installationsanleitung Zuweisen der IP-Adresse per ARP/Ping 1. Wählen Sie eine IP-Adresse aus dem Netzwerksegment, in dem sich auch Ihr Computer befindet. 2. Suchen Sie - Axis Communications P5534 | P5532/P5534 - Installation Guide - Page 63
. Mehrfachanschluss - Anschluss für externe Geräte: • Audio-Geräte • Eingabe-/Ausgabegeräte • AC/DC-Netzteil Wenn Sie externe Geräte an die AXIS P5532/P5534 anschließen, benötigen Sie ein Mehrfachanschlusskabel, damit der IP51-Schutz erhalten bleibt. Das Mehrfachanschlusskabel können Sie von Ihrem - Axis Communications P5534 | P5532/P5534 - Installation Guide - Page 64
üsse: Netzanschluss - 3-poliger Anschlussblock für Netzeingang. Gleichstromeingang 24-34 V Gleichstrom AXIS P5532: max. 15 W AXIS P5534: max. 17 W Wechselstromeingang 20-24 V Wechselstrom AXIS P5532: max 20 VA AXIS P5534: max. 23,6 VA Audioeingang (rosa) - 3,5-mm-Anschluss für ein Monomikrofon - Axis Communications P5534 | P5532/P5534 - Installation Guide - Page 65
-Aktualisierung. Gelb/rot Keine Netzwerkverbindung vorhanden Rot Firmware-Aktualisierung fehlgeschlagen Grün Konstant für 10 Sek. nach erfolgreichem Neustart Hinweis: Weitere Informationen zu den AXIS P5532/P5534 Statusanzeigen finden Sie im Benutzerhandbuch, das sich auf der mitgelieferten - Axis Communications P5534 | P5532/P5534 - Installation Guide - Page 66
Seite 66 AXIS P5532/P5534 Installationsanleitung AXIS T8123 Statusanzeigen LED Port Netzeingang Farbe Leuchtet nicht Blinkt Grün Konstant grün Bedeutung Keine Informationen hierzu finden Sie in der Online-Hilfe und im Benutzerhandbuch auf der mitgelieferten CD für Axis-Netzwerkvideoprodukte. - Axis Communications P5534 | P5532/P5534 - Installation Guide - Page 67
auf der Axis Support-Website unter „www.axis.com/techsup". Weitere Informationen Das Benutzerhandbuch ist auf der Axis Website unter http://www.axis.com erhältlich und befindet sich auch auf der mitgelieferten CD für Axis-Netzwerkvideoprodukte. Tipp! Unter „www.axis.com/techsup" finden Sie Firmware - Axis Communications P5534 | P5532/P5534 - Installation Guide - Page 68
- Axis Communications P5534 | P5532/P5534 - Installation Guide - Page 69
Guida all'installazione Questo documento fornisce le istruzioni necessarie per installare un Telecamera di rete PTZ a cupola AXIS P5532/AXIS P5534 nella rete in uso. Per ulteriori informazioni sull'utilizzo del prodotto, consultare la Guida per l'utente disponibile sul CD incluso nella confezione - Axis Communications P5534 | P5532/P5534 - Installation Guide - Page 70
Pagina 70 Panoramica dell'hardware Telecamera Guida all'installazione AXIS P5532/P5534 Pulsante di comando Alloggiamento scheda SDHC LED di stato Pulsante di riavvio Copertura a cupola Viti dell'anello (6) Anello della Cupola Copertura a cupola Copertura superiore Guarnizione ad anello - Axis Communications P5534 | P5532/P5534 - Installation Guide - Page 71
Guida all'installazione AXIS P5532/P5534 Montaggio su controsoffitto Pagina 71 Montaggio su soffitto mobile Piastra di montaggio Viti della piastra di montaggio (3) Braccio della staffa (3) Vite del braccio della staffa (3) e - Axis Communications P5534 | P5532/P5534 - Installation Guide - Page 72
approvato. Per ulteriori informazioni sulle custodie per esterni, visitare il sito www.axis.com Preparazione dell'installazione Leggere tutte le istruzioni prima di installare l'unità AXIS P5532/P5534 poichè numerose fasi di preparazione dell'istallazione richiedono la rimozione del coperchio - Axis Communications P5534 | P5532/P5534 - Installation Guide - Page 73
Guida all'installazione AXIS P5532/P5534 Pagina 73 Sostituire la copertura a cupola trasparente/oscurata (facoltativo) 1. Allentare le 4 viti della copertura superiore e rimuoverla, come nell'illustrazione a pagina 71. 2. Rimuovere le 6 viti dell' - Axis Communications P5534 | P5532/P5534 - Installation Guide - Page 74
Pagina 74 Guida all'installazione AXIS P5532/P5534 9. Controllare che i LED di segnalazione del midspan indichino le condizioni corrette e consultare la tabella a pagina 87 per ulteriori dettagli. Montaggio su soffitto mobile 1. Rimuovere il - Axis Communications P5534 | P5532/P5534 - Installation Guide - Page 75
Guida all'installazione AXIS P5532/P5534 9. Fissare la telecamera usando il cavo di sicurezza fornito. Staffa per ruotare la telecamera. 11. Installare il Midspan High PoE a 1 porta, vedere Installare il Midspan AXIS T8123 High PoE a 1 porta, a pagina 76. 12. Verificare che i LED di segnalazione del - Axis Communications P5534 | P5532/P5534 - Installation Guide - Page 76
Pagina 76 Guida all'installazione AXIS P5532/P5534 Montaggio su staffa (accessorio opzionale) 1. Installare la staffa selezionata di rete alla staffa di montaggio stringendo le 3 viti (Torx T30). Installare il Midspan AXIS T8123 High PoE a 1 porta Il Midspan T8123 High PoE a 1 porta consente di - Axis Communications P5534 | P5532/P5534 - Installation Guide - Page 77
Guida all'installazione AXIS P5532/P5534 Pagina 77 Assegnazione di un indirizzo IP La maggior l'indirizzo IP predefinito 192.168.0.90. Per assegnare un indirizzo IP statico, utilizzare AXIS IP Utility o AXIS Camera Management in ambiente Windows. In base al numero di videocamere da installare, - Axis Communications P5534 | P5532/P5534 - Installation Guide - Page 78
AXIS P5532/P5534 AXIS IP Utility: telecamera singola/piccole installazioni AXIS IP Utility rileva e visualizza automaticamente i dispositivi Axis a pagina 80 per istruzioni su come assegnare la password. Assegnazione manuale dell'indirizzo IP (opzionale) 1. Acquisire un indirizzo IP non utilizzato - Axis Communications P5534 | P5532/P5534 - Installation Guide - Page 79
AXIS P5532/P5534 Pagina 79 AXIS Camera Management: più telecamere/grandi installazioni È possibile utilizzare AXIS Camera Management per individuare automaticamente la presenza di più periferiche Axis, mostrare lo stato di connessione, gestire gli aggiornamenti del firmware e impostare - Axis Communications P5534 | P5532/P5534 - Installation Guide - Page 80
Pagina 80 Guida all'installazione AXIS P5532/P5534 Assegnazione degli indirizzi IP a più telecamere AXIS Camera Management facilita il processo di assegnazione degli indirizzi IP di più periferiche, suggerendo gli indirizzi IP in base a un intervallo specifico. 1. Selezionare le periferiche - Axis Communications P5534 | P5532/P5534 - Installation Guide - Page 81
Guida all'installazione AXIS P5532/P5534 Pagina 81 3. Inserire una password e reinserirla per confermarla. Fare clic su OK. La password è stata ora configurata. Per creare una connessione HTTPS, iniziare facendo clic - Axis Communications P5534 | P5532/P5534 - Installation Guide - Page 82
Guida all'installazione AXIS P5532/P5534 Accesso al flusso video Viene visualizzata la pagina Live View (Immagini dal vivo) con i collegamenti agli strumenti di configurazione che consentono di personalizzare la telecamera. Se necessario, fare clic su Yes (Sì) per installare AMC (Axis Media Control - Axis Communications P5534 | P5532/P5534 - Installation Guide - Page 83
Guida all'installazione AXIS P5532/P5534 Pagina 83 Altri metodi di assegnazione dell'indirizzo IP La disponibili e possono essere disabilitati. Connessione al servizio AVHS UPnP™ Bonjour AXIS Dynamic DNS Service ARP/Ping DHCP Utilizzo nel Note sistema operativo Tutti i sistemi operativi - Axis Communications P5534 | P5532/P5534 - Installation Guide - Page 84
Pagina 84 Guida all'installazione AXIS P5532/P5534 Assegnazione dell'indirizzo IP con ARP/Ping 1. Acquisire un indirizzo IP sullo stesso segmento di rete cui è connesso il computer in uso. 2. Individuare il numero - Axis Communications P5534 | P5532/P5534 - Installation Guide - Page 85
dispositivi esterni: • Dispositivi audio • Dispositivi di Input/output (I/O) • Alimentatore CA/CC Quando si connettono dispositivi esterni all'unità AXIS P5532/P5534, è necessario un cavo multiplo per mantenere la classificazione IP51. Il cavo multiplo può essere acquistato dal proprio rivenditore - Axis Communications P5534 | P5532/P5534 - Installation Guide - Page 86
- Morsettiera a 3 pin utilizzata per l'ingresso dell'alimentazione. Ingresso alimentazione CC 24-34 V CC AXIS P5532: max 15 W AXIS P5534: max 17 W Ingresso alimentazione CA 20-24 V CA AXIS P5532: max 20 VA AXIS P5534: max 23,6 VA Ingresso audio (rosa) - Ingresso audio da 3,5 mm per microfono in - Axis Communications P5534 | P5532/P5534 - Installation Guide - Page 87
. Connessione di rete non disponibile Errore durante l'aggiornamento del firmware Fisso per 10 secondi dopo un riavvio senza errori Nota: Per ulteriori informazioni sugli indicatori di stato dell'unità AXIS P5532/P5534, leggere la Guida per l'utente, disponibile sul CD del prodotto video di rete - Axis Communications P5534 | P5532/P5534 - Installation Guide - Page 88
Pagina 88 Guida all'installazione AXIS P5532/P5534 Ripristino delle impostazioni predefinite Per reimpostare la telecamera di Axis all'indirizzo www.axis.com/techsup per verificare se sono stati pubblicati aggiornamenti per la telecamera di rete. Per conoscere la versione installata del firmware, - Axis Communications P5534 | P5532/P5534 - Installation Guide - Page 89
de instalación incluye las instrucciones necesarias para instalar una Cámara de red domo AXIS P5532/AXIS P5534 PTZ en su red. Para obtener información sobre cualquier cuestión relacionada con el uso del producto, consulte el Manual del usuario, disponible en el CD que se incluye en este paquete o en - Axis Communications P5534 | P5532/P5534 - Installation Guide - Page 90
Página 90 Presentación del hardware Unidad de cámara AXIS P5532/P5534 Guía de instalación Botón de control Ranura para tarjeta SDHC LED indicador de estado Botón de reinicio Cubierta del domo Anillo del domo anillo del - Axis Communications P5534 | P5532/P5534 - Installation Guide - Page 91
AXIS P5532/P5534 Guía de instalación Montaje en techo duro Montaje en falso techo Página 91 Placa de montaje Tornillos de la placa de montaje (3) Brazo de la - Axis Communications P5534 | P5532/P5534 - Installation Guide - Page 92
.com Preparación para la instalación Lea todas las instruciones de instalación antes de prepararse para instalar la cámara AXIS P5532/ P5534, puesto que varios de los pasos de preparación para la instalación requieren que se retire la cubierta superior y es recomendable llevarlos a cabo todos juntos - Axis Communications P5534 | P5532/P5534 - Installation Guide - Page 93
AXIS P5532/P5534 Guía de instalación Página 93 Sustitución de la cubierta clara/ahumada Para obtener más información, consulte el Manual del usuario disponible en el CD de productos de vídeo en red de AXIS suministrado con este producto o en el sitio web www.axis.com Montaje en techo duro 1. - Axis Communications P5534 | P5532/P5534 - Installation Guide - Page 94
Página 94 AXIS P5532/P5534 Guía de instalación 4. Pase el cable de red y el cable multiconector, . 8. Instale el midspan High PoE de 1 puerto, consulte la sección Instalación del midspan High PoE AXIS T8123 con 1 puerto, en la página 97. 9. Compruebe que los indicadores LED del midspan indiquen las - Axis Communications P5534 | P5532/P5534 - Installation Guide - Page 95
AXIS P5532/P5534 Guía de instalación Página 95 7. Pase el cable de red y el cable multiconector, 11. Instale el midspan High PoE de 1 puerto, consulte la sección Instalación del midspan High PoE AXIS T8123 con 1 puerto, en la página 97. 12. Compruebe que los indicadores LED del midspan indiquen - Axis Communications P5534 | P5532/P5534 - Installation Guide - Page 96
Página 96 AXIS P5532/P5534 Guía de instalación 14. Coloque el anillo embellecedor cable multiconector, si procede, a la cámara de red. 6. Instale el dispositivo AXIS T8123, consulte la sección Instalación del midspan High PoE AXIS T8123 con 1 puerto, en la página 97. 7. Vuelva a colocar la tapa - Axis Communications P5534 | P5532/P5534 - Installation Guide - Page 97
AXIS P5532/P5534 Guía de instalación Página 97 Instalación del midspan High PoE AXIS T8123 con 1 puerto El midspan High PoE Axis T8123 permite que los productos de vídeo en red de Axis con un consumo eléctrico elevado reciban datos y alimentación por el mismo cable Ethernet. Siga estas - Axis Communications P5534 | P5532/P5534 - Installation Guide - Page 98
Página 98 AXIS P5532/P5534 Guía de instalación Asignación de una dirección IP Actualmente, . Si desea asignar una dirección IP estática, el método recomendado en Windows es AXIS IP Utility o AXIS Camera Management. En función del número de cámaras que desee instalar, deberá utilizar el - Axis Communications P5534 | P5532/P5534 - Installation Guide - Page 99
AXIS P5532/P5534 Guía de instalación Página 99 AXIS IP Utility: para cámaras individuales o instalaciones pequeñas AXIS IP Utility detecta y muestra automáticamente los dispositivos Axis instrucciones sobre cómo asignar la contraseña. Asignación manual de la dirección IP (opcional) 1. Obtenga una - Axis Communications P5534 | P5532/P5534 - Installation Guide - Page 100
gina 100 AXIS P5532/P5534 Guía de instalación AXIS Camera Management: para varias cámaras o instalaciones grandes AXIS Camera Management puede detectar automáticamente varios dispositivos Axis, mostrar el estado de la conexión, administrar las actualizaciones del firmware y configurar direcciones - Axis Communications P5534 | P5532/P5534 - Installation Guide - Page 101
AXIS P5532/P5534 Guía de instalación Página 101 Asignación de direcciones IP en varios dispositivos AXIS Camera Management acelera el proceso de asignación de direcciones IP en varios dispositivos indicando direcciones IP disponibles dentro de un intervalo especificado. 1. Seleccione los - Axis Communications P5534 | P5532/P5534 - Installation Guide - Page 102
Página 102 AXIS P5532/P5534 Guía de instalación 3. A continuación, escriba una contraseña y vuelva a escribirla para confirmarla. Haga clic en OK (Aceptar). La contraseña ya se ha configurado. Para crear una - Axis Communications P5534 | P5532/P5534 - Installation Guide - Page 103
AXIS P5532/P5534 Guía de instalación Página 103 Acceso al vídeo continuo La página Live View de la cámara de red aparece con enlaces a las herramientas de configuración que le permiten personalizar la cámara. En caso necesario, haga clic en Yes (Sí) para instalar AMC (AXIS Media Control), lo que - Axis Communications P5534 | P5532/P5534 - Installation Guide - Page 104
Página 104 AXIS P5532/P5534 Guía de instalación Otros métodos para configurar la dirección IP En ício. Para obtener información y ayuda para buscar un proveedor local de servícios AVHS, visite www.axis.com Cuando esta opción está habilitada, el equipo detecta y añade automáticamente la cámara a - Axis Communications P5534 | P5532/P5534 - Installation Guide - Page 105
AXIS P5532/P5534 Guía de instalación Página 105 Configuración de la dirección IP con ARP/Ping 1. Adquiera una dirección IP en el mismo segmento de red en el - Axis Communications P5534 | P5532/P5534 - Installation Guide - Page 106
/P5534 es necesario un cable multiconector a fin de mantener la clasificación IP51. El cable multiconector se puede adquirir en un proveedor de Axis. Para obtener más información, consulte el Manual del usuario disponible en el CD de productos de vídeo en red de AXIS suministrado con este producto - Axis Communications P5534 | P5532/P5534 - Installation Guide - Page 107
de terminales de 3 pines para entrada de alimentación. Entrada de alimentación CC 24-34 V CC AXIS P5532: 15 W máx. AXIS P5534: 17 W máx. Entrada de alimentación CA 20-24 V CA AXIS P5532: 20 VA máx. AXIS P5534: 23,6 VA máx. Entrada de audio (rosa): conector de 3,5 mm para micrófono mono, o entrada - Axis Communications P5534 | P5532/P5534 - Installation Guide - Page 108
Sin conexión de red Fallo de actualización de firmware Fijo durante 10 segundos después de un reinicio correcto Nota: Para obtener más información sobre los indicadores de estado de la cámara AXIS P5532/ P5534, consulte el Manual del usuario disponible en el CD de productos de vídeo en red de - Axis Communications P5534 | P5532/P5534 - Installation Guide - Page 109
de Axis en www.axis.com/ techsup. Más información El Manual del usuario está disponible en el sitio web de Axis, www.axis.com, o en el CD de productos de vídeo en red de AXIS suministrado con este producto. Un consejo: Visite www.axis.com/techsup para comprobar si hay disponible firmware actualizado - Axis Communications P5534 | P5532/P5534 - Installation Guide - Page 110
- Axis Communications P5534 | P5532/P5534 - Installation Guide - Page 111
AXIS P5532/P5534 Installation Guide Page 111 ENGLISH FRANÇAIS DEUTSCH ITALIANO ESPAÑOL Safety Notice - Battery Replacement The AXIS P5532/P5534 batteries according to the manufacturer's instructions. Consignes de sécurité - Remplacement de la pile L'AXIS P5532/P5534 utilise une pile au lithium - Axis Communications P5534 | P5532/P5534 - Installation Guide - Page 112
Installation Guide AXIS P5532/P5534 © Axis Communications AB, 2009-2010 Ver. 2.30 Printed: June 2010 Part No. 39632
-
 1
1 -
 2
2 -
 3
3 -
 4
4 -
 5
5 -
 6
6 -
 7
7 -
8
-
9
-
10
-
11
-
12
-
13
-
14
-
15
-
16
-
17
-
18
-
19
-
20
-
21
-
22
-
23
-
24
-
25
-
26
-
27
-
28
-
29
-
30
-
31
-
32
-
33
-
34
-
35
-
36
-
37
-
38
-
39
-
40
-
41
-
42
-
43
-
44
-
45
-
46
-
47
-
48
-
49
-
50
-
51
-
52
-
53
-
54
-
55
-
56
-
57
-
58
-
59
-
60
-
61
-
62
-
63
-
64
-
65
-
66
-
67
-
68
-
69
-
70
-
71
-
72
-
73
-
74
-
75
-
76
-
77
-
78
-
79
-
80
-
81
-
82
-
83
-
84
-
85
-
86
-
87
-
88
-
89
-
90
-
91
-
92
-
93
-
94
-
95
-
96
-
97
-
98
-
99
-
100
-
101
-
102
-
103
-
104
-
105
-
106
-
107
-
108
-
109
-
110
-
111
-
112
 |
 |

ENGLISH
DEUTSCH
ITALIANO
ESPAÑOL
INSTALLATION GUIDE
FRAN
Ç
AIS
AXIS P5532 PTZ Dome Network Camera
AXIS P5534 PTZ Dome Network Camera