Binatone MBP10S User Guide
Binatone MBP10S Manual
 |
View all Binatone MBP10S manuals
Add to My Manuals
Save this manual to your list of manuals |
Binatone MBP10S manual content summary:
- Binatone MBP10S | User Guide - Page 1
with all relevant standards regarding electromagnetic fields and is, when handled as described in the User's Guide, safe to use. Therefore, always read the instructions in this User's Guide carefully before using the device. • Adult assembly is required. Keep small parts away from children when - Binatone MBP10S | User Guide - Page 2
on the product, User's Guide and/or box indicates a damp cloth. • Keep your MBP10 away from hot, humid areas or Service or Other Information? To obtain service or information, please call: Tel.: +49(0)1805 938 802(Europe) E-Mail: [email protected] You will receive instructions of the problem; and
-
 1
1 -
 2
2
 |
 |

verview of you
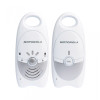
Digital Baby Monitor
Model: MBP
10
The features described in this User’s Guide are subject to modifications without prior notice.
User’s Guide
Got everything?
•
1 x Parent unit
•
1 x Baby unit
•
1 x Rechargeable battery pack for the Parent unit
•
1 x Power adapter for the Parent unit
•
1 x Power adapter for the Baby unit
Welcome...
to your new
Motorola
Tel.: +49 (0) 1805 938 802 (Europe)
E-Mail: [email protected]
Thank you for purchasing the MBP
10
. This baby monitor uses digital
communication which ensures that you can hear your baby clearly
without any distracting noise or interference.
Please retain your original dated sales receipt for your records. For
warranty service of your Motorola product, you will need to provide a
Registration
is not required for warranty coverage.
For product related questions, please call:
This User’s Guide provides you with all the information you need to
get the most from your product.
Before you can use the baby monitor, you’ll need to insert and fully
charge the batteries on the Parent unit. Please read the Safety
Instructions in section 1 “Safety Instructions” before you install the units.
copy of your dated sales receipt to confirm warranty status.
Overview of your Parent unit
Overview of your Baby unit
1
2
3
4
5
6
7
8
1.
Link indicator LED
2.
Volume down button
4.
Speaker
5.
Volume UP button
6.
Power (ON /
) LED
7.
Volume indicator LEDs
8.
Power adapter connector
9.
Belt clip
10.
Battery cover screw
11.
Battery cover
12.
Power LED
13. Microphone
14.
Power adapter connector
15.
FIND key
9
10
11
FIND
14
12
15
13
A
B
C
D
Table of contents
1.
Safety Instructions
.....................................................................................
5
2.
Getting started
..........................................................................................
6
2.1 Baby unit power supply
...................................................................................
6
2.2 Parent unit battery installation
........................................................................
7
2.3 Parent unit power supply
...............................................................................
8
2.4 Link
...................................................................................................................
9
2.5 Paging
.............................................................................................................
9
3.
Using the MBP
10
........................................................................................
9
3.1 Volume adjustment on the Parent unit
...........................................................
9
4.
Disposal of the device (environment)
...................................................
10
5.
Cleaning
..................................................................................................
10
6.
Help
.........................................................................................................
10
7.
General Information
................................................................................
11
1. Safety Instructions
WARNING
STRANGULATION HAZARD
- Keep the adapter cord out of baby's reach.
NEVER
place the baby monitor or its cord within the cot. Secure the cord
some distance away from baby's reach.
Never use extension cords with AC Adapters. Only use the AC Adapters
provided.
This baby monitor is compliant with all relevant standards regarding
electromagnetic fields and is, when handled as described in the User's
Guide, safe to use. Therefore, always read the instructions in this User's
Guide carefully before using the device.
•
Adult assembly is required. Keep small parts away from children when
assembling.
•
This product is not a toy. Do not allow children to play with it.
•
This Baby Monitor is not a substitute for responsible adult supervision.
•
Keep this user's guide for future reference.
•
Keep the cords out of reach of children.
•
Do not cover the Baby Monitor with a towel or blanket.
5
•
Never use extension cords with power adapters. Only use the power
adapters provided.
CAUTION
You chance the risk of explosion if battery is replaced by an incorrect type.
Dispose of used batteries according to their instructions.
2. Getting started
2.1
Baby unit power supply
2.1.1
Connect the small plug of the power adapter to the pow er connector
on the baby unit and the other end of the adapter to the mains socket
(100-240Vac~50/60Hz).
NOTE
Only use the enclosed power adapter (5V DC /600mA).
6
Black
Red
2.2
Parent unit battery installation
The Parent unit can be used with either the rechargeable battery pack (2.4V
600mAh Ni-MH rechargeable battery pack supplied) or via the power adapter
supplied.
WARNING
Never use ordinary, non-rechargeable batteries. The power mains adapter
provides a charging function, and non-rechargeable batteries may burst and
cause damage!
NOTE
The Ni-MH rechargeable batteries must be charged for 16 hours before using
the Parent unit without the mains power.
We recommend the rechargeable batteries are installed, so that the unit
continues to work in the event of a mains power failure.
1.
Using a screwdriver, turn the screw of the battery cover on the back of the
parent unit 90 degrees in a counterclockwise direction. Remove the battery
cover.
NOTE
Rotate the belt clip to its hanging position to make it easier to access the battery
compartment.
7
Do not try to turn the screw further than the
OPEN
position marked on the
cover.
2.
Insert one battery pack with 2 AAA size Ni-MH rechargeable batteries.
3.
Close the battery compartment and turn the screw 90 degrees back in a
clockwise direction.
4.
ON /
)
LED
will illuminate red if it only
Press and hold
. The Power (ON /
has battery power.
NOTE
When the battery level is low, the red power LED will flash and the parent unit
will emit a warning beep once every minute. If the baby unit loses power or
goes out of range, the link will be lost and the parent unit will emit a warning
beep every 20 seconds and the green link LED on the parent unit will continue
to flash.
WARNING
2.3
Parent unit power supply
1.
Connect the small plug of the power adapter to the power connector on
the parent unit and the other end of the adapter to the mains socket
(100V-240V ~ 50/60Hz).
NOTE
Only use the enclosed adapter (5V DC/600mA).
2.
Press and hold
. The Power (ON /
ON /
LED will illuminate red if it only has mains
power.
8
3
.
Press and hold
to switch off the parent
unit.
•
Test the baby monitor before use. Become familiar with its functions.
•
Do not use the baby monitor near water.
•
Do not install the baby monitor near a heat source.
•
Only use the chargers and power adapters provided. Do not use other
chargers or power adapters as this may damage the device and
batteries.
•
Only insert batteries of the same type. Never use ordinary, non-
rechargeable batteries in the parent unit. Insert batteries with the right
polarity (indicated in the battery compartment).
•
Do not place the baby unit or cables in the cot or within arm's reach of
the baby (the unit should be at least 1 metre away).
•
Do not touch the plug contacts with sharp or metal objects.
Do not mix old batteries with new ones.
Keep batteries away from small children.
Do not short-circuit batteries or dispose of in fire.
Remove the batteries if this device is not going to be used for a long
period of time.
Digital Baby Monitor!