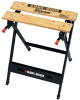
Black & Decker WM125 Type 1 Manual - WM125
Black & Decker WM125 Manual
 |
View all Black & Decker WM125 manuals
Add to My Manuals
Save this manual to your list of manuals |
Black & Decker WM125 manual content summary:
- Black & Decker WM125 | Type 1 Manual - WM125 - Page 1
WORKMATE® 125 INSTRUCTION MANUAL Catalog Number WM125 Thank you for choosing Black & Decker! Go to www.BlackandDecker.com/NewOwner to register your new product. PLEASE READ BEFORE RETURNING THIS PRODUCT FOR ANY REASON: If you have a question or experience a problem with your Black & Decker purchase - Black & Decker WM125 | Type 1 Manual - WM125 - Page 2
situation which, if not avoided, may result in property damage. Assembly Instructions ® NOTE: For assembly of the WM125 Workmate you will need a hammer, flat bladed screwdriver and the provided nut driver part (U). Assembly time is approximately 45 minutes to one hour. Follow the sequence - Black & Decker WM125 | Type 1 Manual - WM125 - Page 3
90555796 WM125.qxd:??????-00 BDL500 laser 9/25/09 12:44 PM Page 3 STEP 2: • Empty the contents of the parts pack and identify all components. 2 STEP 3: • Guide carriage bolt (D) through slot in vise bracket of assembly (L), spacer (F) outer leg (T) and secure with locking knob (E). Repeat this step - Black & Decker WM125 | Type 1 Manual - WM125 - Page 4
90555796 WM125.qxd:??????-00 BDL500 laser 9/25/09 12:44 PM Page 4 STEP 5: • Place onto screw about 1/4 of the way. • Place the two rear slide blocks (J) over pivot nuts of screw assembly (N). • Place the rear vise jaw (W), V-groove facing towards clamp edge, over the slide blocks (J). • Insert - Black & Decker WM125 | Type 1 Manual - WM125 - Page 5
90555796 WM125.qxd:??????-00 BDL500 laser 9/25/09 12:44 PM Page 5 STEP 8: • Push the Snap-in Knobs (L) into the 8 handle arms (K) as shown. STEP 9: • Place handle - Black & Decker WM125 | Type 1 Manual - WM125 - Page 6
90555796 WM125.qxd:??????-00 BDL500 laser 9/25/09 12:44 PM Page 6 Closing and Storage knobs (E). The Work Center is now storable in a convenient minimum space. Holding irregular shapes with Workmate® Work Center Using the swivel pegs (Q) in the appropriate holes and the independent action of both - Black & Decker WM125 | Type 1 Manual - WM125 - Page 7
personnel to provide customers with efficient and reliable power tool service. Whether you need technical advice, repair, or genuine factory replacement parts, contact the Black & Decker location nearest you. To find your local service location, refer to the yellow page directory under "Tools - Black & Decker WM125 | Type 1 Manual - WM125 - Page 8
.qxd:??????-00 BDL500 laser 9/25/09 12:44 PM Page 8 WORKMATE® 125 MODE D'EMPLOI Numéro de catalogue : WM125 Merci d'avoir choisi Black & Decker! Consulter le site Web www.BlackandDecker.com/NewOwner pour enregistrer votre nouveau produit. À LIRE AVANT DE RETOURNER CE PRODUIT POUR QUELQUE RAISON QUE - Black & Decker WM125 | Type 1 Manual - WM125 - Page 9
WM125.qxd:??????-00 BDL500 laser 9/25/09 12:44 PM Page 9 Avertissements relatifs à lʼatelier Workmate mesures de sécurité contenues dans les guides dʼutilisation des outils électriques utilisés Directives dʼassemblage NOTE : Pour assembler le centre de projets Workmatemd WM125, il faut un marteau, un - Black & Decker WM125 | Type 1 Manual - WM125 - Page 10
90555796 WM125.qxd:??????-00 BDL500 laser 9/25/09 12:44 PM Page 10 ÉTAPE 2 • Vider le contenu du paquet de pièces et identifier toutes les composantes. 2 ÉTAPE 3 • Insérer le boulon de carrosserie (D) dans la fente du support de lʼétau de lʼensemble (L) et la cale (F) de la patte extérieure (T) - Black & Decker WM125 | Type 1 Manual - WM125 - Page 11
90555796 WM125.qxd:??????-00 BDL500 laser 9/25/09 12:44 PM Page 11 ÉTAPE 5 • solidement à lʼaide dʼun L tourne-écrou (U). ÉTAPE 7 • Insérer le bout de tige non fileté du module préassemblé de vis dʼétau et dʼécrou pivot (N) dans 7 le trou avant du module de patte (R). Refaire lʼopération avec lʼ - Black & Decker WM125 | Type 1 Manual - WM125 - Page 12
90555796 WM125.qxd:??????-00 BDL500 laser 9/25/09 12:44 PM Page 12 • Insérer deux boulons autotaraudeurs à tête hexagonale (B) dans les trous en retrait de la mâ - Black & Decker WM125 | Type 1 Manual - WM125 - Page 13
90555796 WM125.qxd:??????-00 BDL500 laser 9/25/09 12:44 PM Page 13 FERMETURE ET RANGEMENT 1. produit dans un espace minimal pratique. Fixation de pièces de formes irrégulières avec lʼatelier Workmate® Au moyen des mordaches (Q) orientables quʼil suffit de loger dans les orifices appropriés et grâ - Black & Decker WM125 | Type 1 Manual - WM125 - Page 14
WM125.qxd:??????-00 BDL500 laser 9/25/09 12:44 PM Page 14 Utilisation de votre atelier Workmate . REMARQUE : placer le pied dans le support de lʼatelier pour le stabiliser. NE PAS achat peut être requise. Les centres Black & Decker et les centres de service autorisés sont répertoriés dans les pages - Black & Decker WM125 | Type 1 Manual - WM125 - Page 15
.qxd:??????-00 BDL500 laser 9/25/09 12:44 PM Page 15 WORKMATE® 125 MANUAL DE INSTRUCCIONES Catálogo N° WM125 Gracias por elegir Black & Decker! Visite www.BlackandDecker.com/NewOwner para registrar su nuevo producto. LEA EL MANUAL ANTES DE DEVOLVER ESTE PRODUCTO POR CUALQUIER MOTIVO: Si tiene una - Black & Decker WM125 | Type 1 Manual - WM125 - Page 16
con el centro de trabajo, siga las instrucciones descritas en el manual de instrucciones de la herramienta. 8. Siempre utilice gafas de daños en la propiedad. Instrucciones para el montaje NOTA: Para ensamblar el Workmate® WM125 necesitará un martillo, un destornillador plano y el dado que se le - Black & Decker WM125 | Type 1 Manual - WM125 - Page 17
90555796 WM125.qxd:??????-00 BDL500 laser 9/25/09 12:44 PM Page 17 PASO 2: • Vacíe el contenido del paquete de partes e identifique todos los componentes. 2 PASO 3: • Guíe el perno de soporte (D) a través de la ranura en el soporte de la prensa de la unidad (L), el espaciador (F) y - Black & Decker WM125 | Type 1 Manual - WM125 - Page 18
90555796 WM125.qxd:??????-00 BDL500 laser 9/25/09 12:44 PM Page 18 PASO 5: • Coloque el soporte delantero (Y) sobre 5 las patas, alinee los orificios y ajuste con un - Black & Decker WM125 | Type 1 Manual - WM125 - Page 19
90555796 WM125.qxd:??????-00 BDL500 laser 9/25/09 12:44 PM Page 19 • Coloque la mordaza trasera orificios y asegure el perno (G) con un martillo. PASO 10: • Instale los regatones de goma (P) en la parte inferior de las patas como se ilustra. Observe la orientación correcta 10 de las patas. 19 - Black & Decker WM125 | Type 1 Manual - WM125 - Page 20
90555796 WM125.qxd:??????-00 BDL500 laser 9/25/09 12:44 PM Page 20 CERRADO Y GUARDADO á guardarse ahora en un espacio mínimo. Cómo apoyar piezas irregulares en el centro de trabajo Workmate® Con los topes giratorios (Q) en las perforaciones apropiadas y la acción independiente de las dos - Black & Decker WM125 | Type 1 Manual - WM125 - Page 21
90555796 WM125.qxd:??????-00 BDL500 laser 9/25/09 12:44 PM Page 21 Cómo utilizar el centro de trabajo Workmate® El centro de trabajo Si tiene alguna pregunta, comuníquese con el gerente del Centro de mantenimiento de Black & Decker de su zona. Este producto no está diseñado para uso comercial. AMÉ - Black & Decker WM125 | Type 1 Manual - WM125 - Page 22
90555796 WM125.qxd:??????-00 BDL500 laser 9/25/09 12:44 PM Page 22 Póliza de Garantía IDENTIFICACIÓN DEL PRODUCTO: brica, centros de servicio autorizados y franquiciados en la República Mexicana, donde podrá hacer efectiva su garantía y adquirir partes, refacciones y accesorios originales. 22 - Black & Decker WM125 | Type 1 Manual - WM125 - Page 23
90555796 WM125.qxd:??????-00 BDL500 laser 9/25/09 12:44 PM Page 23 23 - Black & Decker WM125 | Type 1 Manual - WM125 - Page 24
(Tools-Electric)" - Páginas amarillas - para Servicio y ventas BLACK & DECKER S.A. DE C.V. BOSQUES DE CIDROS ACCESO RADIATAS NO. 42 COL. BOSQUES DE LAS LOMAS. 05120 MÉXICO, D.F TEL. 55-5326-7100 Catalog Number WM125 Copyright © 2009 Black & Decker Form No. 90555796 24 SEPT. 2009 Printed in China
-
 1
1 -
 2
2 -
 3
3 -
 4
4 -
 5
5 -
 6
6 -
 7
7 -
8
-
9
-
10
-
11
-
12
-
13
-
14
-
15
-
16
-
17
-
18
-
19
-
20
-
21
-
22
-
23
-
24
 |
 |

INSTRUCTION MANUAL
Catalog Number
WM125
INSTRUCTIVO DE OPERACIÓN, CENTROS DE SERVICIO Y PÓLIZA DE GARANTÍA.
ADVERTENCIA:
LÉASE ESTE INSTRUCTIVO ANTES DE USAR EL PRODUCTO.
VEA EL ESPAÑOL EN LA CONTRAPORTADA.
Thank you for choosing Black & Decker!
Go to www.BlackandDecker.com/NewOwner
to register your new product.
PLEASE READ BEFORE RETURNING THIS
PRODUCT FOR ANY REASON:
If you have a question or experience a problem with your Black & Decker purchase,go to
HTTP://WWW.BLACKANDDECKER.COM/INSTANTANSWERS
If you can’t find the answer or do not have access to the internet,
call 1-800-544-6986 from 8 a.m. to 5 p.m. EST Mon. -- Fri. to speak with an agent.
Please have the catalog number available when you call.
for instant answers 24 hours a day.
WORKMATE
®
125
SAVE THIS INSTRUCTION MANUAL FOR FUTURE REFERENCE.
90555796 WM125.qxd:??????-00 BDL500 laser
9/25/09
12:44 PM
Page 1