Bosch HDI8056U Installation Instructions 1
Bosch HDI8056U Manual
 |
View all Bosch HDI8056U manuals
Add to My Manuals
Save this manual to your list of manuals |
Bosch HDI8056U manual content summary:
- Bosch HDI8056U | Installation Instructions 1 - Page 1
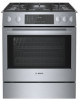
LP Gas Conversion Kit Installation Manual Slide-in Ranges HDIP056U, HDIP056C, HDI8056U, HDI8056C, HGI8046UC, HGI8056UC, HGIP056UC - Bosch HDI8056U | Installation Instructions 1 - Page 2
- Bosch HDI8056U | Installation Instructions 1 - Page 3
Table of Contents Safety Definitions 1 IMPORTANT SAFETY INSTRUCTIONS 2 Conversion 3 Before You Begin 3 Procedure 3 Test the Installation 7 Service 9 Before Calling Service 9 This Bosch Appliance is made by BSH Home Appliances Corporation 1901 Main Street, Suite 600 Irvine, CA 92614 Questions - Bosch HDI8056U | Installation Instructions 1 - Page 4
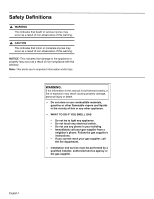
information and/or tips. WARNING: If the information in this manual is not followed exactly, a fire or explosion may result instructions. • If you cannot reach your gas supplier, call the fire department. -- Installation and service must be performed by a qualified installer, authorized service - Bosch HDI8056U | Installation Instructions 1 - Page 5
its individual manual shut-off valve during any pressure testing of the gas supply piping system at test pressures equal to or less than 1/2 psig (3.5 kPa). • WARNING: This conversion kit shall be installed by a qualified service agency in accordance with the manufacturer's instructions and all - Bosch HDI8056U | Installation Instructions 1 - Page 6
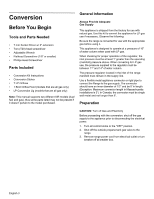
or smaller) • Phillips Head Screwdriver Parts Included • Conversion Kit Instructions • Conversion Sticker • 7 LP Orifices • 1 Broil Orifice Hood (models that are all gas only) • LP Conversion Jig (models that are all gas only) Note: This manual supports two different SIR models (dual fuel and gas - Bosch HDI8056U | Installation Instructions 1 - Page 7
Procedure Replace Cooktop Orifices Convert Pressure Regulator from 6" W.C. to 11" W.C. 1. Remove warming drawer; pull drawer out until stop is reached. Facing the range, push clip on left side up and clip on right side down. Pull drawer the rest of the way out. 2. Remove cover plate from interior - Bosch HDI8056U | Installation Instructions 1 - Page 8
varies slightly for these units due to the dual valve used with them. If your unit has a dual burner in the center please reference the instructions that follow for the proper procedure to convert that burner for LP Gas. Convert Dual Valves for Propane Use 1. Verify that the dual burner control - Bosch HDI8056U | Installation Instructions 1 - Page 9
Adjust Broil Burner Orifice Adjust Bake Burner Orifice 1. Remove oven door (See section "Removing Oven Door" in Use and Care Manual). 2. Remove Broil Burner Assembly. The broil burner assembly is attached to the top of the oven cavity with 5 screws. Remove screws and gently pull broil - Bosch HDI8056U | Installation Instructions 1 - Page 10
. Leak testing is to be conducted by the installer according to the instructions given in this section. Apply Leak Detection Fluid Turn on gas. Apply to the off position. 4. Test each rangetop burner in this fashion. Call Service if any of the burners do not light. Test Flame Characteristics on the - Bosch HDI8056U | Installation Instructions 1 - Page 11
Dual Fuel appliance installation is complete when correct color, carryover and size are verified on each cooktop burner. For gas appliances, continue to "Test Broil Burner". Test Broil Burner Test Ignition Set cooking mode to Hi Broil. The burner will ignite after 30-75 seconds. Test Flame Verify - Bosch HDI8056U | Installation Instructions 1 - Page 12
if the flame is lifting or blowing or not carrying over; open the shutter if it is too yellow. (See Figure 6). Tighten screw. Shutter Service Before Calling Service See Use and Care Manual for troubleshooting information. Refer to the Statement of Limited Product Warranty in the Use and Care - Bosch HDI8056U | Installation Instructions 1 - Page 13
CONSIGNES DE SÉCURIT 2 Conversion 3 Avant de commencer 3 Marche à suivre 4 Tester l'installation 7 Dépannage 9 Avant d'appeler le service de dépannage 9 Cet appareil électroménager Bosch est fabriqué par BSH Home Appliances, Corporation 1901 Main Street, Suite 600 Irvine, CA 92614 Questions - Bosch HDI8056U | Installation Instructions 1 - Page 14
Téléphonez immédiatement à votre fournisseur de gaz de chez un voisin. Suivez les instructions du fournisseur de gaz. • Si vous ne parvenez pas à joindre votre fournisseur de gaz, appelez le service d'incendie. -- L'installation et les réparations doivent être effectuées par un installateur qualifi - Bosch HDI8056U | Installation Instructions 1 - Page 15
égale ou inférieure à 1/2 lb/po² (3,5 kPa). • AVERTISSEMENT : Ce nécessaire de conversion devra être installé par un organisme de service qualifié conformément aux instructions du fabricant et à tous les codes et exigences en vigueur de l'autorité compétente. Si les informations contenues dans ces - Bosch HDI8056U | Installation Instructions 1 - Page 16
lobes Torx (T20) • Clé à molette • Tournevis à tête plate (1/8 po ou 3,175 mm ou inférieur) • Tournevis cruciforme Phillips Pièces comprises • Instructions du nécessaire de conversion • Étiquette de conversion • 7 orifices de gaz propane (LP) • 1 capuchon d'orifice de brûleur de cuisson au gril (mod - Bosch HDI8056U | Installation Instructions 1 - Page 17
2. Retirez les orifices de la table de cuisson pour le gaz naturel. Insérez le tournevis à douille muni d'une rallonge de 3 po minimum dans les supports de buse pour retirer les orifices existants. Mettez les orifices de gaz naturel de côté. 3. Montez les orifices de la table de cuisson pour le gaz - Bosch HDI8056U | Installation Instructions 1 - Page 18
ces appareils en raison de la soupape double qui est utilisée. Si votre appareil est équipé d'un double brûleur central, veuillez vous référer aux instructions qui suivent pour connaître le procédé adéquat de conversion de ce brûleur au gaz propane (LP). 4. Pour les soupapes simples, insérez - Bosch HDI8056U | Installation Instructions 1 - Page 19
Ajuster l'orifice du brûleur du gril 1. Retirez la porte du four (Voir la section « Démontage de la porte du four » dans le Manuel d'utilisation et d'entretien). 2. Retirez l'assemblage du brûleur du gril. L'assemblage du brûleur du gril est fixé sur la voûte de la cavité du four moyennant 5 vis. - Bosch HDI8056U | Installation Instructions 1 - Page 20
La vérification doit être effectuée par l'installateur conformément aux instructions de cette section. Appliquer un liquide de détection des fuites Ouvrez chaque brûleur de la cuisinière de la même manière. Appelez un service de dépannage si un brûleur quelconque ne s'allume pas. Tester les caracté - Bosch HDI8056U | Installation Instructions 1 - Page 21
« Conversion des soupapes de la table de cuisson pour l'utilisation avec le gaz propane », page 5. Si une flamme est jaune, veuillez communiquer avec le service de dépannage. L'installation de l'appareil bi-énergie est terminée lorsqu'on aura vérifié que chaque brûleur de la table de cuisson produit - Bosch HDI8056U | Installation Instructions 1 - Page 22
brûleur; ouvrez le volet si elle est trop jaune. (Voir la figure 6). Serrez la vis. Obturateur Avant d'appeler le service de dépannage Voir le Guide d'utilisation et d'entretien pour obtenir des informations concernant le dépannage. Consultez l'Énoncé de garantie limitée du produit dans le Manuel - Bosch HDI8056U | Installation Instructions 1 - Page 23
2 Conversión 3 Antes de comenzar 3 Procedimiento 4 Pruebe la installación 7 Servicio técnico 9 Antes de llamar al Servicio técnico 9 Este electrodoméstico de Bosch es fabricado por BSH Home Appliances Corporation 1901 Main Street, Suite 600 Irvine, CA 92614 ¿Tiene preguntas? 1-800-944-2904 www - Bosch HDI8056U | Installation Instructions 1 - Page 24
cumplimiento de esta recomendación. Nota: Esto le avisa sobre información y/o consejos importantes. ADVERTENCIA: Si no sigue la información de este manual exactamente, se puede ocasionar un incendio o una explosión que pueden causar daños materiales, lesiones personales o la muerte. -- No almacene - Bosch HDI8056U | Installation Instructions 1 - Page 25
a 1/2 psig (3.5 kPa). b) Se debe aislar el electrodoméstico del sistema de tuberías de suministro de gas cerrando la válvula de paso manual individual durante cualquier prueba de presión del sistema de tuberías de suministro de gas con presiones de prueba iguales o inferiores a 1/2 psig (3.5 kPa - Bosch HDI8056U | Installation Instructions 1 - Page 26
que son totalmente de gas). • Dispositivo de montaje para la conversión a LP (únicamente para los modelos que son totalmente de gas). Nota: Este manual sirve para dos modelos de SIR distintos (dos combustibles y gas); por ende, es posible que algunas de las piezas mencionadas no estén presentes si - Bosch HDI8056U | Installation Instructions 1 - Page 27
Procedimiento Cómo convertir el regulador de presión de 6 pulg. de W.C. a 11 pulg. de W.C. y retire las bases de las hornillas. Vuelva a insertar los tornillos en el sostén de la salida para sostener el conjunto de tubos en su lugar. Rejilla del quemador 1. Retire el cajón calentador; jale el caj - Bosch HDI8056U | Installation Instructions 1 - Page 28
orificio de la hornilla para asar con calor directo 1. Retire la puerta del horno (consulte la sección "Cómo retirar la puerta del horno" en el Manual de uso y cuidado). 2. Retire el conjunto de la hornilla para asar con calor directo. El conjunto de la hornilla para asar con calor directo est - Bosch HDI8056U | Installation Instructions 1 - Page 29
del horno con 5 tornillos. Retire los tornillos y jale con suavidad el conjunto de la hornilla para asar con calor directo directamente hacia afuera teniendo cuidado de no desconectar los cables eléctricos. Coloque la hornilla para asar con calor directo contra la pared trasera de la cavidad del - Bosch HDI8056U | Installation Instructions 1 - Page 30
Pruebe la instalación Pruebe para detectar fugas de gas. 9 PRECAUCIÓN Nunca verifique la presencia de fugas con una llama. Las pruebas de detección de fugas deben ser llevadas a cabo por el instalador, de acuerdo con las instrucciones que se proporcionan en esta sección. Cómo aplicar un fluido de - Bosch HDI8056U | Installation Instructions 1 - Page 31
Si alguna llama se extingue, no se extiende en forma adecuada o es demasiado grande, comuníquese con el Servicio técnico. Cómo ajustar la llama para asar con calor directo (de ser necesario) Llamas amarillas: Se requiere un ajuste adicional. Puntas amarillas en conos externos: Normal para gas LP. - Bosch HDI8056U | Installation Instructions 1 - Page 32
técnico, consulte la información de contacto que aparece en el frente del manual. Cuando llame, tenga a la mano la información impresa en la placa para hornear La placa de datos muestra el modelo y el número de serie. Al solicitar servicio técnico, consulte la placa de datos del electrodoméstico. - Bosch HDI8056U | Installation Instructions 1 - Page 33
- Bosch HDI8056U | Installation Instructions 1 - Page 34
- Bosch HDI8056U | Installation Instructions 1 - Page 35
- Bosch HDI8056U | Installation Instructions 1 - Page 36
1901 Main Street, Irvine, CA 92614 • 800-944-2904 • www.boschappliances.com 8001150782 • 990401 © BSH Home Appliances Corporation, 2019
-
 1
1 -
 2
2 -
 3
3 -
 4
4 -
 5
5 -
 6
6 -
 7
7 -
8
-
9
-
10
-
11
-
12
-
13
-
14
-
15
-
16
-
17
-
18
-
19
-
20
-
21
-
22
-
23
-
24
-
25
-
26
-
27
-
28
-
29
-
30
-
31
-
32
-
33
-
34
-
35
-
36
 |
 |

Installation Manual
LP Gas Conversion Kit
Slide-in Ranges
HDIP05
6U
,
HDIP056C,
HDI8056U, HDI8056C,
HGI8046UC, HGI8056UC,
HGI
P
05
6UC