Bosch HSLP451UC Installation Instructions
Bosch HSLP451UC Manual
 |
View all Bosch HSLP451UC manuals
Add to My Manuals
Save this manual to your list of manuals |
Bosch HSLP451UC manual content summary:
- Bosch HSLP451UC | Installation Instructions - Page 1
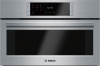
Built-In Steam Convection Oven Models: HSLP451UC - Bosch HSLP451UC | Installation Instructions - Page 2
2 Electrical Requirements 2 Installation Instructions 3 Appliance and Cabinet Cutout Dimensions 3 Steam Oven Installation Dimensions 3 Steam Oven With Wall Oven Installation Dimensions 4 Installation 5 Installing the Appliance 5 Electrical Connection 6 Service and Installer Final Check List - Bosch HSLP451UC | Installation Instructions - Page 3
SAVE THESE INSTRUCTIONS INSTALLER: Please leave these Installation Instructions with this unit for the owner. IMPORTANT: Save these instructions for the local electrical inspector's use. OWNER: Please retain these instructions for future reference. WARNING! If the information in this manual is not - Bosch HSLP451UC | Installation Instructions - Page 4
dimensions, please refer to your BOSCH warming drawer instruction manual. • This steam oven, HSLP451UC, is also used in combination BOSCH oven model HSLx75xxx. Detailed instructions for the combination assembly, wiring, and installation is included with the oven portion of the combination model - Bosch HSLP451UC | Installation Instructions - Page 5
Installation Instructions Appliance and Cabinet Cutout Dimensions Steam Oven Installation Dimensions Appliance Dimensions 195/8" (498) 293/4" (755 depth 1" (25) 281/2" (724) 30" (762) * 231/2" (597) * Flush installation requires a 5/16"(8) high x 28½" (724) wide x 22½" (571) deep baseplate - Bosch HSLP451UC | Installation Instructions - Page 6
Steam Combination Oven with Wall Oven Installation Dimensions ATTENTION: Only valid for Combo SKU HSLP751UC. NOTE: Refer to the oven installation manual for connector bracket mounting and oven installation instructions. Appliance Dimensions 293/4" (755) 283/8" (720) * 50" (1270) 49" (1244) 487 - Bosch HSLP451UC | Installation Instructions - Page 7
to install the mounting screws may cause the oven to tip forward during use. 90° 5. As the oven is slid into position, guide the pigtail through the opening of the adjacent cabinet or base support. Verify the pigtail is not trapped between the oven and cabinet wall. 6. Position the steam oven fully - Bosch HSLP451UC | Installation Instructions - Page 8
Electrical Installation Steam oven models are designed to be connected to either a 208 or 240 V AC, 60 Hz. 3-wire single-phase power supply. The electrical supply should be a 3-wire single-phase AC. Install a suitable conduit box (not furnished). IMPORTANT: Local codes may vary; installation, - Bosch HSLP451UC | Installation Instructions - Page 9
USE AND CARE MANUAL and the INSTALLATION MANUAL with the owner of the appliance. Before Calling Service If the steam oven elements or indicator light do not turn on, check the power source to see if the circuit breaker is off. See the Use and Care Manual for troubleshooting information. Refer to - Bosch HSLP451UC | Installation Instructions - Page 10
électriques 2 Instructions d'installation 3 Dimensions de l'appareil et de l'ouverture de l'armoire 3 Dimensions d'installation pour four à vapeur 3 Dimensions d'installation pour four à vapeur et four mural 4 Installation 3 Installation de l'électricit 5 Raccordement électrique 6 Service et - Bosch HSLP451UC | Installation Instructions - Page 11
Sécurité CONSIGNES DE SÉCURITÉ IMPORTANTES LISEZ ET CONSERVEZ CES INSTRUCTIONS INSTALLATEUR : Veuillez laisser ces instructions d'installation au propriétaire de l'appareil. IMPORTANT : Conservez ces instructions pour l'inspecteur en électricité de votre localité. PROPRIÉTAIRE : Veuillez conserver - Bosch HSLP451UC | Installation Instructions - Page 12
à pratiquer, rapportez-vous au manuel d'instructions du tiroir chauffant de BOSCH. • Le four à vapeur HSLP451UC peut également être jumelé au modèle de four de BOSCH HSLx75xxx. Des instructions détaillées pour procéder à l'assemblage, au câblage et à l'installation sont comprises dans la partie sur - Bosch HSLP451UC | Installation Instructions - Page 13
Instructions d'installation Dimensions de l'appareil et de l'ouverture de l'armoire Dimensions d'installation du four à vapeur Dimensions de l'appareil 195 de l'unité à portée du cordon d'alimentation. Dimensions requises pour une installation sous le comptoir ** 3" (76) 23½" (597) 191/4" (488 - Bosch HSLP451UC | Installation Instructions - Page 14
avec four mural ATTENTION : Valide uniquement pour la combinaison SKU HSLP751UC. NOTE : Rapportez-vous au manuel d'installation du four pour obtenir des instructions relativement à l'installation du four et de la bride de fixation du connecteur. Dimensions de l'appareil 293/4" (755) 283/8" (720 - Bosch HSLP451UC | Installation Instructions - Page 15
de base de l'armoire. Faites glisser l'appareil dans l'ouverture jusqu'à ce qu'il se trouve à environ 6 po (152 mm) de sa position d'installation définitive. 6. Placez le four à vapeur à sa position définitive dans l'ouverture de l'armoire. 7. Ouvrez et fermez doucement la porte du four pour vous - Bosch HSLP451UC | Installation Instructions - Page 16
la terre ou si vous avez des doutes quant à la mise à la terre adéquate de l'appareil. Si le cordon d'alimentation est trop court, faites installer une prise murale près de l'appareil par un électricien qualifié. N'UTILISEZ PAS UNE RALLONGE ÉLECTRIQUE. 4. Branchez le fil noir du four au fil noir de - Bosch HSLP451UC | Installation Instructions - Page 17
plaque signalétique dans le MANUEL D'UTILISATION ET D'ENTRETIEN. Laissez le MANUEL D'UTILISATION ET D'ENTRETIEN et le MANUEL D'INSTALLATION au propriétaire de l'appareil. Avant d'appeler le service à la clientèle Si des éléments ou des témoins lumineux du four à vapeur ne s'allument pas, vérifiez - Bosch HSLP451UC | Installation Instructions - Page 18
ón de la placa de señalización y del diagrama de cableado 7 Antes de solicitar servicio 7 Lista de chequeo final para el instalador 7 Este electrodoméstico de Bosch® está hecho por BSH Home Appliances Corporation 1901 Main Street, Suite 600 Irvine, CA 92614 ¿Preguntas? 1-800-944-2904 www - Bosch HSLP451UC | Installation Instructions - Page 19
de su localidad. PROPIETARIO: Guarde estas instrucciones para futuras referencias. ¡ADVERTENCIA! El hecho de no seguir atentamente las instrucciones de este manual puede provocar un incendio o una descarga eléctrica que puede causar daños a la propiedad o lesiones a personas. ¡ADVERTENCIA! No repare - Bosch HSLP451UC | Installation Instructions - Page 20
instrucciones detalladas sobre las dimensiones de la abertura necesaria, consulte el manual de instrucciones del cajón calentador de Bosch. • También se puede combinar el horno de vapor HSLP451UC con el modelo de horno HSLx75xxx de Bosch. La parte que trate sobre la combinación de modelos contiene - Bosch HSLP451UC | Installation Instructions - Page 21
Instrucciones de Instalación Dimensiones del aparato y de la abertura del armario Dimensiones de instalación del horno de vapor Dimensiones del aparato 195/8" (498) 293/4" (755) 2713/16" (706) 48" (1220) 241/2" (622) 19" (483) 133/4" (350) 213/8" (543) 223/8" (568) Dimensiones del - Bosch HSLP451UC | Installation Instructions - Page 22
de instalación para horno de vapor con horno de pared PRECAUCIÓN: Válido únicamente para la combinación con SKU HSLP751UC. NOTA: Consulte el manual de instalación del horno para obtener las instrucciones de instalación del horno y de la brida de fijación del conector. Dimensiones del aparato 293 - Bosch HSLP451UC | Installation Instructions - Page 23
Instalación Instalación del aparato ¡PRECAUCIÓN! Antes de proceder a la instalación, corte la alimentación eléctrica en el panel. Bloquee el dispositivo de desconexión para evitar que se vuelva a conectar la alimentación eléctrica por error. Amarrar el horno al armario 8. Abra la puerta del horno y - Bosch HSLP451UC | Installation Instructions - Page 24
Si el cable eléctrico es demasiado corto, haga que un electricista cualificado instale un enchufe de pared cerca del aparato. NO USE UN ALARGADOR ELÉ temporalmente el horno. 1. Pase los cables por el agujero hundible. 2. Instale el prensacable en su posición. 3. Conecte el cable rojo del horno al - Bosch HSLP451UC | Installation Instructions - Page 25
material de embalaje. F INSTALADOR: Escriba el número de modelo y el número de serie de la placa de señalización en el MANUAL DE USO Y CUIDADO. Deje el MANUAL DE USO y el MANUAL DE CUIDADO en poder del dueño del aparato. Antes de solicitar servicio Si algún elemento o alguna luz del horno de vapor - Bosch HSLP451UC | Installation Instructions - Page 26
1901 Main Street, Suite 600, Irvine, CA 92614 • 800-944-2904 • www.boschappliances.com 9000942465 • 5U05NW • Rev. A • © BSH Home Appliances Corporation • 05/14
-
 1
1 -
 2
2 -
 3
3 -
 4
4 -
 5
5 -
 6
6 -
 7
7 -
8
-
9
-
10
-
11
-
12
-
13
-
14
-
15
-
16
-
17
-
18
-
19
-
20
-
21
-
22
-
23
-
24
-
25
-
26
 |
 |

HSLP451UC
Models:
Built-In Steam Convection Oven