Canon 1861B001 User Manual
Canon 1861B001 Manual
 |
View all Canon 1861B001 manuals
Add to My Manuals
Save this manual to your list of manuals |
Canon 1861B001 manual content summary:
- Canon 1861B001 | User Manual - Page 1
DIGITAL CAMERA CDI-E287-010 XX07XXX © 2007 CANON INC. PRINTED IN JAPAN Advanced Camera User Guide Before Using the Camera Shooting Playback/Erasing Print/Transfer Settings Customizing the Camera Troubleshooting List of Messages Advanced Appendix Camera User Guide This guide explains camera - Canon 1861B001 | User Manual - Page 2
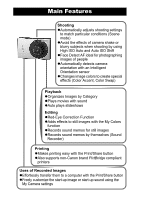
Detect AF ideal for photographing images of people zAutomatically detects camera orientation with an Intelligent Orientation sensor zChanges image colors to easy with the Print/Share button zAlso supports non-Canon brand PictBridge compliant printers Uses of Recorded Images zEffortlessly transfer - Canon 1861B001 | User Manual - Page 3
operating procedures. You can use SD memory cards, SDHC memory cards and MultiMediaCards with this camera. These cards are collectively called memory cards in this guide. Use of genuine Canon accessories is recommended. This product is designed to achieve excellent performance when used with genuine - Canon 1861B001 | User Manual - Page 4
camera functions or procedures. Conventions Used in this Guide 1 Handling Precautions 5 Please Read 5 Safety Precautions 6 Preventing Malfunctions 11 Before Using the Camera Images) 30 Using the Digital Zoom/Digital Tele-Converter 32 Magnified Close-Up Shooting (Digital Macro 34 Red-Eye - Canon 1861B001 | User Manual - Page 5
Locking the Flash Exposure Setting (FE Lock 50 Switching between Metering Modes 51 Adjusting the Exposure Compensation 52 Setting the Shutter Speed (Long Shutter Mode 53 Adjusting the Tone (White Balance 55 Shooting in a My Colors Mode 58 Changing Colors 60 Adjusting the ISO Speed 65 - Canon 1861B001 | User Manual - Page 6
Settings 109 Registering My Camera Settings 110 Troubleshooting 112 Camera 112 When the power is turned on 112 LCD monitor 113 Shooting 114 Shooting Movies 118 Playback 119 Battery/Battery Charger 120 TV monitor output 120 Printing on Direct Print Compatible Printers 121 List of Messages - Canon 1861B001 | User Manual - Page 7
Please note that Canon digital cameras are intended for problem arises while the camera is in use abroad, please convey it back to the country of sale before proceeding with a warranty claim to a Canon Customer Support Help Desk. For Canon Customer Support contacts, please see the customer support - Canon 1861B001 | User Manual - Page 8
in the "Safety Precautions" section of the Basic Camera User Guide. Always ensure that the camera is operated correctly. zThe safety precautions noted on the following pages are intended to instruct you in the safe and correct operation of the camera and its accessories to prevent injuries or damage - Canon 1861B001 | User Manual - Page 9
not expressly described in this guide. z To avoid the risk of high-voltage electrical shock, do not touch the flash portion of the camera if it has been damaged. from the power outlet. Please consult your camera distributor or the closest Canon Customer Support Help Desk. z Do not use substances - Canon 1861B001 | User Manual - Page 10
Use only the specified battery charger to charge the battery. z The battery charger and compact power adapter are designed for exclusive use with your camera. Do not use it with other products or batteries. There is a risk of overheating and distortion which could result in fire or electrical shock - Canon 1861B001 | User Manual - Page 11
objects that are sensitive to magnetic fields (such as credit cards) away from the speaker of the camera. Such items may lose data or stop working. Cautions Equipment z Be careful not to bang the camera or subject it to strong impacts or shocks that could lead to injury or damage the equipment - Canon 1861B001 | User Manual - Page 12
Equipment z Do not connect compact power adapters or battery chargers to devices such as electrical transformers for foreign travel because it may lead to malfunctions, excessive heat generation, fire, electric shock or injury. Flash z Do not operate the flash with dirt, dust or other items stuck to - Canon 1861B001 | User Manual - Page 13
Strong Magnetic Fields z Never place the camera in close proximity to electric motors or other equipment generating strong electromagnetic fields. Exposure to strong magnetic fields may cause malfunctions or corrupt image data. Avoid Condensation Related Problems z When moving the equipment rapidly - Canon 1861B001 | User Manual - Page 14
for approximately 6 sec. when a setting is changed, regardless of the selected display mode. z The LCD monitor on or off setting is retained even after the camera power is turned off. z The LCD monitor does not shut off in the or mode. z The LCD monitor is set to the detailed display (Information - Canon 1861B001 | User Manual - Page 15
and use method 1 to display the date and time, the time will be initially displayed in the same way as when the camera is held horizontally. zYou can change the display color by pressing the or button. zThe clock display will disappear when the display interval is over - Canon 1861B001 | User Manual - Page 16
this function if you have already set it to its highest setting in the Set up menu. Night Display When shooting in dark conditions, the camera automatically brightens the LCD monitor to suit the brightness of the subject*, making it easier to frame the subject. * Although noise may appear and the - Canon 1861B001 | User Manual - Page 17
LCD Monitor Shooting Information (Shooting mode) Digital Tele-converter/Zoom Magnification/Safety Zoom (p. 32) Spot Frame AF Frame (p. 46) Macro/Infinity (Basic Guide p. 15) ( ... )* ISO Speed (p. 65) Flash (Basic Guide p. 14) Before Using the Camera-Basic Operations Shooting Method (p. 36 - Canon 1861B001 | User Manual - Page 18
Raise the ISO speed (p. 65). - Set the Auto ISO Shift to [On] (p. 66). - Select a setting other than (flash off) (Basic Guide p. 14). - Attach the camera to a tripod or other device. Playback Information (Playback Mode) Standard Defined Playback (p. 79) WAVE Format Sound (p. 90) Folder Number-File - Canon 1861B001 | User Manual - Page 19
Detailed My Category (p. 78) Before Using the Camera-Basic Operations ... Exposure Compensation (p. 52) Histogram (p. 18) Flash (Basic Guide p. 14) Macro/Infinity (Basic Guide p. 15) Shooting Mode (pp. 34, 39, 44, 60, 62, Basic Guide pp. 11 - 13) My Colors (Shooting) (p. 58), Color Accent / - Canon 1861B001 | User Manual - Page 20
compensation to a negative value if the image is too bright (p. 52). Sample Histograms Dark Image Balanced Image Bright Image Using the Viewfinder The viewfinder (Basic Guide p. 1) can be used to conserve power by turning the LCD monitor off (p. 12) while shooting. 18 - Canon 1861B001 | User Manual - Page 21
Press any button other than the power button or change the camera orientation to turn the LCD monitor back on. Playback Mode Powers down approximately 5 minutes after the last Connected to a Printer control is accessed on the camera. * This time can be changed. z The power saving function will - Canon 1861B001 | User Manual - Page 22
Setting the World Clock When traveling abroad, you can record images with local dates and times simply by switching the time zone setting if you pre-register the destination time zones. You can enjoy the convenience of not having to switch the Date/Time settings. Setting the Home/World Time Zones - Canon 1861B001 | User Manual - Page 23
select a destina- tion time zone . zAs in Step 3, you can set daylight Time Difference from the saving time. Home Time Zone Before Using the Camera-Basic Operations 6 Use the or button to select [Home/ World], and the or button to select . Switching to the Destination Time Zone 1 (Set up - Canon 1861B001 | User Manual - Page 24
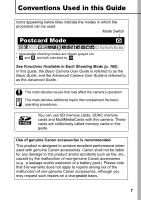
settings as the date/time and electronic beep. The following menus are available. zFUNC. Menu zRec., Play, Print, Set up and My Camera Menus FUNC. Menu This menu sets many of the common shooting functions. a b e c d This example shows the FUNC. menu in (Auto) mode. a Slide the mode switch - Canon 1861B001 | User Manual - Page 25
button when this part is selected. c d • This example shows the Rec. menu in (Auto) mode. • In playback mode, the Play, Print, Set up and My Camera menus display. a Press the MENU button. b Use the or button to switch between menus. • You can also use the zoom lever to switch between menus - Canon 1861B001 | User Manual - Page 26
Image) p. 30 Recording Pixels (Movie) p. 42 Rec. Menu Menu Item AiAF Digital Zoom (Still) (Movie) Slow Synchro Red-Eye Self-timer Auto ISO Shift AF p. 46 p. 32 p. 35 p. 35 Basic Guide p. 16 p. 66 p. 115 Basic Guide p. 10 p. 64 Sets whether or not images are automatically classified into categories during - Canon 1861B001 | User Manual - Page 27
Before Using the Camera-Basic Operations Disp. Overlay (Still) Off*/Grid Lines/3:2 Guide/ Both p. 38 (Movie) Off*/Grid Lines Date Stamp Off*/Date/Date & Time p. 37 Set button p. 67 Stitch Assist Left to right*/ Right to left p. 44 *1 - Canon 1861B001 | User Manual - Page 28
set to [On]. Adjusts the volume of the start-up sound when the camera is turned on. Adjusts the volume of the operation sound that plays when On*/Off Sets whether or not the camera automatically powers down after a set period of time elapses without the camera being operated. 10 sec./20 sec./ - Canon 1861B001 | User Manual - Page 29
Camera- Guide p. 9 Video System Print Method NTSC/PAL Auto*/ p. 100 See below. *2 Reset All p. 28 *1 Default setting is 5 seconds. *2 You can change the printer page setting for wide paper using a Canon SELPHY CP730/CP720/CP710/CP510 Compact Photo Printer. Since this setting is saved even when - Canon 1861B001 | User Manual - Page 30
(Set up) Menu [Reset All]. See Menus and Settings (p. 23). 2 Select [OK] and press . z Settings cannot be reset when the camera is connected to a computer or to a printer. z The following cannot be reset. - Shooting mode - The [Time Zone], [Date/Time], [Language] and [Video System] options in the - Canon 1861B001 | User Manual - Page 31
up) Menu [Format]. See Menus and Settings (p. 23). Before Using the Camera-Basic Operations 2 Select [OK] and press . zTo perform a low level by pressing the FUNC./ SET button. You can still use a card without problem when formatting is halted, but its data will be erased. Displays when sound - Canon 1861B001 | User Manual - Page 32
Shooting Changing the Recording Pixels and Compression (Still Images) 1 FUNC. Menu * (Compression)/ * (Recording Pixels). See Menus and Settings (p. 22). * Default setting. zUse the or button to select compression/recording pixels settings and press the FUNC./SET button. Approximate Values - Canon 1861B001 | User Manual - Page 33
Approximate Values for Compression Settings Compression Purpose Superfine High Quality Shoot higher quality images Fine Shoot normal quality images Normal Normal Shoot more images z See Image Data Sizes (Estimated) (p. 141). z See Memory Cards and Estimated Capacities (p. 139). Shooting 31 - Canon 1861B001 | User Manual - Page 34
[Off] options at a similar angle of view, this option uses a higher shutter speed to reduce the potential for camera shake. z The digital zoom cannot be used when the LCD monitor is turned off. z The digital zoom cannot be used in the or (Postcard mode) or the (Widescreen) mode. z [1.5x] or [1.9x - Canon 1861B001 | User Manual - Page 35
on the number of recording pixels set, the Safety Zoom feature calculates the maximum zoom factor beyond which image quality will begin to deteriorate. The digital zoom pauses at this zoom factor for a moment, and appears on the LCD monitor (except in mode). If you press the zoom lever toward again - Canon 1861B001 | User Manual - Page 36
on the number of recording pixels set, the Safety Zoom feature calculates the maximum zoom factor beyond which image quality will begin to deteriorate. The digital zoom pauses at this zoom factor for a moment, and appears on the LCD monitor. If you press the zoom lever toward again, you can zoom - Canon 1861B001 | User Manual - Page 37
for shooting at night or under artificial lighting indoors. 1 (Rec.) Menu [Slow Synchro] [On]/ [Off]*. See Menus and Settings (p. 23). *Default setting. Please note that camera shake becomes a factor when [Slow Synchro] is set to [On]. If this occurs, you are recommended to fix the - Canon 1861B001 | User Manual - Page 38
(p. 29). • This reflects standard shooting criteria established by Canon. Actual results may vary according to the subject and shooting the button and use the or button to display . 2 Shoot. zThe camera will continue to record successive images while the shutter button is fully pressed. Recording - Canon 1861B001 | User Manual - Page 39
) and the compression to (Fine). zThe area that will not print displays in gray. The digital zoom or the digital tele-converter cannot be used in this mode. For printing instructions, refer to the Direct Print User Guide. Embedding the Date in the Image Data You can embed the date in image data - Canon 1861B001 | User Manual - Page 40
can check a composition's horizontal and vertical alignment as well as a 3:2 aspect ratio print range on the LCD monitor by using a shooting guide while shooting. Displays grid lines dividing the monitor into 9 areas, Grid Lines allowing you to check the subject's horizontal and vertical alignment - Canon 1861B001 | User Manual - Page 41
frame rate and record until the memory card is full (when a super high-speed memory card is used, such as the recommended SDC-512MSH). The digital zoom can be used while shooting in this mode. (p. 32) • Maximum Size: 4 GB*/movie Fast Frame Rate Use this mode to record fast moving subjects - Canon 1861B001 | User Manual - Page 42
• The recording time will vary according to the capacity of the memory card you use (p. 139). * Recording will stop after one hour of continuous recording even if the recorded data volume has not reached 4 GB. Depending on the volume and data writing speed of the memory card, recording may stop - Canon 1861B001 | User Manual - Page 43
of the following while recording. - Try not to touch the microphone (Basic Guide p. 1). - Do not press any buttons other than the shutter button. The sound that buttons make will be recorded in the movie. - The camera will automatically adjust the exposure and white balance to suit the shooting - Canon 1861B001 | User Manual - Page 44
Changing Recording Pixels and Frame Rates You can change the recording pixels and frame rate when the movie mode is set to (Standard), (Color Accent) or (Color Swap). 1 FUNC. Menu * (Frame Rate)/ * (Recording Pixels). See Menus and Settings (p. 22). *Default setting. zUse the or button to - Canon 1861B001 | User Manual - Page 45
Changing the Shooting Interval ( (Time Lapse)) 1 FUNC. Menu */ . See Menus and Settings (p. 22). *Default setting. zUse the or button to select a shooting interval (1 sec./2 sec.) and press the FUNC./SET button. zThe recordable duration will display. Recordable Duration Shooting 43 - Canon 1861B001 | User Manual - Page 46
) to create one panoramic image on a computer. The overlapping seams of several adjacent images can be joined into a single panoramic image. 1 FUNC. Menu *(Auto) (Manual). See Menus and Settings (p. 22). *Default setting. 2 (Rec.) Menu [Stitch Assist]. See Menus and Settings (p. 23). 44 - Canon 1861B001 | User Manual - Page 47
Shooting 3 Select a shooting direction . zYou can select from the following two shooting directions. - Left to right horizontally - Right to left horizontally 4 Shoot the first image in the sequence. zThe exposure and white balance are set and locked with the first image. 5 Compose the second - Canon 1861B001 | User Manual - Page 48
No frame) Face Detect On Off You can have the camera automatically detect the position of a face and use this data to set the focus , from 9 available points, that it will use to determine the focus. The camera focuses using the center AF frame. This is convenient for focusing on a specific - Canon 1861B001 | User Manual - Page 49
has detected a face. At this point, the frame the camera judges to be the main subject appears in white while appear in gray, images will be shot using the [On] option rather than [Face Detect]. - The camera may mistakenly identify non-human subjects as a face. If this occurs, switch to the [On] or - Canon 1861B001 | User Manual - Page 50
Lock The focus lock can be used in any shooting mode. 1 Aim the camera so that an object at the same focal distance as the main subject is in the , , , , or mode. 1 Turn on the LCD monitor. 2 Aim the camera so that an object at the same focal distance as the main subject is centered in the AF - Canon 1861B001 | User Manual - Page 51
monitor, setting [AiAF] to [Off] (p. 46) makes shooting easier since the camera focuses using the center AF frame only. z The AF lock is convenient because halfway and press the button. zThe icon will display. 4 Re-aim the camera to compose the shot as desired and press the shutter button fully. To - Canon 1861B001 | User Manual - Page 52
lock the flash exposure setting. 4 Press the shutter button halfway and press the button. zThe flash will pre-fire and will display. 5 Re-aim the camera to compose the shot as desired and press the shutter button fully. To Release the FE Lock Press the button. 50 - Canon 1861B001 | User Manual - Page 53
the FUNC./SET button. Metering Methods Evaluative Center Weighted Average Spot Appropriate for standard shooting conditions, including backlit scenes. The camera divides images into several zones for metering. It evaluates complex lighting conditions, such as the position of the subject, the - Canon 1861B001 | User Manual - Page 54
Adjusting the Exposure Compensation Adjust the exposure compensation to a positive value to avoid making the subject too dark when it is backlit or shot against a bright background. Adjust the exposure compensation to a negative value to avoid making the subject too bright in night shots or when - Canon 1861B001 | User Manual - Page 55
to the Exposure Compensation setting screen. z The setting cancels when the camera's power is turned off. z The nature of CCD image sensors is such noise in the recorded image increases at long shutter speeds. This camera, however, applies special processing to images shot at shutter speeds slower - Canon 1861B001 | User Manual - Page 56
z Use the LCD monitor to confirm that the image was recorded at the desired brightness. z Please note that camera shake becomes a factor at low shutter speeds. Shoot with the camera attached to a tripod. z Use of the flash may result in an over-exposed image. If this occurs, shoot with the flash set - Canon 1861B001 | User Manual - Page 57
button to select a white balance setting and press the FUNC./SET button. White Balance Settings Auto Settings are automatically set by the camera Day Light For recording outdoors on a bright day Cloudy For recording under overcast, shady or twilight skies Tungsten For recording under tungsten - Canon 1861B001 | User Manual - Page 58
lamp) 1 FUNC. Menu * (Auto) See Menus and Settings (p. 22). * Default setting. (Custom). 2 Aim the camera at a piece of white paper or cloth and press . zIf you are viewing it with the LCD monitor, ensure that filled. However, the center frame will not display when using the digital zoom. 56 - Canon 1861B001 | User Manual - Page 59
z You are recommended to set the shooting mode to and the exposure compensation setting to [±0] before setting a custom white balance. The correct white balance may not be obtained when the exposure setting is incorrect (image appears completely black or white). z Shoot with the same settings - Canon 1861B001 | User Manual - Page 60
Shooting in a My Colors Mode You can change the look and feel of the pictures you take. My Colors Settings My Colors Off Records normally with this setting. Vivid Emphasizes the contrast and color saturation to record bold colors. Neutral Tones down the contrast and color saturation to record - Canon 1861B001 | User Manual - Page 61
1 FUNC. Menu * (My Colors Off). See Menus and Settings (p. 22). *Default setting. zUse the or button to select a My Colors mode. zIn See Setting the Camera to a Custom Color Mode (p. 59). zWhen not in Press the FUNC./SET button to return to the shooting screen. 2 Shoot. Shooting Setting the - Canon 1861B001 | User Manual - Page 62
Changing Colors You can shoot images with the original colors transformed. This can be performed on movies as well as still images, allowing you to enjoy photographing with image or movie effects. However, depending on the shooting conditions, the images may appear rough or you may not get the - Canon 1861B001 | User Manual - Page 63
to color input mode and the display will alternate between the original image and the color accent image (using the previously set color). 4 Aim the camera so that the color you wish to retain appears at the center of the LCD monitor and press the button. zOnly one color can be - Canon 1861B001 | User Manual - Page 64
Menu (Color Swap). See Menus and Settings (p. 22). *Default setting. *(Auto) (Color * (Standard) Stills 2. Movies zThe Color Swap mode will take effect. 3. zThe camera will switch to color input mode and the display will alternate between the original image and the color swap image (using the - Canon 1861B001 | User Manual - Page 65
are swapped. • -5: Only takes the color that you want to swap • +5: Also takes colors close to the one that you want to swap 5 Aim the camera so that the desired color appears at the center of the LCD monitor and press the button. • Only one color can be specified. 6 Press to - Canon 1861B001 | User Manual - Page 66
Changing the Save Method for the Original Image When shooting still images in the Color Accent or Color Swap mode, you can set whether or not to save the original image as well as the transformed one. 1 (Rec.) Menu [Save Original] [On]/[Off]*. See Menus and Settings (p. 23). *Default setting. - Canon 1861B001 | User Manual - Page 67
. zSelecting (High ISO Auto)* sets the sensitivity to a higher value than the setting. This sets the shutter speed faster, reducing the potential for camera shake or blurry subjects compared with the setting. * Noise in the recorded image may be higher than for the setting. zWhen in (Auto) shooting - Canon 1861B001 | User Manual - Page 68
while shooting, you can raise the ISO speed simply by pressing the button to record at a shutter speed that avoids the effects of camera shake. 1 (Rec.) Menu [Auto ISO Shift] [On]/[Off]*. See Menus and Settings (p. 23). *Default setting. 2 Press the shutter button halfway. zIf appears, the - Canon 1861B001 | User Manual - Page 69
. Movie p. 39 White Balance Custom White Balance p. 55 p. 56 Display Off Play Sound Effect*2 p. 26 p. 28 Digital Tele-converter p. 32 *1 Default setting. *2 Sets the sound registered to the My Camera menu. , found in the [Shutter Sound] section of 1 (Rec.) Menu [Set button]. See Menus and - Canon 1861B001 | User Manual - Page 70
when you press the button even if the mode switch is set to . - The function is useful for directing your subject's atten- tion to the camera right before taking a shot because it plays a sound when you press the button. zIf a function that cannot be used in the currently selected shooting - Canon 1861B001 | User Manual - Page 71
Rotate function is set to [On], the orientation of images downloaded to a computer will depend upon the software used to download the images. When the camera is held vertically to shoot, the Intelligent Orientation sensor judges the upper end to be "up" and the lower end to be "down". It then - Canon 1861B001 | User Manual - Page 72
and the frame that is in focus has an orange frame within it. - Camera is not focused: an orange frame appears at the centre of the recorded the image is displayed, except in the display position change mode (See Basic Guide, p. 19). z Pressing the DISP. button will change the display on the - Canon 1861B001 | User Manual - Page 73
multiple AF frames in focus, you can change the display position between the orange frames each time you press the MENU button. 2 Press . zThe camera will switch to the display position change mode. Change the display position using the , , or button. zPressing the MENU button returns the orange - Canon 1861B001 | User Manual - Page 74
Creating an Image Destination (Folder) You can create a new folder at any time and the recorded images will be automatically saved to that folder. Creates a new folder the next time you shoot Create New Folder images. To create an additional folder, insert another check mark. Auto Create You can - Canon 1861B001 | User Manual - Page 75
Setting the Day or Time for Automatic Folder Creation 1 (Set up) Menu [Create Folder]. See Menus and Settings (p. 23). 2 Select a day for the [Auto Create] option and a time in the [Time] option . z displays when the specified time arrives. The symbol will cease to display after the new - Canon 1861B001 | User Manual - Page 76
file name duplication when changing Continuous folders or memory cards.* *When a blank memory card is used. If a memory card with recorded data is used, the 7-digit number for the last recorded folder and image is compared with the last one on the card, and the larger of the two is utilized - Canon 1861B001 | User Manual - Page 77
[On] zImages cannot be played back when the folder numbers are duplicated or image numbers are duplicated within folders. zPlease refer to the Software Starter Guide for information regarding folder structures or image types. Shooting 75 - Canon 1861B001 | User Manual - Page 78
Playback/Erasing Please also see the Basic Camera User Guide (p. 18). Magnifying Images 1 Press the zoom lever toward around the image. zIf you press the FUNC./SET button while in magnified display, the camera switches to image advance mode and will display. You can use the or button to advance - Canon 1861B001 | User Manual - Page 79
Viewing Images in Sets of Nine (Index Playback) 1 Press the zoom lever toward . zUp to nine images can be viewed at Selected Image once. zUse the , , or button to change the image selection. Movie Switching between Sets of Nine Images The jump bar will display if you press the zoom lever toward - Canon 1861B001 | User Manual - Page 80
Organizing Images by Category (My Category) You can organize images into prepared categories (People, Scenery, Events, Category 1-3, To Do). At the category level, you can perform the following. zImage searches (p. 79) zSlide Show (p. 93) zProtect (p. 98) zErase (p. 101) zConfigure print settings - Canon 1861B001 | User Manual - Page 81
folder. Jumps to a movie. Jumps over 10 images at a time. Jumps over 100 images at a time. 1 In single image playback mode, press the button. zThe camera will switch to jump search mode. 2 Use the or button to select a search key. zThe screen sample will vary slightly according to the search key - Canon 1861B001 | User Manual - Page 82
use the or button to select date, category, Select the search key folder or movie for playback and press the FUNC./SET button. - The camera will switch to defined playback mode and display a blue frame. You can limit playback to the images corresponding to the search key. - Press the button - Canon 1861B001 | User Manual - Page 83
displayed. Operating the Movie Control Panel Ends playback and returns to single image playback Print (An icon will display when a printer is connected. See the Direct Print User Guide for details.) Play Slow Motion Playback (You can use the button to slow down or the button to speed up playback - Canon 1861B001 | User Manual - Page 84
Editing Movies You can delete portions of recorded movies. Protected movies and movies 1 second or less in duration ( of 15 sec.* or 30 sec.**) cannot be edited. * When the shooting interval is 1 sec. **When the shooting interval is 2 sec. 1 Select (Edit) in the movie control panel and Movie - Canon 1861B001 | User Manual - Page 85
./SET button. zThis also can be set in the index playback mode. When images are downloaded to a computer, the orientation of images rotated by the camera will depend upon the software used to download the images. 83 - Canon 1861B001 | User Manual - Page 86
Playback with Transition Effects You can select the transition effect displayed when switching between images. No transition effect. The displayed image darkens and the next image gradually brightens until it is displayed. Press the button to have the previous image display from the left and the - Canon 1861B001 | User Manual - Page 87
Red-Eye Correction Function You can correct red eyes in recorded images. However, red eyes may not be automatically detected in some images or the results may not turn out as you intended. Examples: zFaces near the screen edges or faces that appear extremely small, large, dark or bright in relation - Canon 1861B001 | User Manual - Page 88
4 Select [New File] or [Overwrite] and press . z[New File]: saves the image under a new file name. The original file remains as is. The newly saved image file is saved as the last image of the photographed images. z[Overwrite]: saves the new image under the original file name. The original image is - Canon 1861B001 | User Manual - Page 89
Playback/Erasing Adding Correction Frames You can add up to a maximum of 35 correction frames. 1 Use the or button to select [Add Frame] and press . 2 Use the , , or button to adjust the frame position and press . zYou can change the size of the frame with the zoom lever. 87 - Canon 1861B001 | User Manual - Page 90
Adding Effects with the My Colors Function You can add effects to recorded images (stills only) using the My Colors function. The following selection of My Colors effects is available. For details, see p. 58. Vivid Lighter Skin Tone Neutral Darker Skin Tone Sepia Vivid Blue B/W Vivid Green - Canon 1861B001 | User Manual - Page 91
4 Select [OK] and press . zThe newly saved image transformed with the My Colors effect will be the last one in the list. zTo continue adding effects to other images, repeat the procedures from Step 2 onward. 5 Press and select [Yes] or [No], then press . zSelecting [Yes] displays the image - Canon 1861B001 | User Manual - Page 92
Attaching Sound Memos to Images In playback mode (including single image playback and index playback), you can attach sound memos (up to one minute) to an image. The sound data is saved in the WAVE format. 1 (Play) Menu . See Menus and Settings (p. 23). 2 Use the or button to select an image to - Canon 1861B001 | User Manual - Page 93
Erase Select [Erase] in the confirmation screen and press the FUNC./SET button. z You cannot attach sound memos to movies. z Sound memos for protected images cannot be erased. Sound-Only Recording (Sound Recorder) You can record a continuous sound memo for up to approximately 2 hours without - Canon 1861B001 | User Manual - Page 94
Sound Recorder Panel Use the or button to select an option and press FUNC./SET. Exit Record Stop Play (Use the or button to select a sound memo and then press the FUNC./SET button.) Rewind (Holding down the FUNC./SET button rewinds. The sound memo cannot be heard while rewinding.) Fast Forward ( - Canon 1861B001 | User Manual - Page 95
Automated Playback (Slide Shows) Automated playback of memory card images. Image settings for slide shows are based on the Digital Print Order Format (DPOF) standard. All Images Plays all images on a memory card in order. Date Plays images bearing a specified date in order. My Category - Canon 1861B001 | User Manual - Page 96
3 Select [Start] and press . zThe following functions are available during slide shows. - Pausing/resuming the slide show: press the FUNC./SET button - Fast forwarding/rewinding the slide show: press the or button (continue to hold the button to switch between images more rapidly) - Stopping the - Canon 1861B001 | User Manual - Page 97
Playback/Erasing Select a date/category/folder to play back (//) 1 Select , or and press . 2 Use the or button to select a date/ category/folder to play back and press the button. zTo cancel the selection: press the FUNC./SET button again. zMultiple selections can be made for the date/category/ - Canon 1861B001 | User Manual - Page 98
Selecting Images for Playback ( - ) Select only the images that you wish to play back and save them as a slide show (Custom 1, 2 or 3). Up to 998 images can be selected. They will be played back in their order of selection. 1 Select , or and press . zOnly the icon will display at first. When you set - Canon 1861B001 | User Manual - Page 99
Playback/Erasing Adjusting the Play Time and Repeat Settings zPlay Time Sets the duration that each image displays. Choose between 3*-10 seconds, 15 seconds and 30 seconds. Displaying time can vary slightly depending on the image. * Default setting. zRepeat Sets whether the slide show stops when - Canon 1861B001 | User Manual - Page 100
Protecting Images You can protect important images and movies from accidental erasure. Select Select by Date Select by Category Select by Folder All Images You can configure the protection settings for each image singly while viewing them. You can protect the images from a specified date. You can - Canon 1861B001 | User Manual - Page 101
3 Select the image, date, category or folder to protect and press . z[Select] Use the or button to select an image and press the FUNC./SET button. - Pressing the FUNC./SET button again cancels the setting. - You can also protect images in the index playback mode. Protection Icon - Press the - Canon 1861B001 | User Manual - Page 102
wrist strap or slip a fingernail under the edge of the camera's DIGITAL terminal cover, lift up and plug the interface cable in AUDIO Black 4 Turn on the TV and switch it to video mode. 5 Turn on the camera. z The video output signal can be switched (NTSC or PAL) to accommodate different regional - Canon 1861B001 | User Manual - Page 103
Erasing Images You can erase images from a memory card. Select Select by Date Select by Category Select by Folder All Images Erase images after selecting them one at a time. Erases images corresponding to the selected date. Erases images in the selected category. Erases images in the selected - Canon 1861B001 | User Manual - Page 104
3 Select the image, date, category or folder and press . z[Select] Use the or button to select an image and press the FUNC./SET button. - Pressing the FUNC./SET button again cancels the setting. - You can also erase images in the index playback mode. z[Select by Date] [Select by Category] [Select by - Canon 1861B001 | User Manual - Page 105
copies in advance using the camera. The settings used on the camera comply with the Digital Print Order Format (DPOF) standards. This is extremely convenient for printing on a direct print compatible printer, or for sending the images to a photo developing service that supports DPOF. The icon may - Canon 1861B001 | User Manual - Page 106
1 Slide the mode switch to (playback) (Print) Menu Select a menu item . See Menus and Settings (p. 23). zProceed to Step 4 if you select [Select All Images]. 2 Select the image, date, category or folder to print and press . z[Select Images & Qty.] Selection methods differ for the Print Type - Canon 1861B001 | User Manual - Page 107
OK] and press . zSelecting [Cancel] cancels print settings of the selected image and returns you to Step 1. z The output of some printers or photo developing services may not reflect the specified print settings. z Print settings cannot be set for movies. z Images are printed in order according to - Canon 1861B001 | User Manual - Page 108
same time. - Standard or Both [Date] and [File No.] can be set to [On] at the same time, however, the printable information may vary between printers. 106 - Canon 1861B001 | User Manual - Page 109
to specify settings for images before downloading to a computer. Refer to the Software Starter Guide for instructions on how to transfer images to your computer. The settings used on the camera comply with the Digital Print Order Format (DPOF) standards. The icon may display for a memory card with - Canon 1861B001 | User Manual - Page 110
3 Use the or button to select an image to transfer and press . zPressing the FUNC./SET button again deselects the setting. zYou can also select images in the index playback mode. Transfer Selection All the Images on a Memory Card 1 (Play) Menu . See Menus and Settings (p. 23). 2 Select [Mark - Canon 1861B001 | User Manual - Page 111
operation, self-timer and shutter sounds. You can change and register these settings, enabling you to customize the camera to suit your own tastes. Changing My Camera Settings 1 (My Camera) Menu Menu item. See Menus and Settings (p. 23). 2 Select the contents you wish to set. zSelect [Theme] to - Canon 1861B001 | User Manual - Page 112
settings to the and menu items. You can also use the supplied software to upload your computer's images and sounds to the camera. A computer is required to restore the My Camera settings to the defaults. Use the supplied software (ZoomBrowser EX/ ImageBrowser) to restore the default settings to the - Canon 1861B001 | User Manual - Page 113
memo function (p. 90) - Sounds recorded with the Sound Recorder (p. 91) z The prior setting is erased when a new My Camera setting is added. See the supplied Software Starter Guide for more information on creating and adding to the My Camera data. 111 Customizing the Camera (My Camera Settings) - Canon 1861B001 | User Manual - Page 114
Troubleshooting Camera Camera will not operate. Power is not turned on. zPress the power button (Basic Guide p. 9). Memory card slot/battery zConfirm that the memory card slot/ cover is open. battery cover is securely closed (Basic Guide p. 6). Battery charge insufficient zInsert a fully - Canon 1861B001 | User Manual - Page 115
in the My Camera settings (p. 109) or use the supplied software program ZoomBrowser EX or ImageBrowser to restore the default settings. See ZoomBrowser EX/ ImageBrowser Software User Guide (PDF). The when shooting still images, but it will be recorded when shooting movies. Troubleshooting 113 - Canon 1861B001 | User Manual - Page 116
zSet the Auto ISO Shift to [On] (p. 66). zSet the flash to a setting other than (Flash Off) (Basic Guide p. 14). zSet the self-timer (Basic Guide p. 16) and secure the camera to something, such as a tripod. appears. This displays when using zTake note that these settings will be a memory card - Canon 1861B001 | User Manual - Page 117
memory card (Basic Guide p. 6). zIf logic circuits may be damaged. Consult the nearest Canon Customer Support Help Desk. SD memory card or SDHC memory the viewfinder. Image is blurred or out of focus. The camera moves when zConfirm the procedures in " the shutter button is Troubleshooting 115 - Canon 1861B001 | User Manual - Page 118
function (pp. 49, 51). Too much light is shining zChange the shooting angle. directly into the camera, or is being reflected off the subject. Flash is set to on. zSet the flash to (flash off) (Basic Guide p. 14). Image contains noise. ISO speed is too high. zHigher ISO speeds and the (High - Canon 1861B001 | User Manual - Page 119
has zThis is a phenomenon that occurs reflected off dust particles with digital cameras and does not or insects in the air. This constitute a malfunction are recommended to format (Low Level Format) the memory card in the camera after you save all its images to your computer (p. 29). Recording - Canon 1861B001 | User Manual - Page 120
cards. movie will be recorded correctly on - Cards formatted on a different camera or a computer. - Cards which have had images recorded and the memory before shooting in movie mode (Basic Guide p. 14). Note the digital zoom is available while shooting, but only in Standard movie mode (p. 32). - Canon 1861B001 | User Manual - Page 121
camera using the supplied software program ZoomBrowser EX or ImageBrowser. See ZoomBrowser EX/ ImageBrowser Software User Guide camera. (Refer to the Software Starter Guide for details). Movies cannot be edited. Some movies shot with another camera the movie back on the camera's signal set to the - Canon 1861B001 | User Manual - Page 122
formatted in another device. zUse a memory card formatted in your camera (p. 29). Battery/Battery Charger Battery consumed quickly. Battery is not a new one (Basic Guide p. 6). Battery will not charge. Battery life exceeded. zReplace the battery with a new one (Basic Guide p. 6). TV monitor - Canon 1861B001 | User Manual - Page 123
Cannot print. Camera and printer not zAttach the camera to the printer properly connected. securely with the supplied cable. Printer power is off. zTurn on the printer. Incorrect print connection. zIn the (Set up) menu, select [Print Method] and select [Auto] (p. 27). Troubleshooting 121 - Canon 1861B001 | User Manual - Page 124
. Please refer to the Direct Print User Guide for the messages that display during a printer connection. Busy... zImage is being recorded to using the supplied memory card, contact your Canon Customer Support Help Desk as there may be a problem with the camera. Memory card full zMemory card is full - Canon 1861B001 | User Manual - Page 125
note that formatting will erase all the existing images and other data. Change the battery pack. zBattery charge is insufficient to operate the camera. Replace it at once with a charged one or recharge the battery. Also, see Battery Handling Precautions (p. 126). No image. zNo images recorded on - Canon 1861B001 | User Manual - Page 126
images to your computer using the Direct Transfer menu, you attempted to select an image with corrupted data or an image taken with a different camera or data type. You may have also attempted to select a movie when [Wallpaper] was selected in the Direct Transfer menu. Protected! zYou attempted to - Canon 1861B001 | User Manual - Page 127
appears frequently because there may be a problem with the lens. Exx z(xx: number) Camera detected an error. Turn the power off and then back on, then shoot or play back. A problem exists if the error code reappears. Note the number and contact your Canon Customer Support Help Desk. If an error code - Canon 1861B001 | User Manual - Page 128
soon as possible if it will be used for an extended period. Change the battery pack Battery charge is insufficient to operate the camera. Replace the battery immediately. Battery Handling Precautions z Keep the battery terminals clean at all times. Dirty terminals may cause poor contact between - Canon 1861B001 | User Manual - Page 129
long periods of time, charge it fully and discharge it fully in the camera about once a year before returning it to storage. Charging the Battery z 30 minutes to fully charge the battery from a depleted state (based on Canon's testing standards). • Charging it within a temperature range of 5 - 40 - Canon 1861B001 | User Manual - Page 130
high temperatures z Since some or all of the data recorded on the memory card may be corrupted or erased by electrical noise, static electricity, or camera or card malfunction, making a backup copy of important data is recommended. 128 - Canon 1861B001 | User Manual - Page 131
a corrupted memory card might be the cause. Reformatting the memory card may solve the problem. • When a non-Canon brand memory card is malfunctioning, reformatting it may solve the problem. • Memory cards formatted in other cameras, computers, or peripheral devices may not operate correctly in this - Canon 1861B001 | User Manual - Page 132
with AC Adapter Kit ACK-DC10 (sold separately) when you are using it for long periods of time or connecting it to a computer. Turn the camera power off before connecting or disconnecting the AC adapter. 1 Connect the power cord to the compact power adapter first and then plug the other end - Canon 1861B001 | User Manual - Page 133
when the subject is too far away for proper illumination. Use the following procedures to affix the camera and High-Power Flash to the supporting bracket. Please read the instructions accompanying the flash along with this explanation. Tripod Sockets Bracket (Comes with the flash) z The flash charge - Canon 1861B001 | User Manual - Page 134
or DL123) is installed. z To illuminate the subjects properly, install the flash so that it is up against the side of the camera and parallel with the camera's front panel. z A tripod can be used even when the flash is attached. Batteries zCharge becomes Severely Limited If the battery usage time - Canon 1861B001 | User Manual - Page 135
the lens lightly with a soft cloth. Never use organic solvents on the camera body or lens. If dirt remains, contact the closest Canon Customer Support Help Desk as listed on the customer support list supplied with your camera. Viewfinder and LCD Monitor Use a lens blower brush to remove dust and - Canon 1861B001 | User Manual - Page 136
Specifications All data is based on Canon's standard testing methods. Subject to change without notice. PowerShot SD1000 DIGITAL ELPH/DIGITAL IXUS 70 Camera Effective Pixels Image Sensor Lens Digital Zoom Optical Viewfinder LCD Monitor AF System Focusing Range Shutter Shutter Speeds Metering - Canon 1861B001 | User Manual - Page 137
Long shutter mode available 2 Selectable in Manual mode. 3 Kids&Pets, Indoor, digital camera supports Exif 2.2 (also called "Exif Print"). Exif Print is a standard for enhancing the communication between digital cameras and printers. By connecting to an Exif Print-compliant printer, the camera - Canon 1861B001 | User Manual - Page 138
Compression Number of Recording Pixels (Still Images) Number of Recording Pixels (Movies) Sound Memo Superfine, Fine, Normal Large: 3072 x 2304 pixels Medium 1: 2592 x 1944 pixels Medium 2: 2048 x 1536 pixels Medium 3: 1600 x 1200 pixels Small: 640 x 480 pixels Postcard: 1600 x 1200 pixels - Canon 1861B001 | User Manual - Page 139
possible) or Sound Recorder (up to 2 hours sound-only recording/ playback possible). Direct Print PictBridge compliant, and Canon Direct Print and Bubble Jet Direct compatible My Camera Settings Start-up image, start-up sound, operation sound, self-timer sound, and shutter sound. Interface USB - Canon 1861B001 | User Manual - Page 140
30 second intervals with the flash fired once every two shots and the camera power turned off after every tenth shot. Power is left off for the power is turned back on and the testing procedure is repeated. zA Canon-brand memory card is used. *Until the battery returns to normal temperature Playback - Canon 1861B001 | User Manual - Page 141
(Postcard) 1600 x 1200 pixels (Widescreen) 3072 x 1728 pixels : Card included with the camera 32MB SDC-128M SDC-512MSH 9 40 156 15 64 251 32 134 520 11 49 190 standard shooting criteria established by Canon. Actual results may vary according to the subject and shooting - Canon 1861B001 | User Manual - Page 142
/sec., the recording time and the playback time will differ. Sound Recorder Data Rates and Recording Durations (Estimated) Data Rates 32MB : Card included with the camera SDC-128M SDC-512MSH 11.025 kHz 22 KB/sec. 23 min. 4 sec. 1 hr. 36 min. 59 sec. 6 hrs. 14 min. 16 sec. 22.050 - Canon 1861B001 | User Manual - Page 143
Image Data Sizes (Estimated) Recording Pixels Compression (3072 x 2304 pixels) (2592 x 1944 pixels) (2048 x 1536 pixels) (1600 x 1200 pixels) (640 x 480 pixels) (1600 x 1200 pixels) (3072 x 1728 pixels) 3045 KB 2503 KB 1602 KB 1002 KB 249 KB - 2304 KB 1897 KB 1395 KB 893 KB 558 KB 150 KB 558 KB - Canon 1861B001 | User Manual - Page 144
SD Memory Card Interface Dimensions Weight Compatible with SD memory card standards 32.0 x 24.0 x 2.1 mm (1.26 x 0.94 x 0.08 in.) Approx. 2 g (0.07 oz.) MultiMediaCard Interface Dimensions Weight Compatible with MultiMediaCard standards 32.0 x 24.0 x 1.4 mm (1.26 x 0.94 x 0.06 in.) Approx. 1.5 - Canon 1861B001 | User Manual - Page 145
Compact Power Adapter CA-DC10 (Included with the separately sold AC Adapter Kit ACK-DC10) Rated Input Rated Output Operating Temperatures Dimensions Weight (excluding power cord) 100 - 240 V AC (50/ 60 Hz) 4.3 V DC, 1.5 A 0 - 40 °C (32 - 104 °F) 42.6 x 104.4 x 31.4 mm (1.68 x 4.11 x 1.24 in.) - Canon 1861B001 | User Manual - Page 146
INDEX Numerics 3:2 Guide 38 A AC Adapter Kit ACK-DC10 . 130 Add Frame 85 AE Date/Time Setting Basic 8 Using the Clock 13 World Clock 20 Digital Macro 34 Digital Tele-Converter 32 DIGITAL Terminal .... Basic 2, 27 Digital Zoom 32 Direct Transfer Basic 30 Downloading Images to a Computer - Canon 1861B001 | User Manual - Page 147
6 Menu FUNC. Menu 22, 24 Menu List 24 Menus and Settings 22 My Camera Menu 28 Play Menu 25 Print Menu 25 Rec. Menu 24 Set up Menu Accent ..... 60, Basic 12 Color Swap ....... 62, Basic 12 Digital Macro ..... 34, Basic 12 Manual Basic 12 Stitch Assist ......... Basic 12 Movie 39, Basic 13 - Canon 1861B001 | User Manual - Page 148
T Telephoto Basic 14 Time Lapse 39 Time Zone 20, 26 Transition Effects Playback 84 Slide Show 94 V Video System 100 W White Balance 55 Wide Angle Basic 14 Wrist Strap Basic 1 Z Zoom Basic 14 146 - Canon 1861B001 | User Manual - Page 149
MEMO 147 - Canon 1861B001 | User Manual - Page 150
MEMO 148 - Canon 1861B001 | User Manual - Page 151
MEMO 149 - Canon 1861B001 | User Manual - Page 152
MEMO 150 - Canon 1861B001 | User Manual - Page 153
MEMO 151 - Canon 1861B001 | User Manual - Page 154
MEMO 152 - Canon 1861B001 | User Manual - Page 155
MEMO 153 - Canon 1861B001 | User Manual - Page 156
MEMO 154 - Canon 1861B001 | User Manual - Page 157
MEMO 155 - Canon 1861B001 | User Manual - Page 158
MEMO 156 - Canon 1861B001 | User Manual - Page 159
accordance with the instructions, may cause harmful cable with the ferrite core provided with the digital camera must be used with this equipment in order manual. If such changes or modifications should be made, you could be required to stop operation of the equipment. Canon U.S.A., Inc. One Canon - Canon 1861B001 | User Manual - Page 160
to be serviced. Should the product cease to function in its intended manner, it should be returned to the manufacturer or be discarded. This power unit is intended to be correctly orientated in a vertical or floor mount position. IMPORTANT SAFETY INSTRUCTIONS-SAVE THESE INSTRUCTIONS. DANGER-TO - Canon 1861B001 | User Manual - Page 161
information contained in this guide is accurate and complete, no liability can be accepted for any errors or omissions. • Canon reserves the right to malfunction of the camera, the software, SD memory cards (SD cards), personal computers, peripheral devices, or use of non-Canon SD cards. Trademark - Canon 1861B001 | User Manual - Page 162
10 sec. Self-Timer 2 sec. Self-Timer Custom Timer Autofocus Modes AF-assist Beam Digital Zoom Digital Tele-Converter zzzz {{ { { zzzz {{ { { ---- z {(2 z { z - {(2) - - {{ - { { { {(10) { 2) { - - {(2) - - zzzz -{{ - {{{ - { { {(10) - {{ - - z S- { U- { U- { U - p. 30 - Canon 1861B001 | User Manual - Page 163
the [Off] setting.) (7) The Macro/Infinity modes cannot be selected when the camera is in the or mode. (8) Cannot be selected in the or mode. (9) 11) Can only be set and used in the mode. (12) Automatically set by the camera. (13) Only or can be selected. (14) and cannot be selected in Long
-
 1
1 -
 2
2 -
 3
3 -
 4
4 -
 5
5 -
 6
6 -
 7
7 -
8
-
9
-
10
-
11
-
12
-
13
-
14
-
15
-
16
-
17
-
18
-
19
-
20
-
21
-
22
-
23
-
24
-
25
-
26
-
27
-
28
-
29
-
30
-
31
-
32
-
33
-
34
-
35
-
36
-
37
-
38
-
39
-
40
-
41
-
42
-
43
-
44
-
45
-
46
-
47
-
48
-
49
-
50
-
51
-
52
-
53
-
54
-
55
-
56
-
57
-
58
-
59
-
60
-
61
-
62
-
63
-
64
-
65
-
66
-
67
-
68
-
69
-
70
-
71
-
72
-
73
-
74
-
75
-
76
-
77
-
78
-
79
-
80
-
81
-
82
-
83
-
84
-
85
-
86
-
87
-
88
-
89
-
90
-
91
-
92
-
93
-
94
-
95
-
96
-
97
-
98
-
99
-
100
-
101
-
102
-
103
-
104
-
105
-
106
-
107
-
108
-
109
-
110
-
111
-
112
-
113
-
114
-
115
-
116
-
117
-
118
-
119
-
120
-
121
-
122
-
123
-
124
-
125
-
126
-
127
-
128
-
129
-
130
-
131
-
132
-
133
-
134
-
135
-
136
-
137
-
138
-
139
-
140
-
141
-
142
-
143
-
144
-
145
-
146
-
147
-
148
-
149
-
150
-
151
-
152
-
153
-
154
-
155
-
156
-
157
-
158
-
159
-
160
-
161
-
162
-
163
 |
 |
Shooting
Playback/Erasing
Print/Transfer Settings
Customizing the Camera
Troubleshooting
Before Using the Camera
List of Messages
Appendix
Camera User Guide
Advanced
Advanced Camera User Guide
This guide explains camera features and procedures in detail.
CDI-E287-010
XX07XXX
© 2007 CANON INC.
PRINTED IN JAPAN
ENGLISH
DIGITAL CAMERA