Canon 2105B002 User Manual
Canon 2105B002 - LV X7 XGA LCD Projector Manual
 |
UPC - 013803080414
View all Canon 2105B002 manuals
Add to My Manuals
Save this manual to your list of manuals |
Canon 2105B002 manual content summary:
- Canon 2105B002 | User Manual - Page 1
MULTIMEDIA PROJECTOR LV-7265/LV-7260/LV-X7 User's Manual E English - Canon 2105B002 | User Manual - Page 2
this manual carefully before using your Canon LV-7265/LV-7260/LV-X7 projector and keep the manual CABINET. NO USER-SERVICEABLE PARTS INSIDE. REFER SERVICING TO QUALIFIED SERVICE PERSONNEL. This symbol . The information should be read carefully to avoid problems. WARNING: TO PREVENT FIRE OR SHOCK, DO - Canon 2105B002 | User Manual - Page 3
instructions. If such changes or modifications should be made, you could be required to stop operation of the equipment. Canon U.S.A., Inc. One Canon Plaza, Lake Success, NY 11042, U.S.A. Tel No. (516)328-5600 Canadian Radio Interference Regulations This Class B digital waste disposal service. Your - Canon 2105B002 | User Manual - Page 4
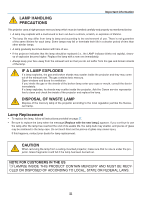
the broken lamp enter your eyes or mouth, consult the doctor immediately. If a lamp explodes, its shards may scatter inside the projector. Ask the Canon service representative to clean and check the inside of the projector and replace the lamp. DISPOSAL OF WASTE LAMP Dispose of the mercury lamp of - Canon 2105B002 | User Manual - Page 5
contact your supplier. Important Safeguards These safety instructions are to ensure the long life of , the ceiling must be strong enough to support the projector and the installation must be in immediately and have the object removed by a qualified service personnel. • Do not place any objects on - Canon 2105B002 | User Manual - Page 6
the projector, unplug the power cord and have the projector serviced by a qualified service personnel under the following conditions: - When the power cord projector does not operate normally when you follow the instructions described in this user's manual. - If the projector has been dropped or the - Canon 2105B002 | User Manual - Page 7
carrying bag, do not give a shock to it, drop it, or place anything on it. Do not transport the projector through a courier or transport service with the carrying bag. The projector can damage. Remote Control Precautions • Handle the remote control carefully. • If the remote control gets wet, wipe - Canon 2105B002 | User Manual - Page 8
display 15 Connecting Your PC or Macintosh Computer (LV-7265 15 Using Two Analog COMPUTER Inputs Simultaneously (LV-7265 16 When Viewing a DVI Digital Signal (LV-7265 17 Connecting Your PC or Macintosh Computer (LV-7260/LV-X7 18 Connecting an External Monitor 19 Connecting Your DVD Player - Canon 2105B002 | User Manual - Page 9
55 ❶ Cleaning or Replacing the Filter 55 ❷ Cleaning the Cabinet and the Lens 56 ❸ Replacing the Lamp 57 7. Appendix ...60 ❶ Troubleshooting ...60 ❷ Specifications...63 ❸ Cabinet Dimensions 65 ❹ Pin Assignments of D-Sub ANALOG Input Connector 66 ❺ Compatible Input Signal List 67 ❻ Relationship - Canon 2105B002 | User Manual - Page 10
IMAGE POWER INPUT NO AUTO SHOW PC INFO. R-CLICKBACK Remote control Batteries (AAAן2) GuidSetaQrtuick InfoIrmmpaotirotannt Quick Start Guide Important Information CD-ROM User's manual For LV-7265/LV-7260 only For LV-7265 only Warranty Remote mouse receiver (10 cm / 0.3') DVI - Canon 2105B002 | User Manual - Page 11
computer (desktop or notebook), VCR, DVD player, document camera, or a laser disc player. You can use the projector the ceiling must be strong enough to support the projector and the installation must be in or control system using the PC Control port (SERVICE PORT). • Easy set up and operation. - Canon 2105B002 | User Manual - Page 12
take your time and do everything right the first time. Take a few minutes now to review the user's manual. This may save you time later on. At the beginning of each section of the manual you'll find an overview. If the section doesn't apply, you can skip it. • IBM is a trademark - Canon 2105B002 | User Manual - Page 13
Filter Cover (See page 55) Do not block this vent. Troubles or fire can result. Two filters on LV-7265/LV-7260 fire can occur. * This security slot supports the MicroSaver ® Security System. MicroSaver ® is page 10) S-VIINDEO VIDINEO L AUDIO IN R SERVICE PORT LAMP R WARNING POWE AUTO PC INPUT - Canon 2105B002 | User Manual - Page 14
Lock Button (See page 26) Lamp Cover (See page 57) HINT: The Canon logo is on the panel of the projector cabinet . When projecting an image with the projector hung from the ceiling, turn the Canon logo upside down. To turn the logo upside down, follow the steps - Canon 2105B002 | User Manual - Page 15
to display the INPUT list. Each time the INPUT button is pressed, the input source will change as follows: Computer 1* → Computer 2 (Digital)* → Computer 2 (Analog)* → VIDEO → S-VIDEO → Computer 1* → ... To display the selected source, press the OK button or allow 2 seconds to elapse. Detecting the - Canon 2105B002 | User Manual - Page 16
SERVICE PORT R AUDIO IN DIGITAL IN / ANALOG IN-2 AUDIO IN ANALOG IN-1 AUDIO OUT 6 LV-7260/LV-X7 7 9 S-VIDEO IN VIDEO IN L SERVICE laser disc player, or ers. document camera here to project video. See page from a Video/S-Video source. These jacks support an analog RGB audio source on LV- - Canon 2105B002 | User Manual - Page 17
to display the INPUT list. Each time the INPUT button is pressed, the input source will change as follows: Computer 1* → Computer 2 (Digital)* → Computer 2 (Analog)* → VIDEO → S-VIDEO → Computer 1* → ... To display the selected source, press the OK button or allow 2 seconds to elapse. Detecting the - Canon 2105B002 | User Manual - Page 18
1 POWER INFO. 2 3 IMAGE INPUT AUTO PC 4 6 ASPECT NO SHOW 7 8 MENU 9 5 10 11 12 BACK L-CLICK R-CLICK 13 14 15 VOL PAGE D.ZOOM 17 16 FREEZE 18 RD-428E 1. Introduction (This button cannot be used for LV-X7.) Use these buttons to operate your computer with the supplied remote - Canon 2105B002 | User Manual - Page 19
Battery Installation 1 Press firmly and slide the battery cover off. 2 Remove both old batteries and install new ones (AAA). Ensure that you have the batteries' polarity (+/-) aligned correctly. 1. Introduction 3 Slip the cover back over the bat- teries until it snaps into place. Do not mix - Canon 2105B002 | User Manual - Page 20
2. Installation and Connections This section describes how to set up your projector and how to connect video and audio sources. To the wall outlet. Your projector is simple to set up and use. But before you get started, you must first: ① Set up a screen and the projector. See page 12, 13. ② Connect - Canon 2105B002 | User Manual - Page 21
screen. The largest the image can be is 300" when the projector is about 8.8 m (29.1') from the wall or screen. Use the drawing below as a guide. 8.4m 5.6m 4.2m 2.2m 1.1m 80" 40" 50" 25" 150" 96" 200" 128" Zoom (max.) 300" 190" Zoom (min.) H1 H2 Optional axis when image - Canon 2105B002 | User Manual - Page 22
screen. The largest the image can be is 300" when the projector is about 8.8 m (29.1') from the wall or screen. Use the drawing below as a guide. 5.9m 4.4m 2.3m 1.2m 80" 1.1m 40" 25" 50" 26" 150" 96" 200" 128" Optional axis when image is projected at right angle to the - Canon 2105B002 | User Manual - Page 23
WARNING • Installing your projector on the ceiling must be done by a qualified technician. Contact your dealer for more information. • Do not attempt to install the projector yourself. • Only use your projector on a solid, level surface. If the projector falls to the ground, you can be injured and - Canon 2105B002 | User Manual - Page 24
For more details, refer to your computer's owner's manual. Connecting Your PC or Macintosh Computer (LV-7265) NOTE: The ANALOG IN- 1 connector supports Plug & Play (DDC2). DIGITAL IN/ ANALOG IN-2 S-VIDEO IN VIDEO IN L SERVICE PORT R AUDIO IN DIGITAL IN / ANALOG IN-2 AUDIO IN AUDIO IN ANALOG - Canon 2105B002 | User Manual - Page 25
(LV-7265) If you need to use two analog inputs simultaneously, connect a VGA cable as shown below. DIGITAL IN / ANALOG IN-2 ANALOG IN-1 S-VIDEO IN VIDEO IN L SERVICE PORT R AUDIO IN DIGITAL IN / ANALOG IN-2 AUDIO IN ANALOG IN-1 AUDIO OUT DVI to VGA adapter (supplied) VGA cable (not - Canon 2105B002 | User Manual - Page 26
output of the graphics card resulting in no picture being displayed. Should this happen, restart your PC. Do not disconnect the DVI digital cable while the projector is running. If the signal cable has been disconnected and then reconnected, an image may not be correctly displayed. Should this - Canon 2105B002 | User Manual - Page 27
2. Installation and Connections Connecting Your PC or Macintosh Computer (LV-7260/LV-X7) NOTE: The ANALOG IN connector supports Plug & Play (DDC2). AUDIO IN S-VIDEO IN VIDEO IN L SERVICE PORT R AUDIO IN ANALOG IN ANALOG IN Audio cable (not supplied) PHONE NOTE: For older Macintosh, use a - Canon 2105B002 | User Manual - Page 28
Monitor LV-7265 ANALOG IN 1 S-VIDEO IN VIDEO IN AUDIO IN L SERVICE PORT R AUDIO IN DIGITAL IN / ANALOG IN-2 AUDIO IN ANALOG IN-1 AUDIO OUT 2. Installation and Connections LV-7260/LV-X7 S-VIDEO IN VIDEO IN L SERVICE PORT R AUDIO IN ANALOG IN VGA cable (supplied) VGA cable (not - Canon 2105B002 | User Manual - Page 29
stereo sound. AUDIO IN ANALOG IN-1 S-VIDEO IN VIDEO IN L SERVICE PORT R AUDIO IN DIGITAL IN / ANALOG IN-2 AUDIO IN ANALOG IN-1 AUDIO OUT Audio cable -X7) → [COMPONENT]. NOTE: Refer to your DVD player's owner's manual for more information about your DVD player's video output requirements. 20 - Canon 2105B002 | User Manual - Page 30
S-VIDEO IN AUDIO IN S-VIDEO IN VIDEO IN L SERVICE PORT R AUDIO IN VIDEO IN DIGITAL IN / ANALOG IN-2 AUDIO IN ANALOG IN-1 AUDIO OUT Video inputs. NOTE: Refer to your VCR or laser disc player owner's manual for more information about your equipment's video output requirements. NOTE: An image - Canon 2105B002 | User Manual - Page 31
AC IN of the projector, and then connect the other plug of the supplied power cord in the wall outlet. S-VIINDEO VIDINEO L R AUDIO IN SERVICE PORT LAMP R WARNING POWE AUTO PC INPUT -VOL ADNIGAILTOAGL IINN-/2 AUDIO IN AUDIO OUT ANALOG IN-1 +VOL BACK MENU KEYSTONE To wall outlet ← Make - Canon 2105B002 | User Manual - Page 32
3. Projecting an Image (Basic Operation) This section describes how to turn on the projector and to project a picture onto the screen. ❶ Turning on the Projector NOTE: • The projector has two power switches: a main power switch and a POWER button. • When plugging in or unplugging the supplied power - Canon 2105B002 | User Manual - Page 33
3. Projecting an Image (Basic Operation) Note on Startup screen (Menu Language Select screen) When you first turn on the projector, you will get the Startup menu. This menu gives you the opportunity to select one of the 21 menu languages. To select a menu language, follow these steps: 1. Use the - Canon 2105B002 | User Manual - Page 34
signal is present, the input will be skipped. TIP: The COMPUTER 2 button on the remote control toggles the Computer 2 source between [Computer 2 (Digital)] and [Computer 2 (Analog)]. Selecting Default Source You can set a source as the default source so that it will be displayed each time the - Canon 2105B002 | User Manual - Page 35
3. Projecting an Image (Basic Operation) ❸ Adjusting the Picture Size and Position Place your projector on a flat level surface and ensure that the projector is square to the screen. Lift the front edge of the projector to center the image vertically. • If the projected image does not appear square - Canon 2105B002 | User Manual - Page 36
Zoom Use the ZOOM lever to finely adjust the image size on the screen. 3. Projecting an Image (Basic Operation) Focus Use the FOCUS ring to obtain the best focus. 27 - Canon 2105B002 | User Manual - Page 37
narrower, depending on a signal or its aspect ratio selection. NOTE: Turning off the projector will cause your manual keystone adjustments to return to "0". To save your manual keystone adjustments, select [Keystone save] from the menu. See page 47. Adjusting with buttons on the cabinet 1. Press - Canon 2105B002 | User Manual - Page 38
that the lens surface is parallel to the screen. The rear feet of the projector can be adjusted to level the projector. NOTE: • Auto and Manual Keystone correction angle could be less than 30 degrees depending on the signal and/or aspect ratios. • Using keystone correction can cause the image to - Canon 2105B002 | User Manual - Page 39
: The Auto PC adjustment function does not work for component, video, and DVI digital signals. • LV-7260/LV-X7: The Auto PC adjustment function does not work the RGB signal, try to adjust Horizontal/Vertical Position Clock and Tracking manually. See page 46. ❻ Turning Up or Down Volume Sound level - Canon 2105B002 | User Manual - Page 40
❼ Turning off the Projector To turn off the projector: 1. Press the POWER button on the projector cabinet or the remote control. The "Push POWER button again to turn off power." message will appear. 3. Projecting an Image (Basic Operation) WARNING POWER LAMP POWER INFO. IMAGE INPUT AUTO PC - Canon 2105B002 | User Manual - Page 41
❽ After Use Preparation: Make sure that the projector is turned off. 3. Projecting an Image (Basic Operation) 1. Unplug the power cord. 2. Disconnect any other cables. 3. Retract adjustable tilt feet if extended. 4. Cover the lens with the lens cap. 5. Put the projector and its accessories in - Canon 2105B002 | User Manual - Page 42
4. Convenient Features ❶ Turning off the Image and Sound Press the NO SHOW button to turn off the image and sound for a short period of time. Press again to restore the image and sound. ❷ Freezing a Picture Press the FREEZE button to freeze a projected moving picture such as DVD. Press again to - Canon 2105B002 | User Manual - Page 43
4. Convenient Features ❹ Using the Remote Mouse Receiver (LV-7265/LV-7260) The remote mouse receiver enables you to operate your computer's mouse functions from the remote control. It is a great convenience for clicking through your computer-generated presentations. Connecting the remote mouse - Canon 2105B002 | User Manual - Page 44
4. Convenient Features Operating your computer's mouse from the remote control You can operate your computer's mouse from the remote control. PAGE ▲/▼ Button scrolls the viewing area of the window or to move to the previous or next slide in PowerPoint on your computer. / Mouse Buttons......moves - Canon 2105B002 | User Manual - Page 45
a combination of the four SELECT buttons and press the OK button. To cancel this operation, press the MENU button. NOTE: A password must be 4 to 10 digits in length. Please make a note of your password. 36 - Canon 2105B002 | User Manual - Page 46
The [Confirm password] screen will be displayed. 4. Convenient Features NOTE: Do not forget your password. If you forget your password, contact your dealer. 7. Type in the same combination of SELECT button The confirmation screen will be displayed. and press the OK button. 8. Select [Yes] and - Canon 2105B002 | User Manual - Page 47
4. Convenient Features 4. Use the SELECT or button to select [Password] and press the OK or SELECT button. 5. Use the SELECT or button to select [off] and press the OK button. The password confirmation screen will be displayed. 6. Type in your password and press the OK button. When the correct - Canon 2105B002 | User Manual - Page 48
5. Using On-Screen Menu ❶ Using the Menus NOTE: The on-screen menu may not be displayed correctly while interlaced motion video image is projected. 1. Press the MENU button on the remote control or projector cabinet to display the Menu. POWER INFO. IMAGE INPUT AUTO PC ASPECT MENU NO SHOW BACK - Canon 2105B002 | User Manual - Page 49
4. Use the SELECT or button on the remote control or the projector cabinet to select the item you want to adjust or set. 5. Using On-Screen Menu 5. Adjusting the level of a selected item or selecting an item. Slide bar Solid triangle Radio button POWER INFO. IMAGE INPUT AUTO PC ASPECT MENU - Canon 2105B002 | User Manual - Page 50
❷ Menu Elements Title Source Highlight Tab 5. Using On-Screen Menu Remaining countdown time Slide bar Radio button Solid triangle Thermometer symbol Key symbol Menu windows or dialog boxes typically have the following elements: Title Indicates the menu title. Highlight Indicates the selected - Canon 2105B002 | User Manual - Page 51
Color, Monochrome Menu display time 45 sec Manual, 5 sec, 15sec, 45 sec No signal screen Blue Blue, Black, Canon logo Off timer Off Off, 0:30, Default source select LV-7265 Last Last, Auto, Computer 1, Computer 2 (Digital), Computer 2 (Analog), VIDEO, S-VIDEO LV-7260/LV-X7 Last Last, - Canon 2105B002 | User Manual - Page 52
Sync polarity Scan type Model Serial number Firmware version Data version 5. Using On-Screen Menu Item RGB, Component, HDTV, VIDEO, S-VIDEO, HDTV, Digital NTSC, NTSC3.58, NTSC4.43, PAL, PAL-M, PAL-N, PAL60, SECAM, Separate Sync, Composite Sync, Sync on Green, Sync on video Interlace, Progressive - Canon 2105B002 | User Manual - Page 53
. Video Select this to project a regular picture such as TV program sRGB Select this when you want to project an image from a sRGBcompatible digital camera. An image is pro- jected in the display mode conforming to the sRGB Standard. Selecting Gamma Correction Mode [Gamma] Each mode is recommended - Canon 2105B002 | User Manual - Page 54
5. Using On-Screen Menu Adjusting White Balance [White balance] This allows you to adjust the white balance. Brightness for each color (RGB) is used to adjust the black level of the screen; Contrast for each color (RGB) to adjust the white level of the screen. Adjusting Brightness, Contrast, - Canon 2105B002 | User Manual - Page 55
for RGB signal only) You can adjust the image manually for position and stability; [Horizontal position], [Vertical position for component signals. Selecting Video Filter Level [Video filter] (not available for Digital RGB, Video and S-Video) Select one of the three levels for reducing video noise - Canon 2105B002 | User Manual - Page 56
automatically. To turn off the Auto Keystone feature, select [Off]. Correcting Vertical Keystone Distortion Manually [Keystone adjustment] You can correct vertical distortion manually. Saving Vertical Keystone Correction [Keystone save] This option enables you to save your current keystone - Canon 2105B002 | User Manual - Page 57
5. Using On-Screen Menu Selecting Lamp Mode [Lamp mode] This feature enables you to select two brightness modes of the lamp: Normal and Quiet modes. The lamp life can be extended by using the Quiet mode. Lamp Mode Normal Mode Quiet Mode Description Status of LAMP indicator This is the default - Canon 2105B002 | User Manual - Page 58
None Rear, Ceiling mounted Rear Ceiling mounted Selecting Communication Speed [Communication speed] This feature sets the baud rate of the SERVICE PORT (Mini DIN 8 Pin). It supports data rates from 4800 to 19200 bps. The default is 19200 bps. Select the appropriate baud rate for your equipment - Canon 2105B002 | User Manual - Page 59
signal screen] Use this feature to display a blue, black screen or the Canon logo screen when no signal is available. [Options] Setting Off Timer [Off adjust mode so that the analog RGB image can be automatically or manually adjusted for noise and stability. You can automatically make adjustment in - Canon 2105B002 | User Manual - Page 60
the previous or last active input each time the projector is turned on. Auto Searches for an active source in order of Computer 1 → Computer 2 (Digital) → Computer 2 (Analog) → Video → S-Video → Computer 1 and displays the first found source. NOTE: The LV-7260/LV-X7 will search for an active source - Canon 2105B002 | User Manual - Page 61
[Computer 2 (Analog)]: LV-7265 only [Video & S-Video System Select] This feature enables you to select composite video standards automatically or manually. Normally select [Auto] and the projector will automatically detect the video standard. In the case where the projector has difficulty detecting - Canon 2105B002 | User Manual - Page 62
5. Using On-Screen Menu ❼ Menu Descriptions & Functions [Information] Displays the status of the lamp / filter / projector usage and the current signal. This item has three pages. The information included is as follows: [Usage time] [Remaining lamp time] (%)* [Filter counter] (H) [Lamp counter] - Canon 2105B002 | User Manual - Page 63
mode). NOTE: Resetting the lamp counter before or without replacing the lamp will not display the exact lamp usage hours. Using the lamp beyond its service life may cause the lamp to break. Be sure to reset the lamp counter after replacing the lamp. Clearing the Filter Usage Hours [Filter counter - Canon 2105B002 | User Manual - Page 64
+VOL BACK MENU KEYSTONE AUTO PC INPUT -VOL PUSH R PUSH LAMP WARNING POWE 6. Maintenance This section describes the simple maintenance procedures you should follow to clean the filter and replace the lamp. ❶ Cleaning or Replacing the Filter The air-filter sponge keeps dust and dirt from getting - Canon 2105B002 | User Manual - Page 65
PUSH R 3. Reinstall the new filter cover. 6. Maintenance NOTE: Do not wash the filter with soap and water. Soap and water will damage the filter membrane. Before replacing the filter, remove dust and dirt from the projector cabinet. Keep out dust and dirt during filter replacement. NOTE: When you - Canon 2105B002 | User Manual - Page 66
standby mode after 3100 (up to 4100 hours in Quiet mode) hours of service. A lamp may burn out before the LAMP indicator blinks. *2 NOTE: This or the remote control. To replace the lamp: IMPORTANT: Follow the instructions described in this section. The lamp component might have high voltage and - Canon 2105B002 | User Manual - Page 67
6. Maintenance 2. Remove the lamp cover. (1) Press firmly and slide the lamp cover by 1 cm (0.4") • Do not force to pull the lamp cover (2) Push two catches on both sides lightly ① to slide the lamp cover slowly ② until the catch is seen and then pull up the lamp cover ③. 3 1 1 2 3. Remove the - Canon 2105B002 | User Manual - Page 68
menu → [Reset] → [Lamp counter] to reset the lamp usage hours. NOTE: When the lamp exceeds 2100* hours (up to 3100* hours in Quiet mode) of service, the projector cannot turn on and the menu is not displayed. If this happens, press the INFO. button on the remote control for ten seconds - Canon 2105B002 | User Manual - Page 69
7. Appendix ❶ Troubleshooting This section helps you resolve problems you may encounter while setting up or using the projector. WARNING Indicator WARNING POWER POWER Indicator LAMP LAMP Indicator INPUT AUTO PC VOL - MENU KEYSTONE - Canon 2105B002 | User Manual - Page 70
"Power/Status/Lamp Indicator" on page 60.) Problem Check These Items Does not turn on • AUTO PC button on the projector cabinet or the remote control. See page 30. • Adjust the computer image manually with [Clock] or [Tracking] in [Display settings] in the menu. See page 46. Whenever the - Canon 2105B002 | User Manual - Page 71
to come on or off. For more details, refer to your computer's owner's manual. • Non-standard signal output from the computer If the output signal from a changes to take affect. For setting display modes other than those supported by your Macintosh and the projector, changing the DIP switch on - Canon 2105B002 | User Manual - Page 72
Array (Aspect 4:3) 1024 x 768 pixels*1 native, up to UXGA with scaling technology Manual zoom and manual focus F1.6 - 2.5 f = 17.7 - 28.3 mm LV-7265: 200W DC (Digital/Analog) (DVI-I 29Pin, HDCP*2 supported), 1 S-Video (DIN 4 Pin), 1 Video (RCA), 1 (Stereo) RCA Audio, 1 Stereo Mini Audio, 1 Service - Canon 2105B002 | User Manual - Page 73
External Control Sync Compatibility Built-in Speaker Power Requirement Input Current Power Consumption Mechanical Installation Orientation Dimensions Weight Fan Noise Environmental Considerations Regulations 7. Appendix RS232, IR Separate Sync / Composite Sync / Sync on Green / Sync on Video LV- - Canon 2105B002 | User Manual - Page 74
(2.9") Lens center 310 (12.2") 109 (4.3") 7. Appendix 265 (10.4") WARNING POWER LAMP INPUT AUTO PC VOL - MENU KEYSTONE VOL + BACK LV-7265 S-VIDEO IN VIDEO IN L SERVICE PORT R AUDIO IN DIGITAL IN / ANALOG IN-2 AUDIO IN ANALOG IN-1 AUDIO OUT LV-7260/LV-X7 S-VIDEO IN VIDEO IN - Canon 2105B002 | User Manual - Page 75
-directional DATA (SDA)* Horizontal Sync or Composite Sync Vertical Sync Data Clock* YCbCr Signal Cr Y Cb Cr Ground Y Ground Cb Ground * Only ANALOG-1 input connector supported on LV-7265. 66 - Canon 2105B002 | User Manual - Page 76
50.00 Interlace 60.00 Progressive 59.94 Progressive 59.94 Interlaced 50.00 Interlaced D : Images in above flagged with "D" are supported by the DVI digital signals on LV-7265. # : Images in above flagged with # are compressed with scaling technology. NOTE: Some composite sync signals may not - Canon 2105B002 | User Manual - Page 77
7. Appendix ❻ Relationship between Screen Size and Projection distance LV-7265 Screen size at 4:3 aspect ratio W x D (cm) 25" 51 x 38 30" 61 x 46 40" 81 x 61 50" 102 x 76 60" 122 x 91 70" 142 x 107 80" 163 x 122 90" 183 x 137 100" 203 x 152 110" 224 x 168 120" 244 x 183 130" 264 x 198 140" 284 x - Canon 2105B002 | User Manual - Page 78
LV-7260/LV-X7 Screen size at 4:3 aspect ratio W x D (cm) 25" 51 x 38 30" 61 x 46 40" 81 x 61 50" 102 x 76 60" 122 x 91 70" 142 x 107 80" 163 x 122 90" 183 x 137 100" 203 x 152 110" 224 x 168 120" 244 x 183 130" 264 x 198 140" 284 x 213 150" 305 x 229 160" 325 x 244 170" 345 x 259 176" 358 x 268 180 - Canon 2105B002 | User Manual - Page 79
COMPUTER-1 02H 03H 00H 00H 02H 01H 01H 09H INPUT SELECT COMPUTER-2 (Digital) 02H 03H 00H 00H 02H 01H 1AH 22H INPUT SELECT COMPUTER-2 (Analog : Depending on the equipment, a lower baud rate may be recommended for long cable runs. SERVICE PORT (Mini DIN-8P) To TxD of PC To GND of PC 12 34 5 678 - Canon 2105B002 | User Manual - Page 80
service personnel, check the following list to be sure repairs are needed, you may also refer to the "Troubleshooting" section in your user's manual. This checklist below will help us solve your problem . Input source's resolution and frequency are supported by the projector. Image is too dark - Canon 2105B002 | User Manual - Page 81
In the space below please describe your problem in detail. 7. Appendix Information on application and environment Native resolution: Refresh rate: Video adapter: Other: DVD player Signal cable Canon standard or other manufacturer's cable? Model number: Length: inch/m Distribution ampli - Canon 2105B002 | User Manual - Page 82
SVENSKA AB Gustav III:s, Boulevard 26, 169 88 Solna, Sweden CANON NORGE A/ S Hallagerbakken 110, P. O. Box 33, Holmlia, N-1201 Oslo, Norway CANON OY Huopalahdentie 24, P. O. Box 1, FIN- 00351 Helsinki, Finland CANON HONGKONG CO., LTD. 19/F., The Metropolis Tower, 10 Metropolis Drive, Hunghom, Kln
-
 1
1 -
 2
2 -
 3
3 -
 4
4 -
 5
5 -
 6
6 -
 7
7 -
8
-
9
-
10
-
11
-
12
-
13
-
14
-
15
-
16
-
17
-
18
-
19
-
20
-
21
-
22
-
23
-
24
-
25
-
26
-
27
-
28
-
29
-
30
-
31
-
32
-
33
-
34
-
35
-
36
-
37
-
38
-
39
-
40
-
41
-
42
-
43
-
44
-
45
-
46
-
47
-
48
-
49
-
50
-
51
-
52
-
53
-
54
-
55
-
56
-
57
-
58
-
59
-
60
-
61
-
62
-
63
-
64
-
65
-
66
-
67
-
68
-
69
-
70
-
71
-
72
-
73
-
74
-
75
-
76
-
77
-
78
-
79
-
80
-
81
-
82
 |
 |
MULTIMEDIA PROJECTOR
LV-7265/LV-7260/LV-X7
User’s Manual
E
English