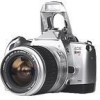
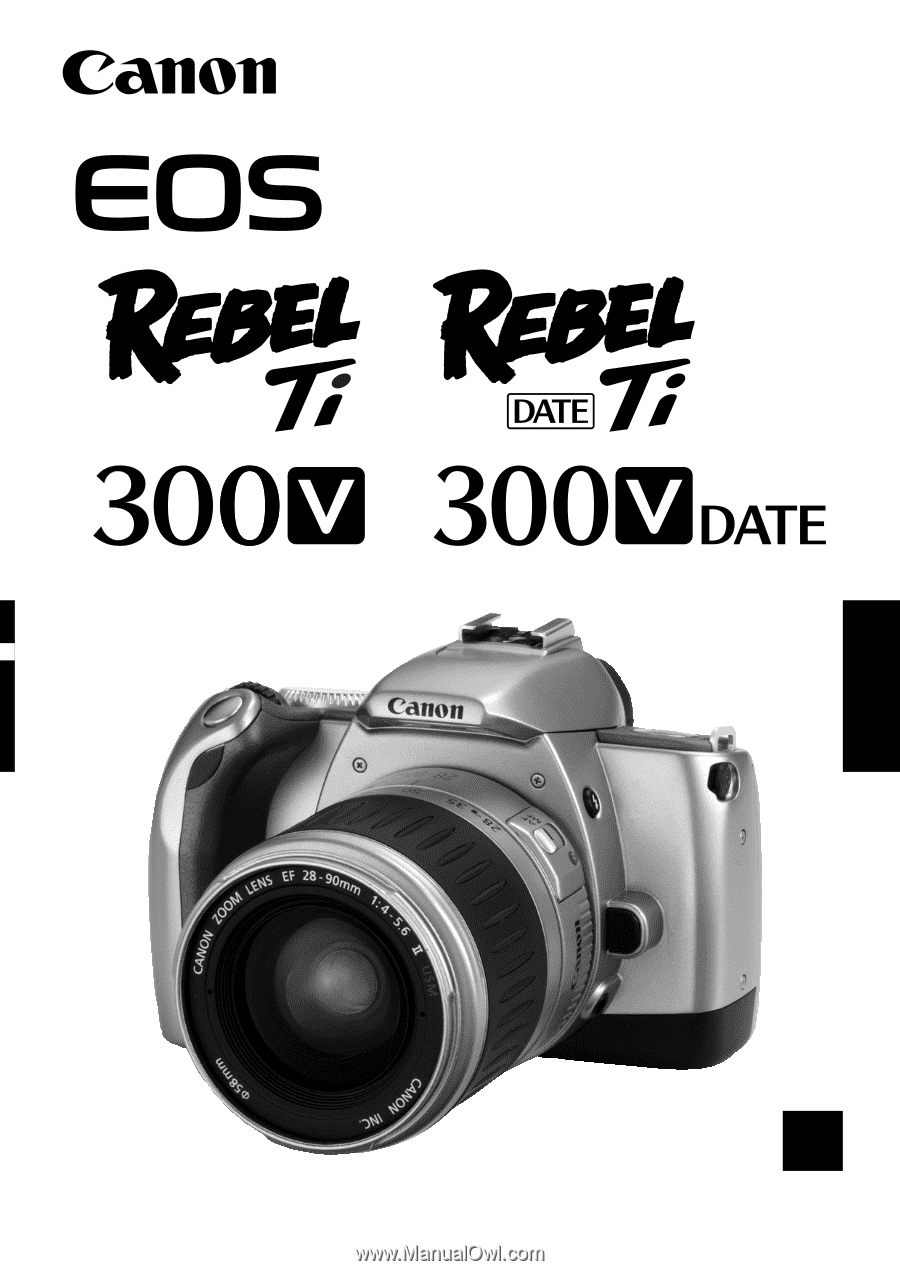
Canon 8090A004 EOS Rebel Ti manual
Canon 8090A004 - EOS Rebel Ti Date SLR Camera Manual
 |
View all Canon 8090A004 manuals
Add to My Manuals
Save this manual to your list of manuals |
Canon 8090A004 manual content summary:
- Canon 8090A004 | EOS Rebel Ti manual - Page 1
English / / E INSTRUCTIONS - Canon 8090A004 | EOS Rebel Ti manual - Page 2
, etc.) with Canon EF lenses. Using a non-Canon EF lens with an EOS camera may not result in proper camera or lens operation. Note that the warranty does not cover any camera malfunction or damage occurring with the use of non-Canon products. Conventions Used in this Instructions • The < > icon - Canon 8090A004 | EOS Rebel Ti manual - Page 3
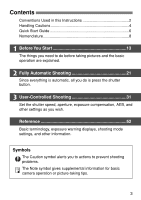
Contents Conventions Used in this Instructions 2 Handling Cautions 4 Quick Start Guide 6 Nomenclature 8 1 Before You Start 13 The things symbol alerts you to actions to prevent shooting problems. The Note symbol gives supplemental information for basic camera operation or picture-taking tips. 3 - Canon 8090A004 | EOS Rebel Ti manual - Page 4
dust on the lens, eyepiece, mirror, focusing screen, and film compartment. Do not clean the camera body or lens with a cleaner containing an organic solvent. For stubborn dirt, consult your nearest Canon Service Center. (6) The shutter curtains are extremely thin. Use only a blower to clean them. Be - Canon 8090A004 | EOS Rebel Ti manual - Page 5
LCD Displays In time, the camera's LCD panel display and the LCD display in the viewfinder may fade and become difficult to read. If this happens, have it replaced (at cost) by a Canon Service Center. At low temperatures, the LCD display response may become slower. And at 60˚C/140˚F or higher - Canon 8090A004 | EOS Rebel Ti manual - Page 6
Quick Start Guide 1 Install the batteries. Insert two CR2 lithium batteries as shown by the battery orientation diagram on the battery compartment cover. (→page 14) 2 Attach a lens. Align the red dots on the lens and camera and turn the lens as shown by the arrow until it snaps into place. (→page - Canon 8090A004 | EOS Rebel Ti manual - Page 7
3 On the lens, set the focus mode switch to < AF>. (→page 16) 4Turn the Command Dial to < > (Full Auto). (→page 22) 7 Take the picture. Press the shutter button fully to take the picture. (→page 17) 8Unload the film. At the end of the roll, the film rewinds automatically. Open the back cover to - Canon 8090A004 | EOS Rebel Ti manual - Page 8
Nomenclature • The reference page is indicated in parentheses. • The camera controls are indicated as icons in brackets < >. Command Dial (→page 12) < >Film plane mark < > Main Dial 16) Depth-of-field preview button (→page 41) Focus mode switch (→page 16) Zoom ring Manual focusing ring (→page 34) - Canon 8090A004 | EOS Rebel Ti manual - Page 9
button (→page 51) * DATE Model only < > Exposure compensation (→page 45) Manual aperture setting (→page 42) *SET button (→page 30) < > AE lock (→ button (→page 19, 26, 29, 46, 48, 50, 51) Guide hole Battery compartment cover Battery compartment release lever (→page 14) Take off the - Canon 8090A004 | EOS Rebel Ti manual - Page 10
Nomenclature Shutter speed ( - , FE lock ( ) ISO film speed ( Date LCD Panel ) - ) DATE Model Shooting mode < > Manual focus Aperture ( - ) Red-ey reduction setting ( , ) Beeper setting ( , ) AEB amount ( - ) Date AF point mark Film advance mode < > Single frame < > Continuous shooting - Canon 8090A004 | EOS Rebel Ti manual - Page 11
Viewfinder Information AF points (7) Superimposed display position New Lasermatte focusing screen < > AE lock / FE lock AEB in progress < > Flash-ready Improper FE lock warning < > High-speed sync (FP flash) Shutter speed ( -, ) FE lock ( ) Aperture ( - ) < > Focus confirmation light - Canon 8090A004 | EOS Rebel Ti manual - Page 12
for a particular subject. : Portrait : Landscape : Close-up : Sports : Night Portrait : Flash off 2 Creative Zone Semi-automatic and manual modes enable you to take control of the camera to obtain the desired result. : Program AE (→page 36) : Shutter-priority AE (→page 38) : Aperture-priority AE - Canon 8090A004 | EOS Rebel Ti manual - Page 13
a Lens 16 How the Shutter Button Works 17 Loading and Unloading Film 18 Midroll Rewind 20 Holding the Camera 20 1 2 1 Attaching the Strap Pass the end of the strap through the camera's strap mount from the bottom. Then pass it through the strap's buckle as shown in the illustration. Pull - Canon 8090A004 | EOS Rebel Ti manual - Page 14
Installing the Batteries and Checking the Battery Level Installing the Batteries The camera uses two CR2 lithium batteries. 2 1 1 Open the battery compartment cover. • Slide the cover release lever as shown by the arrow and open the battery compartment - Canon 8090A004 | EOS Rebel Ti manual - Page 15
after replacing the batteries and before using the camera. Turn the Command Dial to a shooting mode. • The camera will then turn on and the LCD panel 15 rolls • The battery life shown in the table is based on the Canon's testing conditions with new batteries. • If nothing is displayed on the LCD - Canon 8090A004 | EOS Rebel Ti manual - Page 16
lens and camera and turn the lens as shown by the arrow until it snaps in place. 3 On the lens, set the focus mode switch to . • If the focus mode switch is set to (or on older lenses), autofocus not lose them. • "AF" stands for Autofocus. • "MF" (or "M") stands for Manual Focus. 16 - Canon 8090A004 | EOS Rebel Ti manual - Page 17
smaller than f/5.6 (the lowest f/number), autofocusing will not operate. Camera movement during the moment of exposure is called camera shake. Camera shake can cause blurred pictures. To prevent blurred pictures due to camera shake: · Hold the camera steady (→page 20). · Use your finger tip to touch - Canon 8090A004 | EOS Rebel Ti manual - Page 18
shut. After you close the back cover, the film will start winding on the take-up spool and the frame counter will count up. The camera will then make a shutter-release sound and the < > icon and total frame count will be displayed. During the film's prewind, the ISO speed is displayed - Canon 8090A004 | EOS Rebel Ti manual - Page 19
< > arrow to < > on the LCD panel. The film speed will appear on the LCD panel. Unloading Film After the film's last frame is exposed, the camera rewinds the film automatically. After the film is rewound, there will be a shutter-release sound. Check that the < > icon is blinking on the LCD panel - Canon 8090A004 | EOS Rebel Ti manual - Page 20
rewind into the cartridge. Before loading a new roll of film in this case, close the camera back and press the shutter button. Holding the Camera To avoid taking a blurred shot, hold the camera properly as described below. Horizontal shooting Vertical shooting • Wrap your right hand around the - Canon 8090A004 | EOS Rebel Ti manual - Page 21
Control (DATE Model only) ...28 Using the Eyepiece Cover 28 Imprinting the Date or Time (DATE Model only) ..29 2 Basic Zone modes set all the camera settings automatically. All you do is point and shoot. Turn the Command Dial to The picture-taking procedure is the same as with the "< > Full - Canon 8090A004 | EOS Rebel Ti manual - Page 22
Full Auto Mode All you do is point the camera and press the shutter button. Everything is automatic so >. AF point 2 Aim any of the AF points on the subject. • The main subject, as determined by the camera, will be focused by one of the AF points. • To focus a subject not covered by any of the AF - Canon 8090A004 | EOS Rebel Ti manual - Page 23
accidentally, the < > icon will blink on the LCD panel as a warning. If this happens, press the shutter button halfway to return the camera to normal operation. • When focus is achieved, the autofocus and auto exposure setting will also be locked. • If the focus confirmation light < > blinks - Canon 8090A004 | EOS Rebel Ti manual - Page 24
Programmed Image Control Modes Select a shooting mode to suit the target subject, and the camera will be set to obtain the best results. Portrait This mode blurs the background to make the human subject stand out. • Holding down the shutter - Canon 8090A004 | EOS Rebel Ti manual - Page 25
Sports Night Portrait Flash off This is for sports and fast-moving subjects when you want to freeze the action on film. • The camera will first track the subject with the center AF point. Focus tracking will then continue with any of the seven AF points covering the subject. - Canon 8090A004 | EOS Rebel Ti manual - Page 26
light from the flash reflects off the retina of the eyes. The camera's red-eye reduction feature turns on the red-eye reduction lamp to " on the LCD panel. • Press the shutter button halfway to return to normal camera operation. • When red-eye reduction is enabled, the red-eye reduction lamp-on - Canon 8090A004 | EOS Rebel Ti manual - Page 27
self-timer lamp blinks quickly. Also, the self-timer display on the LCD panel counts down in seconds. Do not stand in front of the camera when you start the self-timer. Doing so will throw off the focus. • To cancel the self-timer after it starts, press the < > button again - Canon 8090A004 | EOS Rebel Ti manual - Page 28
the self-timer/wireless remote control lamp will flash. Certain types of fluorescent lights might cause the remote control operation to work improperly. Place the camera away from any fluorescent lights as far as possible. If you set the film advance mode lever to < > and do nothing for four min - Canon 8090A004 | EOS Rebel Ti manual - Page 29
Imprinting the Date or Time (DATE Model only) The camera has a date feature with an automatic calendar to 2099. It can imprint the date or time on the photograph as shown in the left photo. - Canon 8090A004 | EOS Rebel Ti manual - Page 30
digits are blinking. • If you press the < > button while " " is blinking, 0 sec. will be set. If a picture is taken while the date and time are blinking, the date and time will not be imprinted on that picture. The date and time setting can be retained for about 10 min. after the camera - Canon 8090A004 | EOS Rebel Ti manual - Page 31
the Film Advance Mode 35 Metering Modes 35 : Program AE 36 : Shutter-Priority AE 38 : Aperture-Priority AE 40 Depth-of-field Preview 41 : Manual Exposure 42 : Automatic Depth-of-Field AE 43 AE Lock 44 : Exposure Compensation 45 Auto Exposure Bracketing (AEB 46 Bulb Exposures 47 Multiple - Canon 8090A004 | EOS Rebel Ti manual - Page 32
< > modes, the AF point can be selected either automatically or manually. Automatic AF point Selection The camera selects the AF point automatically according to situation. Manual AF point Selection You can select any of the seven AF points manually. This is best when you want to be sure to focus on - Canon 8090A004 | EOS Rebel Ti manual - Page 33
Focusing Off-Center Subjects If you want to focus an off-center subject not covered by any of the AF points, use focus lock as described below. 1 Select the desired AF point. (→page 32) 2 Focus the subject. • Aim the AF point on the subject, then press the shutter button halfway. 3 Keep pressing the - Canon 8090A004 | EOS Rebel Ti manual - Page 34
When Autofocus Fails The camera has a high-precision AF system which can focus almost all EOS-dedicated Speedlite's AF-assist light, select the center AF point. Manual Focusing 1 Set the lens focus mode switch to (or on older lenses). The < > icon will be displayed on the LCD panel. 2 - Canon 8090A004 | EOS Rebel Ti manual - Page 35
backlit subjects. The viewfinder field is divided into 35 metering zones to which the three AF points are linked for evaluative metering. The camera determines the main subject's size, position, brightness, background, front and back lighting, etc., so that it can select the proper exposure for the - Canon 8090A004 | EOS Rebel Ti manual - Page 36
:Program AE Like the < > (Full Auto) mode, this is a general-purpose mode to make picture-taking easy. It sets the shutter speed and aperture automatically to suit the subject's brightness. ∗ "P" stands for Program. ∗ "AE" stands for auto exposure. 1 Turn the Command Dial to < >. 2 Press the - Canon 8090A004 | EOS Rebel Ti manual - Page 37
features can be used with < >, but not with < >: · Manual AF point selection · Film advance mode selection · Program shift · AE lock can freely change the shutter speed and aperture combination (program) set by the camera while retaining the same exposure. This is called program shift. • To - Canon 8090A004 | EOS Rebel Ti manual - Page 38
:Shutter-Priority AE In this mode, you set the shutter speed and the camera sets the aperture automatically to suit the brightness of the scene. A fast shutter speed can freeze the motion of a fast-moving subject. Or, a slow shutter - Canon 8090A004 | EOS Rebel Ti manual - Page 39
4 Check the viewfinder display and take the picture. • If the aperture display is not blinking, a correct exposure will be obtained. • If the maximum aperture (the lowest f/number) blinks, it indicates underexposure. In such a case, turn the < > dial to set a slower shutter speed until the aperture - Canon 8090A004 | EOS Rebel Ti manual - Page 40
:Aperture-Priority AE In this mode, you set the aperture and the camera sets the shutter speed automatically to suit the brightness of the subject. A large aperture (lower f/number) will blur the background and make the subject stand - Canon 8090A004 | EOS Rebel Ti manual - Page 41
aperture opening will be. The displayable range of apertures depends on the lens mounted on the camera. Depth-of-field Preview To check the depth of field, press the depth-of-field preview button. The camera will stop down the aperture and you can check the in-focus range in the viewfinder - Canon 8090A004 | EOS Rebel Ti manual - Page 42
can thereby check how suitable the exposure will be. In the < > mode, the centerweighted average metering will be set automatically. ∗ "M" stands for Manual. Correct exposure Over exposure Under exposure 42 1 Turn the Command Dial to < >. 2 Set the shutter speed and aperture. • To set the shutter - Canon 8090A004 | EOS Rebel Ti manual - Page 43
and far subject. It is effective for group photos and landscapes. The camera uses the 7 AF points to detect the nearest and farthest subjects to be the lens' focus mode switch is set to (or on older lenses). • If the aperture blinks, it indicates that the exposure level is correct but - Canon 8090A004 | EOS Rebel Ti manual - Page 44
AE Lock With the same AF point, you can obtain and lock the auto exposure setting on one part of the picture and then recompose to focus a different part of the picture. AE lock enables you to maintain the same exposure setting even after recomposing the shot. This is effective for backlit subjects. - Canon 8090A004 | EOS Rebel Ti manual - Page 45
:Exposure Compensation Changing the exposure level set by the camera is called exposure compensation. Exposure compensation can be used to make the picture darker or brighter intentionally. Exposure compensation can be set up to +/-2 stops - Canon 8090A004 | EOS Rebel Ti manual - Page 46
or bulb exposures. • During AEB shooting, the < > arrow mark and < > AEB level icon next to the < > icon will blink. • In the < > film advance mode, the camera will stop shooting automatically after three shots. • If the self-timer or remote control is used, the three AEB shots will be taken in - Canon 8090A004 | EOS Rebel Ti manual - Page 47
Bulb Exposures A bulb exposure starts when you press the shutter button fully and ends when you release the shutter button. Bulb exposures are useful when long exposures are required for night scenes, fireworks, astronomical photography, etc. 1 Turn the Command Dial to < >. 2 Set the shutter speed - Canon 8090A004 | EOS Rebel Ti manual - Page 48
Multiple Exposures By not advancing the film after taking a picture, up to nine exposures can be shot on a single frame. 1 Move the < > arrow to the < > icon. • Look at the LCD panel and press the < > button. ( ) The frame counter will show " ". 2 Set the desired number of multiple exposures. - Canon 8090A004 | EOS Rebel Ti manual - Page 49
mode if you want to set a flash sync speed slower than 1/90 sec. The camera will set the flash aperture automatically to obtain a correct flash exposure. : Use this . or slow- The flash aperture is set automatical- er can be set manually.* ly to match the sync speed you set. The sync speed is set - Canon 8090A004 | EOS Rebel Ti manual - Page 50
If the film is not DX-coded or if you want to set a different film speed, you can set the film speed manually after loading the film into the camera. The settable film speed range is ISO 6 to 6400. 1 Move the < > arrow to the < > icon. • Look at the LCD panel and press - Canon 8090A004 | EOS Rebel Ti manual - Page 51
shutter button) or turning any dials will extend the illumination time. Using the Remote Switch Connect the (optional) Remote Switch RS-60E3's plug to the camera's remote control terminal. Press the release button to take the picture. 51 - Canon 8090A004 | EOS Rebel Ti manual - Page 52
striking the film. The aperture setting is displayed on the camera's LCD panel and in the viewfinder. It can range anywhere from 1.0 to 91, depending on the lens attached to the camera. ISO film speed The ISO film speed indicates the film's sensitivity to - Canon 8090A004 | EOS Rebel Ti manual - Page 53
has a maximum aperture of f/4.0 and minimum aperture of f/22. The maximum and minimum aperture warning displays will differ depending on the lens attached to the camera. 53 - Canon 8090A004 | EOS Rebel Ti manual - Page 54
Reference Feature Availability Table Command Dial Mode One-Shot AI Servo AI Focus AF AF Point Auto Selection Manual AF-Assist beam Built-in Flash Metering Mode Film Advance Single frame Continuous Self-timer/Remote control Evaluative Partial - Canon 8090A004 | EOS Rebel Ti manual - Page 55
locked. The shutter cannot be released until focus is achieved. AI Servo AF Ideal for moving subjects. The moving subject is focused continuously while the camera predicts the subject's point of focus for when the shutter is released. The exposure is set when the shutter is released. AI Focus AF - Canon 8090A004 | EOS Rebel Ti manual - Page 56
by referring to this Troubleshooting Guide. If the problem still persists, take the camera to your nearest Canon Service Center. Nothing is displayed Select another AF point. (→page 32) If focus still cannot be achieved, focus manually. (→page 34) The < > The battery level is very low. icon blinks - Canon 8090A004 | EOS Rebel Ti manual - Page 57
camera with built-in winder and flash Recording media 35 mm film Image size 24 x 36 mm Compatible lenses Canon EF lenses Lens mount Canon Shot AF, AI Servo AF, AI Focus AF, manual focusing (MF) AF point selection Automatic/manual Selected AF point display......Super-imposed AF point in - Canon 8090A004 | EOS Rebel Ti manual - Page 58
focus is achieved Manual AE lock: By in flash AF point-linked, 3-zone autoflash Guide No. 12 (ISO 100, meters), 39 Automatic calender to 2099 Power source Uses camera power • Power source Power source Two the specifications above are based on Canon's testing and measuring standards. • - Canon 8090A004 | EOS Rebel Ti manual - Page 59
H Holding the camera 20 L LCD panel 10 illumination 51 Lens mounting / detaching 16 M Manual focusing 34 Metering the equipment unless otherwise specified in the instructions. If such changes or modifications should comply with the limits for a class B digital device, pursuant to part 15 of the - Canon 8090A004 | EOS Rebel Ti manual - Page 60
., INC. 12-15 Mita, 3-Chome, Minato-ku, Tokyo 108-8011, Japan This Instructions booklet is current as of April 2002. For information on using the camera with system accessories introduced after this date, contact your nearest Canon Service Center. CT1-1236-000 © CANON INC. 2002 PRINTED IN TAIWAN
-
 1
1 -
 2
2 -
 3
3 -
 4
4 -
 5
5 -
 6
6 -
 7
7 -
8
-
9
-
10
-
11
-
12
-
13
-
14
-
15
-
16
-
17
-
18
-
19
-
20
-
21
-
22
-
23
-
24
-
25
-
26
-
27
-
28
-
29
-
30
-
31
-
32
-
33
-
34
-
35
-
36
-
37
-
38
-
39
-
40
-
41
-
42
-
43
-
44
-
45
-
46
-
47
-
48
-
49
-
50
-
51
-
52
-
53
-
54
-
55
-
56
-
57
-
58
-
59
-
60
 |
 |
E
INSTRUCTIONS
English
/
/