Canon EOS D60 ImageBrowser 6.6 for Macintosh Instruction Manual
Canon EOS D60 Manual
 |
View all Canon EOS D60 manuals
Add to My Manuals
Save this manual to your list of manuals |
Canon EOS D60 manual content summary:
- Canon EOS D60 | ImageBrowser 6.6 for Macintosh Instruction Manual - Page 1
Image Viewing, Organizing and Editing Software ImageBrowser Ver. 6.6 Instruction Manual In this manual, IB is used for ImageBrowser. In this manual, the windows used in the examples are from Mac OS X Preferences 5Using the Internet Reference Contents Lookup Index © CANON INC. 2010 CT1-7189IBME-000 - Canon EOS D60 | ImageBrowser 6.6 for Macintosh Instruction Manual - Page 2
SOFTWARE. No updates, fixes or support will be made available for the SOFTWARE. 4. LIMITED WARRANTY AND LIMITATION OF LIABILITY: It is your responsibility to choose, maintain and match the hardware and software components of your computer system. Thus Canon does not guarantee uninterrupted service - Canon EOS D60 | ImageBrowser 6.6 for Macintosh Instruction Manual - Page 3
Settings for all functions Chapter 5 Using Images on the Internet Using CANON iMAGE GATEWAY Reference Solving problems Uninstalling IB System requirements Supported images Lists of primary window functions Introduction Table of Contents 1Basic Operation 2Advanced Operation 3High-Level Functions - Canon EOS D60 | ImageBrowser 6.6 for Macintosh Instruction Manual - Page 4
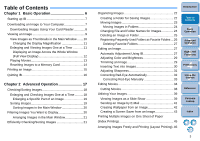
Downloading Images Using Your Card Reader 8 Viewing an Image 9 View Images as Thumbnails in the Main Window .......10 Changing the Display Magnification 11 Enlarging and Viewing Images One at a Time 11 Displaying an Image Across the Whole Window (Full View Display 12 Red-Eye Manually 33 Editing - Canon EOS D60 | ImageBrowser 6.6 for Macintosh Instruction Manual - Page 5
to Other Image Editing Software ..59 Merging Images to Window Settings 64 Confirmation Dialog Box Settings 64 Processing When Rotating Settings 65 Layout Print Settings 65 Photo Print Settings 65 Register Application Settings 65 Chapter 5 Using Images on the Internet .......... 66 Using CANON - Canon EOS D60 | ImageBrowser 6.6 for Macintosh Instruction Manual - Page 6
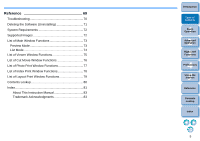
Reference 69 Troubleshooting 70 Deleting the Software (Uninstalling 71 System Requirements 72 Supported Images 72 List of Main Window Functions 73 Preview Mode 73 List Mode 74 List of Viewer Window Functions 75 List of Cut Movie Window Functions 76 List of Photo Print Window Functions 77 - Canon EOS D60 | ImageBrowser 6.6 for Macintosh Instruction Manual - Page 7
Computer 7 Downloading Images Using Your Card Reader 8 Viewing an Image 9 View Images as Thumbnails in the Main Window ...... 10 Changing the Display Magnification 11 Enlarging and Viewing Images One at a Time 11 Displaying an Image Across the Whole Window (Full View Display 12 Playing Movies - Canon EOS D60 | ImageBrowser 6.6 for Macintosh Instruction Manual - Page 8
camera. For downloading images, start up the camera software "EOS Utility" and use. 1 Connect your camera and computer and turn the camera on. When IB starts up, connect the camera and your computer with the interface cable provided with the camera and turn the camera on. For detailed instructions - Canon EOS D60 | ImageBrowser 6.6 for Macintosh Instruction Manual - Page 9
images are saved in the [Pictures] folder and are displayed in the main window of IB. The downloaded images are sorted into folders by date and saved. Click the EOS Utility [Quit] button to quit EOS Utility and turn the camera's power switch to < OFF >. Downloading Images Using Your Card Reader - Canon EOS D60 | ImageBrowser 6.6 for Macintosh Instruction Manual - Page 10
folder selected in step 1 and are displayed in the main window of IB. The downloaded images are sorted into folders by date and saved. Click the [Exit] button to quit Download images window. Viewing an Image Images and movies downloaded to your computer are displayed as thumbnail images in the main - Canon EOS D60 | ImageBrowser 6.6 for Macintosh Instruction Manual - Page 11
Functions 4 Preferences Click to select the image Displays the images in the folder that was selected from the folder area on the left of the window To select multiple images, click on the images while holding down the < > key or < shift > key on the keyboard. You can select all images in - Canon EOS D60 | ImageBrowser 6.6 for Macintosh Instruction Manual - Page 12
the images changes. Enlarging and Viewing Images One at a Time 1 Double-click an image to enlarge. Double-click The viewer window appears. Introduction Table of Contents 1Basic Operation 2Advanced Operation 3High-Level Functions 4 Preferences 5Using the Internet Reference Contents Lookup Index - Canon EOS D60 | ImageBrowser 6.6 for Macintosh Instruction Manual - Page 13
menu that appears. To quit the viewer window, click [ ] on the top left of the window. Displaying an Image Across the Whole Window (Full View Display) Double-click on whole window by clicking [ ] (Full Screen) on the bottom of the window. The image is enlarged and displayed across the whole window. - Canon EOS D60 | ImageBrowser 6.6 for Macintosh Instruction Manual - Page 14
are marked with the [ ] icon in the thumbnail image frame in the main window. 1 In the main window, double-click a movie (image marked with the [ ] icon). Double-click 2 Click the [ ] button. A viewer window appears. The movie begins to play. Playback stops automatically when the movie ends. To - Canon EOS D60 | ImageBrowser 6.6 for Macintosh Instruction Manual - Page 15
. Use a third-party card reader to rewrite your images or movies to a memory card. 1 Insert a memory card that has been formatted on the camera into the card reader. 2 Select the image or movie you want to rewrite. 3 Rewrite the image or movie. Select the [File] menu X [Rewrite Image to - Canon EOS D60 | ImageBrowser 6.6 for Macintosh Instruction Manual - Page 16
in a folder by clicking the [Selecting Images] button and then selecting [Select All] from the menu that appears. 2 Display the print settings window. Click the [Print & Email] button and then select [Photo Print] from the menu that appears. 4 Preferences 5Using the Internet Reference Contents - Canon EOS D60 | ImageBrowser 6.6 for Macintosh Instruction Manual - Page 17
3 Set the paper size and other settings, and then click the [Print] button. Photo Print window Printing begins. Quitting IB In the main window, select the [ImageBrowser] menu X [Quit ImageBrowser]. Introduction Table of Contents 1Basic Operation 2Advanced Operation IB quits. 3High-Level - Canon EOS D60 | ImageBrowser 6.6 for Macintosh Instruction Manual - Page 18
Images in the Main Window 20 Filtering Images You Want to Display 20 Arranging Images in the Main Window 21 Efficiently Checking/Sorting Images Sharpness 31 Correcting Red-Eye Automatically 32 Correcting Red-Eye Manually 33 Introduction Editing Movies 34 Cutting Movies 38 Utilizing Your - Canon EOS D60 | ImageBrowser 6.6 for Macintosh Instruction Manual - Page 19
you click [ ] (Show Shooting Information) and select [Show Shooting Information] from the menu that appears. To quit the viewer window, click [ ] on the top left of the window. When checking RAW images, always click on the [Show Original Image] button and check the processed images. To display only - Canon EOS D60 | ImageBrowser 6.6 for Macintosh Instruction Manual - Page 20
6.6 with other bundled software or on an EOS 60D camera. • EOS Utility version 2.9: Ratings set in IB version 6.6 are displayed on image thumbnails in the viewer window. However, [Reject] is not displayed and you cannot change rating settings. • Digital Photo Professional version 3.9: Ratings - Canon EOS D60 | ImageBrowser 6.6 for Macintosh Instruction Manual - Page 21
the menu that appears select [Change Rating] X select the setting. Filtering Images You Want to Display You can filter images displayed in the main window by the ratings you have attached to them. 1 Click the [ ] button. The filter function appears. 2 Set the criteria to filter images. Only the - Canon EOS D60 | ImageBrowser 6.6 for Macintosh Instruction Manual - Page 22
in order of sorting criteria. Efficiently Checking/Sorting Images With the Preview Mode that displays images as thumbnails and single images in the same window, you can efficiently check the images. You can also check the images' shooting information or sort them by setting their ratings. 1 Enable - Canon EOS D60 | ImageBrowser 6.6 for Macintosh Instruction Manual - Page 23
image display area is enlarged in the center of the window Thumbnail image display area When checking RAW images, always click on the [Show Original Image] button in the viewer window and check the processed images. When you have selected a movie, the first - Canon EOS D60 | ImageBrowser 6.6 for Macintosh Instruction Manual - Page 24
2 Select the [File] menu X [New Folder]. The [New Folder] window appears. 3 Enter a folder name and click the [OK] button. The new folder is created in the folder selected in step 1. Moving Images You can move - Canon EOS D60 | ImageBrowser 6.6 for Macintosh Instruction Manual - Page 25
the destination folder. Changing File and Folder Names for Images 1 In the main window, select the image whose name you want to change, or, in the folder Select the [File] menu X [Rename]. The [Rename] window appears. Introduction Table of Contents 1Basic Operation 2Advanced Operation 3High-Level - Canon EOS D60 | ImageBrowser 6.6 for Macintosh Instruction Manual - Page 26
images and folders cannot be recovered. Also, take care when deleting folders as all the images inside a folder will also be deleted. 1 In the main window, select the image you want to delete, or in the folder area, select the folder you want to delete. 2 Click [Send to Trash]. Introduction Table - Canon EOS D60 | ImageBrowser 6.6 for Macintosh Instruction Manual - Page 27
-used folders in the [Favorite Folders] tab sheet in the folder area to make images easier to find. Please note that because the [Pictures] folder is registered as a favorite folder by default, the folder icon appears as [ ]. 1 Select the folder you want to register. 3 Select the [Favorite - Canon EOS D60 | ImageBrowser 6.6 for Macintosh Instruction Manual - Page 28
the RAW image in the Main Window and select the [File] menu X [Process RAW Images by Digital Photo Professional], which will start up DPP. For detailed instructions on using DPP, refer to "Digital Photo Professional Instruction Manual" (PDF electronic manual). Introduction Table of Contents 1Basic - Canon EOS D60 | ImageBrowser 6.6 for Macintosh Instruction Manual - Page 29
4 Check the adjustments. Checkmark to display the image before adjustments 5 Click the [OK] button. The [Auto Adjustment] window closes. 6 Save as a separate image. In the viewer window, click [Save]. Introduction Table of Contents 1Basic Operation The save dialog box appears. 7 Enter a new name - Canon EOS D60 | ImageBrowser 6.6 for Macintosh Instruction Manual - Page 30
2 Click [Edit] and then select [Trim Image] in the menu that appears (p.27). The [Trim Image] window appears. 3 Drag the trimming range. Trim Image window Introduction Table of Contents 1Basic Operation 2Advanced Operation 3High-Level Functions 4 Preferences 5Using the Internet Reference Drag to - Canon EOS D60 | ImageBrowser 6.6 for Macintosh Instruction Manual - Page 31
[Edit] and then select [Insert Text] in the menu that appears (p.27). The [Insert Text] window appears. 3 Drag the range for inserting text. Insert Text window Introduction Table of Contents 1Basic Operation 2Advanced Operation 3High-Level Functions 4 Preferences 5Using the Internet Reference - Canon EOS D60 | ImageBrowser 6.6 for Macintosh Instruction Manual - Page 32
18). 2 Click [Edit] and then select [Sharpness] in the menu that appears (p.27). The [Sharpness] window appears. 3 Adjust the image. Sharpness window Introduction Table of Contents 1Basic Operation 2Advanced Operation 3High-Level Functions 4 Preferences 5Using the Internet Drag right to adjust - Canon EOS D60 | ImageBrowser 6.6 for Macintosh Instruction Manual - Page 33
Automatically You can automatically detect and correct red-eye that occurs when you photograph people using a flash. 1 Display the image to edit in the viewer window (p.18). 2 Click [Edit] and then select [Red Eye Correction] in the menu that appears (p.27). The [Red Eye Correction - Canon EOS D60 | ImageBrowser 6.6 for Macintosh Instruction Manual - Page 34
correct red-eye that cannot be corrected automatically. 1 Display the [Red Eye Correction] window (p.32). 2 Select [Manual Mode] and then enlarge the image. Enlarge image display 3 Set the amount of correction. Drag to the left or right to adjust 4 Drag and place a - Canon EOS D60 | ImageBrowser 6.6 for Macintosh Instruction Manual - Page 35
you have downloaded to your movies using these functions, you cannot play them back on the camera. You cannot edit MOV movies on a computer with a PowerPC CPU. . 2 Select the [Edit] menu X [Movie Edit]. The movie editing window appears. There is a limit on the number of files when you are - Canon EOS D60 | ImageBrowser 6.6 for Macintosh Instruction Manual - Page 36
Movie icon Enlarges/reduces movie thumbnails Storyboard area* Shows detailed instructions Transition box (icon for the special effect used in the an image with recorded audio that has been shot with a EOS-1D series camera, the audio is not automatically attached. Add the audio file in the [Audio - Canon EOS D60 | ImageBrowser 6.6 for Macintosh Instruction Manual - Page 37
add an MP3, AIFF or WAV audio file as background music (BGM) or as an effects tone. When you add audio to a movie in this window, a bar showing the duration of the audio file appears under the movie's thumbnail in the storyboard area. 4 Click the [Save] tab sheet. 4 Preferences 5Using the - Canon EOS D60 | ImageBrowser 6.6 for Macintosh Instruction Manual - Page 38
(H.264)] is selected in the [Specify a save image type] list box in the window in step 5, the movie durations that can be saved are as shown below. Image are respectively displayed as 24 fps, 30 fps and 60 fps in the camera menu. Saving movies may take some time. Saving movies takes a particularly - Canon EOS D60 | ImageBrowser 6.6 for Macintosh Instruction Manual - Page 39
shot. 1 Double-click the movie you want to play. Double-click The viewer window appears. 2 Click the [Cut Movie] button. The [Cut Movie] window appears. 3 Click the [ ] button. Cut Movie window Introduction Table of Contents 1Basic Operation 2Advanced Operation 3High-Level Functions The movie - Canon EOS D60 | ImageBrowser 6.6 for Macintosh Instruction Manual - Page 40
the [View] menu X [Slide Show Options]. Introduction Table of Contents 1Basic Operation 2Advanced Operation 3High-Level Functions 4 Preferences 5Using the Internet The [Slide Show Options] window appears. Reference Contents Lookup Index 39 - Canon EOS D60 | ImageBrowser 6.6 for Macintosh Instruction Manual - Page 41
last image Switches to the next image Pauses the slide show *1 The image is selected. When the slide show ends and returns to the main window, the image is displayed as being selected. *2 The image is selected for printing. When the slide show ends and returns to the main - Canon EOS D60 | ImageBrowser 6.6 for Macintosh Instruction Manual - Page 42
appears. 3 Select [Using the recommended settings.] and then click the [Finish] button. Create Image for Email window The image is displayed in the main window and the e-mail software starts up. Attach to the e-mail [Email Images] in the folder area and then send the e-mail. Introduction Table - Canon EOS D60 | ImageBrowser 6.6 for Macintosh Instruction Manual - Page 43
2 Select the [File] menu X [Export Image]. 3 Select [Export an Image as Wallpaper] and then click the [Next] button. Write a still image window Introduction Table of Contents 1Basic Operation 2Advanced Operation 3High-Level Functions 4 Preferences 5Using the Internet The [Write a still image - Canon EOS D60 | ImageBrowser 6.6 for Macintosh Instruction Manual - Page 44
the original image remains unaffected. 1 Select an image. 2 Select the [File] menu X [Export Image]. The [Write a still image] window appears. Introduction Table of Contents 1Basic Operation 2Advanced Operation 3High-Level Functions 4 Preferences 5Using the Internet Reference Contents Lookup Index - Canon EOS D60 | ImageBrowser 6.6 for Macintosh Instruction Manual - Page 45
sheet. Introduction Table of Contents 1Basic Operation 2Advanced Operation 3High-Level Functions 4 Preferences Select the saved screen saver data 6 Close the [Desktop & Screen Saver] window. Click [ ] on the top left of the dialog box. 5Using the Internet Reference Contents Lookup Index 44 - Canon EOS D60 | ImageBrowser 6.6 for Macintosh Instruction Manual - Page 46
2 Click the [Print & Email] button and then select [Index Print] from the menu that appears. The [Index Print] window appears. Printing begins. Print preview Introduction Table of Contents 1Basic Operation 2Advanced Operation 3High-Level Functions 4 Preferences 5Using the Internet Reference - Canon EOS D60 | ImageBrowser 6.6 for Macintosh Instruction Manual - Page 47
freely and then print them. 1 Select the images. 3 Lay out your images by dragging them and then click the [Print] button. Layout Print window 2 Click the [Print & Email] button and then select [Layout Print] from the menu that appears. Introduction Table of Contents 1Basic Operation 2Advanced - Canon EOS D60 | ImageBrowser 6.6 for Macintosh Instruction Manual - Page 48
Adjusting the Color of an Image in RGB 57 Adjusting the Brightness Level 58 Adjusting the Tone Curve 58 Transferring Images to Other Image Editing Software... 59 Merging Images to Create Panorama Images 60 Adding Sound to Images/Playing Back 61 Adding Sound to Images 61 Playing Back Sound 61 - Canon EOS D60 | ImageBrowser 6.6 for Macintosh Instruction Manual - Page 49
images you want to display at the same time. 4 Click [Synchronize] and then enlarge the image. Click Select the display magnification The viewer window is split and the multiple images are displayed at the same time. Introduction Table of Contents 1Basic Operation 2Advanced Operation 3High-Level - Canon EOS D60 | ImageBrowser 6.6 for Macintosh Instruction Manual - Page 50
. In Preview Mode, the same information as the [File Information] window is displayed on the information display area (p.73). Changing the Size the [File] menu X [Export Image]. The [Write a still image] window appears. 3 Select [Edit and Save Image] and then click the [Next] button. The [Edit and - Canon EOS D60 | ImageBrowser 6.6 for Macintosh Instruction Manual - Page 51
appears. 3 Select [Export Shooting Properties] and then click the [Next] button. The [Export Shooting Properties] window appears. 4 Specify the export shooting information, the file name, and the save destination, and then click the [Finish] button. Introduction Table of Contents 1Basic Operation - Canon EOS D60 | ImageBrowser 6.6 for Macintosh Instruction Manual - Page 52
Extracting Still Images from a Movie You can extract still images from a movie and save them as image files. When extracting still images from 1920 x 1080 MOV movies, a temporary file is created for editing and it may take some time before you can extract still images. 3 Set the extraction method - Canon EOS D60 | ImageBrowser 6.6 for Macintosh Instruction Manual - Page 53
] is selected in step 3, you can play the movie on the left of the window and extract an image by clicking [ ] when you reach a scene you like. Click [Save] and specify the required settings (destination, etc.) in the window that appears. Then click [Choose]. Still image extraction begins. 6 Select - Canon EOS D60 | ImageBrowser 6.6 for Macintosh Instruction Manual - Page 54
Select an image. 2 Select the [Edit] menu X [Keyword] X [Settings]. The [Keywords Setting] window appears. 3 Select the keyword(s) and then click the [OK] button. 1 Display the [File Information] window (p.49). 2 Click the [Advanced View] button. A field for entering comments is displayed. 3 Enter - Canon EOS D60 | ImageBrowser 6.6 for Macintosh Instruction Manual - Page 55
. 1 Select all the images you want to save with new file names (p.10). 2 Select the [File] menu X [Organize Image] X [Rename]. The [Rename] window appears. 3 Enter the file name and click the [OK] button. Introduction Classifying Images by Shot Date Multiple images can be classified into different - Canon EOS D60 | ImageBrowser 6.6 for Macintosh Instruction Manual - Page 56
4 Specify the folder structure, the file names, and the save destination, and then click the [OK] button. Images are classified by shot date. Settings for Folder Structure Setting Item Description YearMonthDate Classifies images by creating a first-level folder according to shot year/month/date - Canon EOS D60 | ImageBrowser 6.6 for Macintosh Instruction Manual - Page 57
can search for images by ratings (p.19), shot date, comments (p.53) and keywords (p.53). 1 Select the [File] menu X [Search]. The [Set Search Criteria] window appears. 2 Specify the search criteria and then click the [Search Now] button. The search begins and the images that match the criteria are - Canon EOS D60 | ImageBrowser 6.6 for Macintosh Instruction Manual - Page 58
handling standard image editing software. JPEG images deteriorate Window and select the [File] menu X [Process RAW Images by Digital Photo Professional], which will start up DPP. For detailed instructions on using DPP, refer to "Digital Photo Professional Instruction Manual" (PDF electronic manual - Canon EOS D60 | ImageBrowser 6.6 for Macintosh Instruction Manual - Page 59
(p.18). 2 Click [Edit] and then select [Tone Curve Adjustment] in the menu that appears (p.27). The [Tone Curve Adjustment] window appears. 3 Adjust the image. Introduction Table of Contents 1Basic Operation 2Advanced Operation 3High-Level Functions 4 Preferences 5Using the Internet Drag right - Canon EOS D60 | ImageBrowser 6.6 for Macintosh Instruction Manual - Page 60
separate image (p.28). Transferring Images to Other Image Editing Software You can transfer images to image editing software other than IB. 1 In the main window, select the [ImageBrowser] menu X [Preferences]. The [Preferences] window appears. 2 From the menu, select [Register Application] and then - Canon EOS D60 | ImageBrowser 6.6 for Macintosh Instruction Manual - Page 61
to create panorama images. For merging images, start up the image-merging software "PhotoStitch" from IB and use. 1 Select multiple images to merge Select the [Edit] menu X [PhotoStitch]. PhotoStitch starts up and the main window appears. 3 Check the arrangement of the images to be merged and click - Canon EOS D60 | ImageBrowser 6.6 for Macintosh Instruction Manual - Page 62
You can add sound to images and play back sound which you have added to images with a camera that has a sound record function. Adding Sound to Images You can add a sound file to an when you click [ ] on the right of the window for information on operating PhotoStitch and PhotoStitch functions. 61 - Canon EOS D60 | ImageBrowser 6.6 for Macintosh Instruction Manual - Page 63
4 Preferences Introduction Preferences 63 Browser Window Settings 63 Viewer Window Settings 64 Confirmation Dialog Box Settings 64 Processing When Rotating Settings 65 Layout Print Settings 65 Photo Print Settings 65 Register Application Settings 65 Table - Canon EOS D60 | ImageBrowser 6.6 for Macintosh Instruction Manual - Page 64
menu, select the dialog box you want to display, specify your settings, and then click the [OK] button. Browser Window Settings You can change the background color of the main window (browser window) as well as the color of the thumbnail image frames. You can also make settings for color management - Canon EOS D60 | ImageBrowser 6.6 for Macintosh Instruction Manual - Page 65
Settings You can set the shooting information displayed in the viewer window (p.75). Confirmation Dialog Box Settings You can set the software so that confirmation dialog boxes displayed after each operation are not displayed. The items you uncheck are not displayed. Introduction Table of Contents - Canon EOS D60 | ImageBrowser 6.6 for Macintosh Instruction Manual - Page 66
can make settings for layout printing. Photo Print Settings When printing with the [Photo Print] window (p.16), you can set whether to trim the image and print with no borders around Settings You can register other editing software. 5Using the Internet Reference Contents Lookup Index 65 - Canon EOS D60 | ImageBrowser 6.6 for Macintosh Instruction Manual - Page 67
iMAGE GATEWAY 67 Membership Registration 67 Displaying the Top Page of CANON iMAGE GATEWAY 67 Uploading Images in a CANON iMAGE GATEWAY Album 68 Displaying a Registered CANON iMAGE GATEWAY Album 68 Table of Contents 1Basic Operation 2Advanced Operation 3High-Level Functions 4 Preferences - Canon EOS D60 | ImageBrowser 6.6 for Macintosh Instruction Manual - Page 68
it is necessary to register as a member beforehand. Insert the EOS DIGITAL Solution Disk provided into your computer and perform registration in the CANON iMAGE GATEWAY member registration window that appears after installing the software that includes IB. You can also use the following procedure to - Canon EOS D60 | ImageBrowser 6.6 for Macintosh Instruction Manual - Page 69
a new album by following the on-screen instructions. Displaying a Registered CANON iMAGE GATEWAY Album You can display images that have been uploaded in a CANON iMAGE GATEWAY Online photo album with the browser software. 1 Display an album. Click [CANON iMAGE GATEWAY] and in the menu that appears - Canon EOS D60 | ImageBrowser 6.6 for Macintosh Instruction Manual - Page 70
Introduction Troubleshooting 70 Deleting the Software (Uninstalling 71 System Requirements 72 Supported Images 72 List of Main Window Functions 73 Preview Mode 73 List Mode 74 List of Viewer Window Functions 75 List of Cut Movie Window Functions 76 List of Photo Print Window Functions - Canon EOS D60 | ImageBrowser 6.6 for Macintosh Instruction Manual - Page 71
Troubleshooting If IB is not operating correctly, refer to the items below. Also refer to the Help from the [Help] menu or click the [?] button at the top of each window and refer to the Help displayed. Installation could not be completed correctly You cannot install software unless you are logged - Canon EOS D60 | ImageBrowser 6.6 for Macintosh Instruction Manual - Page 72
installation was performed. To prevent computer malfunctions, always restart your computer after you have uninstalled the software. 1 Display the folder in which the software is saved. Open the [Canon Utilities] folder. 2 Drag the [ImageBrowser] folder to the Trash. 3 Select the [Finder] menu on the - Canon EOS D60 | ImageBrowser 6.6 for Macintosh Instruction Manual - Page 73
or more This software program is not Supported Images Image type Extension JPEG images shot with a Canon digital JPEG images camera (Exif 2.2, 2.21 or 2.3-compatible .JPG, .JPEG JPEG images) RAW images shot with a EOS DIGITAL RAW images camera excluding EOS D6000, EOS D2000, EOS DCS1, EOS - Canon EOS D60 | ImageBrowser 6.6 for Macintosh Instruction Manual - Page 74
Number of selected images/ Starts up EOS Utility/Displays Deletes images and folders (p.25) Total number of images Download images window (p.7, p.9) Viewer window (p.75) Prints images and creates images for e-mail (p.15, p.41, p.45, p.46) Connects to the CANON iMAGE GATEWAY Slide show (p.40 - Canon EOS D60 | ImageBrowser 6.6 for Macintosh Instruction Manual - Page 75
Starts up EOS Utility/Displays Slide show Deletes images and folders (p.25) Total number of images Download images window (p.40) Prints images and creates images for e-mail (p.15, p.41, p.45, p.46) (p.7, p.9) Viewer window (p.75) Connects to the CANON - Canon EOS D60 | ImageBrowser 6.6 for Macintosh Instruction Manual - Page 76
magnification (p.19) Switches between images Displayed image size Saves the images (p.28) Edits the images (p.27) Split displays (p.48) Display magnification Photo print window (p.77) Full view display (p.12) Synchronize (p.48) Rating (p.19) Shows/hides the shooting information and AF point - Canon EOS D60 | ImageBrowser 6.6 for Macintosh Instruction Manual - Page 77
List of Cut Movie Window Functions (p.38) Displays the movie Current position during movie play Plays the movie/Stops the movie Adjust volume Sets the start point for a movie cut - Canon EOS D60 | ImageBrowser 6.6 for Macintosh Instruction Manual - Page 78
List of Photo Print Window Functions Printer selection and settings Page settings Shot date and time settings Trims the image Switches the printing image Number of prints Print preview Inserts - Canon EOS D60 | ImageBrowser 6.6 for Macintosh Instruction Manual - Page 79
List of Index Print Window Functions Printer selection and settings Page settings Print information settings Switches the printing page Rotates the image Introduction Print preview Trims the image Table of - Canon EOS D60 | ImageBrowser 6.6 for Macintosh Instruction Manual - Page 80
List of Layout Print Window Functions Sets the printing style Printer selection and settings Page settings Print preview Rotates the image Trims the image Deletes an image Reverts to the - Canon EOS D60 | ImageBrowser 6.6 for Macintosh Instruction Manual - Page 81
Images to Your Computer Download images by connecting your camera and computer Download images using a card reader Image Checking Make into computer wallpaper p.42 Make into a computer screen saver p.43 Use CANON iMAGE GATEWAY p.67 Converting Images Change the size p.49 Convert to a - Canon EOS D60 | ImageBrowser 6.6 for Macintosh Instruction Manual - Page 82
Images 25 Delete the Software (Uninstalling 71 Deleting the IB (Uninstalling 71 Displaying Images Shot with Adobe RGB 70 Downloading an Image to Your Computer 7 Downloading Images from a Camera 7 Downloading Images from a Card Reader 8 Downloading Images 7 Downloading Images from a Card - Canon EOS D60 | ImageBrowser 6.6 for Macintosh Instruction Manual - Page 83
Saver 43 Setting an Image as Wallpaper 42 Slide Show 39 Starting up IB 7 Supported Images 72 Synchronize Display 48 System Requirements 72 T Thumbnail Display (Main Window 10 Transfer Images to other Image Editing Software 59 Trimming 29 Trimming an Image 29 V View an Image 9 Viewer - Canon EOS D60 | ImageBrowser 6.6 for Macintosh Instruction Manual - Page 84
screens and displays printed in this Instruction Manual may differ slightly from the actual software. The content of this Instruction Manual has been reviewed thoroughly. However, if you should notice any errors or omissions, please contact a Canon Service Center. Please note that irrespective of
-
 1
1 -
 2
2 -
 3
3 -
 4
4 -
 5
5 -
 6
6 -
 7
7 -
8
-
9
-
10
-
11
-
12
-
13
-
14
-
15
-
16
-
17
-
18
-
19
-
20
-
21
-
22
-
23
-
24
-
25
-
26
-
27
-
28
-
29
-
30
-
31
-
32
-
33
-
34
-
35
-
36
-
37
-
38
-
39
-
40
-
41
-
42
-
43
-
44
-
45
-
46
-
47
-
48
-
49
-
50
-
51
-
52
-
53
-
54
-
55
-
56
-
57
-
58
-
59
-
60
-
61
-
62
-
63
-
64
-
65
-
66
-
67
-
68
-
69
-
70
-
71
-
72
-
73
-
74
-
75
-
76
-
77
-
78
-
79
-
80
-
81
-
82
-
83
-
84
 |
 |

1
Basic
Operation
Reference
Introduction
2
Advanced
Operation
4
5
Using the
Internet
3
High-Level
Functions
Index
Contents
Lookup
Preferences
Table of
Contents
Image Viewing, Organizing and Editing Software
ImageBrowser
Ver. 6.6
Instruction Manual
O
In this manual, IB is used for ImageBrowser.
O
In this manual, the windows used in the examples are from Mac OS X 10.4.
O
Click on the icons below on the bottom right of the screen to switch
between pages.
: Go to next page
: Go to previous page
: Return to a page you had previously displayed
O
Click on the chapter headings on the right side of the screen to switch to
the contents page of each chapter.
© CANON INC. 2010
CT1-7189IBME-000