Canon LV-7105 Owners Manual
Canon LV-7105 Manual
 |
View all Canon LV-7105 manuals
Add to My Manuals
Save this manual to your list of manuals |
Canon LV-7105 manual content summary:
- Canon LV-7105 | Owners Manual - Page 1
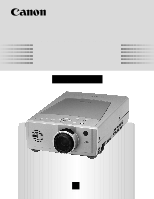
Multimedia Projector LV-7105 Owner's Manual E English - Canon LV-7105 | Owners Manual - Page 2
EXCEPT LAMP REPLACEMENT. REFER SERVICING TO QUALIFIED SERVICE PERSONNEL. THIS SYMBOL INDICATES THAT DANGEROUS VOLTAGE CONSTITUTING A RISK OF ELECTRIC SHOCK IS PRESENT WITHIN THIS UNIT. THIS SYMBOL INDICATES THAT THERE ARE IMPORTANT OPERATING AND MAINTENANCE INSTRUCTIONS IN THE OWNER'S MANUAL WITH - Canon LV-7105 | Owners Manual - Page 3
with the projector. Wall or shelf mounting should follow the manufacturer's instructions, and should use a mounting kit projector exhibits a distinct change in performance-this indicates a need for service. When replacement parts are required, be sure the service technician has used replacement - Canon LV-7105 | Owners Manual - Page 4
, if not installed and used in accordance with the instruction manual, may cause harmful interference to radio communications. Operation of environment. AC POWER CORD REQUIREMENT The AC Power Cord supplied with this projector meets the requirement for use in the country you purchased it. AC Power - Canon LV-7105 | Owners Manual - Page 5
OF EACH PART OF THE PROJECTOR 7 PICTURE IMAGE ADJUSTMENT 26 SETTING-UP THE PROJECTOR 8 ADJUST PICTURE IMAGE MANUALLY 26 CONNECTING THE AC LENS 35 FOCUS ADJUSTMENT 20 LAMP REPLACEMENT 36 KEY STONE ADJUSTMENT 20 LAMP REPLACEMENT MONITOR TIMER 36 NO SHOW FUNCTION 21 TROUBLESHOOTING - Canon LV-7105 | Owners Manual - Page 6
advanced technology for portability, durability, and ease of use. The projector utilizes built-in multimedia features, a palette of 16.77 million colors, and matrix liquid crystal display (LCD) technology. x Compact Design This projector is extremely compact in size and weight. It is designed to - Canon LV-7105 | Owners Manual - Page 7
PROJECTOR FRONT OF THE CABINET PROJECTION LENS ZOOM RING FOCUS RING SPEAKER (Monaural) LENS COVER INFRARED REMOTE RECEIVER BACK OF THE CABINET TERMINALS AND CONNECTORS AIR INTAKE VENTS (Both sides and Rear) This projector or installing the projector, the following projector is used. This projector - Canon LV-7105 | Owners Manual - Page 8
plug into any other type of power system. Consult your authorized dealer or service station if you are not sure of the type of power supply being in use. Connect the projector with the peripheral equipment before turning the projector on. (Refer to pages 11 ~ 13 for connection.) CAUTION For safety - Canon LV-7105 | Owners Manual - Page 9
ADJUSTABLE FEET and rotate the ADJUSTABLE FEET to fine tune the position and the tilt. 3 To shorten the ADJUSTABLE FEET, lift the front of the projector and pull and undo the FEET LOCK LATCHES. The position and the keystone distortion of the image can be adjusted using the Menu Operation. (Refer - Canon LV-7105 | Owners Manual - Page 10
, and it is not designed to protect the LCD projector from external forces. Do not transport the projector through a courier or transport services with this bag. The projector can be damaged. When handling the projector, do not drop or bump the projector, subject it to strong forces or put other - Canon LV-7105 | Owners Manual - Page 11
, Pb/Cb and Pr/Cr jacks. (Refer to P12.) RESET BUTTON This projector uses a micro processor to control the unit. Occasionally, the micro processor may CONNECTOR When controlling the computer with the Remote Control of this projector, connect the mouse port of your personal computer to this terminal - Canon LV-7105 | Owners Manual - Page 12
- VIDEO Y - Pb/Cb - Pr/Cr RESET AUDIO OUT AV COMPUTER IN COMPUTER AUDIO IN CONTROL PORT AV AUDIO IN Audio Cable (Stereo) ✽ Terminals of the Projector 12 Audio Input External Audio Equipment Audio Speaker (stereo) Audio Amplifier NOTE : When connecting the cable, the power cords of both the - Canon LV-7105 | Owners Manual - Page 13
Amplifier Audio Speaker (stereo) x MAC ADAPTER (Not supplied) Set the switches as shown in the table below depending on the RESOLUTION MODE that you want to use before you turn-on the projector and computer. ON OFF ON DIP 123456 1 2 3 4 56 13" MODE (640 x 480) ON ON OFF OFF OFF OFF 16 - Canon LV-7105 | Owners Manual - Page 14
Mouse Operation. (P34) ✽ When pressing the center of this button, it works as the SELECT button. Operating Range Point the remote control toward the projector (the Remote Receiver) whenever pressing the buttons. Maximum operating range for the remote control is about 16.4' (5m) and 60° in front of - Canon LV-7105 | Owners Manual - Page 15
with the pins in the compartment. To insure safe operation, please observe the following precautions : q Use (2) AA, UM3 or R06 type alkaline batteries. q Replace two batteries at the same time. q Do not use a new battery with a used battery. q Avoid contact with water or liquid. q Do not expose - Canon LV-7105 | Owners Manual - Page 16
high. (P35) READY INDICATOR This indicator lights green when the projector is ready to be turned on. And it flashes green in Power Management mode. (P33) WIDE TELE POWER MENU NORMAL MODE LAMP REPLACE WARNING TEMP. READY LAMP NORMAL BUTTON Used to reset to normal picture adjustment preset by - Canon LV-7105 | Owners Manual - Page 17
HOW TO OPERATE ON-SCREEN MENU You can control and adjust this projector through the ONSCREEN MENU. Refer to the following pages to operate SELECT button. Refer to the following pages for details of respective adjustments. SELECT BUTTON POINTER (red frame) POINTER (red frame) MENU - Canon LV-7105 | Owners Manual - Page 18
the parameters to match with the input signal format. (Refer to P24, 25) SETTING MENU Used to adjust Volume, set the Display Menu and reset Lamp Replacement Monitor Timer. (Refer to P32, 33) LANGUAGE MENU Used to select the language used in the MENU. (Refer to P33) SYSTEM MENU Used to select - Canon LV-7105 | Owners Manual - Page 19
-OFF button again to turn off the projector. The LAMP indicator lights bright and the READY indicator turns off. The Cooling Fans operate sales dealer where you purchased this projector or service center. NOTE: The Cooling Fan may work for cooling while the projector is turned off. When the Cooling - Canon LV-7105 | Owners Manual - Page 20
BASIC OPERATION ADJUSTING THE IMAGE ZOOM ADJUSTMENT Turn the ZOOM RING to adjust the projected picture size. Turn the ring to "WIDE" direction to make the image larger, and turn to "TELE" direction to make the image smaller. MIN. MAX. FOCUS ADJUSTMENT Turn the FOCUS RING to adjust the - Canon LV-7105 | Owners Manual - Page 21
BASIC OPERATION NO SHOW FUNCTION Press the NO SHOW button on the Remote Control Unit to black out the image. This function is cancelled when the NO SHOW button is pressed again or any other function button is pressed. No show The message disappears after 4 seconds. PICTURE FREEZE FUNCTION Press - Canon LV-7105 | Owners Manual - Page 22
is no signal input from the computer. Make sure the connection of the computer and the projector is set correctly. (Refer to TROUBLESHOOTING on page 37.) SELECT COMPUTER SYSTEM MANUALLY To set the Computer system manually, select the mode on the ON-SCREEN MENU. 1 Press the MENU button and the ON - Canon LV-7105 | Owners Manual - Page 23
COMPUTER MODE COMPATIBLE COMPUTER SPECIFICATIONS Basically this projector can accept the signal from all computers with the V, H-Frequency below mentioned and less than 140 MHz of Dot Clock. ON-SCREEN DISPLAY RESOLUTION VGA 1 640 x 480 H-Freq. (kHz) 31.47 V-Freq. (Hz) 59.88 ON-SCREEN DISPLAY - Canon LV-7105 | Owners Manual - Page 24
function, to enable you to precisely adjust several parameters to match with those special signal formats. This projector has five independent memory areas to memorize those parameters manually adjusted. This enables you to recall the setting for a specific computer whenever you use it. Note : This - Canon LV-7105 | Owners Manual - Page 25
Display area Adjustment of the area displayed with this projector. Select the resolution at the Display area dialog box, or adjust the number at the ratio to fit the screen. Press the SELECT button to select the typical resolution of the image. Each of the keys operates as follow. Reset Recalls - Canon LV-7105 | Owners Manual - Page 26
COMPUTER MODE PICTURE IMAGE ADJUSTMENTS ADJUST PICTURE IMAGE MANUALLY 1 Press the MENU button and the on the SYSTEM MENU (P22 and 23). NORMAL FUNCTION The normal picture level is preset on this projector at the factory and can be restored anytime you press the NORMAL button (located on the Top - Canon LV-7105 | Owners Manual - Page 27
23). The Fine sync, Total dots, and Picture Position of some computers may not be fully adjusted with the Auto Image Function. In that case, manual adjustment is required to make fine image. (Refer to page 26 to adjust "Fine sync" or "Total dots" and page 27 to adjust Picture Position - Canon LV-7105 | Owners Manual - Page 28
the image to 1024 x 768, press NORMAL button. q This projector cannot display any resolution higher than 1280 X 1024. If your computer's screen resolution is higher than 1280 X 1024, reset the resolution to the lower before connecting the projector. q The image data in other than XGA (1024 x 768 - Canon LV-7105 | Owners Manual - Page 29
red-arrow icon will appear. Move the arrow to the source that you want to select, and then press the SELECT button. Auto The projector automatically detects the incoming Video source, and adjusts itself to optimize its performance. • When both VIDEO jack and S-VIDEO jack are connected, the S- VIDEO - Canon LV-7105 | Owners Manual - Page 30
optimize its performance. When the Video System is PAL-M or PAL-N, select the system manually. This box indicates the system being selected. PAL / SECAM / NTSC / NTSC4.43 / PAL-M / PAL-N If the projector cannot reproduce the proper video image, it is necessary to select a specific broadcast signal - Canon LV-7105 | Owners Manual - Page 31
. Stored Stores the data in the memory. Quit Closes the PICTURE IMAGE ADJUSTMENT MENU. NORMAL FUNCTION The normal picture level is preset on this projector at the factory and can be restored anytime you press the NORMAL button (located on the Top Control or on the Remote Control Unit). The - Canon LV-7105 | Owners Manual - Page 32
When this function is "On," the top / bottom and the left / right reversed picture is provided to project the image from a ceiling mounted projector. Ceiling function Rear When this function is "On," the left / right reversed picture is provided to project the image to a rear projection screen - Canon LV-7105 | Owners Manual - Page 33
on when the input signal connected or the projector is operated with any button on the Top Control or the Remote Control. Lamp age The Lamp age function is designed to reset the lamp replacement monitor timer. When replacing the lamp, reset the lamp replacement monitor timer by using this function - Canon LV-7105 | Owners Manual - Page 34
) is required. Make sure that the mouse driver is properly installed in your computer. And make sure that the mouse port of the computer connected to Control Port is activated. 1 Connect the mouse port of your computer to the Control Port of the projector with the Control Cable. (Refer to page - Canon LV-7105 | Owners Manual - Page 35
Filters with brush or wash out the dust and particles. 4 Replace each Air Filter properly. Make sure that the Air Filters are fully inserted. CAUTION Do not operate the projector with the Air Filter removed. Dust may accumulate on the LCD Panel and the Mirror degrading picture quality. Do not put - Canon LV-7105 | Owners Manual - Page 36
: Do not reset the LAMP REPLACEMENT MONITOR TIMER when the lamp is not replaced. LAMP ASSEMBLY ORDER REPLACEMENT LAMP Replacement Lamp can be ordered through your dealer. information to the dealer. q Model No. of your projector : LV-7105 q Replacement Lamp Type No. : LV-LP10 (610 289 8422) When - Canon LV-7105 | Owners Manual - Page 37
APPENDIX TROUBLESHOOTING Before calling your dealer or service center for assistance, check the matters below once again. 1. Make sure you have connected the projector to your equipment as described in the section "CONNECTING THE PROJECTOR" on pages 11 ~ 13. 2. Check cable connection. Verify that - Canon LV-7105 | Owners Manual - Page 38
. WARNING : High voltages are used to operate this projector. Do not attempt to open the cabinet. If the problem still persists after following all operating instructions, contact the sales dealer where you purchased the projector or the service center. Give the model number and explain the - Canon LV-7105 | Owners Manual - Page 39
sync. 50 ~ 100 Hz Projection Image size (Diagonal) Horizontal Resolution Projection Lens Adjustable from 34" to 200" 550 TV lines F 1.7 ~ 1.9 lens with f 28.8 mm ~ 34.5 mm Manual zoom and focus Throw Distance Projection Lamp 5.2' ~ 26.3' (1.6 m ~ 8.0 m) 132 W AV Input Jacks AV Audio Input Jack - Canon LV-7105 | Owners Manual - Page 40
. 30-2, Shimomaruko 3-chome, Ohta-ku, Tokyo 146-8501, Japan CANON U.S.A., INC. NEW YORK OFFICE One Canon Plaza, Lake Success, NY 11042-1198, U.S.A. CANON U.S.A., INC. LOS ANGELES OFFICE 15955 Alton Parkway, irvine, CA 92718-3616, U.S.A. CANON CANADA, INC. 6390 Dixie Road Mississauga, Ontario L5T 1P7
-
 1
1 -
 2
2 -
 3
3 -
 4
4 -
 5
5 -
 6
6 -
 7
7 -
8
-
9
-
10
-
11
-
12
-
13
-
14
-
15
-
16
-
17
-
18
-
19
-
20
-
21
-
22
-
23
-
24
-
25
-
26
-
27
-
28
-
29
-
30
-
31
-
32
-
33
-
34
-
35
-
36
-
37
-
38
-
39
-
40
 |
 |
E
English
Multimedia Projector
Owner’s Manual
LV-7105