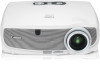
Canon LV-7365 LV User's Manual
Canon LV-7365 Manual
 |
View all Canon LV-7365 manuals
Add to My Manuals
Save this manual to your list of manuals |
Canon LV-7365 manual content summary:
- Canon LV-7365 | LV User's Manual - Page 1
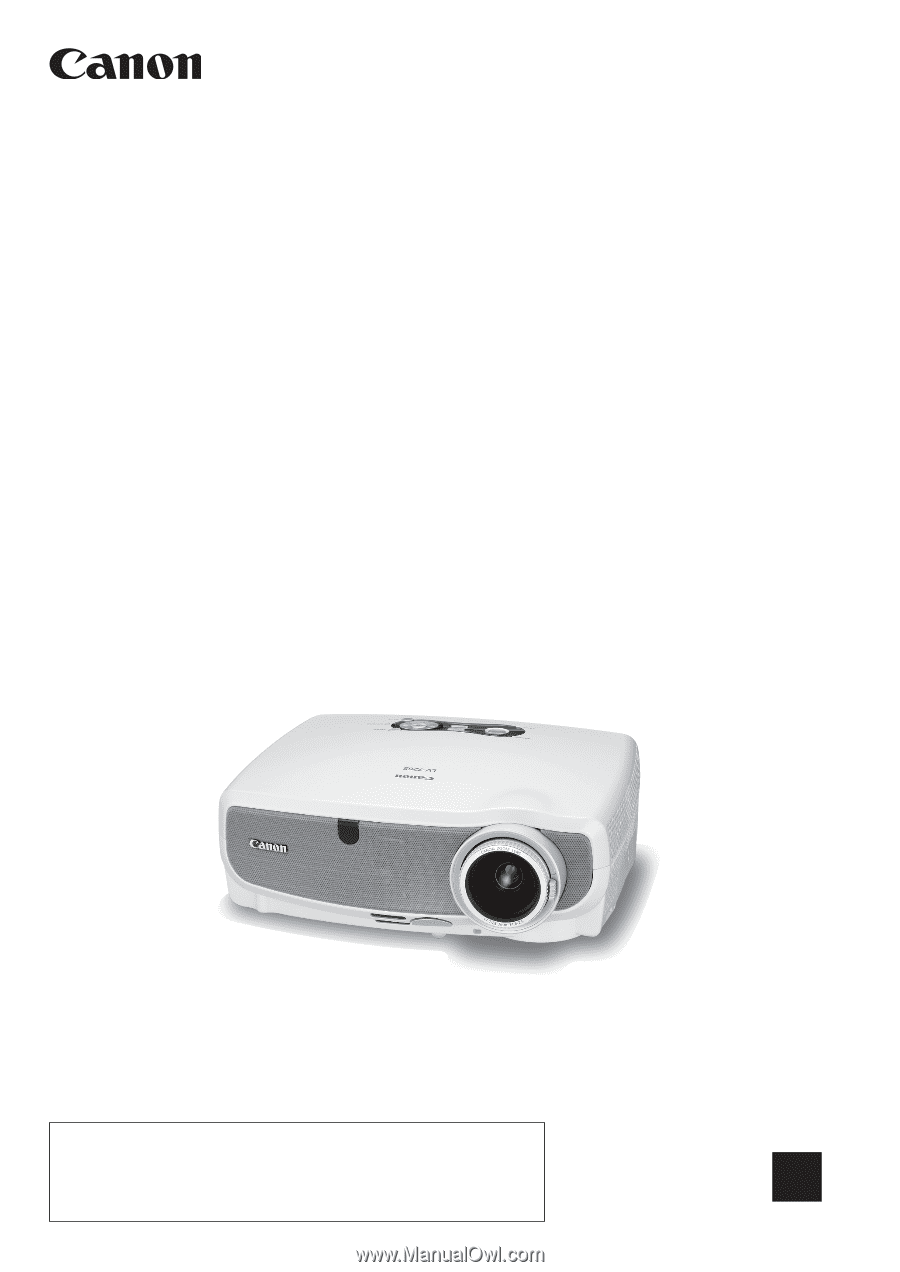
MULTIMEDIA PROJECTOR LV-7365/LV-7265/LV-7260/LV-X7 User's Manual The LV-7365 projector's model name indicated on the projector's label is LV-7365 and LV-7365 (E) respectively. Both models are referred to as LV-7365 throughout the user's manual except some of the specifications pages. E English - Canon LV-7365 | LV User's Manual - Page 2
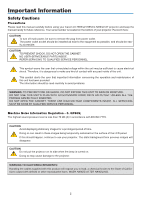
Cautions Precautions Please read this manual carefully before using your Canon LV-7365/LV-7265/LV-7260/LV-X7 projector and keep the manual handy for future reference. Your serial number is located on the bottom of your projector. Record it here: CAUTION To turn off main power, be sure to remove the - Canon LV-7365 | LV User's Manual - Page 3
Important Information Federal Communication Commission Notice Multimedia Projector, Model : LV-7365, LV-7365(E), LV-7265, LV-7260 and LV-X7 This device complies with Part 15 of the FCC Rules. Operation is subject to the following two conditions: (1) This device may not cause harmful - Canon LV-7365 | LV User's Manual - Page 4
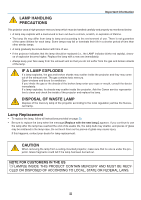
Canon service representative to clean and check the inside of the projector and replace the lamp. DISPOSAL OF WASTE LAMP Dispose of the mercury lamp of the projector according to the local regulation just like the fluorescent lamp. Lamp Replacement • To replace the lamp, follow all instructions - Canon LV-7365 | LV User's Manual - Page 5
a Black (five Amps) fuse installed for use with this equipment. If a power cord is not supplied with this equipment please contact your supplier. Important Safeguards These safety instructions are to ensure the long life of your projector and to prevent fire and shock. Please read them carefully and - Canon LV-7365 | LV User's Manual - Page 6
operate normally when you follow the instructions described in this user's manual. - If the projector has been dropped or the cabinet has been damaged. - If the projector exhibits a distinct change in performance, indicating a need for service. • Disconnect the power cord and any other cables before - Canon LV-7365 | LV User's Manual - Page 7
image to flicker. Switch [Fan mode] to [Auto]. • Using the projector at altitudes approximately 5500 feet/1600 meters or higher can shorten the life of optical components such as the lamp. LV-7265/LV-7260/LV-X7 • On LV-7265, LV-7260, and LV-X7 [Fan mode] menu does not have [High altitude]. Select - Canon LV-7365 | LV User's Manual - Page 8
Output 20 Connecting Your VCR or Laser Disc Player 21 Connecting a Digital Video Signal (LV-7365/LV-7265 22 Connecting the Supplied Power Cord 23 3. Projecting an Image (Basic Operation 24 ❶ Turning on the Projector 24 Note on Startup Screen (Menu Language Select screen 25 ❷ Selecting - Canon LV-7365 | LV User's Manual - Page 9
34 ❹ Using the Remote Mouse Receiver (LV-7365/LV-7265/LV-7260 35 ❺ Preventing the Unauthorized Use of the Projector 37 5. Using On- Cleaning or Replacing the Filter 56 ❷ Cleaning the Cabinet and the Lens 57 ❸ Replacing the Lamp...58 7. Appendix ...61 ❶ Troubleshooting...61 ❷ Specifications - Canon LV-7365 | LV User's Manual - Page 10
MENU ASPECT IMAGE POWER INPUT NO AUTO SHOW PC INFO. R-CLICKBACK Remote control Batteries (AAA2) GuidSetaQrtuick InfoIrmmpaotirotannt Quick Start Guide Important Information CD-ROM User's manual For LV-7365/LV-7265/LV-7260 For LV-7365/LV-7265 Warranty Remote mouse receiver (10 - Canon LV-7365 | LV User's Manual - Page 11
injury. In addition, the ceiling must be strong enough to support the projector and the installation must be in accordance with any local building codes. Please consult your dealer for more information. Features you'll enjoy: • Auto vertical keystone correction (LV-7365/LV-7265). • Built-in Wall - Canon LV-7365 | LV User's Manual - Page 12
is to take your time and do everything right the first time. Take a few minutes now to review the user's manual. This may save you time later on. At the beginning of each section of the manual you'll find an overview. If the section doesn't apply, you can skip it. • Microsoft, Windows, Windows - Canon LV-7365 | LV User's Manual - Page 13
VOL BACK MENU KEYSTONE Remote sensor (LV-7365/LV-7265) (See page 10) Monaural Speaker (LV-7365/LV-7265: 5W) (LV-7260/LV-X7: 1W) Ventilation (outlet) Heated air is exhausted from here. Do not block this vent. Troubles or fire can result. AC Input Connect the supplied power cord's two-pin plug here - Canon LV-7365 | LV User's Manual - Page 14
Right) 1. Introduction Adjustable Tilt Foot Lock Button (See page 27) Lamp Cover (See page 58) HINT: The Canon logo is on the panel of the projector cabinet . When projecting an image with the projector hung from the ceiling, turn the Canon logo upside down. To turn the logo upside down, follow - Canon LV-7365 | LV User's Manual - Page 15
Top Features 3 WARNING LAMP 4 POWER 12 58 INPUT AUTO PC VOL - 69 7 MENU KEYSTONE VOL + BACK 10 1. Introduction 1. POWER Button ( ) Use this button to turn the power on and off when the main power is supplied and the projector is in standby mode. To turn on the projector, press and hold this - Canon LV-7365 | LV User's Manual - Page 16
Terminal Panel Features 7 8 9 LV-7365/LV-7265 S-VIDEO IN VIDEO IN L SERVICE PORT R AUDIO IN 2 DIGITAL IN / ANALOG IN-2 31 AUDIO IN ANALOG IN-1 AUDIO OUT 1. Introduction 6 LV-7260/LV-X7 7 9 S-VIDEO IN VIDEO IN L SERVICE PORT R AUDIO IN 54 ANALOG IN 68 4 1 1. Computer 1 Input - Canon LV-7365 | LV User's Manual - Page 17
remote control toward the remote sensor on the projector cabinet. 2. POWER Button When the main power is on, you can use this button to turn your projector on. NOTE: To turn on the projector, press and hold the POWER Digital)* → Computer 2 (Analog)* → VIDEO → S-VIDEO → Computer 1* → ... * LV-7260/LV- - Canon LV-7365 | LV User's Manual - Page 18
VOL PAGE D.ZOOM 17 16 FREEZE 18 RD-428E 1. Introduction 16. PAGE ▲/▼ Button (This button cannot be used for LV-X7.) Use these buttons to operate your computer with the supplied remote mouse receiver. See page 36. You can use these buttons to scroll the viewing area of the window or to - Canon LV-7365 | LV User's Manual - Page 19
cabinet 7m/22 feet 30° 30° 30° 30° Remote control 7m/22 feet Vertical range Remote sensor on projector cabinet 7m/22 feet 7m/22 feet 30° 30° 30° 30° Remote control NOTE: The LV-7260 and LV-X7 do not have the remote sensor on the rear panel. • The infrared signal operates by line - Canon LV-7365 | LV User's Manual - Page 20
Connect your computer or video equipment to the projector. See pages 15, 16, 17, 18, 19, 20, 21, 22. ③ Connect the supplied power cord. See page 23. NOTE: Ensure that the power cord and any other cables are disconnected before moving the projector. When moving the projector or when it is not in use - Canon LV-7365 | LV User's Manual - Page 21
❶ Setting Up the Screen and the Projector Selecting a Location (LV-7365/LV-7265) The further your projector is from the screen or wall, the larger the image. The minimum size the image can be is approximately 25" measured diagonally when the projector is roughly 1.1 m (3.5') from the wall or - Canon LV-7365 | LV User's Manual - Page 22
the image can be is 300" when the projector is about 8.8 m (28.9') from the wall or screen. Use the drawing below as a guide. 5.9m 4.4m 2.3m 1.2m 80" 1. This projector can be hung from the ceiling (Ceiling mounted) with it turned up side down. When a translucent screen is used, the projector can - Canon LV-7365 | LV User's Manual - Page 23
your projector on the ceiling must be done by a qualified technician. Contact your dealer for more information. • Do not attempt to install the projector yourself. • Only use your projector on a solid, level surface. If the projector falls to the ground, you can be injured and the projector severely - Canon LV-7365 | LV User's Manual - Page 24
For more details, refer to your computer's owner's manual. Connecting Your PC or Macintosh Computer (LV-7365/LV-7265) NOTE: The ANALOG IN- 1 connector supports Plug & Play (DDC2). DIGITAL IN/ ANALOG IN-2 S-VIDEO IN VIDEO IN L SERVICE PORT R AUDIO IN DIGITAL IN / ANALOG IN-2 AUDIO IN AUDIO IN - Canon LV-7365 | LV User's Manual - Page 25
LV-7365/LV-7265) If you need to use two analog inputs simultaneously, connect a VGA cable as shown below. DIGITAL IN / ANALOG IN-2 ANALOG IN-1 S-VIDEO IN VIDEO IN L SERVICE PORT R AUDIO IN DIGITAL of time, remove it from the projector. Failure to do so may cause damage to the connector of the - Canon LV-7365 | LV User's Manual - Page 26
When Viewing a DVI Digital Signal (LV-7365/LV-7265) To project a DVI digital signal, be sure to connect the PC and the projector using a DVI digital cable (not supplied) before turning on your PC or projector. Turn on the projector first and select Computer 2 (Digital) from the source menu - Canon LV-7365 | LV User's Manual - Page 27
or Macintosh Computer (LV-7260/LV-X7) NOTE: The ANALOG IN connector supports Plug & Play (DDC2). AUDIO IN S-VIDEO IN VIDEO IN L SERVICE PORT R AUDIO IN ANALOG IN ANALOG IN Audio cable (not supplied) PHONE VGA cable (supplied) To mini D-Sub 15-pin connector on the projector. It is recommended - Canon LV-7365 | LV User's Manual - Page 28
Connecting an External Monitor LV-7365/LV-7265 ANALOG IN 1 S-VIDEO IN VIDEO IN AUDIO IN L SERVICE PORT R AUDIO IN DIGITAL IN / ANALOG IN-2 AUDIO IN ANALOG IN-1 AUDIO OUT 2. Installation and Connections LV-7260/LV-X7 S-VIDEO IN VIDEO IN L SERVICE PORT R AUDIO IN ANALOG IN VGA cable ( - Canon LV-7365 | LV User's Manual - Page 29
sound. AUDIO IN ANALOG IN-1 S-VIDEO IN VIDEO IN L SERVICE PORT R AUDIO IN DIGITAL IN / ANALOG IN-2 AUDIO IN ANALOG IN-1 AUDIO OUT Audio Computer 2 (Analog)] ([Computer] on LV-7260/LV-X7) → [COMPONENT]. NOTE: Refer to your DVD player's owner's manual for more information about your DVD player - Canon LV-7365 | LV User's Manual - Page 30
S-VIDEO IN AUDIO IN S-VIDEO IN VIDEO IN L SERVICE PORT R AUDIO IN VIDEO IN DIGITAL IN / ANALOG IN-2 AUDIO IN ANALOG IN-1 AUDIO OUT Video inputs. NOTE: Refer to your VCR or laser disc player owner's manual for more information about your equipment's video output requirements. NOTE: An image - Canon LV-7365 | LV User's Manual - Page 31
of the projector as shown below. To output the sound in stereo, connect to audio equipment. DIGITAL IN/ ANALOG IN-2 S-VIDEO IN VIDEO IN L SERVICE PORT R AUDIO IN DIGITAL IN / ANALOG IN-2 AUDIO IN AUDIO IN ANALOG IN-1 AUDIO OUT HDMI-to-DVI cable (not supplied) (LV-7365 / LV-7265) Audio - Canon LV-7365 | LV User's Manual - Page 32
Supplied Power Cord Connect the supplied power cord to the projector. First connect the supplied power cord's two-pin plug to the AC IN of the projector, and then connect the other plug of the supplied power cord in the wall outlet. S-VIINDEO VIDINEO L R AUDIO IN SERVICE PORT LAMP R WARNING - Canon LV-7365 | LV User's Manual - Page 33
power cord, make sure that the main power switch is pushed to the off () po- sition. Failure to do so may cause damage to the projector. 1. To turn on the main power to the projector, press the Main Power switch to the on position ( I ). WARNING • The POWER indicator will light orange. LAMP - Canon LV-7365 | LV User's Manual - Page 34
and 49. MENU VOL VOL - + KEYSTONE BACK POWER INFO. IMAGE INPUT AUTO PC ASPECT MENU NO SHOW BACK NOTE: Immediately after turning on the projector, screen flicker may occur. This is normal. Wait 3 to 5 minutes until the lamp lighting is stabilized. When the Lamp mode is set to Quiet, the - Canon LV-7365 | LV User's Manual - Page 35
from INPUT List WARNING POWER Press and quickly release the INPUT button on the projector cabinet to display the Source list. Each time the INPUT button is pressed, the input source will change as follows: "Computer 1", "ComputeLrAM2P (Digital/Analog) [LV-7365/LV-7265]", "Video", "S-Video", To - Canon LV-7365 | LV User's Manual - Page 36
LAMP foot. 3 WARNING POWE There is approximately 10 degrees (up) of adjustment for the front of the projector. projector. CAUTION: Do not use the tilt-foot for purposes other than originally intended. Misuses such as using the tilt foot to carry or hang (from the wall or ceiling) the projector - Canon LV-7365 | LV User's Manual - Page 37
Zoom Use the ZOOM lever to finely adjust the image size on the screen. 3. Projecting an Image (Basic Operation) Focus Use the FOCUS ring to obtain the best focus. 28 - Canon LV-7365 | LV User's Manual - Page 38
range can be made narrower, depending on a signal or its aspect ratio selection. NOTE: Turning off the projector will cause your manual keystone adjustments to return to "0". To save your manual keystone adjustments, select [Keystone save] from the menu. See page 48. Adjusting with buttons on the - Canon LV-7365 | LV User's Manual - Page 39
LV-7365/LV-7265) The Auto Keystone correction feature will correct the vertical distortion of a projected image on the screen. No special operation required. Just put the projector rear feet of the projector can be adjusted to level the projector. NOTE: • Auto and Manual Keystone correction angle - Canon LV-7365 | LV User's Manual - Page 40
image automatically. [Poor picture] WARNING POWER LAMP INPUT AUTO PC VOL - MENU POWER INFO. IMAGE INPUT AUTO PC . • LV-7365/LV-7265: The Auto PC adjustment function does not work for component, video, and DVI digital signals. • LV-7260/LV-X7: projector cabinet work as a volume control. 31 - Canon LV-7365 | LV User's Manual - Page 41
Do not turn off the AC power by pressing the main power switch or by unplugging the power cord when the projector is powered on. Doing so can cause damage to the projector. Power On WARNING Fan running Standby WARNING WARNING LAMP LAMP LAMP Steady Blinking Steady green light orange light - Canon LV-7365 | LV User's Manual - Page 42
an Image (Basic Operation) 1. Unplug the power cord. 2. Disconnect any other cables. 3. Retract adjustable tilt feet if extended. 4. Cover the lens with the lens cap. 5. Put the projector and its accessories in the supplied soft case. Place the projector in the soft case with the lens facing - Canon LV-7365 | LV User's Manual - Page 43
INPUT AUTO PC ASPECT MENU NO SHOW L-CLICK BACK R-CLICK VOL PAGE D.ZOOM FREEZE 2. Return the image to the original size. 34 POWER INFO. IMAGE INPUT AUTO PC ASPECT MENU NO SHOW POWER INFO. IMAGE INPUT AUTO PC BACK ASPECT NO SHOW MENU L-CLICK BACK R-CLICK VOL PAGE D.ZOOM FREEZE - Canon LV-7365 | LV User's Manual - Page 44
Features ❹ Using the Remote Mouse Receiver (LV-7365/LV-7265/LV-7260) The remote mouse receiver enables you to operate your computer's mouse functions from the remote control. It is a great convenience for clicking through your computer-generated presentations. Connecting the remote mouse receiver to - Canon LV-7365 | LV User's Manual - Page 45
4. Convenient Features Operating your computer's mouse from the remote control You can operate your computer's mouse from the remote control. PAGE ▲/▼ Button scrolls the viewing area of on the Windows. For more information, see the user documentation or online help supplied with your computer. 36 - Canon LV-7365 | LV User's Manual - Page 46
the correct password is entered, the projector cannot project an image. To enable the Password function: 1. Press the MENU button. The menu will be displayed. 2. Use the SELECT or button to select [Setup] and press the OK or SELECT button. [Menu example for LV-7365] 3. Use the SELECT or button to - Canon LV-7365 | LV User's Manual - Page 47
projector when Password is enabled: 1. Press the Main Power Switch to the On position (I). 2. Press and hold the POWER button for about 1 second. The projector the main power is turned off (by setting the main power switch to "O" or unplugging the power cord). Turning off the main power and turning - Canon LV-7365 | LV User's Manual - Page 48
[Password] and press the OK or SELECT button. 5. Use the SELECT or button to select [off] and press the OK button. [Menu example for LV-7365] The password confirmation screen will be displayed. 6. Type in your password and press the OK button. When the correct password is entered, the Password - Canon LV-7365 | LV User's Manual - Page 49
NOTE: The on-screen menu may not be displayed correctly while interlaced motion video image is projected. 1. Press the MENU button on the remote control or projector cabinet to display the Menu. POWER INFO. IMAGE INPUT AUTO PC ASPECT MENU NO SHOW BACK 2. Press the SELECT or button on the - Canon LV-7365 | LV User's Manual - Page 50
4. Use the SELECT or button on the remote control or the projector cabinet to select the item you want to adjust or set. 5. Using On-Screen Menu 5. Adjusting the level of a selected item or selecting an item. Slide bar Solid triangle Radio button POWER INFO. IMAGE INPUT AUTO PC ASPECT MENU - Canon LV-7365 | LV User's Manual - Page 51
indicates the item is active. Key symbol Indicates the Key Lock is enabled. Thermometer symbol Indicates the lamp is forcibly being cooled down because the internal temperature is too high. High altitude symbol (LV-7365 only)........Indicates the [Fan mode] is set to [High altitude] mode. 42 - Canon LV-7365 | LV User's Manual - Page 52
Off Off, On Menu color select Color Color, Monochrome Menu display time 45 sec Manual, 5 sec, 15sec, 45 sec No signal screen Blue Blue, Black, Canon logo Filter message (LV-7365 only) 500(H) Off, 100(H), 200(H), 500(H), 1000(H) Options Off timer Off Off, 0:30, 1:00 - Canon LV-7365 | LV User's Manual - Page 53
Information Item Usage time Input signal Version Remaining lamp time Lamp counter Filter counter Source index Horizontal frequency Vertical frequency Input signal type RGB, Component, HDTV, VIDEO, S-VIDEO, HDTV, Digital Video type NTSC, NTSC3.58, NTSC4.43, PAL - Canon LV-7365 | LV User's Manual - Page 54
are five factory presets optimized for various types of images, you can set user adjustable settings. Standard Select this to project an image with a similar Select this when you want to project an image from a sRGBcompatible digital camera. An image is pro- jected in the display mode conforming - Canon LV-7365 | LV User's Manual - Page 55
to display your source image. You can also display the Aspect menu by pressing the ASPECT button on the remote control. True size (RGB only): Turns off the scaling feature. The projector displays the current image in its true resolution. When 4:3 is selected from the source (i.e. DVD player), the - Canon LV-7365 | LV User's Manual - Page 56
higher resolution than the projector's native resolution, the image will be dis- played in the projector's native resolution. In can adjust the image manually for position and stability; component signals. Selecting Video Filter Level [Video filter] (not available for Digital RGB, Video and S-Video - Canon LV-7365 | LV User's Manual - Page 57
LV-7365/LV-7265) This feature allows the projector to detect its tilt and correct vertical distortion automatically. To turn off the Auto Keystone feature, select [Off]. Correcting Vertical Keystone Distortion Manually available. Next time you turn on the power, the Auto keystone function will work - Canon LV-7365 | LV User's Manual - Page 58
the Steady Green light lamp life (LV-7365:approx 80%, LAMP LV-7265: approx.75%, LV-7260/ LV-X7: approx. 80% Brightness). NOTE: • The lamp life remaining and lamp hours used can be checked in [Usage time]. Select [Information] →[Usage time]. • If the projector is overheated in Normal mode - Canon LV-7365 | LV User's Manual - Page 59
[Installation] LV-7365 5. Using On-Screen Menu LV-7265/LV-7260/LV-X7 Selecting Projector Orientation [Image flip H/V] This sets your image for your type of projection application. The options are: front projection, rear projection, ceiling mounted projection and rear ceiling mounted projection. - Canon LV-7365 | LV User's Manual - Page 60
this feature to display a blue, black screen or the Canon logo screen when no signal is available. Selecting Interval Time for Filter Message [Filter message] (LV-7365 only) The projector has a feature that informs you of the timing for cleaning the filters. This item allows you to select the time - Canon LV-7365 | LV User's Manual - Page 61
IN-1] connector every time the projector is started up. (LV-7365/LV-7265) Computer 2 (Digital) ... Displays the DVI digital source from the Computer 2 Input [DIGITAL IN/ANALOG IN-2] (Digital) connector every time the projector is started up. (LV-7365/LV-7265) Computer 2 (Analog) ... Displays the RGB - Canon LV-7365 | LV User's Manual - Page 62
select [COMPONENT]. * [Computer]: LV-7260/LV-X7 only * [Computer 1] / [Computer 2 (Analog)]: LV-7365/LV-7265 [Video & S-Video System Select] This feature enables you to select composite video standards automatically or manually. Normally select [Auto] and the projector will automatically detect the - Canon LV-7365 | LV User's Manual - Page 63
the projector cabinet or the remote control. • When the remaining lamp time reaches 0%, the Remaining lamp time bar indicator changes from 0% to 100(H) in red and starts counting down. When the remaining lamp time reaches 0 hours, the projector will not turn on. Model LV-7365 LV-7265/LV-7260 LV-X7 - Canon LV-7365 | LV User's Manual - Page 64
. NOTE: The projector will turn off and go into standby mode after 2100* hours (up to 3100* hours in Quiet mode) of service. If this happens, press the INFO button on the remote control for ten seconds to reset the lamp clock back to zero. Do this only after replacing the lamp. * LV-X7: 3100 hours - Canon LV-7365 | LV User's Manual - Page 65
Turn off the projector, turn off the main power switch and unplug the projector before replacing the filter. • Only clean the outside of the filter cover with a vacuum cleaner. • Do not attempt to operate the projector without the filter cover. NOTE: [LV-7365] • When the projector reaches the usage - Canon LV-7365 | LV User's Manual - Page 66
is also wise to replace the filter. The filter comes in the same package with your replacement lamp. 4. Turn on the projector. 5. Reset the Filter counter. See page 55. ❷ Cleaning the Cabinet and the Lens 1. Turn off the projector before cleaning. 2. Clean the cabinet periodically with a damp cloth - Canon LV-7365 | LV User's Manual - Page 67
the instructions described in this section. The lamp component might have high voltage and heat. For safety, the lamp part is designed to prevent the lamp cover from easily becoming detached. Optional lamp and tools needed for replacement: • Replacement lamp LV-LP30 (LV-7365), LV-LP26 (LV-7265/LV - Canon LV-7365 | LV User's Manual - Page 68
it has been used. It will be extremely hot. Before handling, turn the projector off, wait until the cooling fans stop, turn off the main power switch, disconnect the power cord and then allow at least 60 minutes for the lamp to cool. Interlock NOTE: There is an interlock on this case to prevent - Canon LV-7365 | LV User's Manual - Page 69
. 6. Connect the supplied power cord, turn on the Main Power switch and turn on the projector. 7. Finally, select the menu → [Reset] → [Lamp counter] to reset the lamp usage hours. NOTE: When the lamp exceeds 2100* hours (up to 3100* hours in Quiet mode) of service, the projector cannot turn on and - Canon LV-7365 | LV User's Manual - Page 70
turn off the lamp with the WARNING indicator blinking (2-cycle On and Off.) Should this happen, do the following: - Unplug the power cord after the cooling fans stop. - Move the projector to a cooler location if the room where you are presenting is particularly too warm. - Clean the ventilation - Canon LV-7365 | LV User's Manual - Page 71
Common Problems & Solutions (→ "Power/Status/Lamp Indicator" on page 61.) Problem Check These Items Does not turn on or shut down • Check that the power cord is plugged in and that the power button on the projector cabinet or the remote control is on. See pages 23 and 24. • Ensure that the lamp - Canon LV-7365 | LV User's Manual - Page 72
your computer's owner's manual. • Non-standard LCD screen when the projector display is in use. Each notebook PC has a different way of deactivate/reactivate the local LCD screens as described in the previous step. Refer to your computer's documentation supported by your Macintosh and the projector - Canon LV-7365 | LV User's Manual - Page 73
❷ Specifications This section provides technical information about the projector's performance. 7. Appendix Model Number LV-7365/LV-7265/LV-7260/LV-X7 Optical LCD Panel Resolution Lens Lamp Brightness Contrast Ratio Uniformity Image Size (Diagonal) Projection Distance Projection Angle Keystone - Canon LV-7365 | LV User's Manual - Page 74
mode / 170W in Lamp Quiet mode Front / Rear / Ceiling mounted / Rear, Ceiling mounted 12.2" (W)4.3" (H)10.4" (D) 310 mm (W)109 mm (H)265 mm (D) (not including protrusions) LV-7365: 7.3 lbs / 3.3 kg LV-7265: 6.8 lbs / 3.1 kg LV-7260: 6.6 lbs / 3.0 kg LV-X7: 6.4 lbs / 2.9 kg LV-7365/LV-7265: 35 dB - Canon LV-7365 | LV User's Manual - Page 75
(4.3") 7. Appendix 265 (10.4") WARNING POWER LAMP INPUT AUTO PC VOL - MENU KEYSTONE VOL + BACK LV-7365/LV-7265 S-VIDEO IN VIDEO IN L SERVICE PORT R AUDIO IN DIGITAL IN / ANALOG IN-2 AUDIO IN ANALOG IN-1 AUDIO OUT LV-7260/LV-X7 S-VIDEO IN VIDEO IN L SERVICE PORT R AUDIO IN ANALOG IN - Canon LV-7365 | LV User's Manual - Page 76
-directional DATA (SDA)* Horizontal Sync or Composite Sync Vertical Sync Data Clock* YCbCr Signal Cr Y Cb Cr Ground Y Ground Cb Ground * Only ANALOG-1 input connector supported on LV-7365/LV-7265. 67 - Canon LV-7365 | LV User's Manual - Page 77
15.63 31.25 33.75 28.13 45.00 31.47 15.73 15.63 Refresh Rate ( Hz ) 59.94 50.00 60.00 50.00 59.94 59.95 66. Interlaced 50.00 Interlaced D : Images in above flagged with "D" are supported by the DVI digital signals on LV-7365/LV-7265. # : Images in above flagged with # are compressed with scaling - Canon LV-7365 | LV User's Manual - Page 78
7. Appendix ❻ Relationship between Screen Size and Projection distance LV-7365/LV-7265 Screen size at 4:3 aspect ratio W x D (cm) 25" 51 x 38 30" 61 x 46 40" 81 x 61 50" 102 x 76 60" 122 x 91 70" 142 x 107 80" - Canon LV-7365 | LV User's Manual - Page 79
LV-7260/LV-X7 Screen size at 4:3 aspect ratio W x D (cm) 25" 51 x 38 30" 61 x 46 40" 81 x 61 50" 102 x 76 60" 122 x 91 70" 142 x 107 - Canon LV-7365 | LV User's Manual - Page 80
LV-7365/LV-7265 Function Code Data POWER ON 02H 00H 00H 00H 00H 02H POWER OFF 02H 01H 00H 00H 00H 03H INPUT SELECT COMPUTER-1 02H 03H 00H 00H 02H 01H 01H 09H INPUT SELECT COMPUTER-2 (Digital LV-7260/LV-X7 Function POWER ON POWER rate rate may be recommended for long cable runs. SERVICE PORT - Canon LV-7365 | LV User's Manual - Page 81
your user's manual. This checklist below will help us solve your problem more efficiently. * Print the following pages. Frequency of occurrence always sometimes (How often other Power No power (POWER indicator does not light green) See also "WARNING Indicator (WARNING)". Power cord's plug - Canon LV-7365 | LV User's Manual - Page 82
Flashing light [ ] cycles Remote control model number: Projector PC Installation environment Screen size: inch Screen type: White matte Beads Polarization Wide angle High contrast Throw distance: feet/inch/m Orientation: Ceiling mount Desktop Power outlet connection - Canon LV-7365 | LV User's Manual - Page 83
SVENSKA AB Gustav III:s, Boulevard 26, 169 88 Solna, Sweden CANON NORGE A/ S Hallagerbakken 110, P. O. Box 33, Holmlia, N-1201 Oslo, Norway CANON OY Huopalahdentie 24, P. O. Box 1, FIN- 00351 Helsinki, Finland CANON HONGKONG CO., LTD. 19/F., The Metropolis Tower, 10 Metropolis Drive, Hunghom, Kln
-
 1
1 -
 2
2 -
 3
3 -
 4
4 -
 5
5 -
 6
6 -
 7
7 -
8
-
9
-
10
-
11
-
12
-
13
-
14
-
15
-
16
-
17
-
18
-
19
-
20
-
21
-
22
-
23
-
24
-
25
-
26
-
27
-
28
-
29
-
30
-
31
-
32
-
33
-
34
-
35
-
36
-
37
-
38
-
39
-
40
-
41
-
42
-
43
-
44
-
45
-
46
-
47
-
48
-
49
-
50
-
51
-
52
-
53
-
54
-
55
-
56
-
57
-
58
-
59
-
60
-
61
-
62
-
63
-
64
-
65
-
66
-
67
-
68
-
69
-
70
-
71
-
72
-
73
-
74
-
75
-
76
-
77
-
78
-
79
-
80
-
81
-
82
-
83
 |
 |
MULTIMEDIA PROJECTOR
LV-7365/LV-7265/LV-7260/LV-X7
User’s Manual
E
English
The LV-7365 projector's model name indicated on the projector's la-
bel is LV-7365 and LV-7365 (E) respectively.
Both models are referred to as LV-7365 throughout the user's manu-
al except some of the specifications pages.