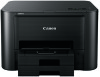
Canon MAXIFY iB4120 iB4100 Getting Started Guide
Canon MAXIFY iB4120 Manual
 |
View all Canon MAXIFY iB4120 manuals
Add to My Manuals
Save this manual to your list of manuals |
Canon MAXIFY iB4120 manual content summary:
- Canon MAXIFY iB4120 | iB4100 Getting Started Guide - Page 1
2 EN Turn on the printer. ES Encienda la impresora ROM (Windows) EN Manuals ES Manuales 3 EN Lift paquete. b 6 3 EN Insert the ink tank all the way and straight. ES instructions. ES Siga las instrucciones que aparezcan en 5 pantalla. b a b 3a b QT6-1236-V01 XXXXXXXX © CANON INC - Canon MAXIFY iB4120 | iB4100 Getting Started Guide - Page 2
Manual is accessible from the website. ES Se puede acceder al Manual en línea desde el sitio web. 5 6 7 8a b a b a b EN To connect the printer Conexión LAN cableada Wireless LAN connection Conexión LAN Stop). c EN Follow the on-screen instructions. ES Siga las instrucciones que aparezcan - Canon MAXIFY iB4120 | iB4100 Getting Started Guide - Page 3
wireless router • Not using/having wireless router (Connecting printer to device via wireless LAN connection directly) Proceed to connect printer to up Canon PRINT Inkjet/SELPHY, a dialog asking you to setup a printer appears. The printer will be detected by following the on-screen instructions. - Canon MAXIFY iB4120 | iB4100 Getting Started Guide - Page 4
manual después de completar la instalación de la impresora de acuerdo con la Guía de inicio 1. Teléfono inteligente/Tableta (iOS/Android) 1. Instale Canon PRINT Inkjet inalámbrica (Wireless LAN Connection) Printer is not registered. Perform printer setup?)" no aparece al iniciar Canon PRINT Inkjet
-
 1
1 -
 2
2 -
 3
3 -
 4
4
 |
 |

3
2
4
5
1
XXXXXXXX
© CANON INC. 2015
CD-ROM (Windows)
1
1
2
3
2
1
a
b
c
b
a
a
b
b
c
5
1
2
3
4
3
4
a
a
b
5
6
1
2
3
a
b
a
b
a
b
a
b
b
ES
EN
ES
ES
EN
EN
ES
EN
ES
EN
ES
EN
ES
EN
ES
EN
ES
ES
EN
EN
ES
EN
ES
EN
ES
EN
ES
EN
ES
EN
ES
EN
ES
EN
Manuales
ESPAÑOL
Guía de inicio 1
Retire la cinta y los materiales de protección del
exterior de la impresora.
Elimine la cinta naranja.
Levante el plegamiento y quite el material de
protección.
Quite el material de protección.
Encienda la impresora.
No conecte ningún cable excepto el de alimentación.
Tutoriales en vídeo
Configuración
¡No toque esta parte
hasta que se pare!
Extraiga el depósito de tinta
del paquete.
Inserte el depósito de tinta
recto y hasta el fondo.
Empuje el depósito de tinta
firmemente y hacia
el fondo hasta que encaje en su posición.
Un depósito de tinta instalado no se puede retirar hasta
que aparece el mensaje para retirarlo.
Repita
a
para instalar los otros depósitos de
tinta.
2 pulgadas (5 cm)
Parte posterior
Siga las instrucciones que aparezcan en
pantalla.
Utilice el botón
[
o
]
para cambiar números y
pulse el botón
OK
para fijar números.
Defina los otros números también.
Manuals
ENGLISH
Getting Started 1
Remove the tape and packing materials from outside
the printer.
Remove the orange tape.
Lift the pinch and remove the protective material.
Remove the protective material.
Turn on the printer.
Do not connect any cables except the power cord yet.
Video Tutorials
Setup
Do not touch this part until
it stops!
Remove the ink tank
from the package.
Insert the ink tank
all the way and straight.
Push the ink tank
firmly and all the way until it
snaps into place.
An installed ink tank cannot be removed until the
message to replace it is displayed.
Repeat
to
to install the other ink tanks.
2 inches (5 cm)
Back
Follow the on-screen instructions.
Use the
[
or
]
button to change numbers and
press the
OK
button to fix numbers.
Set the other numbers as well.
QT6-1236-V01
PRINTED IN XXXXXXXX
RMC (Regulatory Model Code): K10433