Canon PIXMA MP500 MP500 User's Guide
Canon PIXMA MP500 Manual
 |
View all Canon PIXMA MP500 manuals
Add to My Manuals
Save this manual to your list of manuals |
Canon PIXMA MP500 manual content summary:
- Canon PIXMA MP500 | MP500 User's Guide - Page 1
User's Guide ENG QT7-0096-V07 - Canon PIXMA MP500 | MP500 User's Guide - Page 2
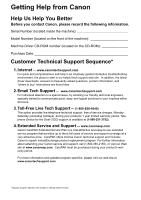
self-help in an intuitively guided interactive troubleshooting environment, the place to start is our helpful tech support web site. In addition, the latest driver downloads, answers to frequently asked questions, product information, and "where to buy" instructions are found here. 2. Email Tech - Canon PIXMA MP500 | MP500 User's Guide - Page 3
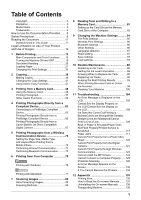
Jams 117 Cannot Print Properly from a Photo Index Sheet 120 Cannot Print Properly from the Digital Camera 121 Cannot Print Properly through Wireless Communication 123 Cannot Install the MP Drivers 124 Cannot Connect to Computer Properly ...... 125 Problems Scanning 126 An Error Message Appears - Canon PIXMA MP500 | MP500 User's Guide - Page 4
Specifications 139 Users in the U.S.A 143 FCC Notice 143 Canon U.S.A., Inc. Limited Warranty U.S. Only 144 Users in Canada 147 Customer Technical Supports 147 Index 148 2 - Canon PIXMA MP500 | MP500 User's Guide - Page 5
Canon MP500 User's Guide Copyright This manual is copyrighted by Canon Inc. with all rights reserved. Under the copyright laws, this manual may not be reproduced in any form, in whole or in part, without the prior written consent of Canon Inc. © 2005 Canon Inc. Disclaimer Canon Inc. has reviewed - Canon PIXMA MP500 | MP500 User's Guide - Page 6
Windows" and "Internet Explorer" are trademarks of Microsoft Corporation, registered in the United States and other countries. z "Macintosh" and "Mac "xD-Picture Card" is a trademark of Fuji Photo Film Co., Ltd. z "MultiMediaCard" is Canon Inc. z Specifications are subject to change without notice. 4 - Canon PIXMA MP500 | MP500 User's Guide - Page 7
features. Scan Guide Refer to this guide for full instructions on scanning operation and settings. Printer Driver Guide Refer to this guide for full instructions on setting the printer driver. Photo Application Guide Refer to this guide for instructions on using various application software included - Canon PIXMA MP500 | MP500 User's Guide - Page 8
on the plug absorbs moisture and may cause insulation failure and fire. Do not service the machine yourself except as specifically described in this guide. If further servicing is required, contact the Canon Customer Care Center. When storing the machine, choose a location where the machine is not - Canon PIXMA MP500 | MP500 User's Guide - Page 9
user serviceable parts inside the machine. The machine contains high-voltage components. Never attempt any maintenance procedure not described in this guide contact the Canon Customer Care Print Head is not protected, and you may not be able to print that is strong enough to support its weight. If the - Canon PIXMA MP500 | MP500 User's Guide - Page 10
guides included with your machine. z If the machine does not operate normally when you have followed the instructions provided in "Troubleshooting" on page 104. z If the machine has been dropped or damaged. z If the machine exhibits a distinct change in performance, indicating a need for servicing - Canon PIXMA MP500 | MP500 User's Guide - Page 11
Then, contact the Canon Customer Care Center. printing. Parts inside the machine are moving and this may result in injury. Do not turn the machine upside down. Ink may leak out and stain clothing or the surrounding area. Adjust only those controls that are covered by the instructions in the guides - Canon PIXMA MP500 | MP500 User's Guide - Page 12
Print Head/Ink tanks For safety reasons, store print heads and ink tanks out of the reach of small children. If a child ingests any ink, consult a doctor immediately. Do not shake print heads or ink tanks. Ink may leak out and stain clothing or the surrounding area. Never touch the Print Head. 10 - Canon PIXMA MP500 | MP500 User's Guide - Page 13
below of symbols used in this guide. The following symbols are used to indicate important instructions. Be sure to obey these instructions. Warning Indicates a warning concerning when the machine is connected to a Windows® system. Read this when the machine is connected to a Macintosh® system. - Canon PIXMA MP500 | MP500 User's Guide - Page 14
Product and Use of Images It may be unlawful to make copies of, scan, print or use reproductions of the following documents. The list provided is non-exhaustive badges or insignias z Internal revenue stamps (canceled or z Selective service or draft papers uncanceled) z Checks or drafts issued by - Canon PIXMA MP500 | MP500 User's Guide - Page 15
the knob and slide in the appropriate direction. (4) Auto Sheet Feeder Load paper here before printing. Paper feeds automatically, one sheet at a time. (5) Cover Guide Align the right side of the paper to this guide. (6) Card Slot Cover Open to insert a memory card. For details, see "Inserting the - Canon PIXMA MP500 | MP500 User's Guide - Page 16
optional Bluetooth unit*, connect it to this port. Refer to the Bluetooth User's Guide. *The Bluetooth unit is not available to some regions due to the law of the countries or the regulations. For details, contact the Canon Customer Care Center. (9) Paper Output Tray Printouts are output to this - Canon PIXMA MP500 | MP500 User's Guide - Page 17
the status of the ink tank. (16) Print Head Holder Used to install a Print Head. (17) Scanning Unit (Printer Cover) This is the unit used to scan documents. (18) Inner Cover Open this cover when replacing the ink tanks. (19) Card Slot Set the memory card containing photos here. For details, see - Canon PIXMA MP500 | MP500 User's Guide - Page 18
the machine is printing from or scanning images to the computer, or the computer is in the sleep mode or standby mode, do not disconnect and connect the USB cable. Note z For information on how to install the Print Head and ink tanks, refer to the Easy Setup Instructions. Ink Tank Lamps z You - Canon PIXMA MP500 | MP500 User's Guide - Page 19
Scan Guide.) (4) [MEMORY CARD] Switches the machine to Memory Card mode. (5) Alarm Lamp Flashes orange, when an error occurs, or when paper or ink Photos with the Shooting Date (Search)" on page 54. (14) [Photo Index Sheet] Switches to Photo Index Sheet mode. See "Printing by Using the Photo Index - Canon PIXMA MP500 | MP500 User's Guide - Page 20
to normal operation after a printing error was resolved, or if paper photo that is displayed. See "Printing a Specified Area (Trimming)" on page 55. (19) [Black] Starts black & white copying, or photo scanning. (20) [Color] Starts color copying, photo printing, or scanning. 18 Before Printing - Canon PIXMA MP500 | MP500 User's Guide - Page 21
the Print Head and ink tanks are set into place. Note If preparatory operations above are not yet finished, follow the Easy Setup Instructions to complete them. 1 Press [ON/OFF]. [COPY] flashes green for a while, and then turns on. Note z If the Alarm Lamp flashes orange and an error message - Canon PIXMA MP500 | MP500 User's Guide - Page 22
Max. 0.7" / 18 mm „ Loading Documents Load documents that you want to copy or scan on the Platen Glass. Note Make sure any glue, ink, correction fluid, or the like is completely dry before loading the document. 1 Lift on the lower right corner of the Platen Glass. 20 Before Printing Chapter 1 - Canon PIXMA MP500 | MP500 User's Guide - Page 23
also scan in Support Load Limit Auto Sheet Feeder Cassette - 0.52"/13 mm 0.52"/13 mm - 10 envelopes 5 envelopes Printer Driver mm), Not supported (Credit Card)*5 [Glossy Photo Paper] Glossy Photo GP-501 101.6 x 152.4 mm) [Glossy Photo Paper] Matte Photo Paper MP-101 10 sheets (A4, Letter - Canon PIXMA MP500 | MP500 User's Guide - Page 24
plain paper (64 gsm or 17 lb), up to 150 sheets (13 mm or 0.52 inches in height) can be loaded in the Auto Sheet Feeder and Cassette respectively. Select [Plain Paper] from [Media Type] in the printer driver. For a detailed description of printing media types, refer to the Printer Driver Guide. 22 - Canon PIXMA MP500 | MP500 User's Guide - Page 25
64 gsm or 17 lb) z Excessively thick paper* (more than 105 gsm or 28 lb)(non-Canon branded paper) z Picture postcards z Postcards affixed with photos or stained with water or sweat, ink may blur. z Photo Paper Pro guidelines z Do not touch the print surface until the ink is dry (approx. 30 minutes). - Canon PIXMA MP500 | MP500 User's Guide - Page 26
you can specify that Letter-sized plain paper is always fed from the Cassette whenever you print. Note For information on the printer driver settings, refer to the Printer Driver Guide. (A) (A) You can switch between paper loaded in the Auto Sheet Feeder (e.g., 4" x 6" / 101.6 x 152.4 mm) or the - Canon PIXMA MP500 | MP500 User's Guide - Page 27
Lamp is lit when loading paper in the Cassette. „ Loading the Print Media in the Auto Sheet Feeder z Loading Paper Note For detailed information on the specialty media Canon provides for use with its various printers, refer to "Recommended Paper and Requirements" on page 21. 1 Flatten the - Canon PIXMA MP500 | MP500 User's Guide - Page 28
paper source with the printer driver. For details, refer to Printer Driver Guide. 3 Load the paper. (1) Load the paper into the Auto Sheet Feeder with the print side facing UP. (2) Align the paper stack against the Cover Guide on the right side of the Paper Support. Important Ensure that the - Canon PIXMA MP500 | MP500 User's Guide - Page 29
. z Do not touch the printed surfaces until the ink dries. For specific drying times, refer to the instructions packaged with your media. z on the printer driver settings, refer to the Printer Driver Guide. 1 Load the envelope against the Cover Guide on the right side of the Paper Support with the - Canon PIXMA MP500 | MP500 User's Guide - Page 30
on the printer driver settings, refer to the Printer Driver Guide. (A) 1 2 3 (B) Note z Fold the envelope flap shut (A). z Printing direction (B). with the print side facing UP and align the Cover Guide on the right side of the Paper Support. Important Ensure that the Cover Guide stands - Canon PIXMA MP500 | MP500 User's Guide - Page 31
in the printer driver. For a detailed description of the printer driver settings, refer to "Printing with Windows" on page 75, or "Printing with Macintosh" using genuine Canon photo media when printing photographs. See "Recommended Paper and Requirements" on page 21. „ Loading the Print Media in - Canon PIXMA MP500 | MP500 User's Guide - Page 32
: 203 mm / 8 inches or longer in length) When loading 5" x 7"- or smaller sized paper (nonstandard-size paper: 202 mm / 8 inches or shorter in length) 30 Before Printing Chapter 1 - Canon PIXMA MP500 | MP500 User's Guide - Page 33
sheets of plain paper (64 gsm or 17 lb, 13 mm or 0.52 inches in height) in the Cassette. However, do not stack more than 50 sheets in the Paper Output Tray. z Do not touch the printed surfaces until the ink dries. For specific drying times, refer to the instructions packaged with your media - Canon PIXMA MP500 | MP500 User's Guide - Page 34
it back while raising it a little. (3) Press [Feed Switch] so that the Cassette Lamp (A) lights. (3) (A) Note (2) (1) You can also select the paper source with the printer driver. For details, refer to the Printer Driver Guide. 32 Before Printing Chapter 1 - Canon PIXMA MP500 | MP500 User's Guide - Page 35
are using. z If the print image is upside down when printing onto special envelopes, open the printer properties dialog box then select the [Rotate 180 degrees] check box on the [Page Setup] tab. For information on the printer driver settings, refer to the Printer Driver Guide. 1 Align the envelope - Canon PIXMA MP500 | MP500 User's Guide - Page 36
.] or [Comm. Env. #10] in [Page Size]. For information on the printer driver settings, refer to the Printer Driver Guide. z Loading 4" x 6" or 5" x 7"-Sized Paper in the Cassette Important z Do not leave photo paper, such as Photo Paper Pro, in the Cassette for a long time. This may cause paper - Canon PIXMA MP500 | MP500 User's Guide - Page 37
orientation (B) can cause the paper to be jammed. (A) (B) Note We recommend using genuine Canon photo media when printing photographs. See "Recommended Paper and Requirements" on page 21. Changing the Print Settings This section describes the setting items that can be specified in the Settings - Canon PIXMA MP500 | MP500 User's Guide - Page 38
the setting. (1) Use [ ] or [ ] to change the setting. Change to here. 5 Complete setting. (1) Press [Settings]. Return to the Settings screen. „ Print Setting Items Each tab contains the following setting items. To change the tab, use [ ] to select the tab and use [ ] or - Canon PIXMA MP500 | MP500 User's Guide - Page 39
to copy in grayscale. Grayscale renders tones in a range of grays instead of black or white. (4) You can specify the reduction or enlargement method. Same magnification, Plain paper, Photo Paper Pro, Photo Plus Glossy, Matte Photo Paper, Glossy Photo Paper (3) Select the print quality. Standard, High - Canon PIXMA MP500 | MP500 User's Guide - Page 40
date, file no., or not. No date/file no., Print date only, Print file no. only, Print date & file no. Tab 2 Allows you to optimize photos with the functions below. (1) (2) (5) (3) (6) (4) (7) (8) (1) Activate/deactivate Vivid photo function. This function makes green and blue more lively - Canon PIXMA MP500 | MP500 User's Guide - Page 41
check or change the page size, media type, or other settings. See "To Change Print Settings" on page 35. (2) Use [ ] or [ ] to specify the number of page 20. (4) Press [Color] for color copying, or [Black] for black & white copying. The machine starts copying. Note To cancel copying, press - Canon PIXMA MP500 | MP500 User's Guide - Page 42
„ Reducing or Enlarging a Copy You can reduce or enlarge copies. 1 Prepare for copying. See "Prepare for copying." on page 39. 2 Select the reduction/enlargement method. The example below assumes that you will select . (1) Press [Settings]. (2) Use [ ] or [ ] to select Tab 1. (3) Use - Canon PIXMA MP500 | MP500 User's Guide - Page 43
the Copy Settings You can change the copy settings such as the page size, media type, or print quality. For details on changing the copy settings and setting items, see "To Change Print Settings" on page 35. 1 5 2 3 4 1 You can specify the page size. 2 You can specify the media type. 3 You - Canon PIXMA MP500 | MP500 User's Guide - Page 44
[OK]. (5) Follow the on-screen instructions to load the document to be printed on the front face on the Platen Black] for black & white copying. (8) Load the document to be printed on the back face on the Platen Glass. If you have only one document to scan, press [OK]. (9) Press [Color] or [Black - Canon PIXMA MP500 | MP500 User's Guide - Page 45
[OK]. (3) Follow the on-screen instructions to load the document to be printed on the left side on the Platen Black] for black & white copying. (6) Load the document to be printed on the right side on the Platen Glass. If you have only one document to scan, press [OK]. (7) Press [Color] or [Black - Canon PIXMA MP500 | MP500 User's Guide - Page 46
instructions to load the first document to print on the Platen Glass, then press [OK]. (5) Specify the necessary items. See "To Change Print Settings" on page 35. (6) Press [Color] for color copying, or [Black] for black 101.6 x 152.4 mm photos or graphics using Canon sticker paper. Platen Glass ( - Canon PIXMA MP500 | MP500 User's Guide - Page 47
or [Black] for black & white copying. Note z Load stickers in the Auto Sheet Feeder when using this function. z You can only load one sheet the paper is set to , , , . z You can specify print quality to either or - Canon PIXMA MP500 | MP500 User's Guide - Page 48
to select , then press [OK]. 3 Start copying. (1) Follow the on-screen instructions to load the document on the Platen Glass, then press [OK]. (2) Specify the necessary items. See "To Change Print Settings" on page 35. (3) Press [Color] to start copying. 46 Copying Chapter 2 - Canon PIXMA MP500 | MP500 User's Guide - Page 49
or . z You can use this feature only when the paper is set to , , , . z You can specify print quality to either or . z Neither or can be specified. z Fade Restoration - Canon PIXMA MP500 | MP500 User's Guide - Page 50
and 2MB cards are not supported z MEMORY STICK z MEMORY STICK PRO z SD Secure Digital memory card z MultiMedia Card Memory cards that can be inserted in the Card Slot using the adapter: xD-Picture Card*1 z MEMORY STICK Duo*2 z MEMORY STICK PRO Duo*2 miniSD Card*2 48 Printing from a Memory Card - Canon PIXMA MP500 | MP500 User's Guide - Page 51
provided with the card. Important z This machine supports image data created by DCF standard digital cameras compatible with the digital camera, see the manuals supplied with your digital camera. z edited on a computer may not be printed correctly. z Insert only one kind of memory card at a time. - Canon PIXMA MP500 | MP500 User's Guide - Page 52
on the memory card. 5 Close the Card Slot Cover. „ Removing the Memory Card Note If you use the machine connected to your computer, follow the instructions for removal of the memory card from the computer. For the procedure, see "Setting up the Card Slot as the Memory Card Drive of the - Canon PIXMA MP500 | MP500 User's Guide - Page 53
card. Important Removing the memory card or turning off the printer while the indicator lamp is flashing can damage the data stored in the memory card. 3 Close the Card Slot Cover. Printing Photograph Let's select a photo from the photos stored on the memory card of the digital camera, and - Canon PIXMA MP500 | MP500 User's Guide - Page 54
>. z To stop the slide show, press [Stop/Reset] during the slide show. You can do... z To search for photos with the shooting date (Search), see page 54. z To print a specified area (Trimming), see page 55. (1) Check the page size and media type. Note Press [Settings] to check or change the page - Canon PIXMA MP500 | MP500 User's Guide - Page 55
Note z To cancel printing, press [Stop/Reset]. z The printing is not started if you press [Black]. „ Specifying How Many Copies to Print for Each Photo (Multi-photo print) You can specify the number of prints to be made for each photo. 1 Prepare for printing. See "Prepare for printing." on page 51 - Canon PIXMA MP500 | MP500 User's Guide - Page 56
2 Specify the date range. z If you selected : (1) Use [ ] or [ ] to specify the date to search for. Go to main step 3. z If you selected : (1) Use [ ] or [ ] to specify the date of the oldest photos you want to print, then press [OK]. (2) Use [ ] or [ ] to specify - Canon PIXMA MP500 | MP500 User's Guide - Page 57
you want to crop. (1) Use [ ] or [ ] to select the photo you want to crop. 2 Display the trimming edit screen. (1) Press [Trimming]. The trimming edit screen is displayed. 3 Choose the area you want to print. (1) Use to position the cropping frame, then press [Trimming]. If you do not rotate - Canon PIXMA MP500 | MP500 User's Guide - Page 58
[Trimming] and then press [Stop/Reset]. „ Printing Several Photos on a Single Sheet of Paper (Layout print) You can print the specified photos in the specified layout. 1 Prepare for printing. See "Prepare for printing." on page 51. 2 Select the print menu. (1) Press [MEMORY CARD]. (2) Use [ ] or - Canon PIXMA MP500 | MP500 User's Guide - Page 59
When you finish pasting photos for one page, print the page. 6 Start printing. See "Start printing." on page 52. „ Printing on the Sticker (Sticker Print) You can print your favorite photo with a frame on Canon Photo Stickers. 1 Prepare for printing. See "Prepare for printing." on page 51. Note - Canon PIXMA MP500 | MP500 User's Guide - Page 60
functions are also provided under the Special photo print menu. z You can print all photos saved on the memory card. z You can print a list of all the photos saved on a memory card. Note The number of photos printed on a single sheet of paper depends on - Canon PIXMA MP500 | MP500 User's Guide - Page 61
: Supported image formats: CIFF, Exif and JFIF Print Style Standard Print: Prints photos that were specified as "Standard Print" with DPOF Print Style Index Print: Prints an index of photos that were specified as "Index Print" with DPOF using the machine's index printing layout Print Photo - Canon PIXMA MP500 | MP500 User's Guide - Page 62
, you can easily select print options as well as the photos to print using the Photo Index Sheet and by marking its appropriate circles. Simply scanning the Photo Index Sheet prints the selected photographs according to the settings you have made. 1 Prepare for printing. (1) Press [ON/OFF] to - Canon PIXMA MP500 | MP500 User's Guide - Page 63
. (A) (B) (C) (D) (E) (F) (G) (A) Select the page size and media type. (B) Select date printing and/or photo optimizer as necessary. See "Print Setting Items" on page 36. (C) Mark this to print all photographs, one copy each. *When you mark this, even if you mark the number of copies you want to - Canon PIXMA MP500 | MP500 User's Guide - Page 64
with a dark pencil or a black ink pen to select the photos to print and their print options. z Good z Bad (A) (B) (C) (A) Check mark (B) Line only (C) Too light Important z Be sure to fill a circle for every setting item (except options). z If there is more than one Photo Index Sheet, fill in - Canon PIXMA MP500 | MP500 User's Guide - Page 65
to use a computer. z It is possible to specify which images to print and various print settings from the operation panel of your camera or mobile phone. z Canon Bubble Jet Direct allows you to print photos from a Canon Bubble Jet Direct compatible (PictBridge incompatible) digital camera or digital - Canon PIXMA MP500 | MP500 User's Guide - Page 66
Easy Setup Instructions to set up the machine and make it ready for printing. Note The Print Head cannot be aligned using the controls of the digital device. If the Print Head alignment is not yet performed, execute automatic Print Head alignment, refer to "Aligning Print Head automatically" on - Canon PIXMA MP500 | MP500 User's Guide - Page 67
instructions given in the instruction manual supplied with the device. Let's take a look at the page size, media type, layout, image optimization modes, and date printing is used. * Names of settings that are displayed on Canon PictBridge compliant device are used in the description given below. - Canon PIXMA MP500 | MP500 User's Guide - Page 68
Glossy Photo Paper A4 Photo Glossy Photo Paper "Everyday Use" 5.4 x 8.6 cm/Credit Card Photo Glossy Photo Paper *1 This paper is exclusively used to print photo stickers. When printing on sticker paper, select 10x15 cm/4" x 6" in "Page size". *2 This size can be selected only for Canon - Canon PIXMA MP500 | MP500 User's Guide - Page 69
up, or 16-up, printing on stickers is not possible. z When you using Photo Stickers (PS-101), do instructions given in the device's instruction manual. z Controls of the device cannot be used for the following: - Print quality setting - Machine maintenance Printing Photographs Directly from a Canon - Canon PIXMA MP500 | MP500 User's Guide - Page 70
Photo Paper "Everyday Use" A4 „ Printing Directly from a Digital Camera or a Digital Video Camcorder This section describes how to print after connecting a camera to the machine. Note z For the digital camera operation method and troubleshooting, refer to your digital camera manual. z For print - Canon PIXMA MP500 | MP500 User's Guide - Page 71
the image size set on the digital camera and the size of the media set on the machine. z The digital camera does not support the following functions: - Print quality setting - Machine maintenance z To disconnect the USB cable connecting the digital camera to the machine, follow the procedure below - Canon PIXMA MP500 | MP500 User's Guide - Page 72
communication or Bluetooth communication. For how to print from a computer through Bluetooth communication, refer to the Bluetooth User's Guide. * The initial setting is borderless printing on 4" x 6" Photo Paper Plus Glossy. „ Displaying the Wireless Print Screen and Specifying the Settings 1 Press - Canon PIXMA MP500 | MP500 User's Guide - Page 73
on Canon Photo Stickers, make the settings as below. Page Size Sticker Media Type Photo Paper Plus Glossy Layout Stickers x 16 Performing Infrared Communication You can print photos in your mobile phone. When printing through infrared communication, also refer to your mobile phone manual - Canon PIXMA MP500 | MP500 User's Guide - Page 74
phone z For the procedure to print from your mobile phone, refer to your mobile phone manual. z Do not place any support printing a downloaded content or photo and a photo attached to an E-mail for security reason. z It does not support printing video files. z Depending on the size of a photo - Canon PIXMA MP500 | MP500 User's Guide - Page 75
from the computer, refer to the Bluetooth User's Guide. Note The mobile phone supporting the OPP (Object Push Profile) or BIP (Basic Image Profile) can print photos. For details of profiles, refer to your product's instruction manual. „ Printing through Bluetooth Communication When you - Canon PIXMA MP500 | MP500 User's Guide - Page 76
"Turning on the Machine" on page 19. 2 Connect the Bluetooth Unit BU-20 to the Direct Print Port. 3 Display the Bluetooth settings screen. (1) Press [Menu]. (2) Use [ ] or [ set the machine name on the Bluetooth device is "Canon MP500-2." The initial value is set to . Selecting - Canon PIXMA MP500 | MP500 User's Guide - Page 77
application software you use. z The steps described in this section are for printing in Windows XP Service Pack 2 (hereafter, called Windows XP print from the application software. 5 Open the printer properties dialog box. (1) Select [Print] from the application software's [File] menu. The [Print - Canon PIXMA MP500 | MP500 User's Guide - Page 78
] is selected from [Paper Source]. (3) Specify the print quality and other settings in [Print Quality] or [Color/Intensity]. Note For print settings, refer to the Printer Driver Guide. (4) Click [OK]. The [Print] dialog box opens. (1) (2) (3) (4) 76 Printing from Your Computer Chapter 6 - Canon PIXMA MP500 | MP500 User's Guide - Page 79
Driver Guide. [Instructions] is only displayed when the Printer Driver Guide is installed. z Selecting the [Preview before printing] check box displays a preview screen that allows you to confirm the selected printing effects and how your document will look when printed. Some application softwares - Canon PIXMA MP500 | MP500 User's Guide - Page 80
the Cassette. 4 Create a document or open a file to print from the application software. 5 Select [Page Size]. (1) Select [Page Setup] from the application software's [File] menu. The [Page Setup] dialog box opens. (2) Confirm that [MP500] is selected in [Format for]. (3) Select the desired page - Canon PIXMA MP500 | MP500 User's Guide - Page 81
Driver Guide. If the Printer Driver Guide is not installed, the Printer Driver Guide is not displayed even if is clicked. z Clicking [Preview] displays a preview screen that allows you to confirm the selected printing effects and how your document will look when printed. Some application softwares - Canon PIXMA MP500 | MP500 User's Guide - Page 82
z Easy-PhotoPrint (Photo Printing) z ArcSoft PhotoStudio (Photo image editing) z ScanSoft OmniPage SE (Converting scanned document to text)* * This application software may not be supplied with this machine in some country. Note If you did a [Custom Install] and only installed the MP Driver and MP - Canon PIXMA MP500 | MP500 User's Guide - Page 83
next time, MP Navigator is automatically started. z When using Mac OS X For the machine to start scanning when [Color] or [Black] is pressed, you need to set MP Navigator as the starting application software in Image Capture under [Applications] of Mac OS X. Important z If you are using Macintosh - Canon PIXMA MP500 | MP500 User's Guide - Page 84
, refer to the Scan Guide. „ Scanning from an Application Software You can scan an image from a TWAIN- or WIA- (Windows XP only) compliant application software and handle the scanned image in the application software. For detailed operations, refer to the Scan Guide. 82 Scanning Images Chapter 7 - Canon PIXMA MP500 | MP500 User's Guide - Page 85
using the Operation Panel of the machine, card direct printing cannot be done. After using the Card Slot as the memory card drive select this mode when printing photos from a memory card. The Card Slot is used as the memory card drive of the computer. Photo data can be written - Canon PIXMA MP500 | MP500 User's Guide - Page 86
[OK]. The Device settings screen is displayed. (2) 4 Select the menu. (1) Use [ ] or [ ] to select the setting item, then press [OK]. Example: select . The setting screen for the selected item is displayed. (1) (2) Use [ ] or [ ] to select the menu, then press [OK]. Example: select - Canon PIXMA MP500 | MP500 User's Guide - Page 87
or [ ] to select the setting item, then press [OK]. Example: select . (1) The Print Settings „ Quiet mode Use this function if you want to reduce the operation noise, such as when printing at night. Important z The printing speed may be reduced compared to when this setting is set to - Canon PIXMA MP500 | MP500 User's Guide - Page 88
phone. „ Image optimizer Choosing enables you to correct and smooth the jagged contours for printing. „ Layout print Specifies the layout for the paper when printing photos saved on a mobile phone. Note , , or can be selected only when the page - Canon PIXMA MP500 | MP500 User's Guide - Page 89
. Reset setting You can change the settings back to the default, except for the language for LCD messages and the position of the Print Head. Save settings Saves the settings for the Settings screen. Load settings Loads the settings for the Settings screen that were saved. Chapter 9 Changing - Canon PIXMA MP500 | MP500 User's Guide - Page 90
ink levels, see "When Printing Becomes Faint or Colors are Incorrect" on page 94. Getting the Ink Level Information You can check the ink tank status by the ink tank lamp display. Open the Scanning Unit (Printer Cover) of the machine and check the ink tank lamp. When the ink level is low: The ink - Canon PIXMA MP500 | MP500 User's Guide - Page 91
. The following message appears on the LCD when ink becomes empty during printing. Printing will resume as soon as ink tank is replaced and the Scanning Unit (Printer Cover) is closed. (A) z The ink tank with symbol(A) is out of ink. Replace with a new ink tank. z Press [Stop/Reset] to cancel the - Canon PIXMA MP500 | MP500 User's Guide - Page 92
the center. Caution Do not hold the LCD. Important If the Scanning Unit (Printer Cover) is left open for more than 10 minutes, the Print Head Holder moves to the right. Close and reopen the Scanning Unit (Printer Cover) to return the Print Head Holder to the center. 3 Open the Inner Cover. 90 - Canon PIXMA MP500 | MP500 User's Guide - Page 93
to manually move or stop the Print Head Holder. z Do not touch any metal parts. 4 Remove the ink tank whose lamp is flashing fast. (1) Push the tab (A) and remove the ink tank. (B) (A) Caution Do not touch the Print Head Lock Lever (B). Remove only the ink tank. Important z Handle ink tanks - Canon PIXMA MP500 | MP500 User's Guide - Page 94
peeled off along the perforation. If there remains a part of the orange tape, ink may not be ejected correctly. 6 Install the ink tank. (1) Install the ink tank into the Print Head. Note Refer to the guide label (A) and insert the ink tank in the correct position. (2) Press on the mark on the - Canon PIXMA MP500 | MP500 User's Guide - Page 95
installed in the wrong positions. Open the Scanning Unit (Printer Cover) and make sure that all the ink tanks are installed in the correct order directed on the label. z When you start printing after replacing the ink tank, the machine executes Print Head cleaning automatically. Do not perform any - Canon PIXMA MP500 | MP500 User's Guide - Page 96
running the Print Head maintenance, align the Print Head. Note Before printing the nozzle check pattern or cleaning the Print Head, check the following; - Open the Scanning Unit (Printer Cover), and make sure that all the ink tanks click into place and then their lamps light red. - If any one of - Canon PIXMA MP500 | MP500 User's Guide - Page 97
screen for the selected item is displayed. (3) „ Printing the Nozzle Check Pattern Print the nozzle check pattern to determine whether the ink ejects properly from the Print Head nozzles and to verify Print Head alignment. Use this function when printed results are blurred or the color is incorrect - Canon PIXMA MP500 | MP500 User's Guide - Page 98
the Nozzle Check Pattern Examine the nozzle check pattern. Perform cleaning if necessary. Note If the ink level is low, the nozzle check pattern is not printed correctly. Replace the relevant ink tank. (See "Replacing an Ink Tank" on page 88.) z There are no white stripes./All the patterns are - Canon PIXMA MP500 | MP500 User's Guide - Page 99
check pattern. This unclogs the nozzles to restore the Print Head condition. Note that cleaning the Print Head causes waste ink to be absorbed in the waste ink absorber. Cleaning the Print Head consumes ink, so perform Print Head cleaning only when necessary. Note Ensure that the Inner Cover - Canon PIXMA MP500 | MP500 User's Guide - Page 100
then perform Deep cleaning. See "Print Head Deep Cleaning" on page 98. „ Print Head Deep Cleaning If print quality does not improve by standard Print Head cleaning, try Print Head deep cleaning, which is a more powerful process. Print Head deep cleaning consumes ink, so perform this procedure only - Canon PIXMA MP500 | MP500 User's Guide - Page 101
the problem still remains, the Print Head may be damaged. Contact the Canon Customer Care Center. „ Aligning Print Head automatically If the ruled lines are shifted after running the Print Head maintenance, align the Print Head. There are two ways to align the Print Head, automatic or manual. First - Canon PIXMA MP500 | MP500 User's Guide - Page 102
printed in black and blue. When Automatic Print Head Aligning Cannot Be Executed Correctly z When automatic Print Head aligning cannot be executed correctly, the message "Auto head align has failed." is displayed on the LCD. See "An Error . If you have trouble getting the scanning area clean, wipe - Canon PIXMA MP500 | MP500 User's Guide - Page 103
(B) (A) „ Cleaning the Protrusions inside the Machine If protrusions inside the machine are stained, wipe ink off the protrusions using a swab or the like. „ Cleaning the Roller (Roller Cleaning) Clean the paper feed rollers if paper is not fed properly. Cleaning - Canon PIXMA MP500 | MP500 User's Guide - Page 104
there are no signs of improvement after performing three times, contact the Canon Customer Care Center. „ Cleaning the Interior of the Machine (Bottom Plate the machine. If the interior of the machine becomes dirty, paper printed onto by the machine may get dirty, so we recommend performing cleaning - Canon PIXMA MP500 | MP500 User's Guide - Page 105
then press [OK]. The sheet of paper is automatically fed in and then out of the machine. If the printed paper is smudged, clean the inside of the machine again. If the problem remains after performing cleaning again, the protrusions inside the machine may be stained. Clean them up. See "Cleaning the - Canon PIXMA MP500 | MP500 User's Guide - Page 106
on page 129 z "Trouble scanning with MP Navigator" on page 129 z "Image position and size incorrect when scanning from the machine's operation panel" on page 130 z "An Error Message Appears on the Screen" on page 130 z "Service Error 5100 is Displayed" on page 130 104 Troubleshooting Chapter 11 - Canon PIXMA MP500 | MP500 User's Guide - Page 107
No.: 2500 is Displayed" on page 133 z "For Windows Users" on page 133 If an error occurs when the machine is connected to a computer When an error occurs in printing such as the printer is out of paper or paper jams, a troubleshooting message is displayed automatically. Take the appropriate action - Canon PIXMA MP500 | MP500 User's Guide - Page 108
. Follow the directions given in the Easy Setup Instructions to install the Print Head. If the Print Head is already installed, remove the Print Head and reinstall it. If this error still remains, the Print Head may be damaged. Contact the Canon Customer Care Center. Inner cover is open. Close - Canon PIXMA MP500 | MP500 User's Guide - Page 109
measures, if the problem continues after aligning the Print Head again, press the [OK] to resolve the error, and then perform manual Print Head alignment. For details on manual Print Head alignment, see "Adjusting the Print Head Manually" on page 108. An error requiring servicing might have occurred - Canon PIXMA MP500 | MP500 User's Guide - Page 110
[ ] to select , then press [OK]. 5. Use [ ] or [ ] to select , then press [OK]. The Print Head alignment pattern is printed. 6. When is displayed, the operation panel, press a button other than [ON/OFF]. 108 Troubleshooting Chapter 11 - Canon PIXMA MP500 | MP500 User's Guide - Page 111
inserted. Action If the ink tank lamp is flashing, ink is empty. Replace the ink tank, and close the Scanning Unit (Printer Cover). If printing is not finished yet, just press the [OK] on the machine to continue printing in the "no ink" state. Replace the ink tank with a new one as soon as possible - Canon PIXMA MP500 | MP500 User's Guide - Page 112
z Ink supply is uneven. See "Print Head Cleaning" on page 97. See "Print Head Deep Cleaning" on page 98. z If straight lines are shifted. See "Aligning Print Head automatically" on page 99. Be sure to set the [Print Quality] setting to [High] in Windows, or [Fine] in Macintosh. 1. Open the printer - Canon PIXMA MP500 | MP500 User's Guide - Page 113
Restart your computer. It may solve the problem. Delete an undesired print job, if there is any. Use Canon IJ Status Monitor in Windows or Printer Setup Utility (or Print Center) in Macintosh for the deletion. 1. Open the printer properties dialog box. 2. Click the [Maintenance] tab and then - Canon PIXMA MP500 | MP500 User's Guide - Page 114
Note When Reduce spool data size is set, the print quality may be degraded. Performing automatic duplex printing Select [Use reduced printing] in the printer driver. It may solve the problem. 1. Open the printer properties dialog box. 2. Click [Print Area Setup] in the [Page Setup] tab and select - Canon PIXMA MP500 | MP500 User's Guide - Page 115
the inside of the machine is dirty, printed paper may be smudged. Follow the Output Tray, and pull out the extension. 3. Place the only one sheet of A4/Letter-size plain paper in landscape, horizontally fold the machine are stained, wipe ink off the protrusions using a swab or the like. Chapter - Canon PIXMA MP500 | MP500 User's Guide - Page 116
after performing three times, contact the Canon Customer Care Center. z Check to see if the paper you are printing on is too thick or curled. Printing. Ensure that the paper you are using is compatible with Borderless Printing. Refer to the Printer Driver Guide. 114 Troubleshooting Chapter - Canon PIXMA MP500 | MP500 User's Guide - Page 117
is complete. When [Prevent paper abrasion] is selected in the printer properties dialog box (Windows) or selected from [Custom Settings] in the Canon IJ Printer Utility dialog box (Macintosh), the setting is also applied under direct printing with the digital camera. If all four corners or the - Canon PIXMA MP500 | MP500 User's Guide - Page 118
[Print] dialog box of the printer driver, Photo Paper Pro or other Canon specialty paper to print images that have a high color saturation. See "Media types you cannot use" on page 23. Ensure that the media type selected on the operation panel matches that of the paper loaded. 116 Troubleshooting - Canon PIXMA MP500 | MP500 User's Guide - Page 119
Scanning Unit (Printer Cover printing, because this operation cancels any print jobs in progress. If you cannot remove the paper or the paper tears inside the machine, or if the paper jam error continues after removing the paper, contact the Canon Customer Care Center. Chapter 11 Troubleshooting - Canon PIXMA MP500 | MP500 User's Guide - Page 120
you will need to retry printing, because this operation cancels any print jobs in progress. If you cannot remove the paper or if the paper tears inside the machine, or if the paper jam error continues after removing the paper, contact the Canon Customer Care Center. 118 Troubleshooting Chapter 11 - Canon PIXMA MP500 | MP500 User's Guide - Page 121
to turn on the power. The paper is fed and the jammed paper is ejected accordingly. If you cannot remove the jammed paper or the error still persists, contact the Canon Customer Care Center. Chapter 11 Troubleshooting 119 - Canon PIXMA MP500 | MP500 User's Guide - Page 122
jammed paper is automatically ejected. If you cannot remove the jammed paper or the error still persists, contact the Canon Customer Care Center. Cannot Print Properly from a Photo Index Sheet Cause Action is displayed. Make sure all required circles on the - Canon PIXMA MP500 | MP500 User's Guide - Page 123
their solution, also refer to the user's manual of the camera. For other troubles with a digital camera, contact the manufacturer of the camera. Error Message On Camera Printer in use/Printer warming up Action Photos are printed from the computer. Wait until printing ends. When it is ready, the - Canon PIXMA MP500 | MP500 User's Guide - Page 124
according to the Easy Setup Instructions. If the Print Head has already been installed, remove the Print Head and reinstall it. If the error still remains, the Print Head may be defective. Contact the Canon Customer Care Center. Waste tank (ink absorber) full This error message indicates that the - Canon PIXMA MP500 | MP500 User's Guide - Page 125
Message On Camera Hardware Error/No ink Action Ink tank errors have occurred. Replace the ink tank. See "Replacing an Ink Tank" on page 88. Printer error An error requiring servicing might have occurred. Disconnect the cable between the machine and the camera, turn off the machine , and unplug - Canon PIXMA MP500 | MP500 User's Guide - Page 126
can interfere with the installation routine. Close all open application softwares before reinstalling the MP Drivers. Click [Start], select [My Computer] and then double-click the CD-ROM icon. For non-Windows XP users, open the [My Computer] window and then double-click the CD-ROM icon. Double - Canon PIXMA MP500 | MP500 User's Guide - Page 127
Action Uninstall the old version of the software following the instructions in the manual of that version, and reinstall the new version. Follow the Easy Setup Instructions packaged with your machine for proper MP Drivers installation. If the MP Drivers was not installed correctly, uninstall the MP - Canon PIXMA MP500 | MP500 User's Guide - Page 128
Scanning „ Scanner won't work Cause The machine is not recognized by the computer. Action Restart the computer. This may enable the computer to recognize the machine. „ ScanGear MP won't start Cause Scanner driver (ScanGear MP) not installed. Scanner is not selected in the application software - Canon PIXMA MP500 | MP500 User's Guide - Page 129
, refer to the Scan Guide. Some application software does not display the image clearly if the image is too small. Set the view mode to 100%. Set [Descreen] to [ON] in the [Image Settings] section of the Advanced Mode of ScanGear MP. Note Moiré may appear when you scan digital photo prints. Set your - Canon PIXMA MP500 | MP500 User's Guide - Page 130
a photo print, of if you otherwise want to specify a custom scan area, specify the scan area manually. Refer to the Scan Guide for details on manual scan area specification. „ Trouble scanning with Multi-Scan or Multi-Crop function Cause The original is positioned outside the supported area. Error - Canon PIXMA MP500 | MP500 User's Guide - Page 131
is not supported by the application software. Rescan the image using an application software, such as ArcSoft PhotoStudio, and change the file name extension when saving the image. See the on-screen manual for each application software for the detailed procedures. „ Trouble scanning with MP - Canon PIXMA MP500 | MP500 User's Guide - Page 132
Document Size] to match the originals. those of the originals being scanned. For more information, refer to the Scan Guide. An Error Message Appears on the Screen „ Service Error 5100 is Displayed Cause Movement of the Print Head Holder is blocked. Action Clear the paper jam or foreign object - Canon PIXMA MP500 | MP500 User's Guide - Page 133
described in the Easy Setup Instructions and reinstall the MP Drivers. „ When an Error is Displayed Regarding Automatic Duplex Printing Cause The correct media size is not selected in the printer driver. Action Check the page size setting from within your application software to ensure that it - Canon PIXMA MP500 | MP500 User's Guide - Page 134
menu on the [Print] dialog box. If [MP500] does not appear on the [Printer] pop-up menu, add the machine following the procedures described in the Printer Setup Utility Help in the Mac Help. „ Error No.: 1700 is Displayed Cause The waste ink absorber is almost full. Action Ink used for cleaning - Canon PIXMA MP500 | MP500 User's Guide - Page 135
See "Auto head align has failed." on page 107. „ For Windows Users Cause The [Instructions] is not displayed on the printer driver screen. Scan Guide is not displayed. Action The [Instructions] on the printer driver screen is not displayed if the onscreen manuals (instruction manuals) are not - Canon PIXMA MP500 | MP500 User's Guide - Page 136
of whether the warranty has expired. Before contacting the Canon Customer Care Center, confirm the following: z Product name: PIXMA MP500 z Serial number: written on label inside machine z Details of the problem z What you tried to solve the problem, and what happened Note If the machine emits - Canon PIXMA MP500 | MP500 User's Guide - Page 137
x 195.2 mm / 3.7 x 7.8 inches 47.2 x 78.0 mm / 1.86 x 3.07 inches Note When Printing on Photo Paper Pro PR-101, Glossy Photo Paper GP-401, Glossy Photo Paper "Everyday Use" GP-501, Photo Paper Plus Glossy PP-101, Photo Paper Plus Double Sided PP-101D, Photo Paper Plus Semi-gloss SG-101 and Matte - Canon PIXMA MP500 | MP500 User's Guide - Page 138
x 271.4 mm / 8.0 x 10.7 inches 203.2 x 347.6 mm / 8.0 x 13.7 inches Note When Printing on Photo Paper Pro PR-101, Glossy Photo Paper GP-401, Glossy Photo Paper "Everyday Use" GP-501, Photo Paper Plus Glossy PP-101, Photo Paper Plus Double Sided PP-101D, Photo Paper Plus Semi-gloss SG-101 and Matte - Canon PIXMA MP500 | MP500 User's Guide - Page 139
the on-screen manuals along with the MP driver and application softwares. z Select "On-screen Manual" from "Custom Install" to install the on-screen manuals. If you have not installed or have deleted the on-screen manuals, use either method above to install them. z Browser: Windows HTML Help Viewer - Canon PIXMA MP500 | MP500 User's Guide - Page 140
Printer Driver Guide The Printer Driver Guide is deleted when the printer driver is deleted. z Deleting the User's Guide and the Photo Application Guide (1) Select [Applications] from the [Go] menu. (2) Double-click the [Canon Utilities] folder, and then the [IJ Manual] folder. (3) Drag the [MP500 - Canon PIXMA MP500 | MP500 User's Guide - Page 141
* x 2400 dpi. max. * Ink droplets can be placed with a pitch of 1/9600 inch at minimum. Print speed * *Based on Canon standard pattern. Print speed may vary depending on system configuration, software, document complexity, print mode and page coverage. Print width Black printing (text pattern) Max - Canon PIXMA MP500 | MP500 User's Guide - Page 142
. No. of copies Copy Specifications Black & white: mode approx. 29 cpm Color: mode approx. 19 cpm Maximum 99 copies Density adjustment 9 levels Zoom 25% to 400% Camera Direct Print (Canon Bubble Jet Direct) Compatible paper Card #1 (Photo Paper Pro 4" x 6"/101.6 x 152.4 mm - Canon PIXMA MP500 | MP500 User's Guide - Page 143
"VIVID+NR"*, "Face"* * If using a Canon PictBridge-compatible camera, you can select it. Default (Off: No printing), Date, File No., Both, Off Compatibility Scan Specifications TWAIN / WIA (Windows XP) Effective scanning width 216 mm / 8.5 inches Scanning resolution 1200 dpi x 2400 dpi optical - Canon PIXMA MP500 | MP500 User's Guide - Page 144
following functions are not supported: - Manual Duplex Printing - Photo Optimizer PRO - Poster Printing - Fit-to-Page Printing - Booklet Printing - Reverse Order Printing (supported with Mac OS X v.10.3.x) Additional Systems Requirements for On-screen Manuals z Browser: Windows HTML Help Viewer - Canon PIXMA MP500 | MP500 User's Guide - Page 145
Users in the U.S.A. FCC Notice PIXMA MP500 not installed and used in accordance with the instructions, may cause harmful interference to radio communications. guide. If such changes or modifications should be made, you could be required to stop operation of the equipment. Canon U.S.A. Inc. One Canon - Canon PIXMA MP500 | MP500 User's Guide - Page 146
current fluctuations, improper use, failure to follow operating or maintenance instructions in, or environmental conditions prescribed in, Canon USA's user's manual or other documentation, or services performed by someone other than a Canon USA repair facility or ASF. Without limiting the foregoing - Canon PIXMA MP500 | MP500 User's Guide - Page 147
WHOM IT WAS PURCHASED AS A GIFT, AND STATES YOUR EXCLUSIVE REMEDY. Canon USA offers a range of customer technical support* options: z Interactive troubleshooting, e-mail technical support, the latest driver downloads and answers to frequently asked questions (www.canontechsupport.com) z Toll-free - Canon PIXMA MP500 | MP500 User's Guide - Page 148
also have other rights, which vary from state to state. * Support program specifics are subject to change without notice. ** InstantExchange warranty service is subject to the availability of refurbished or new replacement units. Canon U.S.A., Inc. One Canon Plaza Lake Success, NY 11042 USA ©2005 - Canon PIXMA MP500 | MP500 User's Guide - Page 149
du Règlement sur le matériel brouilleur du Canada. Customer Technical Supports Canon Canada Inc., offers a full range of customer technical support* options: z For interactive troubleshooting, e-mail technical support, the latest driver downloads and answers to frequently asked questions (www - Canon PIXMA MP500 | MP500 User's Guide - Page 150
B Back button 17 Before Printing 13 Black button 18 C Card Slot Guide 13 D Device settings 83 Direct Print Port 14 Document Cover 13 Duplexing Transport Unit 15 F Feed Switch button 17 I Ink supported by this machine 48 MEMORY CARD button 17 Menu button 17 N Nozzle Check Pattern examining 96 printing - Canon PIXMA MP500 | MP500 User's Guide - Page 151
71 PGI-5BK Black 88 Photo Index Sheet button 17 Platen Glass 14 Power Connector 15 Power save setting 87 Print Head adjusting the print head manually 108 aligning print head automatically 99 cleaning 97 deep cleaning 98 Print Head Holder 15 Print Head Lock Lever 15 Printing Area 135 Printing from - Canon PIXMA MP500 | MP500 User's Guide - Page 152
150 Chapter 13 - Canon PIXMA MP500 | MP500 User's Guide - Page 153
Chapter 13 151 - Canon PIXMA MP500 | MP500 User's Guide - Page 154
are duplicated in all such forms and that any documentation, advertising materials, and other materials related to such distribution and use acknowledge that the software was developed at Cygnus Support, Inc. Cygnus Support, Inc. may not be used to endorse or promote products derived from this - Canon PIXMA MP500 | MP500 User's Guide - Page 155
following descriptions and order numbers. Description Order # Ink Tanks PGI-5 Black CLI-8 Black CLI-8 Cyan CLI-8 Magenta CLI-8 Yellow 0628B002 0620B002 0621B002 0622B002 0623B002 Canon Specialty Papers Photo Paper Plus Glossy (4" x 6" / 20 sheets) Photo Paper Plus Glossy (4" x 6" / 50 sheets - Canon PIXMA MP500 | MP500 User's Guide - Page 156
QT7-0096-V07 XXXXXXXX ©CANON INC.2005 PRINTED IN THAILAND
-
 1
1 -
 2
2 -
 3
3 -
 4
4 -
 5
5 -
 6
6 -
 7
7 -
8
-
9
-
10
-
11
-
12
-
13
-
14
-
15
-
16
-
17
-
18
-
19
-
20
-
21
-
22
-
23
-
24
-
25
-
26
-
27
-
28
-
29
-
30
-
31
-
32
-
33
-
34
-
35
-
36
-
37
-
38
-
39
-
40
-
41
-
42
-
43
-
44
-
45
-
46
-
47
-
48
-
49
-
50
-
51
-
52
-
53
-
54
-
55
-
56
-
57
-
58
-
59
-
60
-
61
-
62
-
63
-
64
-
65
-
66
-
67
-
68
-
69
-
70
-
71
-
72
-
73
-
74
-
75
-
76
-
77
-
78
-
79
-
80
-
81
-
82
-
83
-
84
-
85
-
86
-
87
-
88
-
89
-
90
-
91
-
92
-
93
-
94
-
95
-
96
-
97
-
98
-
99
-
100
-
101
-
102
-
103
-
104
-
105
-
106
-
107
-
108
-
109
-
110
-
111
-
112
-
113
-
114
-
115
-
116
-
117
-
118
-
119
-
120
-
121
-
122
-
123
-
124
-
125
-
126
-
127
-
128
-
129
-
130
-
131
-
132
-
133
-
134
-
135
-
136
-
137
-
138
-
139
-
140
-
141
-
142
-
143
-
144
-
145
-
146
-
147
-
148
-
149
-
150
-
151
-
152
-
153
-
154
-
155
-
156
 |
 |
QT7-0096-V07
ENG
User’s Guide