Canon PIXMA MP800 Service Manual
Canon PIXMA MP800 Manual
 |
View all Canon PIXMA MP800 manuals
Add to My Manuals
Save this manual to your list of manuals |
Canon PIXMA MP800 manual content summary:
- Canon PIXMA MP800 | Service Manual - Page 1
PIXMA MP800 SERVICE MANUAL Canon Copyright 2005, Canon U.S.A. This technical publication is the proprietary and confidential information of Canon U.S.A. which shall be retained for reference purposes by Authorized Service Facilities of Canon U.S.A. Its unauthorized use is prohibited. - Canon PIXMA MP800 | Service Manual - Page 2
trademarks or trademarks of the respective holders. Copyright All rights reserved. No parts of this manual may be reproduced in any form or by any means or translated into another language without the written permission of Canon Inc., except in the case of internal business use. Copyright © 2005 by - Canon PIXMA MP800 | Service Manual - Page 3
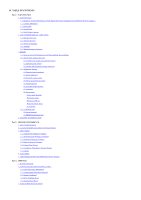
OUTLINE This manual consists of the following three parts to provide information necessary to service the PIXMA MP800: Part 1: Maintenance Information on maintenance and troubleshooting of the PIXMA MP800 Part 2: Technical Reference New technology and technical information such as FAQ's (Frequently - Canon PIXMA MP800 | Service Manual - Page 4
/ Photo Direct / Wireless Printing 3-7. Copying 4. SCAN MODE 5. FAQ (Problems Specific to the MP800 and Corrective Actions) Part 3: APPENDIX 1. BLOCK DIAGRAM 2. CONNECTOR LOCATION AND PIN LAYOUT 2-1. Logic Board Ass'y (Main Board) 2-2. Carriage Board (Print Head Connector) 2-3. Memory Card Board - Canon PIXMA MP800 | Service Manual - Page 5
Part 1 MAINTENANCE - Canon PIXMA MP800 | Service Manual - Page 6
loosened only at replacement of the paper feed motor unit. *1: Only for CD / DVD printing supported regions. (2) Periodic maintenance No periodic maintenance is necessary. (3) Periodic replacement parts There are no parts in this machine that require periodic replacement by a service engineer. 1-1 - Canon PIXMA MP800 | Service Manual - Page 7
by a service engineer. 1-2. Customer Maintenance Adjustment Print head alignment Print head cleaning Print head deep cleaning Ink tank replacement Paper feed roller cleaning CD / DVD print position adjustment*1 Bottom plate cleaning Scanning area cleaning ASF sub- roller cleaning Timing Purpose - Canon PIXMA MP800 | Service Manual - Page 8
Windows XP driver, using Windows XP Photo Printing Wizard. The print yield in the table above is an average value measured in continuous printing, using the ink tank immediately after it is unsealed, until the ink is out. Ink yield may vary depending on texts and photos printed, application software - Canon PIXMA MP800 | Service Manual - Page 9
To the table of contents To the top 1-4 - Canon PIXMA MP800 | Service Manual - Page 10
] Paper jam. Paper jam in the rear guide. [1300] [1303] Cassette. Set the paper ink tanks light red. Print head is not installed. Install the print head. Install the print head properly. (U051) Print head temperature [1403] sensor error Faulty EEPROM data of [1405] the print head Error code - Canon PIXMA MP800 | Service Manual - Page 11
exit from the error by the Stop/Reset button, the automatic print head alignment will not be re-done. The remaining ink amount unknown. [1683] Ink tank not recognized. [1684] Ink tank not recognized. [1410 to 1419] Scanning unit (printer cover) open. [1200] (Applicable ink tank icon) An - Canon PIXMA MP800 | Service Manual - Page 12
] The internal temperature is not proper. [5B00] The waste ink absorber is full. [5200] The print head temperature exceeded the specified value. - Logic board ass'y - Ink absorber kit - Print head - Logic board ass'y EEPROM error [6800] A problem occurred in writing to the EEPROM. Carriage lift - Canon PIXMA MP800 | Service Manual - Page 13
. [6100] The check sum value is incorrect in the ROM - Logic board ass'y check at hard-power-on. [6300] The RAM error occurred in the RAM check at - Logic board ass'y hard-power-on. 2-3. Other Error Messages Message on the LCD Cause Solution Printing is unavailable. Data received The received - Canon PIXMA MP800 | Service Manual - Page 14
limit when the scanning unit (printer cover) is opened, the carriage does not move to the ink tank replacement position. Protection of excess rise If the print head temperature does not fall, the error If the print head temperature exceeds the specified of the print head code "5200" is displayed - Canon PIXMA MP800 | Service Manual - Page 15
the - LCD, or - logic board ass'y. Paper feed problems (multi-feeding, skewed feeding, no feeding) - Examine the inside to confirm that no parts are damaged, and the rollers are clean. - Remove foreign material. - Adjust the paper guide properly. - Confirm the connection of each harness and the - Canon PIXMA MP800 | Service Manual - Page 16
the print head. printouts even after print head cleaning. - Replace the Line(s) not included in the print data appears on printouts. - ink tank, - print head*1, - purge unit, or - logic board ass'y. Paper gets smeared. A part of a line is missing on printouts. Color hue is incorrect. Printing - Canon PIXMA MP800 | Service Manual - Page 17
board ass'y. - Replace the - scanner unit, - logic board ass'y, or - sponge sheet. *1: Replace the print head only after the print head deep cleaning is performed 2 times, and when the problem persists. To the table of contents To the top 1-12 - Canon PIXMA MP800 | Service Manual - Page 18
See 3.3. Adjustment / Settings, (8) Service mode.] 2. Check the ink system function. [See 3.3. Adjustment / Settings, (8) Service mode.] - Service test print (Confirm CD / DVD and automatic print head alignment sensor correction, and ink system function.) 3. Perform the print head alignment in the - Canon PIXMA MP800 | Service Manual - Page 19
[See 3.3. Adjustment / Settings, (2) Grease application.] After replacement: - Service test print 1. Perform the print head alignment in the user mode. Print head QY6-0061 After replacement: - Service test print 1. Perform the print head alignment in the user mode. *1: General notes: - Make - Canon PIXMA MP800 | Service Manual - Page 20
3-2. Special Notes on Repair Servicing (1) External cover, scanner unit, and FAU removal (I) Remove the cassette, and front door (paper output tray) with door damper. - Slide the cassette to remove it - Canon PIXMA MP800 | Service Manual - Page 21
groove of the side cover. (V) Remove the side cover L and R (3 claws each). Side cover R: - Be cautious of the FAU cable, IrDA board, and card LED guide. - For the shape of the boss and recess, see the photos below. - The bosses of the bottom case will fit into the square holes of - Canon PIXMA MP800 | Service Manual - Page 22
Side cover L: - Be cautious not to contact the Open button. Back of the side covers: - The boss and recess are shown in the red circles in the photos below (side cover L on the left, side cover R on the right). 1-17 - Canon PIXMA MP800 | Service Manual - Page 23
from the logic board. - The photo on the left shows the cables connected, and the photo on the right shows the cables removed. [See Part 3, 2. CONNECTOR LOCATION AND PIN LAYOUT.] Note: A square core is taped to the CN602 connector. (VII) Remove the scanner stop arm. - While holding the scanner - Canon PIXMA MP800 | Service Manual - Page 24
- When assembling the scanner stop arm, make sure the black sticker side is up, as shown in the photos below photo on the right). (IX) Remove the paper support. - Disengage one side of the paper support from the main case, then the other side of the paper support. - The photo on the right shows the - Canon PIXMA MP800 | Service Manual - Page 25
(2) Operation panel removal (I) Remove the panel cover L and R. - Insert a flat-blade screwdriver into a space between the panel cover and the scanner unit, and slowly push the cover up to remove it. - For claws, see the photos below (5 claws each). (II) Remove the panel board. - Remove the 4 screws - Canon PIXMA MP800 | Service Manual - Page 26
. Improper wiring or connection may cause breakage of a line, leading to ignition or emission of smoke. For wiring details, refer to the Parts Catalog, and [Part 3, 2. CONNECTOR LOCATION AND PIN LAYOUT]. Rear view with the main case removed: (Logic board side on the left, AC adapter / PF motor - Canon PIXMA MP800 | Service Manual - Page 27
Each cable in place of the side of the bottom case unit: (Be cautious of the points in the red circles.) With the IrDA board, memory card board, and bottom case unit removed: (II) AC adapter and paper feed motor side wiring With the bottom case unit and AC adapter installed: (Be cautious of the - Canon PIXMA MP800 | Service Manual - Page 28
With the bottom case unit and AC adapter removed: To the table of contents 1-23 To the top - Canon PIXMA MP800 | Service Manual - Page 29
stretched (in the direction indicated by the blue arrow in the figure below). 2) After replacement, be sure to perform the service test print, and confirm that no strange noise or faulty print operation (due to dislocation of the belt or gear, or out-of-phase motor, etc.) occurs Note: The red screws - Canon PIXMA MP800 | Service Manual - Page 30
3) PR shaft / LF roller bushing To the table of contents To the top 1-25 - Canon PIXMA MP800 | Service Manual - Page 31
Service test print, or (2) EEPROM information print. How to set the waste ink amount: See 3-3. Adjustment / Settings, (8) Service mode, "Waste ink amount setting." (4) White sponge sheet attachment Position one of the corners of the white sponge sheet at the scanning over the mold part of the - Canon PIXMA MP800 | Service Manual - Page 32
Cleaning Deep cleaning Auto head align (automatic print head alignment) Manual head align (manual print head alignment) Head alignment print Roller cleaning Bottom plate cleaning Purpose To confirm the print head nozzles eject ink properly. Do the cleaning if necessary. To unclog the print head - Canon PIXMA MP800 | Service Manual - Page 33
numbers (COPY) Orange at odd numbers (Alarm) Service test print EEPROM information print EEPROM initialization Waste ink counter resetting Destination settings Print head deep cleaning LF correction CD / DVD check pattern print CD / DVD print position correction (horizontal: X direction) CD / DVD - Canon PIXMA MP800 | Service Manual - Page 34
different from the destination settings). Confirm the model name and destination in service test print or EEPROM information print. [See 3-4. Verification Items, (1) Service test print, or (2) EEPROM information print.] Confirm the operation after replacement of - Canon PIXMA MP800 | Service Manual - Page 35
4) Open the scanning unit (printer cover) to display the color pattern. Only the ON/OFF button is enabled. 5) Press the ON/OFF button to return to the service mode menu selection. Set the waste ink amount data to a replaced new EEPROM after the logic board is - Canon PIXMA MP800 | Service Manual - Page 36
4 times Paper type High Resolution Paper Plain paper Paper name Canon HR-101 Canon PB PAPER GF-500, Office Planner HP BrightWhite, OFFICE 80 Canon Extra, STEINBEIS Note: - The High Resolution Paper is the most desirable for LF correction printing (Canon HR-101 is used at the production site), but - Canon PIXMA MP800 | Service Manual - Page 37
select the Pattern No. in which streaks or lines (white or black) are the least noticeable, press the Stop/Reset button the same number the ON/OFF button is pressed, the machine returns to the service mode menu selection. 4) The LF correction value is written to the EEPROM, and the machine returns - Canon PIXMA MP800 | Service Manual - Page 38
To the table of contents To the top 1-33 - Canon PIXMA MP800 | Service Manual - Page 39
correction value AB (K = OK Y = ...): Ink system check result On the service test print (sample below), confirm the following items: - printing due to carriage movement (standard mode): There shall be no remarkable unevenness. - Check 8, CD / DVD sensor and automatic print head - Canon PIXMA MP800 | Service Manual - Page 40
(2) EEPROM information print Print sample: 1-35 - Canon PIXMA MP800 | Service Manual - Page 41
6. Operator call/service call error record 7. Last printing time 8. Purging count (manual/deep cleaning/timer/dot count/ink tank replacement) 9. Cleaning time (BK/CL) 10. Print head replacement count 11. Ink tank replacement count (PBK/BK/Y/M/C) 12. Ink status (PBK/BK/Y/M/C) 13. Power-on count (soft - Canon PIXMA MP800 | Service Manual - Page 42
(BK/CL) 55. Inside temperature 56. Line inspection information HDEEPROM 57. Version 58. Serial number 59. Lot number 60. Print head ID 61. Ink ejection level (PBK, BK, Y, M, M2, C, C2) 62. The last 2 errors To the table of contents To the top 1-37 - Canon PIXMA MP800 | Service Manual - Page 43
lock switch to lock the scanner. Caution: (1) If the print head is removed from the machine and left alone by itself, ink (the pigment-based black ink in particular) is likely to dry. For this reason, keep the print head installed in the machine even during transportation. (2) Securely lock the - Canon PIXMA MP800 | Service Manual - Page 44
Part 2 TECHNICAL REFERENCE - Canon PIXMA MP800 | Service Manual - Page 45
combination of the new pigment-based black ink with higher resistance against bleeding or marker pens and the new dyebased inks with higher photo quality and weather resistance makes the new ink system strong in both photo and text printing. (2) Super-photo quality printing By the FINE technologies - Canon PIXMA MP800 | Service Manual - Page 46
(optional) The Bluetooth Unit BU-20 is available as an option. Adopting a compatible USB adapter, the BU-20, when attached to the machine, enables wireless printing from a Bluetoothcompliant computer or mobile phone. To the table of contents To the top 2-2 - Canon PIXMA MP800 | Service Manual - Page 47
printing problems due to bubbles, dust, or ink clogging, print head cleaning is performed before the start of printing (when the cleaning flag is on), except in the following cases: - Cleaning on arrival: Performed when the scanning unit (printer cover) is closed. - Manual cleaning / deep cleaning - Canon PIXMA MP800 | Service Manual - Page 48
the same time) 0.20 (Black) 0.65 (Color) Deep cleaning Via the MP driver (Selectable from Black, (Black/Color/All at the Color, or All at the same time) same time) 1.95 (Black) 1.06 (Color) If the print head has not been capped before power-on (All in sequence) 0.38 (Black) 1.06 (Color) 80 - Canon PIXMA MP800 | Service Manual - Page 49
3. PRINT MODE 3-1. Normal Color Printing via Computer 3-2. Normal Grayscale Printing via Computer 3-3. Borderless Printing via Computer 2-5 - Canon PIXMA MP800 | Service Manual - Page 50
via Computer 3-5. Camera Direct Printing 3-6. Card Direct / Photo Direct / Wireless Printing Print quality in wireless printing is fixed to Standard. (Selectable paper types in wireless printing: Plain paper, Photo Paper Pro, Photo Paper Plus Glossy, Matte Photo Paper, and Glossy Photo Paper - Canon PIXMA MP800 | Service Manual - Page 51
To the table of contents To the top 2-7 - Canon PIXMA MP800 | Service Manual - Page 52
4. SCAN MODE To the table of contents 2-8 To the top - Canon PIXMA MP800 | Service Manual - Page 53
In borderless 1. Perform Bottom back side of borderless printing of printing, printing is plate cleaning paper (lines or small sized paper performed to the size (from the MP streaks parallel to (such as 4 x 6), when slightly larger than driver or via the the paper feed a larger sized - Canon PIXMA MP800 | Service Manual - Page 54
perpendicular to the paper feed direction) 5B Print results may accumulate, smearing paper. duplex printing, and manually print each side of paper. Cleaning by user: 1. Perform Bottom plate cleaning (from the MP driver or via the operation panel) up to 3 times*1. smeared. - Even after Bottom - Canon PIXMA MP800 | Service Manual - Page 55
environment Due to decrease of the friction coefficient and inaccurate print head alignment. - Perform Manual print head alignment. - Perform Bottom plate cleaning. - Uneven printing at the bottom of the paper. Print smeared 10 B Print results - When the inner cover is not completely closed - Canon PIXMA MP800 | Service Manual - Page 56
(white area along the edges of the scanned image), if any. *1: Change the paper in each Bottom plate cleaning. The cleaning can end when paper does not get any soiling. *2: Locations to clean in servicing when soiling on paper in automatic duplex printing persists: *3: How to prepare and set the - Canon PIXMA MP800 | Service Manual - Page 57
low in practical usage. C: The symptom is unlikely to be recognized by the user, and no practical issues are assumed. To the table of contents To the top 2-13 - Canon PIXMA MP800 | Service Manual - Page 58
Part 3 APPENDIX - Canon PIXMA MP800 | Service Manual - Page 59
ink amount detection Paper type detection Print head alignment Power supply voltage, frequency AC 100 to 120V, 50/60Hz AC 220 to 240V, 50/60Hz Power consumption Standby Approx. 20W Approx. 2.0W Approx. 20W Approx. 2.0W Power-off Approx. 0.8W Approx. 0.8W Machine: With the paper support - Canon PIXMA MP800 | Service Manual - Page 60
(BK / Y) Pigment-based black Dye-based black, cyan, magenta, yellow PGI-5BK (pigment-based), CLI-8BK / C / M / Y (dye-based) Print head, approx. 60g As a service part (not including ink tanks) QY6-0061-000 Model name and destination PIXUS MP800 PIXMA MP800 Japan Other than - Canon PIXMA MP800 | Service Manual - Page 61
adjustment function Image processing function Image retrieval function DPOF Card Direct Printing Print layout Information print Throughput Camera Direct Printing Supported digital camera Print layout Information print Throughput Before changing the settings, the memory card must be removed - Canon PIXMA MP800 | Service Manual - Page 62
BU-20 external dimensions Microsoft "Support for Bluetooth Wireless Devices" or Toshiba Bluetooth Stack for Windows Ver. 3.00.10 or later has to be installed - Mac OS X 10.3.3 or later 18.5 (W) x 47.5 (D) x 8.7 (H) mm with a cap BU-20 weight Approx. 7g BU-20 power supply 4.4 to 5.25V voltage BU
-
 1
1 -
 2
2 -
 3
3 -
 4
4 -
 5
5 -
 6
6 -
 7
7 -
8
-
9
-
10
-
11
-
12
-
13
-
14
-
15
-
16
-
17
-
18
-
19
-
20
-
21
-
22
-
23
-
24
-
25
-
26
-
27
-
28
-
29
-
30
-
31
-
32
-
33
-
34
-
35
-
36
-
37
-
38
-
39
-
40
-
41
-
42
-
43
-
44
-
45
-
46
-
47
-
48
-
49
-
50
-
51
-
52
-
53
-
54
-
55
-
56
-
57
-
58
-
59
-
60
-
61
-
62
 |
 |

PIXMA MP800
SERVICE
MANUAL
Canon
Copyright 2005, Canon U.S.A. This technical publication is the proprietary and confidential information of Canon U.S.A. which
shall be retained for reference purposes by Authorized Service Facilities of Canon U.S.A. Its unauthorized use is prohibited.