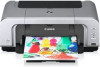
Canon PIXMA iP4200 iP4200 Quick Start Guide
Canon PIXMA iP4200 Manual
 |
View all Canon PIXMA iP4200 manuals
Add to My Manuals
Save this manual to your list of manuals |
Canon PIXMA iP4200 manual content summary:
- Canon PIXMA iP4200 | iP4200 Quick Start Guide - Page 1
Photo Printer Series Quick Start Guide - Canon PIXMA iP4200 | iP4200 Quick Start Guide - Page 2
(located on the top of the printer): Printer Driver CD-ROM number (located on the CD-ROM): Purchase Date: Customer Technical Support Sequence* 1. Internet - www.canonhelp.com For quick and comprehensive self-help in an intuitively guided interactive troubleshooting environment, the place to start is - Canon PIXMA iP4200 | iP4200 Quick Start Guide - Page 3
Photo Printer Quick Start Guide - Canon PIXMA iP4200 | iP4200 Quick Start Guide - Page 4
part, without the prior written consent of Canon U.S.A., Inc. © 2005 Canon U.S.A., Inc. Disclaimer Canon U.S.A., Inc. has reviewed this manual thoroughly in order that it will be an easy-to-use guide to your Canon PIXMA iP4200 Photo Printer. All statements, technical information and recommendations - Canon PIXMA iP4200 | iP4200 Quick Start Guide - Page 5
the Bundled Software 36 Printing Maintenance Replacing an Ink Tank 37 When Printing Becomes Faint or Colors are Incorrect 46 Printing the Nozzle Check Pattern 47 Print Head Cleaning 52 Print Head Deep Cleaning 56 Aligning the Print Head 60 Troubleshooting Cannot Install the Printer Driver 65 - Canon PIXMA iP4200 | iP4200 Quick Start Guide - Page 6
. For more information, view the iP4200 User's Guide and Printer Driver Guide installed on your computer, or use the online help within your printer driver interface: While in the printer's properties window, press the F1 key, or click in the upper right corner. Then click the feature you want to - Canon PIXMA iP4200 | iP4200 Quick Start Guide - Page 7
the POWER button. When the POWER lamp stops blinking, the printer is turned off. Basic Printing About the Power Plug When removing the power plug after turing off the printer, be sure to check that the POWER lamp is not lit. If the power plug is removed from the wall outlet with the POWER - Canon PIXMA iP4200 | iP4200 Quick Start Guide - Page 8
the printer to jam or malfunction. • Folded, curled or wrinkled paper • Damp paper • Excessively thin paper (less than 64 gsm or 17 lb) • Excessively thick paper* (more than 105 gsm or 28 lb) * non-Canon branded paper • Picture postcards • Postcards affixed with photos or stickers • Envelopes with - Canon PIXMA iP4200 | iP4200 Quick Start Guide - Page 9
2.13" x 3.39"/ 54.0 x 86.0 mm size paper, and Photo Stickers are not loadable in the Cassette. • Changing the paper source to feed always fed from the Cassette whenever you print. For information on the printer driver settings, refer to the Printer Driver Guide. You can switch between paper loaded - Canon PIXMA iP4200 | iP4200 Quick Start Guide - Page 10
automatically switches to the other one. This is useful for printing onto a large volume of paper. To use this feature, you need to configure the printer driver beforehand. For information on the printer driver settings, refer to the Printer Driver Guide. If the Auto Sheet Feeder runs out of paper - Canon PIXMA iP4200 | iP4200 Quick Start Guide - Page 11
For detailed information on the specialty media Canon provides for use with its various printers, refer to "Using Specialty Media" on page 18. z See "Printing Media" in the User's Guide for detailed instructions on how to load specialty media into the printer. 1 Flatten the four corners of the paper - Canon PIXMA iP4200 | iP4200 Quick Start Guide - Page 12
of plain paper (64 gsm or 17 lb, 13 mm or 0.52 inches in height) in the Auto Sheet Feeder. However, do not stack more than 50 sheets in the Paper Output Tray. z Do not touch the printed surfaces until the ink dries. For specific drying times, refer to the instructions packaged with your media - Canon PIXMA iP4200 | iP4200 Quick Start Guide - Page 13
lamp lights. A maximum of 10 envelopes can be loaded at once. (4) Select Envelope in Media Type, and then select European DL Env. or US Comm. Env. #10 in Page Size. For a detailed description of the printer driver settings, refer to "Printing with Windows" on page 20, "Printing with Macintosh - Canon PIXMA iP4200 | iP4200 Quick Start Guide - Page 14
of the printer driver settings, refer to "Printing with Windows" on page 20, or "Printing with Macintosh" on page 23. Always load paper in portrait orientation. Loading paper in landscape orientation can cause the paper to be jammed. Portrait Landscape We recommend using genuine Canon photo media - Canon PIXMA iP4200 | iP4200 Quick Start Guide - Page 15
.0 mm size paper, and Photo Stickers are not loadable in the Cassette. z For detailed information on the specialty media Canon provides for use with its various printers, refer to "Using Specialty Media" on page 18. z See "Printing Media" in the User's Guide for detailed instructions on how to load - Canon PIXMA iP4200 | iP4200 Quick Start Guide - Page 16
Basic Printing 3 Adjust the size of the Cassette. When loading A5- or larger sized paper (nonstandard-size paper: 203 mm / 8 inches 8 inches in length), do not extend the Cassette. Legal-sized paper and 2.13" x 3.39"/ 54.0 x 86.0 mm size paper, and Photo Stickers are not loadable in the Cassette. 12 - Canon PIXMA iP4200 | iP4200 Quick Start Guide - Page 17
Limit Mark. (1) Load the paper into the Cassette with the print side facing DOWN. (2) Align the paper stack against the right side of the Cassette. (3) Slide the paper guides to fit the loaded paper stack. z You can use general copy paper or Canon's Super White Paper. z You can load up to 150 sheets - Canon PIXMA iP4200 | iP4200 Quick Start Guide - Page 18
Paper Feed Switch so that the Cassette lamp lights. z You can also select the paper source with the printer driver. For details, refer to the Printer Driver Guide. z Do not touch the printed surfaces until the ink dries. For specific drying times, refer to the instructions packaged with your media. - Canon PIXMA iP4200 | iP4200 Quick Start Guide - Page 19
Feed Switch so that the Cassette lamp lights. (4) Select Envelope in Media Type, and then select European DL Env. or US Comm. Env. #10 in Page Size. For a detailed description of the printer driver settings, refer to "Printing with Windows" on page 20, "Printing with Macintosh" on page 23. 15 - Canon PIXMA iP4200 | iP4200 Quick Start Guide - Page 20
in the Cassette z Do not leave photo paper, such as Photo Paper Pro, in the Cassette for a long time. This may cause paper discoloration due to natural aging. z Cutting plain paper to 4" x 6" / 101.6 mm x 152.4 mm or 5" x 7" / 127.0 x 177.8 mm size for a trial printing can cause paper jams. (1) Load - Canon PIXMA iP4200 | iP4200 Quick Start Guide - Page 21
of the printer driver settings, refer to "Printing with Windows" on page 20, or "Printing with Macintosh" on page 23. Always load paper in portrait orientation. Loading paper in landscape orientation can cause the paper to be jammed. Portrait Landscape We recommend using genuine Canon photo media - Canon PIXMA iP4200 | iP4200 Quick Start Guide - Page 22
that you use genuine Canon media to ensure optimal print quality. „ Photo Quality Media • High Resolution Paper • Glossy Photo Paper • Matte Photo Paper • Photo Paper Plus Double Sided • Photo Paper Plus Glossy • Photo Paper Plus Semi-gloss • Photo Paper Pro • Photo Stickers „ Media Suited for - Canon PIXMA iP4200 | iP4200 Quick Start Guide - Page 23
Letter: up to 10 sheets 4" x 6": up to 20 sheets Not loadable*3 Transparencies T-Shirt Transfers Up to 30 sheets 1 sheet Up to 30 sheets 1 sheet Basic Printing Printer Driver Setting for Media Type High Resolution Paper Plain Paper Glossy Photo Paper Matte Photo Paper Photo Paper Plus Double - Canon PIXMA iP4200 | iP4200 Quick Start Guide - Page 24
and Cassette respectively. Select Plain Paper from Media Type in the printer driver. z For a detailed description of printing media types, refer to the User's Guide. Printing with Windows z Menu and command names may differ between software applications, and more steps may be required. For details - Canon PIXMA iP4200 | iP4200 Quick Start Guide - Page 25
properties dialog box. (1) Select Print from the application software's File menu. The Print dialog box opens. Basic Printing (2) Ensure that your printer is selected. (3) Click Preferences or Properties. 6 Specify the required settings. (1) Click Media Type to select the type of media loaded - Canon PIXMA iP4200 | iP4200 Quick Start Guide - Page 26
Quality dialog box. z For details about other printer driver functions, click Help or Instructions to view the Help or Printer Driver Guide. Instructions is only displayed when the On-screen Manual is installed. z Selecting the Preview before printing check box displays a preview screen that allows - Canon PIXMA iP4200 | iP4200 Quick Start Guide - Page 27
, refer to the documentation for each software application you use. z The steps described in this section are for printing in Mac® OS X v.10.3.x (hereafter called Macintosh®). 1 Turn on the printer. See "Turning on the Printer" on page 2. 2 Load the paper on the printer. See "Loading Paper" on page - Canon PIXMA iP4200 | iP4200 Quick Start Guide - Page 28
Page Setup dialog box opens. (2) Confirm that iP4200 is selected in Format for. (3) Select the desired paper size from Paper Size. (4) Click OK. 6 Specify the required settings. (1) Select Print from the application software's File menu. The Print dialog box opens. (2) Select Quality & Media from - Canon PIXMA iP4200 | iP4200 Quick Start Guide - Page 29
Select the type of the document from Print Type. z For details about other printer driver functions, click to view the Printer Driver Guide. If the On-screen Manual is not installed, the Printer Driver Guide is not displayed even if is clicked. z Clicking the Preview button displays a preview screen - Canon PIXMA iP4200 | iP4200 Quick Start Guide - Page 30
on the printer. 1 Press the RESUME/CANCEL button while printing. (1) Press the RESUME/CANCEL button. Printing is canceled and paper is fed out. You can also cancel a print job by clicking Cancel Printing on the Canon IJ Status Monitor. To display the Canon IJ Status Monitor, click Canon iP4200 on - Canon PIXMA iP4200 | iP4200 Quick Start Guide - Page 31
in your application program. The Print dialog box opens. 2 Select Edit Printer List from the Printer pop-up menu. The Printer List opens. 3 Double-click the printer name displayed in the Name list. The iP4200 dialog box opens. 4 Select the desired document, then click Delete icon. To temporality - Canon PIXMA iP4200 | iP4200 Quick Start Guide - Page 32
or mobile phone. z Canon Bubble Jet Direct allows you to print photos from a Canon Bubble Jet Direct compatible (PictBridge incompatible) digital camera or digital video camcorder without a computer, by simply connecting the digital camera or digital camcorder to this printer. For details, refer to - Canon PIXMA iP4200 | iP4200 Quick Start Guide - Page 33
than PictBridge compliant devices or Canon Bubble Jet Direct compatible digital camera to the Direct Print Port of the printer. If you do so, electric shock, fire, or damage to the device could result. z When printing photos with the digital device connected to the printer, it is advisable to use - Canon PIXMA iP4200 | iP4200 Quick Start Guide - Page 34
, you may have to select a print mode compliant with PictBridge before connecting the device. You may also have to turn on the device or select Play mode manually after connecting the device to the printer. Perform necessary operations according to the instruction manual supplied with your device - Canon PIXMA iP4200 | iP4200 Quick Start Guide - Page 35
when the printer is correctly connected. A PictBridge-compliant device. A Canon Bubble Jet Direct compatible digital camera. „ Printing Photographs Directly from a PictBridge Compliant Device When operating the device, be sure to follow the instructions given in the instruction manual supplied with - Canon PIXMA iP4200 | iP4200 Quick Start Guide - Page 36
Paper size" setting 10 x 15 cm/4" x 6" (Default) 13 x 18 cm/5" x 7"*2 5.4 x 8.6 cm/Credit Card A4/8.5" x 11" (Letter)*3*4 "Paper type" setting Photo (Default) Photo Photo Photo Fast Photo Photo Photo Photo Photo Photo Fast Photo Paper loaded in printer Photo Paper Plus Glossy Photo Paper Plus Semi - Canon PIXMA iP4200 | iP4200 Quick Start Guide - Page 37
, ExifPrint is selected for this printer. If you use a Canon PictBridge-compatible device, you can select VIVID, NR, or VIVID+NR. (Note that these options cannot be selected for some models.) z When VIVID is selected, green and blue portions of photos are printed vividly. z When NR (Noise Reduction - Canon PIXMA iP4200 | iP4200 Quick Start Guide - Page 38
and printer, follow the instructions given in the instruction manual of the device. z Controls of the device cannot be used for the following functions: - Print quality setting - Printer maintenance z For the device operation method and troubleshooting, refer to your device manual. For print error - Canon PIXMA iP4200 | iP4200 Quick Start Guide - Page 39
Advanced Printing Accessing the Printer Driver (Windows) The printer properties dialog box can be opened from either within an application, or directly from the Windows Start menu. This manual refers to Windows XP SP2 operation. The operations may vary depending on the version of your Windows - Canon PIXMA iP4200 | iP4200 Quick Start Guide - Page 40
to the Windows documentation. For details on how to set each function, refer to the Help or Printer Driver Guide. Using the Bundled Software The Setup Software & User's Guide CD-ROM includes photo applications designed to edit the photographs taken by a digital camera and print them as photo-lab - Canon PIXMA iP4200 | iP4200 Quick Start Guide - Page 41
Printing Maintenance Printing Maintenance Replacing an Ink Tank Replace ink tank(s) if they are out of ink. When replacing them, check the model numbers and their installation positions. With this printer, the ink tanks must be installed in the order (from left to right) indicated below: z Black: - Canon PIXMA iP4200 | iP4200 Quick Start Guide - Page 42
to print. For details, refer to "Handling Error Messages" on page 77. Ink Level Indication on the PC Open the Canon IJ Status Monitor to check the ink level information. 1. Open the printer properties dialog box. See "Accessing the Printer Driver (Windows)" on page 35. 2. Click View Printer Status - Canon PIXMA iP4200 | iP4200 Quick Start Guide - Page 43
Maintenance Open the Canon IJ Printer Utility to check the ink level information. 1. Select Applications from the Go menu, and then double-click the Utilities folder. 2. Double-click the Printer Setup Utility icon. When using Mac OS X v.10.2, double-click the Print Center icon. 3. Select the - Canon PIXMA iP4200 | iP4200 Quick Start Guide - Page 44
the printer. * Printing does not resume if any of the ink tanks are removed. Be sure to press the RESUME/CANCEL button with the ink tanks installed. * Continuing to print in the out of ink state will cause the remaining ink level to be displayed incorrectly in the Canon IJ Status Monitor. z Click - Canon PIXMA iP4200 | iP4200 Quick Start Guide - Page 45
button with the ink tanks installed. * Continuing to print in the out of ink state will cause the remaining ink level to be displayed incorrectly in the Canon IJ Printer Utility. z Click Delete Job to cancel the current printing job. Click Stop Job to stop the current printing job. Click Stop All - Canon PIXMA iP4200 | iP4200 Quick Start Guide - Page 46
Maintenance „ Replacing Ink Tanks When an ink tank runs out of ink, replace it using the following steps. 1 Ensure that the printer is on, and then open the Top Cover. The Print Head Holder moves to the center. If the Top Cover is left open for more than 10 minutes, the Print Head Holder moves - Canon PIXMA iP4200 | iP4200 Quick Start Guide - Page 47
and stain your clothes and hands. z Do not touch the electrical contacts on the ink tank. Doing so can cause the printer to malfunction or become unable to print. z Do not squeeze the side of ink tanks as this may cause the ink to leak out and stain your clothes and hands. z Do not re-attach the - Canon PIXMA iP4200 | iP4200 Quick Start Guide - Page 48
the ink tank. Lamp lights red (1) Insert the ink tank into the Print Head. (2) Press on the mark on the ink tank until the ink tank snaps firmly into place. (3) Ensure that the ink tank lamp lights red. Ensure that all the ink tanks are installed in the order directed by the label. The printer - Canon PIXMA iP4200 | iP4200 Quick Start Guide - Page 49
the Top Cover and make sure that all the ink tanks are installed in the correct order directed on the label. z To maintain optimal print quality, use an ink tank within six months of its first use. z Once an ink tank has been used, do not remove it from the printer and leave it out in the open. This - Canon PIXMA iP4200 | iP4200 Quick Start Guide - Page 50
an Ink Tank" on page 37. If the ink tank lamp is unlit, press the mark on the ink tank to fully insert it. Make sure that all packaging material is peeled off the ink tank. See "Replacing Ink Tanks" on page 42. z Increase the Print Quality setting in the printer driver settings. See "Print Results - Canon PIXMA iP4200 | iP4200 Quick Start Guide - Page 51
the ink ejects properly from the Print Head nozzles. Use this function when printed results are blurred or the color is incorrect. z Ensure that the Inner Cover is closed. Printing the Nozzle Check Pattern Without a Computer z Nozzle check pattern printing can also be executed from the printer - Canon PIXMA iP4200 | iP4200 Quick Start Guide - Page 52
. The nozzle check pattern will be printed. Clicking Initial Check Items displays the items to be checked before printing the pattern. 5 Examine the pattern and take the appropriate action. See "Examining the Nozzle Check Pattern" on page 50. 1 With the printer on, load a sheet of Letter-sized - Canon PIXMA iP4200 | iP4200 Quick Start Guide - Page 53
the Canon IJ Printer Utility dialog box. Printing Maintenance (1) Select Applications from the Go menu, and then double-click the Utilities folder. (2) Double-click the Printer Setup Utility icon. When using Mac OS X v.10.2, double-click the Print Center icon. (3) Select the name of your printer - Canon PIXMA iP4200 | iP4200 Quick Start Guide - Page 54
the nozzle check pattern output by the printer, and clean the Print Head when necessary. The nozzle check pattern will not be printed correctly if there is not enough ink. Replace the ink tank if the remaining amount of ink is insufficient. See "Replacing an Ink Tank" on page 37. 1 Confirm the - Canon PIXMA iP4200 | iP4200 Quick Start Guide - Page 55
Head from here, go to step 3-(3) of the Windows or Macintosh Print Head Cleaning procedures as appropriate. See "Print Head Cleaning" on page 52. If no lines of the group (1) pattern are missing, and the group (2) patterns have no white stripes, click Exit or Quit. Nozzle Check Pattern examination - Canon PIXMA iP4200 | iP4200 Quick Start Guide - Page 56
in the waste ink absorber. Cleaning the Print Head consumes ink, so perform Print Head Cleaning only when necessary. z Ensure that the Inner Cover is closed. Cleaning the Print Head Without a Computer z The Print Head can also be cleaned from the printer itself. With the printer on, hold down - Canon PIXMA iP4200 | iP4200 Quick Start Guide - Page 57
the nozzles of black ink tanks: select Black to clean the nozzles of PGI-5BK, Color to clean the nozzles of CLI-8BK. Clicking Initial Check Items displays the items to be checked before cleaning. (4) Click Execute. Print Head Cleaning starts when the POWER lamp starts blinking green. Do not perform - Canon PIXMA iP4200 | iP4200 Quick Start Guide - Page 58
50. 1 Ensure that the printer is on. 2 Open the Canon IJ Printer Utility dialog box. (1) Select Applications from the Go menu, and then double-click the Utilities folder. (2) Double-click the Printer Setup Utility icon. When using Mac OS X v.10.2, double-click the Print Center icon. (3) Select the - Canon PIXMA iP4200 | iP4200 Quick Start Guide - Page 59
the nozzles of black ink tanks: select Black to clean the nozzles of PGI-5BK, Color to clean the nozzles of CLI-8BK. Clicking Initial Check Items displays the items to be checked before cleaning. (4) Click OK. Print Head Cleaning starts when the POWER lamp starts blinking green. Do not perform - Canon PIXMA iP4200 | iP4200 Quick Start Guide - Page 60
Note that cleaning the Print Head causes waste ink to be absorbed in the waste ink absorber. Print Head Deep Cleaning consumes more ink than standard Print Head Cleaning, so perform this procedure only when necessary. Ensure that the Inner Cover is closed. 1 Ensure that the printer is on. 2 Open the - Canon PIXMA iP4200 | iP4200 Quick Start Guide - Page 61
, open the Top Cover and ensure that there are sufficient ink levels in all ink tanks and turn off the printer. Be sure to perform another Print Head Deep Cleaning 24 hours after turning off the printer. z If this does not solve the problem, the Print Head may be worn out. Contact the Customer Care - Canon PIXMA iP4200 | iP4200 Quick Start Guide - Page 62
on. 2 Open the Canon IJ Printer Utility dialog box. (1) Select Applications from the Go menu, and then double-click the Utilities folder. (2) Double-click the Printer Setup Utility icon. When using Mac OS X v.10.2, double-click the Print Center icon. (3) Select the name of your printer from the Name - Canon PIXMA iP4200 | iP4200 Quick Start Guide - Page 63
, open the Top Cover and ensure that there are sufficient ink levels in all ink tanks and turn off the printer. Be sure to perform another Print Head Deep Cleaning 24 hours after turning off the printer. z If this does not solve the problem, the Print Head may be worn out. Contact the Customer Care - Canon PIXMA iP4200 | iP4200 Quick Start Guide - Page 64
from the printer itself. If the printer driver is not installed in the computer, align the print head in this way. 1. With the printer on, load a sheet of Letter-sized plain paper in the Auto Sheet Feeder. 2. Hold down the RESUME/CANCEL button until the POWER lamp flashes green four times, and then - Canon PIXMA iP4200 | iP4200 Quick Start Guide - Page 65
The printer is now ready to use. z If the pattern is not printed successfully, refer to "Eleven flashes" in "Handling Error Messages" on page 77. z If results of Automatic Print Head Alignment are not satisfactory, refer to "Routine Maintenance" of the User's Guide and align the Print Head manually - Canon PIXMA iP4200 | iP4200 Quick Start Guide - Page 66
in the Auto Sheet Feeder. 2 Open the Canon IJ Printer Utility dialog box. (1) Select Applications from the Go menu, and then double-click the Utilities folder. (2) Double-click the Printer Setup Utility icon. When using Mac OS X v.10.2, double-click the Print Center icon. (3) Select the name of your - Canon PIXMA iP4200 | iP4200 Quick Start Guide - Page 67
The printer is now ready to use. z If the pattern is not printed successfully, refer to "Eleven flashes" in "Handling Error Messages" on page 77. z If results of Automatic Print Head Alignment are not satisfactory, refer to "Routine Maintenance" of the User's Guide and align the Print Head manually - Canon PIXMA iP4200 | iP4200 Quick Start Guide - Page 68
most common printing problems. Troubleshooting usually falls into one of the following categories. z "Cannot Install the Printer Driver" on page 65 z "Cannot Connect to PC Properly" on page 66 z "Print Results Not Satisfactory or Contains Errors" on page 67 z "Troubleshooting Printer Hardware" on - Canon PIXMA iP4200 | iP4200 Quick Start Guide - Page 69
If the printer driver installation did not start automatically when you inserted the Setup Software & User's Guide CD-ROM into the CD-ROM drive: 1. Click Start and select My Computer. 2. Double-click the CD-ROM icon. For non-Windows XP, open the My Computer window, and then double-click the CD-ROM - Canon PIXMA iP4200 | iP4200 Quick Start Guide - Page 70
Troubleshooting Cannot Connect to PC Properly Problem Possible Cause Try This Printing Speed Is Slow / USB 2.0 Hi-Speed Connection Does Not Work Your environment is not fully compatible with USB 2.0. If your environment is not fully compatible with USB 2.0, the printer will operate at a lower - Canon PIXMA iP4200 | iP4200 Quick Start Guide - Page 71
the Canon specialty media is used In the Print dialog box of the printer driver, select Quality & Media from the pop-up menu, and then ensure that the Media Type selected matches the paper loaded. Select Other Photo Paper from Media Type. It may resolve the problem. Load one sheet at a time and - Canon PIXMA iP4200 | iP4200 Quick Start Guide - Page 72
from the pop-up menu and then click Detailed Setting. 3. Drag the Print Quality slide bar to Fine end. Use High Resolution Paper, Photo Paper Pro or other Canon specialty paper to print images that have high color saturation. On the Main tab of the printer driver, ensure that the Media Type selected - Canon PIXMA iP4200 | iP4200 Quick Start Guide - Page 73
and the loaded paper. Clear the Prevent paper abrasion check box once printing is complete. 1. Open the printer properties dialog box. 2. Click the Maintenance tab and then Custom Settings. In Windows XP and Windows 2000 When not logged on as a computer administrator or Administrators, you cannot - Canon PIXMA iP4200 | iP4200 Quick Start Guide - Page 74
Troubleshooting Troubleshooting Printer Hardware Problem Printer Does Not Start or Printer Stops During Print Jobs Possible Cause Ink tank is empty Try This If the ink tank lamp is flashing fast, ink is empty. Replace the ink tank and close the Top Cover. If printing is not finished yet, just - Canon PIXMA iP4200 | iP4200 Quick Start Guide - Page 75
Troubleshooting Problem Printer Does Not Start or Printer Stops During Print Jobs Possible Cause There may be problems with your operating system Try This Restart your computer. It may solve the problem. Delete an undesired print job, if there is any. Use Canon IJ Status Monitor in Windows or - Canon PIXMA iP4200 | iP4200 Quick Start Guide - Page 76
this procedure three times or more does not solve the problem, contact the Customer Care Center. Paper is loaded incorrectly Always load paper in the portrait orientation in the Auto Sheet Feeder or Cassette regardless of the print direction selected in the printer driver. Ensure that paper - Canon PIXMA iP4200 | iP4200 Quick Start Guide - Page 77
Paper Jams Troubleshooting Problem Paper Jams Possible Cause Paper jams in the Paper Output Slot into the printer and press the RESUME/CANCEL button on the printer. If you have turned off the printer in step 1, you will need to retry printing, because this operation cancels any print jobs in - Canon PIXMA iP4200 | iP4200 Quick Start Guide - Page 78
Troubleshooting Problem Paper Jams Possible Cause Try This Landscape Credit Card-sized Paper Jams inside the Printer You cannot in the Cassette jams inside the printer Load 4" x 6" / 101.6 x 152.4 mm media in the portrait orientation regardless of the print direction. Remove the paper following - Canon PIXMA iP4200 | iP4200 Quick Start Guide - Page 79
Troubleshooting Problem Paper Jams Possible Cause Paper jams inside the printer (Transport Unit) Try This printer. If you have turned off the printer in step 2, you will need to retry printing, because this operation cancels any print jobs in progress. When reloading the paper into the printer - Canon PIXMA iP4200 | iP4200 Quick Start Guide - Page 80
Troubleshooting Problem Paper Jams Possible Cause Paper jams inside the printer (Duplex Transport Section) Try This Remove Feeder, remove the paper from the Auto Sheet Feeder and close the Paper Support. 2. Stand the printer with the rear side down. 3. Slowly pull the jammed paper out while pulling - Canon PIXMA iP4200 | iP4200 Quick Start Guide - Page 81
full, contact the Customer Care Center. (You will need to replace a particular part of the printer.) Canon recommends that you call for service as soon as this error occurs. Once the waste ink absorber becomes completely full, printing cannot be performed until the Waste ink tank is replaced. 77 - Canon PIXMA iP4200 | iP4200 Quick Start Guide - Page 82
manual print head alignment, refer to "Aligning the Print Head" in the User's Guide. Thirteen Flashes The remaining level of the ink tank cannot be correctly detected An ink tank that was once empty is installed. Replace the ink tank. Printing under the situation may damage the Print Head. Canon - Canon PIXMA iP4200 | iP4200 Quick Start Guide - Page 83
be a problem with the cable(s). Replace the cable(s) and try printing again. Printer driver is not installed properly Uninstall then reinstall the printer driver. 1. Click Start, and select All Programs (or Programs), the name of your printer, and Uninstall. 2. Follow the on-screen instructions to - Canon PIXMA iP4200 | iP4200 Quick Start Guide - Page 84
up menu on the Print dialog box. The Printer List opens. 2. Ensure that the iP4200 is selected in the Printer List. If iP4200 is not displayed in the Printer List, click Add to add the printer. For details, refer to the Printer Setup Utility Help in the Mac Help. Waste ink absorber almost full The - Canon PIXMA iP4200 | iP4200 Quick Start Guide - Page 85
printer flashes orange five times.) Install a Print Head according to the Easy Setup Instructions. If the Print Head has already been installed, remove the Print Head and reinstall it. If the error still remains, the Print Head may be defective. Contact the Customer Care Center. Waste tank (ink - Canon PIXMA iP4200 | iP4200 Quick Start Guide - Page 86
flashes orange fourteen times/Ink tank lamp is off) Install the appropriate ink tank. Ink Error/No ink An ink tank that was once empty is installed (Printer ALARM lamp flashes orange thirteen times) Replace the ink tank. Printing under the situation may damage the Print Head. Canon shall not be - Canon PIXMA iP4200 | iP4200 Quick Start Guide - Page 87
if it takes too much time to send data. This may stop printing. In such a case, disconnect the cable between the printer and the camera, and reconnect it. Then, turn the camera on, if it does not automatically turn on. If the problem is still unresolved, select some other photo and check if it can - Canon PIXMA iP4200 | iP4200 Quick Start Guide - Page 88
gloss Letter Glossy Photo Paper Letter Photo Paper Pro A4 Photo Paper Plus Glossy A4 Photo Paper Plus Semi-gloss A4 Glossy Photo Paper A4 z For the digital camera operation method and troubleshooting, refer to your digital camera manual. For print error messages, see "Cannot Print Properly from the - Canon PIXMA iP4200 | iP4200 Quick Start Guide - Page 89
Appendix z The digital camera does not support the following functions: - Print quality setting - Printer maintenance z Images other than Exif may not be index-printed. 85 - Canon PIXMA iP4200 | iP4200 Quick Start Guide - Page 90
Appendix Specifications Printer Maximum resolution (dpi): Print speed * * Print speed will vary depending on system configuration, software, document complexity, print mode and page coverage. Print width: Resident print control mode: Receive buffer: Interface (USB): Acoustic noise level: Operating - Canon PIXMA iP4200 | iP4200 Quick Start Guide - Page 91
Appendix Camera Direct Print (Canon Bubble Jet Direct) Interface Direct Print Port (Connect a iP4200-compatible digital camera or digital video camcorder using the USB cable supplied with the camera.) Compatible digital cameras and digital video camcorders iP4200-compatible digital cameras and - Canon PIXMA iP4200 | iP4200 Quick Start Guide - Page 92
optimize Date/File No. print Default (Photo Paper Plus Glossy 10 x 15 cm/4" x 6") 10 x 15 cm/4" x 6" (Photo Paper Plus Glossy, Photo Paper Pro, Photo Paper Plus Semi-gloss, Glossy Photo Paper, Photo Stickers*1) 13 x 18 cm/5" x 7" (Photo Paper Plus Glossy)*2 A4/8.5" x 11" (Photo Paper Plus Glossy A4 - Canon PIXMA iP4200 | iP4200 Quick Start Guide - Page 93
z CD-ROM drive z Available hard-disk space for printer driver installation Mac OS X v.10.2.x to 10.3.x: 100 MB z The following functions are not supported: - Manual Duplex Printing - Photo Optimizer PRO - Poster Printing - Fit-to-Page Printing - Booklet Printing - Reverse Order Printing (supported - Canon PIXMA iP4200 | iP4200 Quick Start Guide - Page 94
to disassemble or modify the printer. There are no user serviceable parts inside the printer. The printer contains high-voltage components. Never attempt any maintenance procedure not described in this guide. Working around the printer Do not use flammable sprays near the printer. This could cause - Canon PIXMA iP4200 | iP4200 Quick Start Guide - Page 95
or liquid) fall into the printer, unplug the power cord and call for service. Do not transport or store the printer on a slant, vertically or upside-down, as the ink may leak and damage the printer. Print heads and ink tanks For safety reasons store Print Heads and ink tanks out of the reach of - Canon PIXMA iP4200 | iP4200 Quick Start Guide - Page 96
Printer installation. This equipment generates, uses and can radiate radio frequency energy and, if not installed and used in accordance with the instructions manual. If such changes or modifications should be made, you could be required to stop operation of the equipment. Canon U.S.A., Inc. One Canon - Canon PIXMA iP4200 | iP4200 Quick Start Guide - Page 97
current fluctuations, improper use, failure to follow operating or maintenance instructions in, or environmental conditions prescribed in, Canon USA's user's manual or other documentation, or services performed by someone other than a Canon USA repair facility or ASF. Without limiting the foregoing - Canon PIXMA iP4200 | iP4200 Quick Start Guide - Page 98
(BILL OF SALE), and a complete explanation of the problem. DO NOT INCLUDE ANY OTHER ITEMS WITH THE DEFECTIVE PRODUCT IN THE RETURN SHIPPING CARTON, AND BE SURE TO RETAIN YOUR PRINTHEAD AND INK CARTRIDGE(S) AND TANK(S). InstantExchange Service expedites, usually by the second business day, the - Canon PIXMA iP4200 | iP4200 Quick Start Guide - Page 99
81 Canceling Print Jobs (Windows 22 Canceling Printing 26 Cannot Connect to PC Properly 66 Cannot Install the Printer Driver 65 Cannot Print Properly from the Digital Camera 81 Canon IJ Printer Utility dialog box (Macintosh 49 Canon IJ Status Monitor (Windows 71 CANON U.S.A., INC. LIMITED - Canon PIXMA iP4200 | iP4200 Quick Start Guide - Page 100
47 Printing with Macintosh 23 Printing with Windows 20 R Regulatory Information 92 Replacing an Ink Tank 37 RESUME/CANCEL button 22 S Safety Precautions 90 Specialty Media 19 Specifications 86 Super White Paper 19 T Transparencies 19 Troubleshooting 64 Troubleshooting Printer Hardware - Canon PIXMA iP4200 | iP4200 Quick Start Guide - Page 101
97 - Canon PIXMA iP4200 | iP4200 Quick Start Guide - Page 102
98 - Canon PIXMA iP4200 | iP4200 Quick Start Guide - Page 103
and order numbers. Description Ink Tanks PGI-5 Black CLI-8 Black CLI-8 Cyan CLI-8 Magenta CLI-8 Yellow Canon Specialty Papers Photo Paper Plus Glossy (4" x 6"/20 sheets) Photo Paper Plus Glossy (4" x 6"/50 sheets) Photo Paper Plus Glossy (4" x 6"/120 sheets) Photo Paper Plus Glossy (5" x 7"/20 - Canon PIXMA iP4200 | iP4200 Quick Start Guide - Page 104
S. de R.L. de C.V. Periferico Sur No. 4124 Col. Ex-Rancho de Anzaldo, C.P. 01900, Mexico, D.F. The following ink tanks are compatible with this printer. For details on ink tank replacement, refer to "Replacing an Ink Tank" in this guide. QA7-3537-V01 XXXXXXXX ©CANON INC.2005 PRINTED IN THAILAND
-
 1
1 -
 2
2 -
 3
3 -
 4
4 -
 5
5 -
 6
6 -
 7
7 -
8
-
9
-
10
-
11
-
12
-
13
-
14
-
15
-
16
-
17
-
18
-
19
-
20
-
21
-
22
-
23
-
24
-
25
-
26
-
27
-
28
-
29
-
30
-
31
-
32
-
33
-
34
-
35
-
36
-
37
-
38
-
39
-
40
-
41
-
42
-
43
-
44
-
45
-
46
-
47
-
48
-
49
-
50
-
51
-
52
-
53
-
54
-
55
-
56
-
57
-
58
-
59
-
60
-
61
-
62
-
63
-
64
-
65
-
66
-
67
-
68
-
69
-
70
-
71
-
72
-
73
-
74
-
75
-
76
-
77
-
78
-
79
-
80
-
81
-
82
-
83
-
84
-
85
-
86
-
87
-
88
-
89
-
90
-
91
-
92
-
93
-
94
-
95
-
96
-
97
-
98
-
99
-
100
-
101
-
102
-
103
-
104
 |
 |
Series
Photo Printer
Quick Start Guide