Canon PowerShot A75 ZoomBrowser EX 4.6 Software User Guide
Canon PowerShot A75 Manual
 |
View all Canon PowerShot A75 manuals
Add to My Manuals
Save this manual to your list of manuals |
Canon PowerShot A75 manual content summary:
- Canon PowerShot A75 | ZoomBrowser EX 4.6 Software User Guide - Page 1
1 ZoomBrowser EX Software User Guide - Canon PowerShot A75 | ZoomBrowser EX 4.6 Software User Guide - Page 2
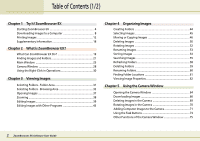
5 Using the Camera Window Opening the Camera Window 64 Downloading Images 66 Deleting Images in the Camera 69 Rotating Images in the Camera 70 Adding Computer Images to the Camera 71 Using the Task Buttons 73 Other Functions of the Camera Window 75 2 ZoomBrowser EX Software User Guide - Canon PowerShot A75 | ZoomBrowser EX 4.6 Software User Guide - Page 3
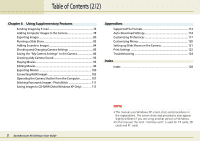
Supported File Formats 113 Auto-Download Settings 114 Customizing Preferences 117 Customizing Menus 120 Setting up Slide Shows on the Camera 121 Print Settings 122 Troubleshooting 124 Index Index 128 3 ZoomBrowser EX Software User Guide NOTE • This manual uses Windows XP screen - Canon PowerShot A75 | ZoomBrowser EX 4.6 Software User Guide - Page 4
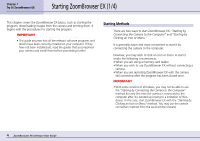
ZoomBrowser EX basics, such as starting the program, downloading images from the camera and printing them. It begins with the procedures for starting the program. IMPORTANT • This guide assumes that all the relevant software programs and drivers have been correctly installed on your computer. If - Canon PowerShot A75 | ZoomBrowser EX 4.6 Software User Guide - Page 5
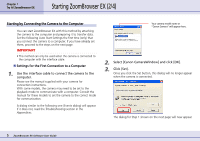
name or "Canon Camera" will appear here. 2. Select [Canon CameraWindow] and click [OK]. 3. Click [Set]. Once you click the Set button, this dialog will no longer appear when the camera is connected. The dialog for Step 1 shown on the next page will now appear. 5 ZoomBrowser EX Software User Guide - Canon PowerShot A75 | ZoomBrowser EX 4.6 Software User Guide - Page 6
both a camera and a memory card reader connected at the same time. Confirm that your camera model name or [Canon Camera] appears in the list box and click [OK]. 6 ZoomBrowser EX Software User Guide 1. Use the interface cable to connect the camera to the computer. Please see the manual supplied with - Canon PowerShot A75 | ZoomBrowser EX 4.6 Software User Guide - Page 7
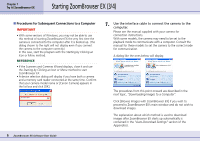
and select [All Programs] or [Programs], followed by [Canon Utilities], [ZoomBrowser EX] and [ZoomBrowser EX]. ZoomBrowser EX will downloading images are described in the next topic, "Downloading Images to a Computer." 7 ZoomBrowser EX Software User Guide Main Window The procedures for downloading - Canon PowerShot A75 | ZoomBrowser EX 4.6 Software User Guide - Page 8
main window displays. 2. Click [Camera & Memory Card]. If you are using a memory card reader, check to ensure that the card is correctly inserted in the reader. 3. Click [Browse & Download Images]. * The dialog will vary slightly according to your camera model. 8 ZoomBrowser EX Software User Guide - Canon PowerShot A75 | ZoomBrowser EX 4.6 Software User Guide - Page 9
Chapter 1 Try It! ZoomBrowser EX Downloading Images to a Computer (2/4) REFERENCE • A dialog will appear if multiple memory card readers are connected and loaded with memory cards, or if a camera and a memory card are connected concurrently, to allow you to select which images are shown from - Canon PowerShot A75 | ZoomBrowser EX 4.6 Software User Guide - Page 10
• The camera's Print/Share button cannot be used to download images if it is not lighted. REFERENCE • The dialog in step 1 will not display if the Camera Window or RemoteCapture Task window is open. Please close these windows. • A dialog will appear if a camera and a memory card reader are - Canon PowerShot A75 | ZoomBrowser EX 4.6 Software User Guide - Page 11
the Camera User Guide for the settings and procedures related to the Direct Transfer menu shown on the camera's LCD monitor. • You can also download images by clicking the [Start Image Download] button on the program window on the computer instead of clicking the camera's Print/Share button. • You - Canon PowerShot A75 | ZoomBrowser EX 4.6 Software User Guide - Page 12
more details on using this program. 1. Click [Print]. 3. Select the images you wish to print and click [Next]. The background of the selected images will turn orange. 2. Click [Layout Print] in the next menu. 12 ZoomBrowser EX Software User Guide REFERENCE • More than one image can be selected - Canon PowerShot A75 | ZoomBrowser EX 4.6 Software User Guide - Page 13
PhotoRecord, follow the procedures displayed at the window's left. This will start PhotoRecord and display the print image in the album window. REFERENCE • If the PhotoRecord Guide displays at startup, read it as necessary. The Steps in Order 13 ZoomBrowser EX Software User Guide Album Window - Canon PowerShot A75 | ZoomBrowser EX 4.6 Software User Guide - Page 14
type Detailed settings for each album type 14 ZoomBrowser EX Software User Guide REFERENCE • Select among the following album types. (The displayed album types may vary according to the printer in use.) • One Photo Per Page/One Photo Per Sheet Prints one image on each sheet of paper. • Free Form - Canon PowerShot A75 | ZoomBrowser EX 4.6 Software User Guide - Page 15
Chapter 1 Try It! ZoomBrowser EX Printing Images (4/6) 6. Click [3 Select Paper] and choose the media type, shown in this window may vary according to the printer in use. 15 ZoomBrowser EX Software User Guide Select a design REFERENCE • The items that can be changed include the themes (a - Canon PowerShot A75 | ZoomBrowser EX 4.6 Software User Guide - Page 16
add titles and text as desired. Click on text that is already displayed to change it. Select the text. To add new text, click the target page and input the text. Select the page Edit it here. 16 ZoomBrowser EX Software User Guide Input the text REFERENCE • You can also adjust the font, font - Canon PowerShot A75 | ZoomBrowser EX 4.6 Software User Guide - Page 17
rotation angle by dragging this point. 17 ZoomBrowser EX Software User Guide This starts the printing process. To close PhotoRecord, click the (close box), or click the [File] menu and select [Exit]. REFERENCE • Images captured by cameras that support the Exif 2.2 standard (nicknamed the "Exif - Canon PowerShot A75 | ZoomBrowser EX 4.6 Software User Guide - Page 18
use ZoomBrowser EX. If You Have a Problem ZoomBrowser EX comes with a Help file. button. Help menu Help button Exiting ZoomBrowser EX You can exit ZoomBrowser EX by clicking (Close button) on the Browser Window. Alternatively, select [Exit] from the [File] menu. 18 ZoomBrowser EX Software User Guide - Canon PowerShot A75 | ZoomBrowser EX 4.6 Software User Guide - Page 19
sounds and self-timer sound are collectively called the My Camera Settings. • The Canon CD-ROM supplied with your product contains several prepared My Camera Settings files. These files are automatically copied to your computer when you install ZoomBrowser EX. 19 ZoomBrowser EX Software User Guide - Canon PowerShot A75 | ZoomBrowser EX 4.6 Software User Guide - Page 20
.) ■ PhotoRecord • You can use this program to create and print beautiful layouts consisting of multiple images. • You can select frames images (which were split and shot individually using functions like the camera's Stitch Assist mode) together to form a single, large size, EX Software User Guide - Canon PowerShot A75 | ZoomBrowser EX 4.6 Software User Guide - Page 21
the right of the ZoomBrowser EX window. 21 ZoomBrowser EX Software User Guide If you double-click the folders appearing in the Windows screen shot at the left, you will find image files and folders with the same names as those displayed in the ZoomBrowser EX window. As this demonstrates, when you - Canon PowerShot A75 | ZoomBrowser EX 4.6 Software User Guide - Page 22
categorizing images Folder Area 22 ZoomBrowser EX Software User Guide Browsing Area REFERENCE • Instructions for creating folders are included in will not display. To display these images, follow the procedures in If You Were Using ZoomBrowser EX Version 2 or 3 of the Troubleshooting (2/ 4) - Canon PowerShot A75 | ZoomBrowser EX 4.6 Software User Guide - Page 23
functions, such as printing and sending images by e-mail. Main Window Components Path of the selected folder (word string describing the location) Switching to the Camera Window To switch to the Camera Window, click the [Camera & Memory Card] task button, followed by [Browse & Download Images] in - Canon PowerShot A75 | ZoomBrowser EX 4.6 Software User Guide - Page 24
four task buttons: Camera & Memory Card, Print, View & Modify and Internet. Click one of these buttons to perform the related task. ■ Camera & Memory Card Click this to open the Camera Window or perform remote shooting. ■ Print Click this to print images. ■ View & Modify Click this to display images - Canon PowerShot A75 | ZoomBrowser EX 4.6 Software User Guide - Page 25
to reselect the image. ■ Grayed Out Buttons Grayed out buttons indicate tasks that are not available at the time. When you finish the task underway, the buttons will once again become selectable. REFERENCE • Click [Previous] to return to the prior step. 25 ZoomBrowser EX Software User Guide - Canon PowerShot A75 | ZoomBrowser EX 4.6 Software User Guide - Page 26
one step up from a lower level folder. Select All Button Selects all the images and folders in the Browser Area. Clear All Button Deselects any images or folders selected in the Browser Area. Chapters 3 and 4 explain more about the task and function buttons. 26 ZoomBrowser EX Software User Guide - Canon PowerShot A75 | ZoomBrowser EX 4.6 Software User Guide - Page 27
make the Browsing Area larger. Click the button to redisplay the Folder Area. REFERENCE • You can also hide the Task Area by clicking the [View] menu, selecting [Task Area] and removing the check mark beside it. 27 ZoomBrowser EX Software User Guide REFERENCE • You can also hide the Folder - Canon PowerShot A75 | ZoomBrowser EX 4.6 Software User Guide - Page 28
displays the Setup Slide Show window. ■ Connect to Internet After the selected images have been downloaded to the computer, this button starts the process for creating e-mail attachments. A submenu like the one to the right appears when you click this button. 28 ZoomBrowser EX Software User Guide - Canon PowerShot A75 | ZoomBrowser EX 4.6 Software User Guide - Page 29
left, 90º right or 180º. Delete Button Deletes the selected image from the camera (memory card). Properties Button Displays information about the selected image. Help Button Displays the help dialog. Chapter 5 explains more about the task and function buttons. 29 ZoomBrowser EX Software User Guide - Canon PowerShot A75 | ZoomBrowser EX 4.6 Software User Guide - Page 30
with its convenience. Note that, in general, this manual does not cover operations using the right-click. ( display a shortcut menu. A shortcut menu is a convenient collection of the most common window buttons and menu commands that apply to a given situation. 30 ZoomBrowser EX Software User Guide - Canon PowerShot A75 | ZoomBrowser EX 4.6 Software User Guide - Page 31
the and buttons to collapse or expand the folder. When you click the button to collapse the folder, its subfolders are hidden. When you click the button to expand the folder, its subfolders are displayed. Click to collapse a folder. Click to expand a folder. 31 ZoomBrowser EX Software User Guide - Canon PowerShot A75 | ZoomBrowser EX 4.6 Software User Guide - Page 32
image thumbnail size by clicking the (Thumbnail Size) button (or by clicking the [View] menu and selecting [Thumbnail Size]) and selecting a size from the menu. 32 ZoomBrowser EX Software User Guide Images within nestled folders also display (a folder-shaped border indicates a subfolder). REFERENCE - Canon PowerShot A75 | ZoomBrowser EX 4.6 Software User Guide - Page 33
using the [Next] and [Previous] buttons. Scroll Bar Images in subfolders do not display. Displays various image information Images within the folder do not display Switches between the Click an image to preview next and previous images it at a larger size 33 ZoomBrowser EX Software User Guide - Canon PowerShot A75 | ZoomBrowser EX 4.6 Software User Guide - Page 34
Browsing Area, double-click the icon of a displayed folder to view its images and subfolders. If a folder icon is not shown on the screen, click the scroll bar to display it. Double-click inside the desired folder deeper and deeper into the folder hierarchy. 34 ZoomBrowser EX Software User Guide - Canon PowerShot A75 | ZoomBrowser EX 4.6 Software User Guide - Page 35
the same for the other display modes. Double-click the folder icon to display its images and then click on one to preview it. By repeating this step, you can go deeper and deeper into the folder hierarchy. 35 ZoomBrowser EX Software User Guide Click the [Up One Level] button to zoom out the folder - Canon PowerShot A75 | ZoomBrowser EX 4.6 Software User Guide - Page 36
in by skipping levels You can zoom in directly on a subfolder displayed in the Browsing Area without going through each Browsing Area by clicking it with this cursor. Click the button to zoom out. 36 ZoomBrowser EX Software User Guide REFERENCE • You can get the same result by using the - Canon PowerShot A75 | ZoomBrowser EX 4.6 Software User Guide - Page 37
images. Then click (View Image) to open all the images simultaneously. REFERENCE • A confirmation dialog will display if you attempt to open more than five images at one time. Closing an image Click (Close button) on the image window to close the image. 37 ZoomBrowser EX Software User Guide - Canon PowerShot A75 | ZoomBrowser EX 4.6 Software User Guide - Page 38
of the window. Choose a zoom ratio from the list. 38 ZoomBrowser EX Software User Guide The mouse cursor changes to an arrow when you place it here. Click in this state to change the window size. Typing a zoom ratio You can display an image at a ratio you set by typing a value in the zoom ratio - Canon PowerShot A75 | ZoomBrowser EX 4.6 Software User Guide - Page 39
explains how to edit an open image. Edit Panel Features An edit panel for revising images displays beneath images that have been opened. Using the edit panel, you can perform the following editing pages for detailed descriptions of these functions. Edit Panel 39 ZoomBrowser EX Software User Guide - Canon PowerShot A75 | ZoomBrowser EX 4.6 Software User Guide - Page 40
, place the mouse pointer within the frame and drag it. Drag the anchor points ■ to adjust the size of the area for cropping. B Click this button. Drag within the frame to adjust position of the frame. 40 ZoomBrowser EX Software User Guide - Canon PowerShot A75 | ZoomBrowser EX 4.6 Software User Guide - Page 41
in the box beside the slider and pressing the [Tab] or [Enter] key. Increase color saturation Decrease brightness Increase brightness Decrease contrast 41 ZoomBrowser EX Software User Guide Increase contrast - Canon PowerShot A75 | ZoomBrowser EX 4.6 Software User Guide - Page 42
can save it under a different name so that the original image remains intact. Click [Save As] to display the Save As dialog. Type a new name and specify the kind of file and the image quality. Then want to save the changes, click [Cancel]. 42 ZoomBrowser EX Software User Guide Click this button. - Canon PowerShot A75 | ZoomBrowser EX 4.6 Software User Guide - Page 43
other programs Click [View & Modify] in the main window, followed by [Edit Image] in the next menu. A Select an image. 43 ZoomBrowser EX Software User Guide B Click this. This will start the image editing program and open the selected image in it. REFERENCE • You can also open an image after - Canon PowerShot A75 | ZoomBrowser EX 4.6 Software User Guide - Page 44
. 3. Type a name for the new folder and click [OK]. You have created a new folder. 2 Click the [File] menu and select [New Folder]. 44 ZoomBrowser EX Software User Guide - Canon PowerShot A75 | ZoomBrowser EX 4.6 Software User Guide - Page 45
select a series of adjoining images in one step by holding down the [Shift] key while you click the first and last images. 45 ZoomBrowser EX Software User Guide REFERENCE • Click (Clear All) at the top of the Browsing Area to deselect all the images at once. • You can also deselect all the - Canon PowerShot A75 | ZoomBrowser EX 4.6 Software User Guide - Page 46
can move an image in the Browsing Area simply by using a drag-and-drop operation. A Drag the image you want to move. 46 ZoomBrowser EX Software User Guide B Drop it at the desired location. - Canon PowerShot A75 | ZoomBrowser EX 4.6 Software User Guide - Page 47
Area To copy an image, before you drop the image you are dragging, press and hold the [Ctrl] key and release the mouse button, while still holding the key. A Drag the image you want to copy. 47 ZoomBrowser EX Software User Guide B While holding down the [Ctrl] key, drop it at the desired location. - Canon PowerShot A75 | ZoomBrowser EX 4.6 Software User Guide - Page 48
folder, proceed the same way. Hold down the [Ctrl] key before dropping the image and release the mouse button while holding the key over the target library. 48 ZoomBrowser EX Software User Guide B Drop it in the target folder. A Drag the image you wish to move. REFERENCE • On the other hand - Canon PowerShot A75 | ZoomBrowser EX 4.6 Software User Guide - Page 49
or copy an entire folder. In the Zoom display mode, select the folder by clicking inside it then dragging and dropping the folder. Display modes and folder selection procedures are explained • You can select all the folders or images displayed in the Browsing Area at once by clicking (Select - Canon PowerShot A75 | ZoomBrowser EX 4.6 Software User Guide - Page 50
click the [View] menu and select [Refresh Current Folder], the image will reappear in its original location. A Click an image. B Click [Delete]. 50 ZoomBrowser EX Software User Guide - Canon PowerShot A75 | ZoomBrowser EX 4.6 Software User Guide - Page 51
Windows 2000/Windows Me/Windows 98 in web page view mode, click [Empty Recycle Bin] at the left side of the window.) 51 ZoomBrowser EX Software User Guide - Canon PowerShot A75 | ZoomBrowser EX 4.6 Software User Guide - Page 52
the desired orientation. This is useful for images taken by holding the camera sideways. IMPORTANT • By the default setting, rotating an image in Image] and choosing the direction of rotation. Select an image to rotate and click to specify the direction. 52 ZoomBrowser EX Software User Guide - Canon PowerShot A75 | ZoomBrowser EX 4.6 Software User Guide - Page 53
Mode), choose [Preview Mode] from the next menu and select an image, you can change the name of that image. B Click [Rename]. 53 ZoomBrowser EX Software User Guide - Canon PowerShot A75 | ZoomBrowser EX 4.6 Software User Guide - Page 54
file type. ■ By Date Sorts images in order from the oldest modification date to the newest. Click [Arrange] and select a menu item. 54 ZoomBrowser EX Software User Guide - Canon PowerShot A75 | ZoomBrowser EX 4.6 Software User Guide - Page 55
to search in the Browsing Area. Click [Select All] to search all of the images and folders displayed in the Browsing Area. 2. Click [View & Modify], followed by [Search] in the next menu. . A set of images corresponding to the search parameters will display. 55 ZoomBrowser EX Software User Guide - Canon PowerShot A75 | ZoomBrowser EX 4.6 Software User Guide - Page 56
display in the folder named "Search Results" in the main window. You can select and print these images, or copy them to other folders. These images will remain registered in the Search Results folder until you close ZoomBrowser EX or perform another search. 56 ZoomBrowser EX Software User Guide - Canon PowerShot A75 | ZoomBrowser EX 4.6 Software User Guide - Page 57
Instead, you can also click the [Tool] menu and select [View/ Modify keywords]. A window for setting keywords will display. 3. Click to place a check mark beside a keyword. Place a check mark beside a keyword To add a new used in the past but want it back. 57 ZoomBrowser EX Software User Guide - Canon PowerShot A75 | ZoomBrowser EX 4.6 Software User Guide - Page 58
the [View] menu and select [Refresh Current Folder]. This will update ZoomBrowser EX's information about all the folders. Click [Refresh Current Folder]. 58 ZoomBrowser EX Software User Guide - Canon PowerShot A75 | ZoomBrowser EX 4.6 Software User Guide - Page 59
in web page view mode, click [Empty Recycle Bin] at the left side of the window.) Select the folder and click [Delete]. 59 ZoomBrowser EX Software User Guide - Canon PowerShot A75 | ZoomBrowser EX 4.6 Software User Guide - Page 60
that below will appear. Input a new file name and click [OK] to set the name. After you select the folder, click [Rename]. 60 ZoomBrowser EX Software User Guide - Canon PowerShot A75 | ZoomBrowser EX 4.6 Software User Guide - Page 61
. You can check the location of the saved folder by looking at the categories below. Select the folder and click [Properties]. Click the (Close button) to close the window once you have checked it. Alternative Method ■ Using the Menu to View Folder Properties You can also find out where a folder - Canon PowerShot A75 | ZoomBrowser EX 4.6 Software User Guide - Page 62
the information for each image. • You can also view image properties by selecting the image, clicking the [View] menu and selecting [Properties]. Click this button. Shooting Information (The information in this area will vary according to your camera model.) 62 ZoomBrowser EX Software User Guide - Canon PowerShot A75 | ZoomBrowser EX 4.6 Software User Guide - Page 63
settings for use in searches Histogram (graph showing the distribution of brightness data) Shooting Information (The information in this area will vary according to your camera model.) 63 ZoomBrowser EX Software User Guide - Canon PowerShot A75 | ZoomBrowser EX 4.6 Software User Guide - Page 64
appear when you connect the camera to a computer using an interface cable and prepare the camera to communicate. If you select [List Images], the Camera Window will display. IMPORTANT • ZoomBrowser EX may of Chapter 1 for details. Click here. 64 ZoomBrowser EX Software User Guide Camera Window - Canon PowerShot A75 | ZoomBrowser EX 4.6 Software User Guide - Page 65
performing the procedure. Click [Camera & Memory Card] in the main window and [Browse & Download Images] in the next menu. A window like that below will open. Click [List Images] to open the Camera Window. Click here. Click here. Main Window 65 ZoomBrowser EX Software User Guide Camera Window - Canon PowerShot A75 | ZoomBrowser EX 4.6 Software User Guide - Page 66
downloading images from a camera (memory card) to a computer disk. Downloading Images Select the image(s) and click [Download downloaded images in a new folder created within the one specified above. Then select a naming option for the new folder to the right. 66 ZoomBrowser EX Software User Guide - Canon PowerShot A75 | ZoomBrowser EX 4.6 Software User Guide - Page 67
menu, which contains the following options. 67 ZoomBrowser EX Software User Guide • Select All Selects all the images in the camera (memory card). • Select New Selects only the images that have not yet been downloaded to the computer. • Select Print mark Selects only the images that have be marked - Canon PowerShot A75 | ZoomBrowser EX 4.6 Software User Guide - Page 68
is taken in the Movie mode, it appears in the Camera Window as follows: Mark indicating Movie • If an image has a sound memo attached (some camera models do not come with this feature),it appears in the Camera Window as follows: Mark indicating a sound memo 68 ZoomBrowser EX Software User Guide - Canon PowerShot A75 | ZoomBrowser EX 4.6 Software User Guide - Page 69
camera (memory card). IMPORTANT • Please note that deleting an image in the Camera Window deletes the actual image from the memory card selected images are deleted. ■ Selecting images for deletion Click (Select) to display the selection menu, which can be used to select the images for deletion. - Canon PowerShot A75 | ZoomBrowser EX 4.6 Software User Guide - Page 70
rotation. • The Rotate function affects only the image displayed in the Camera Window. The image stored on the camera is not changed at all. However, when you download the image, the image is rotated and saved on once at the same rotation angle. B Click here. 70 ZoomBrowser EX Software User Guide - Canon PowerShot A75 | ZoomBrowser EX 4.6 Software User Guide - Page 71
here. Select this to upload the image to the camera without resizing. 71 ZoomBrowser EX Software User Guide Select this to resize the image before uploading it to the camera. Select the image size in the list box beneath. (With a memory card reader, the image size is input as numerical values - Canon PowerShot A75 | ZoomBrowser EX 4.6 Software User Guide - Page 72
size] for all other images. • JPEG format images can be uploaded to the camera. • RAW format images and movie files (AVI format) cannot be uploaded to the camera. • File formats are explained in more detail in the Supported File Formats topic in the Appendices. 72 ZoomBrowser EX Software User Guide - Canon PowerShot A75 | ZoomBrowser EX 4.6 Software User Guide - Page 73
of the task. 73 ZoomBrowser EX Software User Guide Downloading Images (1/3) in this chapter explains how to specify a download destination. IMPORTANT • The selected images are downloaded to the computer each time a task button is selected in the Camera Window and then the tasks are performed - Canon PowerShot A75 | ZoomBrowser EX 4.6 Software User Guide - Page 74
the Camera Window Using the Task Buttons (2/2) Selectable Tasks The procedures after a download destination has been specified are the same as below. ■ Download Image These procedures are explained in Downloading Images in this chapter. ■ Print • Layout Print • Contact Sheet Print This procedure - Canon PowerShot A75 | ZoomBrowser EX 4.6 Software User Guide - Page 75
Setting Up Slide Shows on the Camera and Print Settings in the Appendices.) * 75 ZoomBrowser EX Software User Guide Click here to deselect images. Click this button to check Image Properties information. On the [Set] menu, select [My Camera] to display the My Camera window, which can be used to - Canon PowerShot A75 | ZoomBrowser EX 4.6 Software User Guide - Page 76
becomes smaller.) Use it to check the file size when you actually compress the image. (The file is displayed in the "Total size of changed images" category.) Use it to check the image quality as it will appear when compressed. (A preview image will display.) 76 ZoomBrowser EX Software User Guide - Canon PowerShot A75 | ZoomBrowser EX 4.6 Software User Guide - Page 77
email program], click [Browse] to specify a destination. 77 ZoomBrowser EX Software User Guide • If You Selected [Save the images in a folder to send programs might not be able to start automatically (those without MAPI support). In this case, save the image to the disk, start the e-mail program - Canon PowerShot A75 | ZoomBrowser EX 4.6 Software User Guide - Page 78
values. If [VGA Size] is selected, 640 and 480 appear automatically.) The Camera Window will open and the specified images will be added to the camera (memory card). 78 ZoomBrowser EX Software User Guide REFERENCE • If multiple images have been selected, then the selected resizing option will - Canon PowerShot A75 | ZoomBrowser EX 4.6 Software User Guide - Page 79
size] for all other images. • JPEG format images can be uploaded to the camera. • RAW format images and movie files (AVI format) cannot be uploaded to the camera. • File formats are explained in more detail in the Supported File Formats topic in the Appendices. 79 ZoomBrowser EX Software User Guide - Canon PowerShot A75 | ZoomBrowser EX 4.6 Software User Guide - Page 80
specific items from the shooting information and export it to a text file. ■ Export Images as a Screen Saver You can export an image as a screen saver file. ■ Export an Image as Wallpaper You can export an image as a wallpaper file. This function will not work 80 ZoomBrowser EX Software User Guide - Canon PowerShot A75 | ZoomBrowser EX 4.6 Software User Guide - Page 81
of the export settings vary according to the selected export format. Adjust the settings according to the displayed information. Be sure, however, to note the file name and destination when exporting so that you is saved along with the image. Destination folder 81 ZoomBrowser EX Software User Guide - Canon PowerShot A75 | ZoomBrowser EX 4.6 Software User Guide - Page 82
run a slide show displaying images in sequence in the full-screen mode. Setting and button] to have the slides proceed manually, not automatically. Select [Every X seconds] to have the slides advance automatically and set an interval in seconds with the slider. 82 ZoomBrowser EX Software User Guide - Canon PowerShot A75 | ZoomBrowser EX 4.6 Software User Guide - Page 83
in the printing window. If you click this button while an image is displayed, the image will appear in the selected state in the Browsing Area after the slide show. Click here to add the Favorites symbol to images. It is used to facilitate image searches. 83 ZoomBrowser EX Software User Guide - Canon PowerShot A75 | ZoomBrowser EX 4.6 Software User Guide - Page 84
. How to play a sound added to an image Select an image with a sound attachment, click the [Edit] menu and select [Play Sound]. 84 ZoomBrowser EX Software User Guide - Canon PowerShot A75 | ZoomBrowser EX 4.6 Software User Guide - Page 85
this button to synchronize the camera's date and time settings with the computer. Click this button to format the camera's memory card (not supported by some camera models). After you have checked the camera settings and made necessary changes, click [OK]. 85 ZoomBrowser EX Software User Guide - Canon PowerShot A75 | ZoomBrowser EX 4.6 Software User Guide - Page 86
] tab, try changing options in the Data Type category. The My Computer list displays the image files and sounds that were previously prepared. The Camera list displays the My Camera Settings currently in the camera (only the editable settings are shown). 86 ZoomBrowser EX Software User Guide - Canon PowerShot A75 | ZoomBrowser EX 4.6 Software User Guide - Page 87
as a theme] tab in the My Camera window. To set the My Camera Settings individually, click the [Set Individually] tab instead and select the respective settings, such as the start-up sound or image, in the Data Type category. Select the [Setup as a theme] tab. 87 ZoomBrowser EX Software User Guide - Canon PowerShot A75 | ZoomBrowser EX 4.6 Software User Guide - Page 88
]: When you select a start-up image, it will be displayed in the preview area to the right. When you select a camera. Before you overwrite a settings file in the camera, confirm that it appears in the My Computer list. A Select the setting you want to replace. 88 ZoomBrowser EX Software User Guide - Canon PowerShot A75 | ZoomBrowser EX 4.6 Software User Guide - Page 89
a new image or sound file and save it to the computer and then add that file as a My Camera Settings file. Click here to delete a file from the list. Click here to check a sound file in the camera. Displays the camera settings when an image file is selected. 89 ZoomBrowser EX Software User Guide - Canon PowerShot A75 | ZoomBrowser EX 4.6 Software User Guide - Page 90
x 240 pixels, and less than 20KB. REFERENCE • See the manual and help facility for the editing program for a detailed explanation of how or less 0.4 sec. or less 90 ZoomBrowser EX Software User Guide ■ Adding the new file as My Camera Settings to the computer Once you have created the settings - Canon PowerShot A75 | ZoomBrowser EX 4.6 Software User Guide - Page 91
] button beneath the My Computer list. • Previously created settings can also be added as My Camera Settings to the computer with the same procedures as above, but have to comply with the specifications listed in the Create the new files before adding them section. 91 ZoomBrowser EX Software User - Canon PowerShot A75 | ZoomBrowser EX 4.6 Software User Guide - Page 92
would like to copy from the Camera list. If you selected the Theme tab in Step 1, the preview image will display in the area to the the start-up image will display in the area to the right. If you selected a sound, it will automatically play. 92 ZoomBrowser EX Software User Guide 3. Click [Save to - Canon PowerShot A75 | ZoomBrowser EX 4.6 Software User Guide - Page 93
will open. IMPORTANT • The My Camera Sound Maker window will not appear if QuickTime is not installed. REFERENCE • For detailed information on how to use this function, please refer to the Help file (open it with the [?] button). 93 ZoomBrowser EX Software User Guide Sets the blue and red - Canon PowerShot A75 | ZoomBrowser EX 4.6 Software User Guide - Page 94
will have a low volume when you upload it to the camera. So when the playback volume is too loud on the computer, turn down the volume of the speakers. Saving a Sound Click here to save a sound (A window allowing you to name the file will display). 94 ZoomBrowser EX Software User Guide Select the - Canon PowerShot A75 | ZoomBrowser EX 4.6 Software User Guide - Page 95
Area. When you double-click the thumbnail, QuickTime Player starts and plays the movie. The thumbnail and mark appear when a movie is imported using the Camera Window. QuickTime Player window 95 ZoomBrowser EX Software User Guide Use this button to play the movie. - Canon PowerShot A75 | ZoomBrowser EX 4.6 Software User Guide - Page 96
images that have been downloaded to a computer, button for detailed help with operating procedures Storyboard Area Displays thumbnails of the selected images. Links images in order from left to right Click here to proceed to the next step or previous one 96 ZoomBrowser EX Software User Guide - Canon PowerShot A75 | ZoomBrowser EX 4.6 Software User Guide - Page 97
being edited Displays the properties of the selected image Deletes the selected image from the storyboard area Transition Box Displays the icon of the transition effect used to link adjacent images Displays a dialog with the general movie editing settings 97 ZoomBrowser EX Software User Guide - Canon PowerShot A75 | ZoomBrowser EX 4.6 Software User Guide - Page 98
clicking this button You can set the play duration of a still image selected in the storyboard area by clicking this button You can set the transition effect between images by selecting the transition effect box in the storyboard area and clicking this button 98 ZoomBrowser EX Software User Guide - Canon PowerShot A75 | ZoomBrowser EX 4.6 Software User Guide - Page 99
set the fade-in or fade-out effect for a movie or its linked audio file by selecting it in the storyboard area and clicking this button You can set the size (height and width in pixels) and frame rate (frames/second) of the movie being saved by selecting [Motion JPEG (AVI - Canon PowerShot A75 | ZoomBrowser EX 4.6 Software User Guide - Page 100
save the movie file Follow these steps to proceed To save the movie in a rotated orientation, click here to add a check mark and specify a rotation direction. Use this feature when a camera has been turned on its end to shoot a movie sequence 100 ZoomBrowser EX Software User Guide - Canon PowerShot A75 | ZoomBrowser EX 4.6 Software User Guide - Page 101
of the movie being exported, select [Zoom specification] or [Size specification] and set the size Features of the displayed each second Sets the image quality. The higher the setting, the clearer the image, but the file size also increases correspondingly 101 ZoomBrowser EX Software User Guide - Canon PowerShot A75 | ZoomBrowser EX 4.6 Software User Guide - Page 102
to the manual supplied with your camera to determine whether your camera supports RAW images or not. • Depending upon your camera model, a different program than the one introduced here may start when you convert RAW images. If that occurs, refer to the manual for the software supplied with your - Canon PowerShot A75 | ZoomBrowser EX 4.6 Software User Guide - Page 103
conversion is conducted in this window. Thumbnail Check Mark You can use this button to switch between images and display modes and set various conversion settings, such as the image rotation Preview ■ main window by clicking this red frame and dragging it 103 ZoomBrowser EX Software User Guide - Canon PowerShot A75 | ZoomBrowser EX 4.6 Software User Guide - Page 104
Sets the destination folder for the image file You can change the image file name 5. Click the [3. Exit] tab and click [OK]. 104 ZoomBrowser EX Software User Guide - Canon PowerShot A75 | ZoomBrowser EX 4.6 Software User Guide - Page 105
etc. Adjusts the digital exposure compensation, photo effect, contrast, sharpness and saturation With a check mark here, settings changes in this window are immediately reflected in the image Restores all adjustments to the initial shooting settings 105 ZoomBrowser EX Software User Guide Tone Curve - Canon PowerShot A75 | ZoomBrowser EX 4.6 Software User Guide - Page 106
those corrections to the original image and display the results as the Preview My Color Applied to the Image. 3. Click [Read] beside the original image, select the preadjustment image (original image) and click [Next]. 106 ZoomBrowser EX Software User Guide 5. Check the Preview My Color Applied to - Canon PowerShot A75 | ZoomBrowser EX 4.6 Software User Guide - Page 107
window, followed by [Remote Shooting] in the next menu. A remote shooting window like that below will open. Clicking the [Release] button in this window records the image. The image captured by the camera displays here This button turns the display on or off 107 ZoomBrowser EX Software User Guide - Canon PowerShot A75 | ZoomBrowser EX 4.6 Software User Guide - Page 108
and white balance settings (these settings remain fixed until this button is clicked) Sets the shooting settings. It is divided into the "Field angle/ flash" tab and the "Shooting settings" tab. (The settings categories vary according to your camera model) 108 ZoomBrowser EX Software User Guide - Canon PowerShot A75 | ZoomBrowser EX 4.6 Software User Guide - Page 109
. Click the [Camera] menu in the RemoteCapture Task window and select [Camera Display Settings] to open a window like the one shown here. Select [Camera LCD monitor] or [Video Out terminal] and click [OK]. REFERENCE • See the Camera User Guide for instructions for connecting the camera to the - Canon PowerShot A75 | ZoomBrowser EX 4.6 Software User Guide - Page 110
at the point when remote shooting was started) REFERENCE • If you click [Save Images On] and select [Computer only], you can record images when the memory card in the camera is full and will not accept more images or when it is not present. 110 ZoomBrowser EX Software User Guide - Canon PowerShot A75 | ZoomBrowser EX 4.6 Software User Guide - Page 111
camera's Stitch Assist mode to shoot them. Opening PhotoStitch Click [View & modify] in the main window, followed by [Stitch Photos] in the next menu. Then, follow the instructions (a line with arrows) in the Camera Window. 111 ZoomBrowser EX Software User Guide Save the image. REFERENCE • You - Canon PowerShot A75 | ZoomBrowser EX 4.6 Software User Guide - Page 112
This will copy the images to the CD-R/RW disk. The disk will be ejected from the drive when copying is complete. 112 ZoomBrowser EX Software User Guide - Canon PowerShot A75 | ZoomBrowser EX 4.6 Software User Guide - Page 113
proprietary file format provided by Canon. It saves the output of the image pixels from a digital camera without any deterioration in the quality of the image. Some cameras might not support this file format. ■ Windows QuickTime Player before you can use it.) 113 ZoomBrowser EX Software User Guide - Canon PowerShot A75 | ZoomBrowser EX 4.6 Software User Guide - Page 114
in the camera will automatically download to the computer when the camera is connected. However, if you place a check mark beside the [Display confirm message before downloading] option, the window at the right will display, allowing you to select an action. 114 ZoomBrowser EX Software User Guide - Canon PowerShot A75 | ZoomBrowser EX 4.6 Software User Guide - Page 115
for the naming conventions for the new folders. If you click either of these two options, only the images selected with the camera functions will download. 115 ZoomBrowser EX Software User Guide Type a folder name here if you select the [Set as new] option. If there is no check mark in this option - Canon PowerShot A75 | ZoomBrowser EX 4.6 Software User Guide - Page 116
to be executed after images are downloaded and click [Finish]. After downloading, display the folder containing the images After downloading, you can have it continue to process images. - Layout Print - Contact Sheet Print - View as slideshow - Send by e-mail 116 ZoomBrowser EX Software User Guide - Canon PowerShot A75 | ZoomBrowser EX 4.6 Software User Guide - Page 117
settings that you can customize to make the program work the way you like. This section introduces some of option, access Help from the [Help] menu or the [?] (Help) button to see a description of the option. Opening the Preferences dialog box display speed). 117 ZoomBrowser EX Software User Guide - Canon PowerShot A75 | ZoomBrowser EX 4.6 Software User Guide - Page 118
steps when a task button is used. REFERENCE • With [Windows standard selection], the first image is deselected when a second image is clicked. Multiple selections can be made by holding down the [Ctrl] and [Shift] keys while clicking on successive images. 118 ZoomBrowser EX Software User Guide - Canon PowerShot A75 | ZoomBrowser EX 4.6 Software User Guide - Page 119
Only the rotated image is sent to the Browsing Area when you download an image that has been rotated in the Camera Window. Place a check here to have the original image left untouched an image rotated in the Camera Window is downloaded to the Browsing Area. 119 ZoomBrowser EX Software User Guide - Canon PowerShot A75 | ZoomBrowser EX 4.6 Software User Guide - Page 120
Remove the check mark from the menu items you wish to hide. Sets the categories displayed in this menu. REFERENCE • Use this function to hide items not used on a daily basis to streamline the menus or to shorten the menus so that scrolling is not required. 120 ZoomBrowser EX Software User Guide - Canon PowerShot A75 | ZoomBrowser EX 4.6 Software User Guide - Page 121
the next menu. How to set up a slide show Click the [Camera] menu in the main window and select [Edit Slide/DPOF]. Click the [Slide Show] button at the top left of the next window and select the number show, select the image. On the [Edit] menu, click [Clear]. 121 ZoomBrowser EX Software User Guide - Canon PowerShot A75 | ZoomBrowser EX 4.6 Software User Guide - Page 122
can use ZoomBrowser EX to register print settings on a memory card, including the images to print and the number of copies. IMPORTANT • This feature does not work with unconverted RAW images. If you want to print RAW images, convert them first, copy them to the camera and perform this operation - Canon PowerShot A75 | ZoomBrowser EX 4.6 Software User Guide - Page 123
you are done with your selections, click [Save to Camera] to save the information. REFERENCE • The procedure explained above also applies when the print type is "Both (Standard/Index)". 123 ZoomBrowser EX Software User Guide The index print icon displays when a check mark is added to the image - Canon PowerShot A75 | ZoomBrowser EX 4.6 Software User Guide - Page 124
troubleshoot problems. The event dialog box does not appear The dialog below fails to appear even though the camera is correctly connected to the computer via the interface cable and ready to transfer data... Or, a message, such as "No camera was found", appears when you attempt to download images - Canon PowerShot A75 | ZoomBrowser EX 4.6 Software User Guide - Page 125
. If the problem does not rest in the four areas above, the driver may not be properly installed. Uninstall the driver and then reinstall it. For instructions for this task, refer to the Software Starter Guide. REFERENCE • The Events dialog will not display when a memory card reader is used - Canon PowerShot A75 | ZoomBrowser EX 4.6 Software User Guide - Page 126
Appendices Troubleshooting (3/4) 3. Double-click the [dbconverter.exe] or [ previously: [C: \Program Files\Canon\ZoomBrowser EX\Database\My Database.zbd]. 6. Click [Close] when the dialog in Step 4 appears. This will display in ZoomBrowser EX 4 the EX 2/3 126 ZoomBrowser EX Software User Guide - Canon PowerShot A75 | ZoomBrowser EX 4.6 Software User Guide - Page 127
folder, copy the folder itself to a location higher in the directory hierarchy. When you select the copied folder in ZoomBrowser EX 4, the images will now display. Click the copied folder to display its images in the Browsing Area. 127 ZoomBrowser EX Software User Guide - Canon PowerShot A75 | ZoomBrowser EX 4.6 Software User Guide - Page 128
22, 23, 32 Selecting Folders 31 Buttons Browse & Download Images 8, 23 Camera & Memory Card 8, 23, 24, 65 Clear All 26 Close 18, 42 Connect to Internet 28 Delete 26, 29 Deselect 29 Download Image 28 Download image 66 Function Buttons 26, 29 Help 18, 29 Internet 24 Print 12, 24, 28 Properties 26, 29 - Canon PowerShot A75 | ZoomBrowser EX 4.6 Software User Guide - Page 129
93 My Camera Window 86 My Pictures Folder 21 N New Folder 44 O Opening Images 37 Owner's Name 85 129 ZoomBrowser EX Software User Guide P PhotoCD format 113 PhotoRecord 13, 20 PhotoStitch 20, 111 Play Sound 84 Preferences 117 Preview Mode 33 Print Settings 122 Print/Share Button 10 Printing 12 - Canon PowerShot A75 | ZoomBrowser EX 4.6 Software User Guide - Page 130
Scroll Mode 33 Searching Images 55 Select All 45 Selecting Display Mode 32 Images 45 Set Button 29, 71 Shooting Information 62 Slide Shows Camera 121 Sorting Images 54 Sounds 84 File Length 90 Saving Sounds 94 Sound Memo 68 Standard Print 122, 123 Starting ZoomBrowser EX 4 Stitch Assist Mode 68, 111 - Canon PowerShot A75 | ZoomBrowser EX 4.6 Software User Guide - Page 131
due to a mistaken operation or malfunction of the camera, the software, the CompactFlash™ cards (CF cards), personal computers, peripheral devices, or use of non-Canon CF cards. Trademark Acknowledgments • Canon and PowerShot are trademarks of Canon Inc. • Adobe and Photoshop are trademarks of Adobe
-
 1
1 -
 2
2 -
 3
3 -
 4
4 -
 5
5 -
 6
6 -
 7
7 -
8
-
9
-
10
-
11
-
12
-
13
-
14
-
15
-
16
-
17
-
18
-
19
-
20
-
21
-
22
-
23
-
24
-
25
-
26
-
27
-
28
-
29
-
30
-
31
-
32
-
33
-
34
-
35
-
36
-
37
-
38
-
39
-
40
-
41
-
42
-
43
-
44
-
45
-
46
-
47
-
48
-
49
-
50
-
51
-
52
-
53
-
54
-
55
-
56
-
57
-
58
-
59
-
60
-
61
-
62
-
63
-
64
-
65
-
66
-
67
-
68
-
69
-
70
-
71
-
72
-
73
-
74
-
75
-
76
-
77
-
78
-
79
-
80
-
81
-
82
-
83
-
84
-
85
-
86
-
87
-
88
-
89
-
90
-
91
-
92
-
93
-
94
-
95
-
96
-
97
-
98
-
99
-
100
-
101
-
102
-
103
-
104
-
105
-
106
-
107
-
108
-
109
-
110
-
111
-
112
-
113
-
114
-
115
-
116
-
117
-
118
-
119
-
120
-
121
-
122
-
123
-
124
-
125
-
126
-
127
-
128
-
129
-
130
-
131
 |
 |
1
ZoomBrowser EX Software User Guide