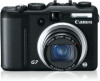
Canon PowerShot G7 Software Starter Guide For the Canon Digital Camera Solutio
Canon PowerShot G7 Manual
 |
View all Canon PowerShot G7 manuals
Add to My Manuals
Save this manual to your list of manuals |
Canon PowerShot G7 manual content summary:
- Canon PowerShot G7 | Software Starter Guide For the Canon Digital Camera Solutio - Page 1
Software Starter Guide For Version 29 ENGLISH Software Starter Guide (For the Canon Digital Camera Solution Disk Version 29) You must install the software bundled on the Canon Digital Camera Solution Disk before connecting the camera to the computer. Install the software. Connect the camera - Canon PowerShot G7 | Software Starter Guide For the Canon Digital Camera Solutio - Page 2
of the camera, the software, the memory cards, personal computers, peripheral devices, or use of non-Canon memory cards. Trademark Acknowledgments • Macintosh, Mac OS and QuickTime are trademarks of Apple Computer Inc., registered in the United States and other countries. • Microsoft® and - Canon PowerShot G7 | Software Starter Guide For the Canon Digital Camera Solutio - Page 3
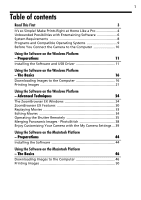
Programs and Compatible Operating Systems 9 Before You Connect the Camera to the Computer 10 Using the Software on the Windows Platform - Preparations 11 Installing the Software and USB Driver 11 Using the Software on the Windows Platform - The Basics 16 Downloading Images to the Computer - Canon PowerShot G7 | Software Starter Guide For the Canon Digital Camera Solutio - Page 4
67 Appendices 72 Uninstalling the Software 72 Memory Card Folder Structure 75 Troubleshooting 76 Information about Your Camera 85 Non-Supported Programs and Features 85 Index 86 Using the PDF Manuals The following PDF-format manuals (hereafter PDF manuals) are provided to explain the - Canon PowerShot G7 | Software Starter Guide For the Canon Digital Camera Solutio - Page 5
This chapter explains what you can accomplish using the camera with the software contained on the Canon Digital Camera Solution Disk. It also lists the computer system configurations required to use the software. About this Guide • The explanations in this guide are based on Windows XP and Mac OS - Canon PowerShot G7 | Software Starter Guide For the Canon Digital Camera Solutio - Page 6
4 Read This First It's so Simple! Make Prints Right at Home Like a Pro Shoot the images See your Camera User Guide for shooting instructions. Install the software on the computer Windows (p. 11) Macintosh (p. 44) Just install the software once at the beginning. - Canon PowerShot G7 | Software Starter Guide For the Canon Digital Camera Solutio - Page 7
5 Connect the camera to the computer Precautions for Connecting the Camera to the Computer (p. 10) See your Camera User Guide for connecting instructions. Download images to the computer Windows (p. 16) Macintosh (p. 46) Print the images Windows (p. 21) Macintosh (p. 50) - Canon PowerShot G7 | Software Starter Guide For the Canon Digital Camera Solutio - Page 8
with Entertaining Software Print a Variety of Layouts Print with the diverse layouts available in ZoomBrowser EX (Windows) and ImageBrowser (Macintosh). The examples shown are from ZoomBrowser EX (Windows). With One Photo per Page Print, printing images is also easy. Confirm all your images in one - Canon PowerShot G7 | Software Starter Guide For the Canon Digital Camera Solutio - Page 9
E-mail Attachment Attach an image to an e-mail message by starting your mail software from within ZoomBrowser EX (Windows) or ImageBrowser (Macintosh). Operate the Camera Shutter from the Computer You can use ZoomBrowser EX (Windows) or ImageBrowser (Macintosh) to operate the camera shutter from the - Canon PowerShot G7 | Software Starter Guide For the Canon Digital Camera Solutio - Page 10
Free Hard Disk Space PowerPC G3/G4/G5 or Intel Processor* 256 MB or more USB •Canon Utilities - ImageBrowser: - PhotoStitch: 200 MB or more 40 MB or more Display 1,024 x 768 pixels/32,000 Colors or better * EOS Utility (software for EOS DIGITAL series cameras) is only supported by PowerPC - Canon PowerShot G7 | Software Starter Guide For the Canon Digital Camera Solutio - Page 11
2000 platforms. QuickTime is included on the Canon Digital Camera Solution Disk. • Macintosh software cannot be used on disks formatted in the UFS (Unix File System) format. Programs and Compatible Operating Systems The CD-ROM labeled "Canon Digital Camera Solution Disk" is provided with all - Canon PowerShot G7 | Software Starter Guide For the Canon Digital Camera Solutio - Page 12
10 Read This First Before You Connect the Camera to the Computer Ensure that you have installed the software from the supplied Canon Digital Camera Solution Disk before you connect the camera to the computer. Precautions for Connecting the Camera to the Computer • The connection may not operate - Canon PowerShot G7 | Software Starter Guide For the Canon Digital Camera Solutio - Page 13
Driver Start by installing the software from the Canon Digital Camera Solution Disk. • You must install the software before you connect the camera to the computer. • Users of Windows XP and Windows 2000 must first log in as an Administrator (computer system administrator) to install programs. Items - Canon PowerShot G7 | Software Starter Guide For the Canon Digital Camera Solutio - Page 14
12 Using the Software on the Windows Platform - Preparations 3 Place the Canon Digital Camera Solution Disk in the computer's CD-ROM drive. If the installer panel does not appear automatically, use the following procedures. How to Display the Installer - Canon PowerShot G7 | Software Starter Guide For the Canon Digital Camera Solutio - Page 15
: Canon Camera WIA Driver With Windows XP, the USB driver supplied with the Windows operating system is used so there is no need to install a USB driver. 7 Click [Yes] if you agree to all of the terms of the software license agreement. The installation will start. Follow the onscreen instructions to - Canon PowerShot G7 | Software Starter Guide For the Canon Digital Camera Solutio - Page 16
XP and Windows 2000 must log in as an Administrator (computer system administrator) after restarting to carry out the subsequent procedures. 9 Remove screen appears after restarting. This concludes the software installation. Continue by connecting the camera to the computer so that the USB driver - Canon PowerShot G7 | Software Starter Guide For the Canon Digital Camera Solutio - Page 17
will display after installation. See Using the Software on the Windows Platform - The Basics (p. 16) for the subsequent procedures. • See USB driver installation not proceeding well in the Troubleshooting section (p. 76) if you are having problems installing the USB driver. • See Uninstalling the - Canon PowerShot G7 | Software Starter Guide For the Canon Digital Camera Solutio - Page 18
are a large number of images (approximately 1000) on the memory card. Use a memory card reader to download in that case. Camera to Computer Connection 1 Attach the supplied interface cable to the computer's USB port and the camera's DIGITAL Terminal. Prepare the camera for communication with the - Canon PowerShot G7 | Software Starter Guide For the Canon Digital Camera Solutio - Page 19
and select [All Programs] or [Programs], followed by [Canon Utilities], [CameraWindow], [PowerShot - IXY - IXUS - DV 6] and [CameraWindow]. 2 Download the images. Download the images using the camera or the computer. By default, the downloaded images are saved into the [My Pictures] folder. Placing - Canon PowerShot G7 | Software Starter Guide For the Canon Digital Camera Solutio - Page 20
light if your camera is equipped with one. • See the Camera User Guide for instructions regarding Direct Transfer settings and procedures. Set the Direct Transfer settings on the camera and press the (Print/Share) button or the SET button. Using the Computer to Download Images Click [Starts to - Canon PowerShot G7 | Software Starter Guide For the Canon Digital Camera Solutio - Page 21
the memory card into the reader. Use a separately sold card adapter if required. See the manual for the memory card reader for its connection and handling instructions. 2 Select [View/Download Images using Canon CameraWindow] when the dialog to the right appears and click [OK]. The Camera Control - Canon PowerShot G7 | Software Starter Guide For the Canon Digital Camera Solutio - Page 22
with the camera] as the image type to be downloaded. • Click [Lets you select and download images] to show the memory card images in a list, check the images before downloading and download only selected images. • See Memory Card Folder Structure (p. 75) for information about memory card folder - Canon PowerShot G7 | Software Starter Guide For the Canon Digital Camera Solutio - Page 23
that accompanied a Canon-brand printer, you will proceed to the Easy-PhotoPrint printing window shown at the right when you select [One Photo per Page Print] according to the default settings. If a window similar to it opens, read the Help menu for EasyPhotoPrint for instructions to proceed. • To - Canon PowerShot G7 | Software Starter Guide For the Canon Digital Camera Solutio - Page 24
22 Using the Software on the Windows Platform - The Basics 2 After confirming that [1. Select Images] is selected, select images. You can select multiple images by holding the [Ctrl] down while clicking on successive images. The background of selected images changes to blue. 3 Click [2. Printer and - Canon PowerShot G7 | Software Starter Guide For the Canon Digital Camera Solutio - Page 25
techniques. Using the Software on the Windows Platform - Advanced Techniques (p. 24). • A PDF-format manual for ZoomBrowser EX is also available. It provides further information about the program's features and procedures. See Using the PDF Manuals (p. 2). Using Cameras That Support My Category When - Canon PowerShot G7 | Software Starter Guide For the Canon Digital Camera Solutio - Page 26
have mastered the basic ZoomBrowser EX procedures in the Using the Software on the Windows Platform - The Basics chapter. To confirm whether your camera supports these functions, please refer to Information about Your Camera (p. 85). The ZoomBrowser EX Windows This section describes the principal - Canon PowerShot G7 | Software Starter Guide For the Canon Digital Camera Solutio - Page 27
] and [Sort by]. • The following icons will display around images according to their attributes. Images shot with the camera's Stitch Assist mode RAW images Movies Images with sound memo attachments Protected images Images shot with the camera's AEB function Images or movies rotated in display only - Canon PowerShot G7 | Software Starter Guide For the Canon Digital Camera Solutio - Page 28
26 Using the Software on the Windows Platform - Advanced Techniques Display Mode • Selects the display style for the Browser Area. Zoom Mode Displays all the images in a folder as thumbnail images. This mode is convenient for searching for images since many can be displayed at once. If additional - Canon PowerShot G7 | Software Starter Guide For the Canon Digital Camera Solutio - Page 29
as the file name or shooting date or rating beneath the thumbnail. Filter Tool Menu Displays only images that correspond to the specific conditions. Select Button Use this to select images in Zoom mode. Function Buttons • These buttons are available for executing various functions. View - Canon PowerShot G7 | Software Starter Guide For the Canon Digital Camera Solutio - Page 30
is handy for comparing images. Zoom Changes the image zoom setting. Star Rating Sets the Star Rating for an image. Full Screen Button Displays the image in the full screen mode. Click the image or press any key on the keyboard to restore the normal display mode. • If a RAW image is displayed, the - Canon PowerShot G7 | Software Starter Guide For the Canon Digital Camera Solutio - Page 31
detailed information, such as the shutter speed and exposure compensation setting. The camera model will determine what information is displayed. Plays a sound memo attached to an image. Protect Prevents an image from being overwritten or deleted. Comment You can type a comment here. Keywords - Canon PowerShot G7 | Software Starter Guide For the Canon Digital Camera Solutio - Page 32
. For details on this function, see the user guide for your camera. Acquire Images from Memory Card Download images from a memory card (p. 19). You can also download sound files recorded with the Sound Recorder function, or select images on the memory card and print them. View & Classify View as - Canon PowerShot G7 | Software Starter Guide For the Canon Digital Camera Solutio - Page 33
music, and apply various effects (p. 34). Process RAW Images Converts RAW images into standard images. You can adjust the image brightness, contrast and color balance among other attributes during conversion. Export Export Still Images Allows you to change the image size or type, and export it as - Canon PowerShot G7 | Software Starter Guide For the Canon Digital Camera Solutio - Page 34
can print "photo" prints easily. Index Print Lines up small versions of the images in rows and prints. Print Using Other Software Select the software to use and then print. Internet Email Images Converts the selected images to the appropriate size for transmission by e-mail. You can also use it to - Canon PowerShot G7 | Software Starter Guide For the Canon Digital Camera Solutio - Page 35
Place the Canon Digital Camera Solution Disk in the CD-ROM drive. If the installer panel fails to appear automatically, display it using the procedures in the How to Display the Installer Panel section (p. 12). 2 Click the QuickTime [Install] button. Follow the onscreen instructions to proceed with - Canon PowerShot G7 | Software Starter Guide For the Canon Digital Camera Solutio - Page 36
34 Using the Software on the Windows Platform - Advanced Techniques Editing Movies You can button for detailed operational instructions. Instructions Click this button to play the movie being edited. Storyboard Area Displays thumbnails of the selected images. Links images in order from left - Canon PowerShot G7 | Software Starter Guide For the Canon Digital Camera Solutio - Page 37
for checking images on the larger display of the computer as you record them and for high volume photography without worrying about filling the camera's memory card. Preparing for Remote Shooting 1 Attach the supplied interface cable to the computer's USB port and the camera's DIGITAL terminal and - Canon PowerShot G7 | Software Starter Guide For the Canon Digital Camera Solutio - Page 38
captured. Release Button Releases the shutter. Slide this to zoom the camera in or out. Viewfinder Display Click the [Start/Stop Viewfinder] button while a connection to the camera is open to display the image appearing in the camera's viewfinder. Start/Stop Viewfinder Button Starts or stops the - Canon PowerShot G7 | Software Starter Guide For the Canon Digital Camera Solutio - Page 39
advance. If your camera's shooting mode is equipped with the Auto Rotate function and you set it to On, the image will automatically be rotated than the shutter button, the camera's buttons and switches, including the zoom, cannot be operated while the camera is being controlled with the Remote - Canon PowerShot G7 | Software Starter Guide For the Canon Digital Camera Solutio - Page 40
in the Browser Area. Symbol displayed by images shot in Stitch Assist mode. • See the Camera User Guide for information about shooting in Stitch Assist mode. • Images shot in Stitch Assist mode with a wide converter, teleconverter or close-up lens cannot be merged accurately. Starting PhotoStitch - Canon PowerShot G7 | Software Starter Guide For the Canon Digital Camera Solutio - Page 41
versa. To register the My Camera settings with the camera, ensure that you install the software that came with the camera. Displaying the My Camera Window 1 Attach the supplied interface cable to the computer's USB port and the camera's DIGITAL terminal and place the camera in the correct mode for - Canon PowerShot G7 | Software Starter Guide For the Canon Digital Camera Solutio - Page 42
40 Using the Software on the Windows Platform - Advanced Techniques The My Camera Window Features ZoomBrowser EX already contains several pre-recorded My Camera settings. You can check these items with the My Camera window. Tabs Click here to switch between adjusting the settings individually or - Canon PowerShot G7 | Software Starter Guide For the Canon Digital Camera Solutio - Page 43
be overwritten. Repeat steps 1-3 as required. To use this data on the camera, change the start-up image and sound settings on the camera itself. Please see the Camera User Guide for these instructions. Saving the Camera's My Camera Settings to the Computer 1 Select the [Setup as a theme] tab in the - Canon PowerShot G7 | Software Starter Guide For the Canon Digital Camera Solutio - Page 44
tab in the My Camera window, followed by the [Create My Camera Data] button. My Camera Maker will start. Add File Button Adds images and sound files for use as settings files. Added files display in the list. Connect to camera Button Connects to the camera. 3 Follow the instructions at the top part - Canon PowerShot G7 | Software Starter Guide For the Canon Digital Camera Solutio - Page 45
the same procedures as in "Saving the My Camera Settings to the Camera" (p. 41). • Use settings like those below when creating an image file for the start- up image using an image editing program other than My Camera Maker. Compression Method : JPEG (Baseline JPEG) Data Sampling : 4:2:0 or - Canon PowerShot G7 | Software Starter Guide For the Canon Digital Camera Solutio - Page 46
Read this material before you connect the camera to the computer for the first time. Installing the Software Start by installing the software from the Canon Digital Camera Solution Disk. Items to Prepare • Your camera and computer • Canon Digital Camera Solution Disk • Interface cable supplied with - Canon PowerShot G7 | Software Starter Guide For the Canon Digital Camera Solutio - Page 47
the terms of the software license agreement. 7 Review the installation settings and click [Next]. Follow the onscreen instructions to proceed. 8 the software installation. See Uninstalling the Software (p. 72) to delete the software installed with these procedures. Continue by downloading images to - Canon PowerShot G7 | Software Starter Guide For the Canon Digital Camera Solutio - Page 48
are a large number of images (approximately 1000) on the memory card. Use a memory card reader to download in that case. Camera to Computer Connection 1 Attach the supplied interface cable to the computer's USB port and the camera's DIGITAL Terminal. Prepare the camera for communication with the - Canon PowerShot G7 | Software Starter Guide For the Canon Digital Camera Solutio - Page 49
is equipped with one. • See the Camera User Guide for instructions regarding Direct Transfer settings and procedures. Set the Direct Transfer settings on the camera and press the (Print/Share) button or the [SET] button. Using the Computer to Download Images Click [Starts to download images]. - Canon PowerShot G7 | Software Starter Guide For the Canon Digital Camera Solutio - Page 50
. Continue by printing out an image (p. 50). Memory Card Reader Connection 1 Insert the memory card into the reader. Use a separately sold card adapter if required. See the manual for the memory card reader for details on how to connect and use the reader. The Camera Control Window will appear. If - Canon PowerShot G7 | Software Starter Guide For the Canon Digital Camera Solutio - Page 51
with the camera] as the type of image for downloading. •Click [Lets you select and download images] to show the memory card images in a list, check the images before downloading and download only selected images. • See Memory Card Folder Structure (p. 75) for information about memory card folder - Canon PowerShot G7 | Software Starter Guide For the Canon Digital Camera Solutio - Page 52
50 Using the Software on the Macintosh Platform - The Basics Printing Images There are three ways in which images may be printed: One Photo per page Print, Index Print and Layout Print. This section explains the One Photo per page Print method. Movies cannot - Canon PowerShot G7 | Software Starter Guide For the Canon Digital Camera Solutio - Page 53
the Software on the Macintosh Platform - Advanced Techniques (p. 52). A PDF-format manual for ImageBrowser is also available. It provides further information about the program's features and procedures. See Using the PDF Manuals (p. 2). Using Cameras That Support My Category When using cameras that - Canon PowerShot G7 | Software Starter Guide For the Canon Digital Camera Solutio - Page 54
you have mastered the basic ImageBrowser procedures in the Using the Software on the Macintosh Platform - The Basics chapter. To confirm whether your camera supports these functions, please refer to Information about Your Camera (p. 85). The ImageBrowser Windows This section describes the principal - Canon PowerShot G7 | Software Starter Guide For the Canon Digital Camera Solutio - Page 55
on the last image. • The following types of icon will display around images according to their attributes. Images shot with the camera's Stitch Assist mode RAW images Movies Images with sound memo attachments Protected images Images shot with the camera's AEB function Images or movies rotated - Canon PowerShot G7 | Software Starter Guide For the Canon Digital Camera Solutio - Page 56
54 Using the Software on the Macintosh Platform - Advanced Techniques Display Mode • Selects the display style for the Browser Area. Preview This mode displays the image at a larger size as well as the image information. List Displays the images in the folder selected in the Explorer Panel section - Canon PowerShot G7 | Software Starter Guide For the Canon Digital Camera Solutio - Page 57
settings for the Browser Area. Display Size Changes the size of the thumbnail in the Browser Area. Selection Menu Click this to select/deselect all images in the Browser Area. Filter Tool Use the Star Rating option in the Show menu to limit the scope of - Canon PowerShot G7 | Software Starter Guide For the Canon Digital Camera Solutio - Page 58
56 Using the Software on the Macintosh Platform - Advanced Techniques Viewer Window Double-click an image in the Browser Area to display it in the Viewer Window. Zoom Changes the image zoom setting. Image Selector Button Switches between images. Save Button Saves the edited image. Edit Menu You - Canon PowerShot G7 | Software Starter Guide For the Canon Digital Camera Solutio - Page 59
Sets the rating for an image. Shows or hides categories. Plays a sound memo attached to an image. Lock Prevents an image from being overwritten or deleted. of the highlights and shadows distribution in an image. Image Selector Buttons Switches between images. File Name You can change file names. - Canon PowerShot G7 | Software Starter Guide For the Canon Digital Camera Solutio - Page 60
To confirm whether your camera supports these functions, please refer to Information about Your Camera (p. 85). Control Panel Features Canon Camera Opens the Camera Control Window, which lets you perform the following operations. Acquire Images Downloads images from the camera/memory card (p. 46, 48 - Canon PowerShot G7 | Software Starter Guide For the Canon Digital Camera Solutio - Page 61
them into a specified folder. •Rename: changes the files names of multiple images in a single pass. Convert RAW Images: [File] menu, [RAW image processing] Converts RAW images. You can adjust the image brightness, contrast and color balance among other attributes during conversion. Merge Panoramas - Canon PowerShot G7 | Software Starter Guide For the Canon Digital Camera Solutio - Page 62
60 Using the Software on the Macintosh Platform - Advanced Techniques Display Settings: [View] menu, [View Settings] Hides or shows image information beneath the thumbnail, such as the file name or the shooting date and time. Sort Images: [View] menu, [Sort] Arranges image order in the Browser Area - Canon PowerShot G7 | Software Starter Guide For the Canon Digital Camera Solutio - Page 63
61 Replaying Movies 1 Double-click an image with a movie icon in ImageBrowser's Browser Area. The movie will appear in the Viewer Window. Movie icon 2 Click the button. You can control the movie's playback and sound volume. You can save the displayed scene as a still image by clicking here. - Canon PowerShot G7 | Software Starter Guide For the Canon Digital Camera Solutio - Page 64
the movie and save it. Follow these steps to proceed. Instructions Click this button for detailed operational instructions. Click this button to play the movie being edited. Storyboard Area Displays thumbnails of the selected images. Links images in order from left to right. Transition Effect Box - Canon PowerShot G7 | Software Starter Guide For the Canon Digital Camera Solutio - Page 65
for checking images on the larger display of the computer as you record them and for high volume photography without worrying about filling the camera's memory card. Preparing for Remote Shooting 1 Attach the supplied interface cable to the computer's USB port and the camera's DIGITAL terminal and - Canon PowerShot G7 | Software Starter Guide For the Canon Digital Camera Solutio - Page 66
Size and Resolution Selector Selects the size and resolution at which images are captured. Rotation Settings Sets the rotation parameters for images after they are captured. Release Button Releases the shutter. Slide this to zoom the camera in or out. Start/Stop Viewfinder Button Starts or stops the - Canon PowerShot G7 | Software Starter Guide For the Canon Digital Camera Solutio - Page 67
advance. If your camera's shooting mode is equipped with the Auto Rotate function and you set it to On, the image will automatically be rotated than the shutter button, the camera's buttons and switches, including the zoom, cannot be operated while the camera is being controlled with the Remote - Canon PowerShot G7 | Software Starter Guide For the Canon Digital Camera Solutio - Page 68
in the Browser Area. Symbol displayed by images shot in Stitch Assist mode. • See the Camera User Guide for information about shooting in Stitch Assist mode. • Images shot in Stitch Assist mode with a wide converter, teleconverter or close-up lens cannot be merged accurately. Starting PhotoStitch - Canon PowerShot G7 | Software Starter Guide For the Canon Digital Camera Solutio - Page 69
versa. To register the My Camera settings with the camera, ensure that you install the software that came with the camera. Displaying the My Camera Window 1 Attach the supplied interface cable to the computer's USB port and the camera's DIGITAL terminal and place the camera in the correct mode for - Canon PowerShot G7 | Software Starter Guide For the Canon Digital Camera Solutio - Page 70
68 Using the Software on the Macintosh Platform - Advanced Techniques The My Camera Window ImageBrowser already contains several pre-recorded My Camera settings items. You can check these items with the My Camera window. Type Select the settings type. Computer Displays the list of settings files - Canon PowerShot G7 | Software Starter Guide For the Canon Digital Camera Solutio - Page 71
concludes the process of saving the My Camera settings to the camera. To use this data on the camera, change the start-up image and sound settings on the camera itself. Please see the Camera User Guide for these instructions. Saving the Camera's My Camera Settings to the Computer 1 Select the type - Canon PowerShot G7 | Software Starter Guide For the Canon Digital Camera Solutio - Page 72
the computer. 1 Click the [File] menu in the ImageBrowser Main Window and select [Canon Camera] and [My camera]. The My Camera window will display. 2 Select the [Start-up Image] in Type. 3 Click [Add]. Add Button Adds images and sound files for use as settings files. Added files display in the list - Canon PowerShot G7 | Software Starter Guide For the Canon Digital Camera Solutio - Page 73
up Image File and then Add It. • Use settings like those below when creating an image file for the start- up image with an image following lengths as guidelines for the length of sound file that can be saved to the camera. Type Duration in Seconds 11.025 kHz 8.000 kHz Start-Up Sound 1.0 sec. - Canon PowerShot G7 | Software Starter Guide For the Canon Digital Camera Solutio - Page 74
72 Appendices This chapter explains how to uninstall the programs. Read the Troubleshooting section in this chapter if you experience a problem using the programs. Uninstalling the Software The procedures for uninstalling the software are only required when you wish to delete the programs from your - Canon PowerShot G7 | Software Starter Guide For the Canon Digital Camera Solutio - Page 75
cable to the computer's USB port and the camera's DIGITAL Terminal. Prepare the camera for communication with the computer. For interface cable connection instructions, see the Camera User Guide. 2 Click the [Finish] button if the Camera Control Window displays. 3 Click the [Start] menu and - Canon PowerShot G7 | Software Starter Guide For the Canon Digital Camera Solutio - Page 76
[Canon Camera] and click [Remove]. Then turn off the camera and remove the interface cable from the computer's USB port. If your camera model name does not appear here, see the Camera not detected, Events dialog won't display or images will not download to the computer (p. 77) of the Troubleshooting - Canon PowerShot G7 | Software Starter Guide For the Canon Digital Camera Solutio - Page 77
75 Memory Card Folder Structure The images on a memory card are placed in the [DCIM] folder in subfolders labeled [xxxCANON], where the "xxx" represents a number in the range 100 - 999. DCIM xxxCANON IMG_xxxx.JPG (JPEG images) _MG_xxxx.JPG (JPEG images recorded in the Adobe RGB color space) - Canon PowerShot G7 | Software Starter Guide For the Canon Digital Camera Solutio - Page 78
76 Appendices Troubleshooting Please read this section if you encounter a problem using the software. Start by Checking This Investigate the following points first if you encounter a problem. Does your computer satisfy the requirements listed in the System Requirements section (p. 8)? Is the camera - Canon PowerShot G7 | Software Starter Guide For the Canon Digital Camera Solutio - Page 79
98 SE)). Click the [Finish] button in the Camera Control Window to close it. Cannot download images or shoot remotely. (For cameras connected to the computer via an interface cable: only cameras supporting Hi-Speed USB 2.0). The problem may be resolved by lowering the transmission speed for data - Canon PowerShot G7 | Software Starter Guide For the Canon Digital Camera Solutio - Page 80
] window. • Your camera model name, [Canon Camera] or a camera icon does not display in the [Scanners and Cameras Properties] dialog or the [Scanners and Cameras] folder. Solution 1: Start with the following procedures. Install the USB driver with the procedures in Installing the Software and USB - Canon PowerShot G7 | Software Starter Guide For the Canon Digital Camera Solutio - Page 81
reasons for the problem if the "Other devices" or "Imaging devices" categories do not appear or your camera model name or [Canon Camera] does not your camera model name or [Canon Camera] if it appears in one or more places in the [Other devices] or [Imaging devices] categories. 6. Close the System - Canon PowerShot G7 | Software Starter Guide For the Canon Digital Camera Solutio - Page 82
Notepad program. Look for [;****Canon Camera Driver Setup File****] in the first line. Note down the names of these files. Several sets of [CAP*] files may be present in the [inf] folder. Open up each file to confirm that it is an [CAP*] file for Canon digital cameras before you do anything with - Canon PowerShot G7 | Software Starter Guide For the Canon Digital Camera Solutio - Page 83
for the problem if the "Other devices" or "Imaging devices" categories do not appear or your camera model name or [Canon Camera] does not camera model name or [Canon Camera] if it appears in one or more places in the [Other devices] or [Imaging devices] categories. 6. Click [OK] to close the System - Canon PowerShot G7 | Software Starter Guide For the Canon Digital Camera Solutio - Page 84
] (or [Drvidx.bin]) files. 9. In the [INF] or [Inf] folder, double-click the [OTHER] or [Other] folder to open it. 10. Find and delete the [Canon.IncCAP xxx.Inf] file (The xxx represents numerals.). You do not need to delete anything if none of the above files are contained in the - Canon PowerShot G7 | Software Starter Guide For the Canon Digital Camera Solutio - Page 85
Software and USB Driver (p. 11). Zooming Images in ZoomBrowser EX is Slow or Not Working Some graphics cards or settings may cause the display of zoomed images Advanced] button and [Troubleshoot] tab. With Windows 2000, click message "Insufficient free memory" displays when Canon\ZoomBrowser EX\Program) - Canon PowerShot G7 | Software Starter Guide For the Canon Digital Camera Solutio - Page 86
Use Windows Explorer to copy the folder and the images it contains from the [Program Files] folder to another folder. (e.g. Copy the image folders in C:\Program Files\Canon\ZoomBrowser EX\Library One to another location.) The moved folder images can now be selected and displayed with ZoomBrowser EX - Canon PowerShot G7 | Software Starter Guide For the Canon Digital Camera Solutio - Page 87
Features Applicable Camera Models PowerShot SD900 DIGITAL ELPH/DIGITAL IXUS 900 Ti PowerShot SD800 DIGITAL ELPH/DIGITAL IXUS 850 IS PowerShot SD40 DIGITAL ELPH/DIGITAL IXUS i7 zoom PowerShot A710 IS PowerShot A630 Non-Supported Functions • The camera does not record RAW images. • The camera does not - Canon PowerShot G7 | Software Starter Guide For the Canon Digital Camera Solutio - Page 88
Camera 85 Installer Panel Macintosh 44 Windows 12 Installing Software Macintosh 44 USB Driver 11 Windows 11 K Keyword Macintosh 57 Windows 29 L Last Acquired Images Macintosh 48, 53 Windows 19, 25 Layout Print Macintosh 50 M Main Window 24 Memory Card Folder Structure 75 Memory Card - Canon PowerShot G7 | Software Starter Guide For the Canon Digital Camera Solutio - Page 89
18, 47 Printing Images Macintosh 50 Windows 21 Programs and Compatible Operating Systems 9 Properties Window 29 Q 87 Stitch Assist Mode Macintosh 66 Windows 38 System Requirements 8 T Task Area 24, 25, 30 Troubleshooting 76 Start by Checking This 76 U Uninstalling Software Macintosh 74 - Canon PowerShot G7 | Software Starter Guide For the Canon Digital Camera Solutio - Page 90
88 MEMO
-
 1
1 -
 2
2 -
 3
3 -
 4
4 -
 5
5 -
 6
6 -
 7
7 -
8
-
9
-
10
-
11
-
12
-
13
-
14
-
15
-
16
-
17
-
18
-
19
-
20
-
21
-
22
-
23
-
24
-
25
-
26
-
27
-
28
-
29
-
30
-
31
-
32
-
33
-
34
-
35
-
36
-
37
-
38
-
39
-
40
-
41
-
42
-
43
-
44
-
45
-
46
-
47
-
48
-
49
-
50
-
51
-
52
-
53
-
54
-
55
-
56
-
57
-
58
-
59
-
60
-
61
-
62
-
63
-
64
-
65
-
66
-
67
-
68
-
69
-
70
-
71
-
72
-
73
-
74
-
75
-
76
-
77
-
78
-
79
-
80
-
81
-
82
-
83
-
84
-
85
-
86
-
87
-
88
-
89
-
90
 |
 |
Windows/Macintosh
Windows
Macintosh
p. 11
p. 44
• This guide explains how to install the software programs and
briefly introduces their functions and operating procedures.
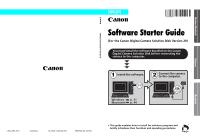
Software Starter Guide
(For the Canon Digital Camera Solution Disk Version 29)
CDI-E263-010
xx04xxxx
© 2006 CANON INC.
PRINTED IN JAPAN
ENGLISH
Windows
Macintosh
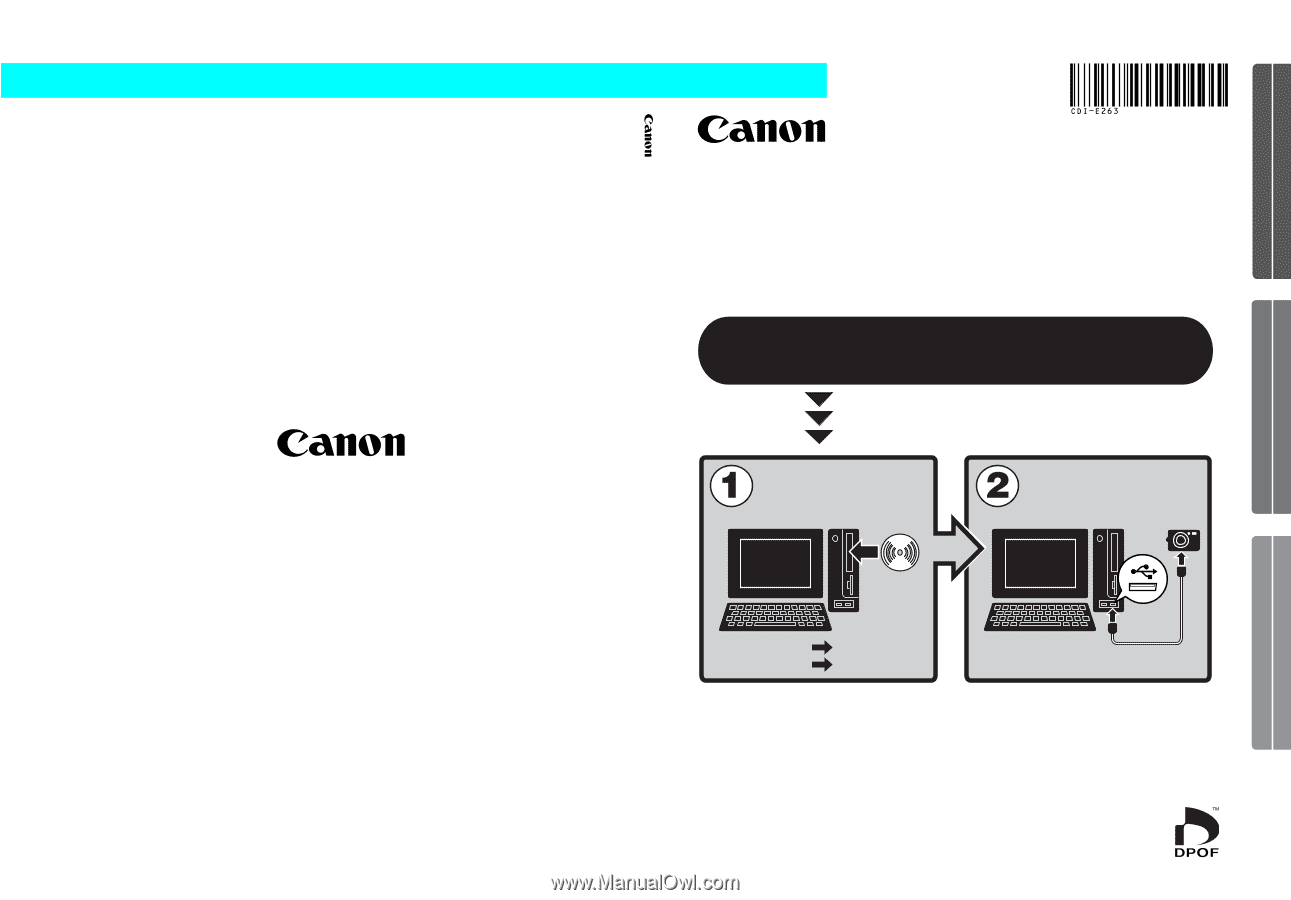
You must install the software bundled on the Canon
Digital Camera Solution Disk before connecting the
camera to the computer.
Install the software.
Connect the camera
to the computer.
Software Starter Guide For Version 29