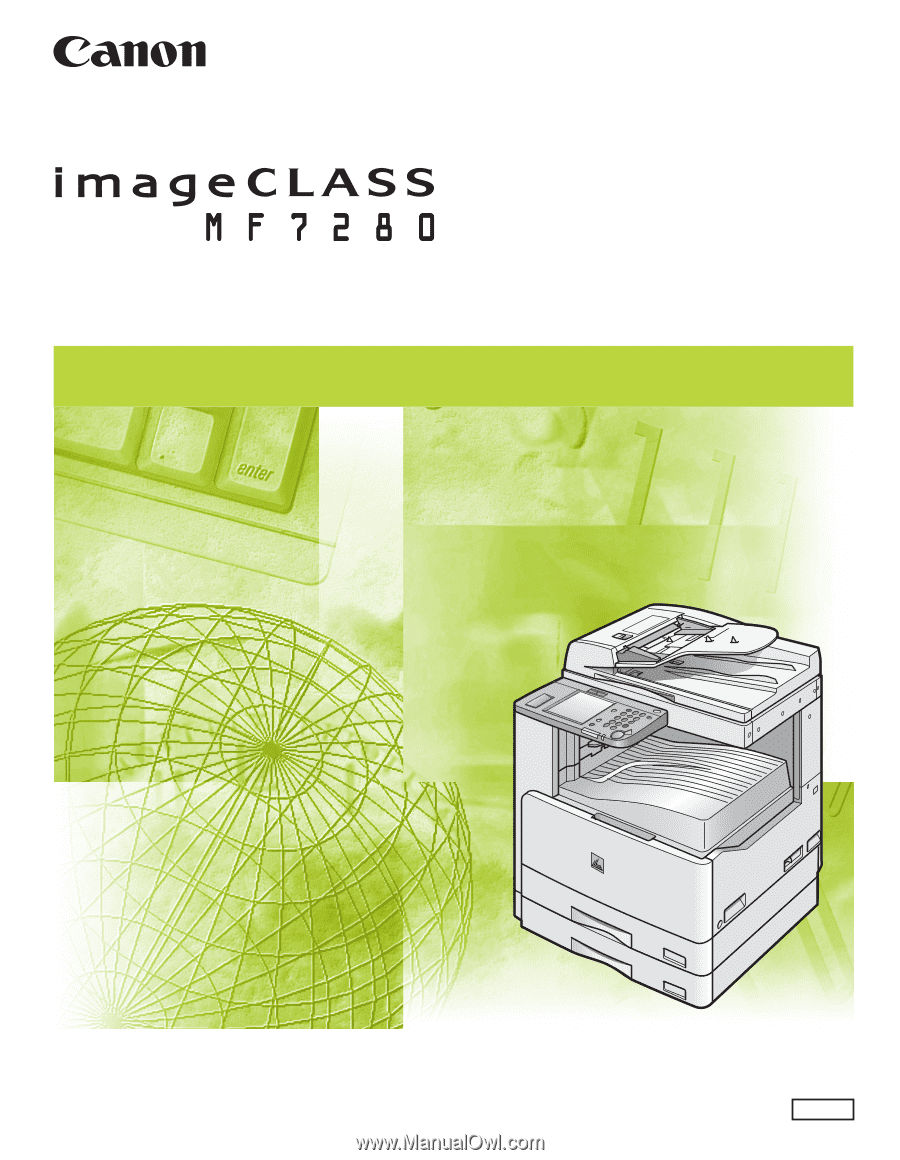
Canon imageCLASS MF7280 imageCLASS MF7280 Network Guide
Canon imageCLASS MF7280 Manual
 |
View all Canon imageCLASS MF7280 manuals
Add to My Manuals
Save this manual to your list of manuals |
Canon imageCLASS MF7280 manual content summary:
- Canon imageCLASS MF7280 | imageCLASS MF7280 Network Guide - Page 1
Network Guide Please read this guide before operating this equipment. After you finish reading this guide, store it in a safe place for future reference. ENG - Canon imageCLASS MF7280 | imageCLASS MF7280 Network Guide - Page 2
0 Ot¯ imageCLASS MF 7280 Network Guide - Canon imageCLASS MF7280 | imageCLASS MF7280 Network Guide - Page 3
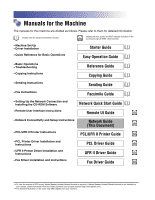
PCL/UFR II Printer Guide CD-ROM • PCL Printer Driver Installation and Instructions • UFR II Printer Driver Installation and Instructions • Fax Driver Installation and Instructions PCL Driver Guide CD-ROM UFR II Driver Guide CD-ROM Fax Driver Guide CD-ROM • To view the manual in PDF format - Canon imageCLASS MF7280 | imageCLASS MF7280 Network Guide - Page 4
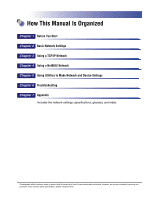
Chapter 5 Using Utilities to Make Network and Device Settings Chapter 6 Troubleshooting Chapter 7 Appendix Includes the network settings, specifications, glossary, and index. Considerable effort has been made to ensure that this manual is free of inaccuracies and omissions. However, as we are - Canon imageCLASS MF7280 | imageCLASS MF7280 Network Guide - Page 5
Contents Preface vii How to Use This Manual vii Symbols Used in This Manual vii Keys and Buttons Used in This Manual viii Displays Used in This Manual ix Abbreviations Used in This Manual x Legal Notices xi Trademarks xi Copyright xii Disclaimers xii Chapter 1 Before You Start System - Canon imageCLASS MF7280 | imageCLASS MF7280 Network Guide - Page 6
2000/XP/Server 2003 4-15 Windows NT 4.0 4-23 Chapter 5 Using Utilities to Make Network and Device Settings NetSpot Device Installer 5-2 NetSpot Console 5-3 Chapter 6 Troubleshooting Network Connection Problems and Remedies 6-2 Printing Problems and Remedies 6-4 Data Sending/File Sharing - Canon imageCLASS MF7280 | imageCLASS MF7280 Network Guide - Page 7
Chapter 7 Appendix Network Setting Items 7-2 Confirming Settings 7-8 Specifications 7-10 Ethernet Interface Adaptor 7-10 Hardware Specifications 7-10 Software Specifications 7-10 Glossary 7-11 Index 7-27 vi - Canon imageCLASS MF7280 | imageCLASS MF7280 Network Guide - Page 8
Preface Thank you for purchasing the Canon imageCLASS MF7280. Please read this manual thoroughly before operating the machine to familiarize yourself with its capabilities, and to make the most of its many functions. After reading this manual, store it in a safe place for future reference. How to - Canon imageCLASS MF7280 | imageCLASS MF7280 Network Guide - Page 9
The following symbols and key/button names are a few examples of how keys and buttons to be clicked or pressed are expressed in this manual: • Control Panel Keys: + (Key Name) Examples: (Start) (Stop) • Touch Panel Display Keys: [Key Name] Examples: [Cancel] [Done] • Buttons on Computer - Canon imageCLASS MF7280 | imageCLASS MF7280 Network Guide - Page 10
Displays Used in This Manual The keys or buttons which you should click or press are marked with a , as shown below. When multiple buttons or keys can be clicked or - Canon imageCLASS MF7280 | imageCLASS MF7280 Network Guide - Page 11
Used in This Manual In this manual, product names and model names are abbreviated as follows: Microsoft® Windows® 98 operating system: Windows 98 Microsoft® Windows® Millennium Edition operating system: Windows Me Microsoft® Windows NT® operating system: Windows NT Microsoft® Windows® 2000 - Canon imageCLASS MF7280 | imageCLASS MF7280 Network Guide - Page 12
, the Canon logo, imageCLASS, NetSpot, and iW are registered trademarks of Canon Inc. in the United States and may also be trademarks or registered trademarks in other countries. Adobe and Acrobat are trademarks of Adobe Systems Incorporated. Apple, AppleTalk, EtherTalk, LocalTalk, Macintosh, Mac OS - Canon imageCLASS MF7280 | imageCLASS MF7280 Network Guide - Page 13
Copyright Copyright 2006 by Canon Inc. All rights reserved. No part of this publication may be reproduced or transmitted in any form or by any means, electronic or mechanical, including photocopying and recording, or by any - Canon imageCLASS MF7280 | imageCLASS MF7280 Network Guide - Page 14
Before You Start 1 CHAPTER This chapter describes what you need to know before you start using the machine, including the network environments with which the machine is compatible, and how to check the network environment you are using. System Environment Requirements 1-2 Printing or Sending a - Canon imageCLASS MF7280 | imageCLASS MF7280 Network Guide - Page 15
XP Professional - Microsoft Windows XP Home Edition - Microsoft Windows Server 2003 • Compatible computers - Windows; IBM PC/compatibles • Compatible protocol - TCP/IP IMPORTANT • If you are using Windows NT 4.0, you need to install Service Pack 6a or later. • If you are using Windows 2000, you need - Canon imageCLASS MF7280 | imageCLASS MF7280 Network Guide - Page 16
Microsoft Exchange Server (Windows) (Microsoft Exchange Server 5.5 + Service Pack 1 or later) - Lotus Domino R4.6 or later (Windows) • Compatible mail latter method is used, it is not necessary for the mail server to support the POP3 protocol. • The machine can receive I-fax images and error - Canon imageCLASS MF7280 | imageCLASS MF7280 Network Guide - Page 17
2000 Server and Internet Information Services 5.0 - Microsoft Windows XP Professional and Internet Information Services 5.1 - Microsoft Windows Server 2003 and Internet Information Services 6.0 - Solaris Version 2.6 or later - Red Hat Linux 7.2 - Mac OS X - FTP server for imageWARE Gateway - Canon imageCLASS MF7280 | imageCLASS MF7280 Network Guide - Page 18
a network of different operating systems as well, including Windows, UNIX, Linux, and Mac OS X, depending on your usage needs. (See "System Environment Requirements," on p. 1-2.) Windows 98 Windows 2000 Windows XP Protocol: TCP/IP Windows 2000 Server The Machine See Chapter 2, "Basic Network - Canon imageCLASS MF7280 | imageCLASS MF7280 Network Guide - Page 19
Basic Network Settings 2 CHAPTER This chapter describes how to connect the machine to a computer or network and to set up a network connection environment. Be sure to set items explained in this chapter before configuring TCP/IP settings and other options in Chapter 3 or Chapter 4. Network - Canon imageCLASS MF7280 | imageCLASS MF7280 Network Guide - Page 20
Basic Network Settings Network Environment Setup Procedures Before using the machine in a network environment, it is necessary to perform the following setup procedures. 2 1 Network Cable Connection (See "Connecting the Machine," on p. 2-3.) Connect the machine to the network using the network - Canon imageCLASS MF7280 | imageCLASS MF7280 Network Guide - Page 21
(See Chapter 1, "Before You Start Using This Machine," in the Reference Guide.) - Turn OFF the computer and disconnect the power cord from the power IMPORTANT • External USB devices (e.g., memory, keyboard, mouse, etc.) are not supported. • A USB cable or a network cable are not included in this - Canon imageCLASS MF7280 | imageCLASS MF7280 Network Guide - Page 22
network (hubs, routers, etc.) must support the mixed environment. For more information, consult your local authorized Canon dealer. • After connecting the network "System Manager Settings," in the Reference Guide.) - Set the network settings. - Install a printer driver if necessary. (See the Starter - Canon imageCLASS MF7280 | imageCLASS MF7280 Network Guide - Page 23
a USB connection, see "Install Driver Software," in the Starter Guide. Printer Driver Software 2 USB Cable USB Port USB Connector Basic Network Settings CAUTION If you connect or disconnect the USB cable while the main power switch is ON, do not touch the metal parts around the connector, as - Canon imageCLASS MF7280 | imageCLASS MF7280 Network Guide - Page 24
a document from your computer using the printer driver, or send a fax from your computer using the fax driver. • You cannot specify the computer connected 2 Canon dealer or call the Canon Support Center at 1-800-828-4040. - Windows 98/Me: USB Full-Speed (USB 1.1 equivalent) - Windows 2000/ - Canon imageCLASS MF7280 | imageCLASS MF7280 Network Guide - Page 25
protocol settings, you can change the content by using the Remote UI. NOTE For instructions on how to enter settings using the Remote UI, see Chapter 3, "Customizing Settings," in the Remote UI Guide. Settings from the Control Panel The procedures for specifying the settings from the control panel - Canon imageCLASS MF7280 | imageCLASS MF7280 Network Guide - Page 26
Basic Network Settings 2 Press [System Settings]. 2 NOTE If the message appears on the touch panel display, enter the System Manager ID and password ➞ press (ID). 3 Press [Network Settings]. 2-8 Interface Settings - Canon imageCLASS MF7280 | imageCLASS MF7280 Network Guide - Page 27
Driver Settings]. 2 5 Select [On] or [Off] for . Basic Network Settings ● If you want the machine to automatically determine the communication mode (Half duplex/Full duplex) and Ethernet type (10Base-T/100Base-TX): ❑ Press [On]. ❑ Skip to step 8. ● If you want to manually specify - Canon imageCLASS MF7280 | imageCLASS MF7280 Network Guide - Page 28
Network Settings ● If you want to alternately send and receive: ❑ Press [Half Duplex]. ● If you want to simultaneously send and receive: ❑ Press [Full Duplex]. 7 Specify on the Ethernet Driver Settings screen. ● If you want to establish a 10Base-T network connection: ❑ Press [10 - Canon imageCLASS MF7280 | imageCLASS MF7280 Network Guide - Page 29
Basic Network Settings NOTE For instructions on how to turn ON/OFF the machine, see Chapter 1, "Before You Start Using This Machine," in the Reference Guide. The Ethernet driver settings are complete. 2 Interface Settings 2-11 - Canon imageCLASS MF7280 | imageCLASS MF7280 Network Guide - Page 30
the control panel become effective after the machine is restarted, after the procedure. NOTE For instructions on how to enter characters using the touch panel display, see Chapter 2, "Basic Operations," in the Reference Guide. 1 Specify the SNMP settings. ● If you want to set or browse each item of - Canon imageCLASS MF7280 | imageCLASS MF7280 Network Guide - Page 31
Basic Network Settings ❑ Press [On]. 2 ❑ To change [Community Name] to a name other than 'public', press [Community Name] ➞ enter the community name using the touch panel keyboard. ❑ If you want to allow the computers on the network to access the machine and modify its settings, press [On] for < - Canon imageCLASS MF7280 | imageCLASS MF7280 Network Guide - Page 32
Basic Network Settings 2 Specify the port setting. ● If you want to set or browse detailed information on the machine with a Canon printer driver or utility: ❑ On the Network Settings screen, press [▼] or [▲] until [Enable Dedicated Port] appears ➞ press [Enable Dedicated Port]. 2 ❑ Press [On]. ❑ - Canon imageCLASS MF7280 | imageCLASS MF7280 Network Guide - Page 33
returns to the Network Settings screen. 2 IMPORTANT • If you want to use a Canon printer driver or utility, press [On] for both and - Canon imageCLASS MF7280 | imageCLASS MF7280 Network Guide - Page 34
machine with a TCP/IP network. TCP/IP Network Setup Procedures 3-2 Protocol Settings 3-3 Settings from the Control Panel 3-4 Setting Up a Computer for Printing/Sending a Fax 3-24 Printer Connection Method (LPD/Raw 3-25 Setting Up a Computer as a File Server 3-35 FTP Server Settings 3-36 3-1 - Canon imageCLASS MF7280 | imageCLASS MF7280 Network Guide - Page 35
To specify the settings, use: 3 • The machine's control panel • The Remote UI (via a web browser) • NetSpot Device Installer (Canon utility) • NetSpot Console (Canon utility) Using a TCP/IP Network 2 Computer Settings for Printing/Sending a Fax (See "Setting Up a Computer for Printing/Sending - Canon imageCLASS MF7280 | imageCLASS MF7280 Network Guide - Page 36
Remote UI (via a web browser) • NetSpot Device Installer (Canon utility) • NetSpot Console (Canon utility) 3 Using a TCP/IP Network IMPORTANT • If you NOTE • For instructions on how to enter settings using the Remote UI, see Chapter 3, "Customizing Settings," in the Remote UI Guide. • For more - Canon imageCLASS MF7280 | imageCLASS MF7280 Network Guide - Page 37
become effective after the machine is restarted, after the procedure. NOTE For instructions on how to enter characters using the touch panel display, see Chapter 2, "Basic Operations," in the Reference Guide. 3 TCP/IP Settings 1 Press (Additional Functions). 2 Press [System Settings]. Using a TCP - Canon imageCLASS MF7280 | imageCLASS MF7280 Network Guide - Page 38
Using a TCP/IP Network 3 Press [Network Settings]. 3 4 Press [TCP/IP Settings]. 5 Press [IP Address Settings]. Protocol Settings 3-5 - Canon imageCLASS MF7280 | imageCLASS MF7280 Network Guide - Page 39
6 Specify the relevant items for your system. Using a TCP/IP Network 3 ● Using a fixed IP address: ❑ Press [IP Address]. ❑ Enter the IP address using - (numeric keys). ❑ Specify the [Subnet Mask] and [Gateway Address] settings in the same way. ● Using DHCP: ❑ Press [DHCP]. ❑ Enter the IP address, - Canon imageCLASS MF7280 | imageCLASS MF7280 Network Guide - Page 40
the DHCP, BOOTP, or RARP settings can be selected at any one time. • Even if you press [DHCP], [BOOTP], or check whether the DHCP, BOOTP, or RARP settings can be used. If you do not plan to use one of these settings, it is recommended that you turn them off. 3 7 Confirm the settings you specified - Canon imageCLASS MF7280 | imageCLASS MF7280 Network Guide - Page 41
9 Specify the IP address of a DNS server using - (numeric keys). 3 If you do not want to set up a DNS secondary server, enter . 10 Press [Next]. 11 Enter the host name and domain name. Using a TCP/IP Network Enter the name of the machine as [Host Name], and the network domain name of the - Canon imageCLASS MF7280 | imageCLASS MF7280 Network Guide - Page 42
13 Specify the LPD settings. ● If you want to use LPD as the print application: ❑ On the TCP/IP Settings screen, press [▼] or [▲] until [LPD Settings] appears ➞ press [LPD Settings]. 3 ❑ Press [On]. Using a TCP/IP Network ❑ Confirm the settings you specified ➞ press [OK]. The display returns to - Canon imageCLASS MF7280 | imageCLASS MF7280 Network Guide - Page 43
Using a TCP/IP Network 14 Specify the Raw settings. ● If you want to use Raw as the print application: ❑ On the TCP/IP Settings screen, press [▼] or [▲] until [RAW Settings] appears ➞ press [RAW Settings]. ❑ Press [On] for . 3 ❑ If you want to establish bidirectional communication using - Canon imageCLASS MF7280 | imageCLASS MF7280 Network Guide - Page 44
Using a TCP/IP Network ❑ Press [On] for [Use PASV Mode for FTP]. 3 ❑ Confirm the settings you specified ➞ press [OK]. The display returns to the TCP/IP Settings screen. 16 Specify the FTP Extension settings. ❑ On the TCP/IP Settings screen, press [▼] or [▲] until [FTP Extention] appears ➞ press [ - Canon imageCLASS MF7280 | imageCLASS MF7280 Network Guide - Page 45
Using a TCP/IP Network 17 Specify the HTTP settings. ❑ On the TCP/IP Settings screen, press [▼] or [▲] until [Use HTTP] appears ➞ press [Use HTTP]. ❑ If you want to use the Remote UI, press [On]. Otherwise, press [Off]. 3 Pressing [Off] for [Use HTTP] automatically sets [Remote UI] to 'Off'. ❑ - Canon imageCLASS MF7280 | imageCLASS MF7280 Network Guide - Page 46
Using a TCP/IP Network ❑ Press a desired protocol key ➞ enter the number using - (numeric keys). 3 ❑ Press [OK]. The display returns to the TCP/IP Settings screen. ● If you do not want to change the standard port number settings: ❑ Leave the settings at the default. 19 Specify an IP Address filter. - Canon imageCLASS MF7280 | imageCLASS MF7280 Network Guide - Page 47
Using a TCP/IP Network ❑ Press [On] ➞ [Settings]. 3 ❑ Press [Permit] or [Reject] for . [Permit]: Allows the access to the machine from the IP addresses of computers specified in the following step. [Reject]: Rejects the access to the machine from the IP addresses of computers - Canon imageCLASS MF7280 | imageCLASS MF7280 Network Guide - Page 48
Using a TCP/IP Network ❑ If you want to store only one IP address, press [Single Address] ➞ enter the IP address that is to be permitted or rejected using - (numeric keys) ➞ press [OK]. 3 ❑ If you want to - Canon imageCLASS MF7280 | imageCLASS MF7280 Network Guide - Page 49
display returns to the TCP/IP Settings screen. 21 Specify a MAC address filter. ● If you want to enable a MAC address filter: ❑ Press [▼] or [▲] until [Receiving MAC Address Settings] appears ➞ press [Receiving MAC Address Settings]. ❑ Press [On] for . 3 ❑ Press [Register]. ❑ Specify - Canon imageCLASS MF7280 | imageCLASS MF7280 Network Guide - Page 50
MAC addresses which have not been specified. Check the MAC addresses carefully before specifying them. If the corresponding MAC MAC address filter: ❑ Press [▼] or [▲] until [Receiving MAC Address Settings] appears ➞ press [Receiving MAC NOTE For instructions on how to turn ON/OFF the - Canon imageCLASS MF7280 | imageCLASS MF7280 Network Guide - Page 51
➞ [Network Settings]. 2 Press [▼] or [▲] until [E-maiI/l-Fax] appears ➞ press [E-mail/ I-Fax]. 3 3 Specify the mail server for receiving e-mail/l-faxes. The machine supports both SMTP and POP3 functions. NOTE The machine can receive I-fax images and communication error notices only. ● If you want to - Canon imageCLASS MF7280 | imageCLASS MF7280 Network Guide - Page 52
Using a TCP/IP Network ❑ Press [On] for ➞ press [Off] for . 3 ❑ Press [E-mail Address] ➞ enter the e-mail address your machine will use ➞ press [OK]. Input Example: ifax@host_name.organization.company.com ● If you want to receive e-mail/l-faxes using a POP server: ❑ Press [On] - Canon imageCLASS MF7280 | imageCLASS MF7280 Network Guide - Page 53
the interval is set to 0, the POP server is not checked automatically. For instructions on how to manually check the POP server, see Chapter 6, "Checking/Changing the Send/Receive Status," in the Sending Guide. 3 ❑ Press [Back]. The display returns to the E-mail/I-Fax screen. 4 Specify the mail - Canon imageCLASS MF7280 | imageCLASS MF7280 Network Guide - Page 54
until the Additional Functions screen closes. 7 Restart the machine. ❑ Turn OFF the machine, wait at least 10 seconds, and then turn it ON. NOTE For instructions on how to turn ON/OFF the machine, see Chapter 1, "Before You Start Using This Machine," in the Reference - Canon imageCLASS MF7280 | imageCLASS MF7280 Network Guide - Page 55
Startup Time Settings If you connect the machine to a switching hub, it may not be able to connect to a network even though your network settings are set correctly. This occurs because the spanning tree process performed between switching hubs prevents them from communicating with each other - Canon imageCLASS MF7280 | imageCLASS MF7280 Network Guide - Page 56
until the Additional Functions screen closes. 6 Restart the machine. ❑ Turn OFF the machine, wait at least 10 seconds, and then turn it ON. NOTE For instructions on how to turn ON/OFF the machine, see Chapter 1, "Before You Start Using This Machine," in the Reference - Canon imageCLASS MF7280 | imageCLASS MF7280 Network Guide - Page 57
up an alternate driver for the print server, printer drivers can be installed in each computer via the network. For instructions on how to set print servers, see the following procedures indicated in the manual for each driver (The UFR II printer driver is not available for Windows NT.): 3-24 - Canon imageCLASS MF7280 | imageCLASS MF7280 Network Guide - Page 58
UFR II Driver Guide. - If you want to use the fax driver See the procedure for alternative printer driver installation in Chapter 2, "Getting Started,'' in the Fax Driver Guide. Printer Connection Method (LPD/Raw) The following is the procedure for specifying the port setting. 3 Windows 98/Me - Canon imageCLASS MF7280 | imageCLASS MF7280 Network Guide - Page 59
Installing the Driver 1 Install Canon LPR2, and change the port settings. For instructions on how to install Canon LPR2 and set ports, see the Canon LPR2 User's Guide (PDF manual) on the UFR II Printer Kit/Super G3 FAX Board CD-ROM. IMPORTANT If you want to use LPD, enter one of the following - Canon imageCLASS MF7280 | imageCLASS MF7280 Network Guide - Page 60
Installing the Driver 1 Install Canon LPR2, and change the port settings. If you do not want to use Canon LPR2, proceed to step 2. For instructions on how to install Canon LPR2 and set ports, see Chapter 1, "Using Canon LPR2," in the Canon LPR2 User's Guide (PDF manual) on the UFR II Printer Kit - Canon imageCLASS MF7280 | imageCLASS MF7280 Network Guide - Page 61
the [Ports] tab to display the [Ports] sheet. For Windows 2000 3 5 Click [Add Port] to open the [Printer Ports] dialog box. 6 From [Available ports types], select [Standard TCP/IP Port] ➞ click [New Port]. The Add Standard TCP/IP Printer Port Wizard starts. 7 Click [Next]. 3-28 Setting Up a Computer - Canon imageCLASS MF7280 | imageCLASS MF7280 Network Guide - Page 62
the [Completing the Add Standard TCP/IP Printer Port Wizard] window appears ➞ click [Finish]. If the dialog box displays , follow the instructions on the screen to search again, or click [Standard] ➞ click [Canon Network Printing Device with P9100] under [Device - Canon imageCLASS MF7280 | imageCLASS MF7280 Network Guide - Page 63
want to use Raw, proceed to step 11. ❑ In the printer properties dialog box, click [Configure Port]. ❑ Click [LPR] under Queue Name] under [LPR Settings] ➞ click [OK]. For Windows 2000 3 You can specify a print queue in [Queue Name driver and the port settings is complete. 3-30 Setting Up a Computer - Canon imageCLASS MF7280 | imageCLASS MF7280 Network Guide - Page 64
Using a TCP/IP Network Windows NT 4.0 ■ Installing a New Driver 1 Check that [Microsoft TCP/IP Printing] is installed. ❑ Right-click the [Network Neighborhood] icon on the screen ➞ click [Properties]. ❑ Click the [Services] tab to display the [Services] sheet. If [Microsoft TCP/IP Printing] is not - Canon imageCLASS MF7280 | imageCLASS MF7280 Network Guide - Page 65
after lnstalling the Driver Using a TCP/IP Network 1 Install Canon LPR2, and change the port settings. If you do not want to use Canon LPR2, proceed to step 2. For instructions on how to install Canon LPR2 and set ports, see the Canon LPR2 User's Guide (PDF manual) on the UFR II Printer Kit/Super - Canon imageCLASS MF7280 | imageCLASS MF7280 Network Guide - Page 66
boxes ➞ install the Microsoft TCP/IP Printing service. After installing, start again from step 2. For instructions on how to install the Microsoft TCP/IP Printing service, see steps 1 and 2 in "Installing a New Driver,'' on p. 3-31. 7 Enter the IP address or printer host name in [Name or address of - Canon imageCLASS MF7280 | imageCLASS MF7280 Network Guide - Page 67
[OK]. Using a TCP/IP Network You can specify a print queue in [Name of printer or print queue on that server]. The following three print queues are available: 3 • 9 Click [OK]. The installation of the driver and the port settings is complete. 3-34 Setting Up a Computer for Printing/Sending a - Canon imageCLASS MF7280 | imageCLASS MF7280 Network Guide - Page 68
NT/2000/XP/Server 2003, UNIX, Linux, Mac OS X, imageWARE Gateway series) 3 • Windows shared folder (Windows 98/Me/NT/2000/XP/Server 2003) This section describes how to set up a computer as an FTP server. For instructions on how to configure a Windows shared folder, see "Setting Up a Computer - Canon imageCLASS MF7280 | imageCLASS MF7280 Network Guide - Page 69
• It is recommended that the FTP server be configured by the network administrator. • The use of Windows 2000 Server as an FTP server requires the installation of Microsoft Internet Information Services 5.0 (IIS 5.0). If IIS is not installed in the computer you are using, you will need to - Canon imageCLASS MF7280 | imageCLASS MF7280 Network Guide - Page 70
point to [Administrative Tools] ➞ click [Internet Service Manager]. ❑ If you are using Windows XP, on the [Start] menu, click [Control Panel] ➞ [Performance and Maintenance] ➞ [Administrative Tools] ➞ [Internet Information Services]. ❑ If you are using Windows Server 2003, on the [Start] menu, point - Canon imageCLASS MF7280 | imageCLASS MF7280 Network Guide - Page 71
Using a TCP/IP Network ❑ Click the [Home Directory] tab to display the [Home Directory] sheet ➞ select both [Read] and [Write]. For Windows 2000 3 ❑ Click [OK] to close the [Default FTP Site Properties] dialog box. 3-38 Setting Up a Computer as a File Server - Canon imageCLASS MF7280 | imageCLASS MF7280 Network Guide - Page 72
display the [Network Identification] sheet ➞ confirm [Full computer name]. ❑ Click [Cancel] to close the [System Properties] dialog box. 3 ● If you are using Windows XP/Server 2003: ❑ On the [Start] menu, right-click [My Computer] ➞ click [Properties]. ❑ Click the [Computer Name] tab to display the - Canon imageCLASS MF7280 | imageCLASS MF7280 Network Guide - Page 73
5 Set up the users and passwords for access to the FTP server. ❑ If you are using Windows 2000, right-click the [My Computer] icon ➞ click [Manage]. The [Computer Management] window opens. ❑ If you are using Windows XP/Server 2003, on the [Start] menu, right-click [My Computer] ➞ click [Manage]. The - Canon imageCLASS MF7280 | imageCLASS MF7280 Network Guide - Page 74
New User] dialog box, enter the user name in [User name] ➞ enter the password in [Password] ➞ re-enter the password in [Confirm password]. For Windows 2000 3 Enter a user name and a password not longer than 24 alphanumeric characters. If [User must change password at next logon] is selected, any new - Canon imageCLASS MF7280 | imageCLASS MF7280 Network Guide - Page 75
6 Set a recipient address using the control panel. Sample recipient setting: • Server side settings: [Full Computer Name]: starfish.organization.company.com Create a directory named "share" in the specified FTP server's home directory "\Inetpub\ftproot", and then set "share" as the data - Canon imageCLASS MF7280 | imageCLASS MF7280 Network Guide - Page 76
NOTE For instructions on how to specify recipient address settings, see Chapter 2, "Basic Sending Methods," in the Sending Guide. The settings for sending data to the FTP server are complete. Windows NT 4.0 IMPORTANT Using a TCP/IP Network • It is recommended that Windows NT Server 4.0 be - Canon imageCLASS MF7280 | imageCLASS MF7280 Network Guide - Page 77
Using a TCP/IP Network 3 Enter the FTP site settings. ❑ Right-click the [Default FTP Site] icon ➞ click [Properties]. 3 ❑ In the [Default FTP Site Properties] dialog box, click the [Security Accounts] tab to display the [Security Accounts] sheet ➞ deselect [Allow Anonymous Connections]. ❑ Click the - Canon imageCLASS MF7280 | imageCLASS MF7280 Network Guide - Page 78
Using a TCP/IP Network 4 Confirm [Host Name] and [Domain]. ❑ Right-click the [Network Neighborhood] icon on the desktop ➞ click [Properties]. ❑ In the [Network] dialog box, click the [Protocols] tab to display the [Protocols] sheet. ❑ In [Network Protocols], double-click [TCP/IP Protocol]. 3 The [ - Canon imageCLASS MF7280 | imageCLASS MF7280 Network Guide - Page 79
Using a TCP/IP Network ❑ Click the [DNS] tab to display the [DNS] sheet ➞ confirm the host name and domain settings. 3 ❑ Click [Cancel] to close the [Network] dialog box. 5 Set up the users and passwords for access to the FTP server. ❑ On the [Start] menu, point to [Programs] ➞ point to [ - Canon imageCLASS MF7280 | imageCLASS MF7280 Network Guide - Page 80
Enter a user name and a password not longer than 24 alphanumeric characters. If [User Must Change Password at Next Logon] is selected, any new users added must change their password in order to send data from the machine. (You cannot change the password from the control panel.) ❑ Confirm the - Canon imageCLASS MF7280 | imageCLASS MF7280 Network Guide - Page 81
panel display, [Host Name] and [File Path] may not be displayed correctly. NOTE 3 For instructions on how to specify recipient address settings, see Chapter 2, "Basic Sending Methods," in the Sending Guide. Using a TCP/IP Network The settings for sending data to the FTP server are complete - Canon imageCLASS MF7280 | imageCLASS MF7280 Network Guide - Page 82
3 [Host Name]: starfish.organization.company.com [User]: User name entered in step 2 [Password]: Password for the above user [File Path]: Enter one of the following: share (when using relative path) /home/hsato/ share (when using absolute path) Using a TCP/IP Network IMPORTANT • To use - Canon imageCLASS MF7280 | imageCLASS MF7280 Network Guide - Page 83
Network NOTE For instructions on how to specify recipient address settings, see Chapter 2, "Basic Sending Methods," in the Sending Guide. The settings for sending data to the FTP server are complete. Mac OS X 1 Log in to Mac OS X as Administrator. 3 2 Start the FTP services under Mac OS X. ❑ Click - Canon imageCLASS MF7280 | imageCLASS MF7280 Network Guide - Page 84
❑ Close the [Info] window. 6 Set a recipient address using the control panel. Sample recipient User]: User name entered in step 3 [Password]: Password for the above user [File Path]: Enter one of the following: Public/iR_Folder (If you enter a relative path) / Users/yoko/Public/iR_Folder - Canon imageCLASS MF7280 | imageCLASS MF7280 Network Guide - Page 85
NOTE For instructions on how to specify recipient address settings, see Chapter 2, "Basic Sending Methods," in the Sending Guide. The for imageWARE Gateway. For details about the settings, see the imageWARE Gateway Users Guide. 2 On the FTP server for imageWARE Gateway, specify the folder to store - Canon imageCLASS MF7280 | imageCLASS MF7280 Network Guide - Page 86
touch panel display, [Host Name] and [File Path] 3 may not be displayed correctly. NOTE For instructions on how to specify recipient address settings, see Chapter 2, "Basic Sending Methods," in the Sending Guide. The settings for sending data to the FTP server for imageWARE Gateway are complete - Canon imageCLASS MF7280 | imageCLASS MF7280 Network Guide - Page 87
Using a NetBIOS Network 4 CHAPTER This chapter describes settings and procedures for using the machine with a NetBIOS network. NetBIOS Network Setup Procedures 4-2 Protocol Settings 4-3 Settings from the Control Panel 4-3 Setting Up a Computer as a File Server 4-9 Connecting to a TCP/IP - Canon imageCLASS MF7280 | imageCLASS MF7280 Network Guide - Page 88
not supported with the machine. • Use the control panel or NetSpot Device Installer if you are configuring the TCP/IP settings for the first time. After configuring the settings, you can change the content by using the Remote UI or NetSpot Console. NOTE NetSpot Console can be downloaded from Canon - Canon imageCLASS MF7280 | imageCLASS MF7280 Network Guide - Page 89
(via a web browser) • NetSpot Device Installer (Canon utility) • NetSpot Console (via a web browser) (Canon utility) Using a NetBIOS Network IMPORTANT • If you NOTE • For instructions on how to enter settings using the Remote UI, see Chapter 3, "Customizing Settings," in the Remote UI Guide. • For - Canon imageCLASS MF7280 | imageCLASS MF7280 Network Guide - Page 90
4 To resolve a name with WINS, specify the WINS settings using the following procedure. NOTE WINS (Windows Internet Name Service) is a service for associating a NetBIOS name (which is a computer name or printer name on a NetBIOS network) with an IP address. To use WINS, a WINS server is required - Canon imageCLASS MF7280 | imageCLASS MF7280 Network Guide - Page 91
Using a NetBIOS Network 3 Press [Network Settings]. 4 4 Press [SMB Settings]. 5 Press [On] for . Protocol Settings 4-5 - Canon imageCLASS MF7280 | imageCLASS MF7280 Network Guide - Page 92
machine using the keyboard on the touch panel display. Be sure to enter a unique name that does not exist as a name for another computer or printer on the same network. [Workgroup]: Enter the name of the workgroup the machine belongs to, using the keyboard on the touch panel display. If there - Canon imageCLASS MF7280 | imageCLASS MF7280 Network Guide - Page 93
NOTE • is provided to enable the LAN Manager to refer to the machine. • If the LAN Manager does not have to refer to the machine, you can control the traffic over your network by selecting [Off]. 9 Confirm the settings you specified ➞ press [OK]. The display returns to the Network - Canon imageCLASS MF7280 | imageCLASS MF7280 Network Guide - Page 94
the Additional Functions screen closes. 16 Restart the machine. ❑ Turn OFF the machine, wait at least 10 seconds, and then turn it ON. NOTE For instructions on how to turn ON/OFF the machine, see Chapter 1, "Before You Start Using This Machine," in the Reference - Canon imageCLASS MF7280 | imageCLASS MF7280 Network Guide - Page 95
for receiving data. You can send data over a NetBIOS network to a Windows shared folder. This section describes how to configure a shared folder. IMPORTANT panel. For instructions on how to specify 4 recipient address settings, see Chapter 2, "Basic Sending Methods," in the Sending Guide. • The - Canon imageCLASS MF7280 | imageCLASS MF7280 Network Guide - Page 96
server instead of using a Windows 98/Me machine. • In the following procedures, items displayed on the screen for Windows 98 are used; items installed], confirm that both [Client for Microsoft Networks] and [File and printer sharing for Microsoft Networks] appear. If these components do not appear, - Canon imageCLASS MF7280 | imageCLASS MF7280 Network Guide - Page 97
Using a NetBIOS Network ❑ To specify the access control method, click the [Access Control] tab ➞ select the level of access control. 4 If you select [User-level access control], specify a domain in which a list of users and groups is saved. ❑ In the [Network] dialog box, click the [Identification] - Canon imageCLASS MF7280 | imageCLASS MF7280 Network Guide - Page 98
Using a NetBIOS Network 2 Set up file sharing. ● If [Share-level access control] is selected: ❑ Right-click the folder you want to share using Explorer ➞ click [Sharing]. ❑ On the [Sharing] sheet, click [Shared As] ➞ enter the share name in [Share Name]. 4 ❑ For [Access Type], select either [Full] - Canon imageCLASS MF7280 | imageCLASS MF7280 Network Guide - Page 99
whom you want to give access to the shared folder ➞ add them to the right list. NOTE For details on this dialog box, see the Windows 98/Me documentation. ❑ Confirm the settings you entered ➞ click [OK]. ❑ Click [OK] to close the properties dialog box of the shared folder. 3 Set a recipient address - Canon imageCLASS MF7280 | imageCLASS MF7280 Network Guide - Page 100
• The machine's recipient settings: The Protocol drop-down list: Windows (SMB) [Host Name]: \\swan\share [File Path]: \Images [User]: (Not required if you have selected [Share-level access control] in step 1) [Password]: Password entered in - Canon imageCLASS MF7280 | imageCLASS MF7280 Network Guide - Page 101
name, and 24 maximum for the user name) • For instructions on how to specify recipient address settings, see Chapter 2, "Basic Sending Methods," in the Sending Guide. The settings for sending data to the shared folder are complete. Windows 2000/XP/Server 2003 4 IMPORTANT It is recommended that - Canon imageCLASS MF7280 | imageCLASS MF7280 Network Guide - Page 102
❑ Confirm that [Client for Microsoft Networks], [File and Printer Sharing for Microsoft Networks], and [Internet Protocol (TCP/IP)] name. ● If you are using Windows 2000: ❑ Right-click the [My Computer] icon ➞ click [Manage]. The [Computer Management] window opens. ❑ Right-click the [Computer - Canon imageCLASS MF7280 | imageCLASS MF7280 Network Guide - Page 103
[Network Identification] sheet ➞ confirm the [Computer name] setting. 4 ❑ Click [Cancel] to close the dialog box ➞ close the [Computer Management] window. ● If you are using Windows XP/Server 2003: ❑ On the [Start] menu, right-click [My Computer] ➞ click [Properties]. ❑ Click the [Computer Name] tab - Canon imageCLASS MF7280 | imageCLASS MF7280 Network Guide - Page 104
dialog box, enter the user name in [User name] ➞ enter the password in [Password] ➞ re-enter the password in [Confirm password]. For Windows 2000 Enter a user name not longer than 24 alphanumeric characters, and a password not longer than 14 alphanumeric characters. If [User must change password at - Canon imageCLASS MF7280 | imageCLASS MF7280 Network Guide - Page 105
. NOTE In the Active Directory environment, the procedures for setting up users differ from the above. For details, see the Windows documentation. 5 Configure the shared folder. ❑ Right-click the folder you want to share using Explorer ➞ click [Properties]. ❑ On the [Sharing] sheet, click [Share - Canon imageCLASS MF7280 | imageCLASS MF7280 Network Guide - Page 106
or a higher access authority. ❑ Click [OK] ➞ close the properties dialog box of the shared folder. NOTE • To display the [Security] tab in Windows XP, open Folder Options ➞ deselect [Use simple file sharing]. However, you can share folders and files with [Use simple file sharing] selected. Select or - Canon imageCLASS MF7280 | imageCLASS MF7280 Network Guide - Page 107
server: Digitally sign communications (always)] ➞ set to [Disabled]. 4 ❑ Close the [Domain Controller Security Settings] window. NOTE To browse the directories and send data in the Windows Server 2003 Active Directory environment, you must first specify this setting. 8 Set a recipient address using - Canon imageCLASS MF7280 | imageCLASS MF7280 Network Guide - Page 108
Images within share, and then specify Images as the recipient for sending. • The machine's Recipient Settings: The Protocol drop-down list: Windows (SMB) [Host Name]: \\swan\share [File Path]: \Images [User]: User name entered in step 4. [Password]: Password for the above user. 4 Using - Canon imageCLASS MF7280 | imageCLASS MF7280 Network Guide - Page 109
2000/XP/Server 2003 computer that belongs to a domain containing Windows 2000/Server 2003 domain controllers. • For instructions on how to specify recipient address settings, see Chapter 2, "Basic Sending Methods," in the Sending Guide. 4 The settings for sending data to the shared folder are - Canon imageCLASS MF7280 | imageCLASS MF7280 Network Guide - Page 110
] sheet ➞ confirm that [NetBIOS Interface] and [Server] appear in [Network Services]. 4 If these services do not appear, click [Add] to install them. ❑ Click the [Protocols] tab to display the [Protocols] sheet ➞ confirm that [TCP/IP Protocol] appears in [Network - Canon imageCLASS MF7280 | imageCLASS MF7280 Network Guide - Page 111
Using a NetBIOS Network ❑ Click [OK] to close the dialog box. 3 Set the users and passwords for access to the shared folder. ❑ On the [Start] menu, point to [Programs] ➞ point to [Administrative Tools] ➞ click [User Manager for Domains] to start the User Manager. ❑ On the [User] menu, click [New - Canon imageCLASS MF7280 | imageCLASS MF7280 Network Guide - Page 112
Using a NetBIOS Network 4 Set up file sharing. ❑ Right-click the folder you want to share using Explorer ➞ click [Sharing]. ❑ Click the [Sharing] tab to display the [Sharing] sheet ➞ click [Shared As] ➞ enter the share name in [Share Name]. 4 5 Set security. ● To create a shared folder on a FAT or - Canon imageCLASS MF7280 | imageCLASS MF7280 Network Guide - Page 113
for each item. For sample settings, see the example of Windows 2000/XP/Server 2003 address settings. (See "Windows 2000/XP/Server 2003," on p. 4-15.) IMPORTANT • • For instructions on how to specify recipient address settings, see Chapter 2, "Basic Sending Methods," in the Sending Guide. The settings - Canon imageCLASS MF7280 | imageCLASS MF7280 Network Guide - Page 114
Using Utilities to Make Network and Device Settings This chapter describes the utilities used for managing networks and printers. 5 CHAPTER NetSpot Device Installer 5-2 NetSpot Console 5-3 5-1 - Canon imageCLASS MF7280 | imageCLASS MF7280 Network Guide - Page 115
Device Installer is a utility for specifying the initial settings of Canon devices connected to a network. Available on the CD-ROM for NetSpot Device Installer and instructions on how to install the utility, see the Readme file for NetSpot Device Installer on the UFR II Printer Kit/Super G3 FAX Board - Canon imageCLASS MF7280 | imageCLASS MF7280 Network Guide - Page 116
, NetSpot Console enables you to jump directly to the Remote UI and perform various settings for the machine. NOTE NetSpot Console can be downloaded from Canon's Web site (http://www.usa.canon.com). 5 Using Utilities to Make Network and Device Settings NetSpot Console 5-3 - Canon imageCLASS MF7280 | imageCLASS MF7280 Network Guide - Page 117
Troubleshooting This chapter describes how to resolve printing problems. 6 CHAPTER Network Connection Problems and Remedies 6-2 Printing Problems and Remedies 6-4 Data Sending/File Sharing Problems and Remedies 6-6 6-1 - Canon imageCLASS MF7280 | imageCLASS MF7280 Network Guide - Page 118
Network Connection Problems and Remedies Troubleshooting 6 6-2 This section describes the causes of network connection problems, and how to resolve them. is displayed on the control panel. Cause The machine and cable are not properly connected. Remedy - Canon imageCLASS MF7280 | imageCLASS MF7280 Network Guide - Page 119
name different from the one stored in the machine to access the machine from a utility, the utility will not detect the machine. In this case, check the SNMP community name. (See 6 "Communication Environment Setup," on p. 2-12.) Troubleshooting Network Connection Problems and Remedies 6-3 - Canon imageCLASS MF7280 | imageCLASS MF7280 Network Guide - Page 120
driver cannot be installed successfully. Check the settings for [IP Address Range Settings]. (See step 19 in "TCP/IP Settings," on p. 3-4.) Unable to Print 6 Cause 1 The machine and cable are not properly connected. Troubleshooting settings are appropriate. This problem may be resolved by delaying - Canon imageCLASS MF7280 | imageCLASS MF7280 Network Guide - Page 121
printer driver is installed. If you are printing from Windows, each computer must have a printer driver installed. For instructions on how to install printer drivers, see the Starter Guide. • Confirm that the correct printer long. Troubleshooting Remedy Normally printer. To correct this problem, - Canon imageCLASS MF7280 | imageCLASS MF7280 Network Guide - Page 122
problems. Unable to Send Data/Share Files (FTP) Cause 1 The FTP server is not set correctly. Remedy Perform the following to check the server status. (If you are using Windows required for user_name. Troubleshooting Password: *Enter password [User] setting contains one or more spaces after - Canon imageCLASS MF7280 | imageCLASS MF7280 Network Guide - Page 123
to resend the data. (If a Windows NT/2000/XP/Server 2003 FTP server is Troubleshooting," in the Reference Guide and perform the necessary operations according to the error message displayed. Unable to Send Data/Share Files (Windows Chapter 7, "Troubleshooting," in the Reference Guide and perform - Canon imageCLASS MF7280 | imageCLASS MF7280 Network Guide - Page 124
Appendix This chapter includes the network settings, specifications, glossary, and index. 7 CHAPTER Network Setting Items 7-2 Confirming Settings 7-8 Specifications 7-10 Ethernet Interface Adaptor 7-10 Glossary 7-11 Index 7-27 7-1 - Canon imageCLASS MF7280 | imageCLASS MF7280 Network Guide - Page 125
set items which cannot be set using NetSpot Device Installer. • NetSpot Console can be downloaded from Canon's Web site (http://www.usa.canon.com). • In the following tables, "N/A" stands for "Not Applicable". ■ TCP/IP Settings 7 Item Setting Description Default Setting Can be set in NetSpot - Canon imageCLASS MF7280 | imageCLASS MF7280 Network Guide - Page 126
Default Setting Can be set in NetSpot Device Installer Can be set in Remote UI 0.0.0.0 N/A 0.0.0.0 N/A CANON****** ("******" represents the last six digits of N/A a MAC address) (NULL) N/A WINS Resolution On/Off Off N/A WINS Server IP Address 0.0.0.0 N/A 7 Use LPD Print - Canon imageCLASS MF7280 | imageCLASS MF7280 Network Guide - Page 127
Range Settings On/Off IP Address Range A maximum of 4 IP Settings addresses can be Off N/A stored. Receiving MAC Address Settings Apply Settings: On/ Off Receiving MAC MAC addresses (a Address Settings maximum of 5 Off N/A addresses can be registered) 7-4 Network Setting Items - Canon imageCLASS MF7280 | imageCLASS MF7280 Network Guide - Page 128
■ SMB Settings Item Setting Description Use SMB Client Server Workgroup Comment LM Announce On/Off 15 Characters maximum 15 Characters maximum 255 Characters maximum On/Off Default Setting Off (NULL) (NULL) (NULL) Off Can be set in NetSpot Device Installer N/A Can be set in Remote UI N/A - Canon imageCLASS MF7280 | imageCLASS MF7280 Network Guide - Page 129
■ Ethernet Driver Settings Item Setting Description Auto Detect Communication Mode Ethernet Type MAC Address On/Off Half Duplex/Full Duplex 10 Base-T/100 Base-TX Display only Default Setting On Half Duplex Can be set in NetSpot Device Installer N/A Can be set in Remote UI N/A 10 Base-T N/A - Canon imageCLASS MF7280 | imageCLASS MF7280 Network Guide - Page 130
■ Startup Time Settings Item Setting Description Startup Time Settings 0 to 300 seconds Default Setting 60 Can be set in NetSpot Device Installer Can be set in Remote UI N/A 7 Appendix Network Setting Items 7-7 - Canon imageCLASS MF7280 | imageCLASS MF7280 Network Guide - Page 131
Confirming Settings You can print a user's data list to confirm the network settings made from the machine's touch panel display. To print a user's data list, follow the procedure below. 1 Press (Additional Functions) ➞ [Report Settings]. 2 Press [Print List]. 7 3 Press [User's Data List]. Appendix - Canon imageCLASS MF7280 | imageCLASS MF7280 Network Guide - Page 132
4 Press [Yes]. 7 Appendix Confirming Settings 7-9 - Canon imageCLASS MF7280 | imageCLASS MF7280 Network Guide - Page 133
Specifications are subject to change without notice. Ethernet Interface Adaptor Hardware Specifications Network Interface 10Base-T/100Base-TX (RJ-45) Software Specifications Protocol Supported TCP/IP Frame type: Print applications: Ethernet II LPD/Raw 7 Appendix 7-10 Specifications - Canon imageCLASS MF7280 | imageCLASS MF7280 Network Guide - Page 134
, which utilizes a twisted-pair cable. 100Base-TX The Ethernet standard supporting data transfer rates a maximum of 100 Mbps, which utilizes two pairs control characters. A seven digit (or seven bit) binary number can represent one of 128 distinct codes. Auto Redial When Auto Redial is set to 'On - Canon imageCLASS MF7280 | imageCLASS MF7280 Network Guide - Page 135
these items manually. bps one device or process from being held up by another. For this to be possible, the buffer must be set up correctly. C Canon Driver Information Assist Service A software module that specializes in retrieving information from other devices. When you are using a shared printer - Canon imageCLASS MF7280 | imageCLASS MF7280 Network Guide - Page 136
automatically using DHCP. Direct Sending Use Direct Sending when the memory is full, and you still need to send a document. Direct Sending scans and sends one page at a time without storing the document in memory. This enables you to send a document even when the memory is full. Glossary 7-13 - Canon imageCLASS MF7280 | imageCLASS MF7280 Network Guide - Page 137
. A measure of screen and printer resolution that is expressed as the block for data lost through poor transmission. If part of the data is missing in a certain block toner or paper. Ethernet An industry standard LAN (Local Area Network) system for connecting multiple computers. Data is sent from one - Canon imageCLASS MF7280 | imageCLASS MF7280 Network Guide - Page 138
Protocol. A client-server protocol enabling a user to transfer files on one computer to and from another computer over a TCP/IP network. The File adjustment to the overall brightness of a scanner, monitor, or printer. On your Canon machine, gamma correction refers to the degree of contrast on - Canon imageCLASS MF7280 | imageCLASS MF7280 Network Guide - Page 139
printers. Images in HP-GL/2 are represented as vector graphics, in which vector objects describe an image in terms of geometric shapes, such as lines and polygons, and fills. HP-GL/2 is supported by your Canon the Internet. Internet Protocol enables data from one computer to be split into packets, - Canon imageCLASS MF7280 | imageCLASS MF7280 Network Guide - Page 140
to a service. Long distance printer. LPR Line Printer Remote. A UNIX command used to print a file via a TCP/IP network. LPR2 A Canon software utility that realizes network printing on TCP/IP networks when using the LPR, or RAW print protocol. Built into the print architecture of Windows, Canon - Canon imageCLASS MF7280 | imageCLASS MF7280 Network Guide - Page 141
a LAN (Local Area Network). NetBIOS is used in Ethernet, Token Ring, and Windows NT/2000/XP networks. NetSpot Network management software that enables the setup and management of multiple printers connected to a network from one central location. A network manager can monitor conditions of network - Canon imageCLASS MF7280 | imageCLASS MF7280 Network Guide - Page 142
Intel x86-based computers. OS/2 provides a graphic user interface similar to Windows, as well as a command line interface similar to DOS. Add-ons to OS/2 enable it to run DOS and Windows applications. P PASV mode Passive FTP mode. An alternative mode for initiating - Canon imageCLASS MF7280 | imageCLASS MF7280 Network Guide - Page 143
that enables you to confirm and reset the correspondence between the port of the device driver installed in Windows and its network address. The Port Setting Tool is useful when the printer driver is unable to acquire the device status information properly. If NetSpot Job Monitor is installed - Canon imageCLASS MF7280 | imageCLASS MF7280 Network Guide - Page 144
of dots attained by an output device, such as a fax, scanner, or printer, in producing an image. Expressed in terms of dots per inch (dpi). 7 Raster Image Processor. The hardware and software functions of a printer that convert vector graphic descriptions from a computer into raster graphic images - Canon imageCLASS MF7280 | imageCLASS MF7280 Network Guide - Page 145
recommended that you register the numbers as a group in a one-touch button for group dialing. SLA Salutation Architecture. An open standard for locating and controlling scanners, printers, copiers, fax machines, multifunctional devices, and other peripherals across 7 the Internet, intranet, or - Canon imageCLASS MF7280 | imageCLASS MF7280 Network Guide - Page 146
Fine. STP Shielded Twisted Pair cable. A cable consisting of one or more twisted pairs of wires and a sheath of foil and remote party's machine supports the same standard with IP addresses that start with 100.100.100. would be part of the same subnet. Subnet Mask The method used to determine to - Canon imageCLASS MF7280 | imageCLASS MF7280 Network Guide - Page 147
detail of the Standard resolution mode. If the receiving machine does not support this mode, the document is automatically sent in the Fine mode. Super . The system can transmit data at 4 or 16 Mbps. Tone Some data services may require that you use tone dialing. If you have a pulse dial telephone - Canon imageCLASS MF7280 | imageCLASS MF7280 Network Guide - Page 148
. The transmission time described in this guide is not the total time required for machine that sends a document. In addition to the unit name that you register for the machine, you can printer to greatly reduce overall printing time. The UFR II printer driver supports only monochrome printers - Canon imageCLASS MF7280 | imageCLASS MF7280 Network Guide - Page 149
on the server. UTP Unshielded Twisted Pair cable. A cable containing one or more twisted pairs of wires without additional shielding. UTP is more of a watermark. WINS Windows Internet Name Service. A service for associating a NetBIOS name, which is a computer name or printer name on a NetBIOS - Canon imageCLASS MF7280 | imageCLASS MF7280 Network Guide - Page 150
Canon Driver Information Assist Service, 7-12 CCITT/ITU-T, 7-12 Coded Speed Dialing, 7-13 Communication Mode, 2-10, 7-6 Full Duplex, 2-10 Half Duplex Ethernet, 7-10, 7-14 Ethernet Driver Settings, 2-9, 7-6 Auto Detect, 7-6 Communication Mode, 7-6 Ethernet Type, 7-6 MAC Address, 7-6 Ethernet Type, - Canon imageCLASS MF7280 | imageCLASS MF7280 Network Guide - Page 151
15 Frame Type, 7-15 FTP, 7-15 Full Duplex, 2-10 G Gamma Correction, 7-15 Gateway Address, 3-6, 7-2, 7-15 H 7 Half Duplex, 2-10 Host Name, 3-8, 7-3 HP-GL/2, 3-25, 3-30, 7-17 LPD Settings, 3-9, 7-3 LPR, 7-17 LPR2, 7-17 M MAC Address, 7-6, 7-18 Memory Lock, 7-18 Memory Sending, 7-18 N NAT, 7-18 NetBIOS - Canon imageCLASS MF7280 | imageCLASS MF7280 Network Guide - Page 152
3-30 Printer connection method for TCP/IP network, 3-25 Windows 2000/XP/Server 2003 (LPD/Raw), 3-26 Windows 98/Me (LPD/Raw), 3-25 Windows NT 3-25, 7-20 RAW Settings, 7-3 Use Bidirectional, 7-3 Use RAW, 7-3 Receiving MAC Address Settings, 7-4 Remote UI (Web browser), 2-7, 3-3, 7-21 Resolution, 7-21 - Canon imageCLASS MF7280 | imageCLASS MF7280 Network Guide - Page 153
), 7-3 RARP, 3-6, 7-2 RAW Settings, 3-10, 7-3 Receiving MAC Address Settings, 7-4 Secondary Server (DNS), 7-3 Single Address, 3- 7-26 W WAN, 7-26 Watermark, 7-26 Web browser, 2-7, 3-3 WINS (Windows Internet Name Service), 7-26 WINS Configuration, 7-3 WINS Resolution, 7-3 WINS Server, 7-3 Z Zoom - Canon imageCLASS MF7280 | imageCLASS MF7280 Network Guide - Page 154
3-chome, Ohta-ku, Tokyo 146-8501, Japan CANON U.S.A., INC. One Canon Plaza, Lake Success, NY 11042, U.S.A. CANON CANADA INC. 6390 Dixie Road Mississauga, Ontario L5T 1P7, Canada CANON EUROPA N.V. Bovenkerkerweg 59-61 1185 XB Amstelveen, The Netherlands CANON FRANCE S.A.S. 17, quai du Président Paul
-
 1
1 -
 2
2 -
 3
3 -
 4
4 -
 5
5 -
 6
6 -
 7
7 -
8
-
9
-
10
-
11
-
12
-
13
-
14
-
15
-
16
-
17
-
18
-
19
-
20
-
21
-
22
-
23
-
24
-
25
-
26
-
27
-
28
-
29
-
30
-
31
-
32
-
33
-
34
-
35
-
36
-
37
-
38
-
39
-
40
-
41
-
42
-
43
-
44
-
45
-
46
-
47
-
48
-
49
-
50
-
51
-
52
-
53
-
54
-
55
-
56
-
57
-
58
-
59
-
60
-
61
-
62
-
63
-
64
-
65
-
66
-
67
-
68
-
69
-
70
-
71
-
72
-
73
-
74
-
75
-
76
-
77
-
78
-
79
-
80
-
81
-
82
-
83
-
84
-
85
-
86
-
87
-
88
-
89
-
90
-
91
-
92
-
93
-
94
-
95
-
96
-
97
-
98
-
99
-
100
-
101
-
102
-
103
-
104
-
105
-
106
-
107
-
108
-
109
-
110
-
111
-
112
-
113
-
114
-
115
-
116
-
117
-
118
-
119
-
120
-
121
-
122
-
123
-
124
-
125
-
126
-
127
-
128
-
129
-
130
-
131
-
132
-
133
-
134
-
135
-
136
-
137
-
138
-
139
-
140
-
141
-
142
-
143
-
144
-
145
-
146
-
147
-
148
-
149
-
150
-
151
-
152
-
153
-
154
 |
 |
Please read this guide before operating this equipment.
After you finish reading this guide, store it in a safe place for future reference.
Network Guide
Network Guide
ENG