Casio XJ-S36 Owners Manual
Casio XJ-S36 - XGA DLP Projector Manual
 |
UPC - 079767178857
View all Casio XJ-S36 manuals
Add to My Manuals
Save this manual to your list of manuals |
Casio XJ-S36 manual content summary:
- Casio XJ-S36 | Owners Manual - Page 1
E DATA PROJECTOR XJ-S31/XJ-S36 XJ-S41/XJ-S46 User's Guide z Be sure to read the precautions in the separate User's Guide (Basic Operation). For details about setting up the projector and lamp replacement, see the User's Guide (Basic Operation). z Be sure to keep all user documentation handy for - Casio XJ-S36 | Owners Manual - Page 2
DLP is User's Guide are subject to change without notice. • Copying of this manual, either in part or its entirety is forbidden. You are allowed to use this manual product or this manual. • CASIO COMPUTER CO., LTD. shall not be held liable for any loss or lost profits due to loss of data due to - Casio XJ-S36 | Owners Manual - Page 3
Contents About this manual 4 XJ-S36/XJ-S46 Users 4 Operation During Projection 5 Image Operations During Projection 5 projected image 9 Eco Mode ...9 Using the [FUNC] Key 10 Configuring Advanced Projector Settings 11 Basic Setup Menu Operations 11 Displaying the Setup Menu 11 Configuring - Casio XJ-S36 | Owners Manual - Page 4
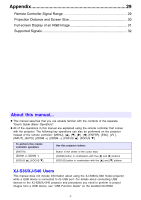
Image 31 Supported Signals 32 About this manual... z This manual assumes that you are already familiar with the contents of the separate "User's Guide (Basic Operation)". z All of the operations in this manual are explained using the remote controller that comes with the projector. The following - Casio XJ-S36 | Owners Manual - Page 5
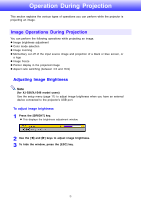
z Aspect ratio switching (between 4:3 and 16:9) Adjusting Image Brightness Note (for XJ-S36/XJ-S46 model users) Use the setup menu (page 11) to adjust image brightness when you have an external device connected to the projector's USB port. To adjust image brightness 1 Press the [BRIGHT] key. z This - Casio XJ-S36 | Owners Manual - Page 6
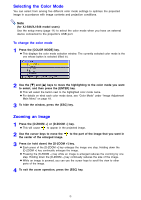
for XJ-S36/XJ-S46 model users) Use the setup menu (page 11) to select the color mode when you have an external device connected to the projector's 2 Use the cursor keys to move the the center of the enlarged image. to the part of the image that you want in 3 Press (or hold down) the [D-ZOOM +] - Casio XJ-S36 | Owners Manual - Page 7
source, press the [FREEZE] key. z This will capture the image that is on the screen at the moment you press [FREEZE] and stores it in projector memory. That image remains projected on the screen. 2 To restore projection of the image from an input source, press the [ESC] key. 7 - Casio XJ-S36 | Owners Manual - Page 8
pointer styles, including various arrow styles, for display in the projected image. Pointers can be used during a presentation to indicate or highlight a specific part of the image. Arrow 1 Oval 1 Spot 2 Note Depending on the pointer style you are using, the pointer may not display properly when - Casio XJ-S36 | Owners Manual - Page 9
your priority is maximum brightness. To turn the Eco Mode on or off Press [ECO] to toggle the Eco Mode on and off. Note (for XJ-S36/XJ-S46 model users) Use the setup menu (page 11) to select the lamp mode when you have an external device connected to the projector's USB port. 9 - Casio XJ-S36 | Owners Manual - Page 10
key. • This performs the same operation as pressing the [ASPECT] key (… key) described on page 9. Note (for XJ-S36/XJ-S46 model users) When you have an external device connected to the projector's USB port, use the [FUNC], [ ], [U], and […] keys to control the connected device. For details, see the - Casio XJ-S36 | Owners Manual - Page 11
Your projector has a setup menu that you can use to configure advanced settings. Basic Setup Menu Operations Displaying the Setup Menu Pressing the [MENU] key displays the menu shown below in the center of the projection screen. Main menu The main menu includes eight (nine on the XJ-S36/XJ-S46 - Casio XJ-S36 | Owners Manual - Page 12
Mode • Option Settings 1 J Eco Mode Note z Certain settings on the setup menu cannot be changed while there is no input signal to the projector. Because of this, you should configure setup menu settings after selecting an input source and starting projection. z This example covers basic steps only - Casio XJ-S36 | Owners Manual - Page 13
will need to enter the initial factory default password the first time you use the projector after turning on the password feature. Change the initial factory default password to a different controller battery is dead. Replace the remote control battery as soon as possible after it starts to go low. - Casio XJ-S36 | Owners Manual - Page 14
I.D., etc.) 2. Projector unit Note that your CASIO distributor will not be able to clear the password of your projector unless you bring both projector, except for the lamp time, to their initial factory defaults. Keep a written record of your password! You will not be able to use the projector - Casio XJ-S36 | Owners Manual - Page 15
up to eight key operations long. z You can use any of the following keys as part of your password key sequence. [INPUT], [AUTO], [BLANK], [FREEZE], [COLOR MODE menu. Entering the Password when Turning On the Projector When you turn on the projector while password protection is turned on will cause a - Casio XJ-S36 | Owners Manual - Page 16
Restoring Projector Settings to Their Initial Factory Defaults You can use the procedures in this section to restore all of the settings on a particular main menu or - Casio XJ-S36 | Owners Manual - Page 17
of the settings to their initial factory defaults, except for the Language, Lamp Time, and password settings. z To exit the operation without doing anything, is supported. Input source names are abbreviated as R (RGB input), C (component video input), V (video input), and U (USB input, XJ-S36/XJ-S46 - Casio XJ-S36 | Owners Manual - Page 18
projected Specific image. A larger value makes the overall image more bluish, while a smaller value makes the overall image more reddish. This setting is supported only when the signal is NTSC or NTSC4.43. Color Mode RCVU Source Specific You can select from among five different color mode - Casio XJ-S36 | Owners Manual - Page 19
happens, use this setting to adjust the phase manually. This setting is valid when VIDEO is selected as images from a digital camera connected to the projector's VIDEO terminal. Use this sub-menu to defaults can be restored for the current signal type (XGA/60Hz, SXGA/60Hz,etc.) only. About the " - Casio XJ-S36 | Owners Manual - Page 20
Main Menu Setting Name Input Setting Unit Description Volume RCVUN Source Specific Use this sub-menu to adjust the volume level of the projector's speaker. z Changing this setting when there is no input signal changes the volume setting of the currently selected signal source. Restore Menu - Casio XJ-S36 | Owners Manual - Page 21
option to project from the back of the screen. This setting flips the front projected image horizontally. Use this sub-menu to configure the projector for use in an installation in which it is positioned upside down. On: Flips the projected image horizontally and vertically. Off*: Projects a normal - Casio XJ-S36 | Owners Manual - Page 22
is pressed. Blue: Select this option to project a blue screen. Black*: Select this option to project a black screen. Logo: Select this option to project the projector's built-in logo screen. Use this sub-menu to return all of the sub-menu items on the Screen Settings main menu to their initial - Casio XJ-S36 | Owners Manual - Page 23
YK-3 component video cable. For information about connection, see "Connecting to a Component Video Output Device" in the "User's Guide (Basic Operation)". Video Signal RCVUN Single Use this sub-menu to specify manually the type of signal being input from the projector's AV terminal. Auto*: Select - Casio XJ-S36 | Owners Manual - Page 24
Eco Mode RCVUN Single Use this sub-menu to turn the Eco Mode on or off. On: Select this option to reduce lamp brightness and save power. This setting also reduces the speed of the projector's cooling fan, which reduces operation noise. Off: Select this option to project at maximum brightness. 24 - Casio XJ-S36 | Owners Manual - Page 25
RCVUN Single Direct Power On RCVUN Single Description Use this sub-menu to turn Auto Power Off on or off. See "Turning Off the Projector" in the "User's Guide (Basic Operation)" for more information. On*: Select this option to turn on Auto Power Off. Off: Select this option to turn off Auto Power - Casio XJ-S36 | Owners Manual - Page 26
all of the sub-menu items on the Option Settings 2 main menu to their initial default settings. *1 When plug-and-play is turned on, the XJ-S36/XJ-S46 projector will make that device the input source automatically. For details about plug-and-play, see "USB Function Guide" on the bundled CD-ROM. 26 - Casio XJ-S36 | Owners Manual - Page 27
the lamp, see "Replacing the Lamp" in the "User's Guide (Basic Operation)". Reset Lamp Time RCVUN Single Use this submenu item to reset the lamp time to 0 hours after replacing the lamp. For details about replacing the lamp and the lamp time reset operation, see "Replacing the Lamp" in the "User - Casio XJ-S36 | Owners Manual - Page 28
Restore All Defaults Main Menu Setting Name Input Setting Unit Description Restore All Defaults RCVUN Single This sub-menu returns all sub-menu items on all main menus to their initial default settings. This operation can be performed regardless of the currently selected input source and - Casio XJ-S36 | Owners Manual - Page 29
Range When performing an operation on the remote controller, point it at the remote control signal receiver on the back or front of the projector. The following illustration shows the range of the remote controller signal. ±30 degrees max. 5 meters (16.4 feet) max. Front ±30 degrees max. 5 meters - Casio XJ-S36 | Owners Manual - Page 30
Projection Distance and Screen Size Screen Size 200 5.7 m to 11.3 m (18.70 feet to 37.07 feet) 12 m (39.37 feet) 10 m (32.81 feet) 8 m (26.25 feet) Screen Size 60 1.7 m to 3.4 m (5.58 feet to 11.15 feet) 6 m (19.69 feet) 4 m (13.12 feet) Screen Size 40 1.1 m to 2.2 m (3.61 feet to 7.22 feet) - Casio XJ-S36 | Owners Manual - Page 31
768 pixels) video resolution. When the input signal from the computer connected to the projector is not an XGA signal, "Resize Image To Fit" automatically enlarges or reduces the image so it matches the projector's video resolution and fills the entire screen. The following shows how different input - Casio XJ-S36 | Owners Manual - Page 32
Supported Signals RGB Signal Signal Name VESA Other 640 × 480/60 640 × 480/72 640 × 480/75 640 × 480/85 800 × 600/56 800 × 600/60 - Casio XJ-S36 | Owners Manual - Page 33
Video Signal Signal Name NTSC NTSC4.43 PAL PAL-M PAL-N PAL60 SECAM Horizontal Frequency (kHz) 15.7 15.7 15.6 15.7 15.6 15.7 15.6 Vertical Frequency (Hz) 60 60 50 60 50 60 50 * Listing of a device in the above table does not guarantee that you will be able to display its images correctly. 33 - Casio XJ-S36 | Owners Manual - Page 34
MA0705-A
-
 1
1 -
 2
2 -
 3
3 -
 4
4 -
 5
5 -
 6
6 -
 7
7 -
8
-
9
-
10
-
11
-
12
-
13
-
14
-
15
-
16
-
17
-
18
-
19
-
20
-
21
-
22
-
23
-
24
-
25
-
26
-
27
-
28
-
29
-
30
-
31
-
32
-
33
-
34
 |
 |
DATA PROJECTOR
XJ-S31/XJ-S36
XJ-S41/XJ-S46
User’s Guide
Be sure to read the precautions in the
separate User’s Guide (Basic Operation). For
details about setting up the projector and lamp
replacement, see the User’s Guide (Basic
Operation).
Be sure to keep all user documentation handy
for future reference.
E